What Are the Best Tools for Concrete Repair
Share
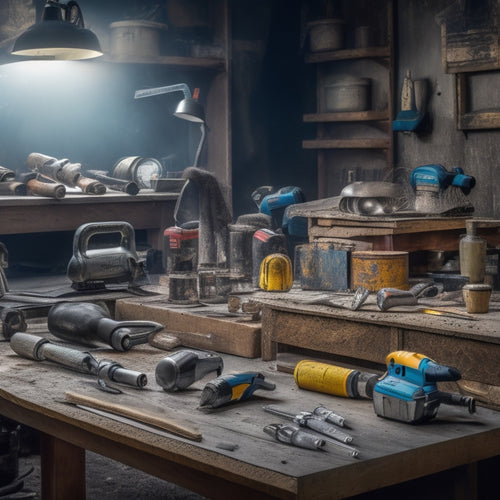
When tackling a concrete repair project, you'll need the right tools to achieve a durable, long-lasting fix. For crack injection, you'll require a high-quality injection gun, injection ports, and a reliable pressure source. Grout pumps are essential for high-flow delivery, with options including piston, diaphragm, and rotor stator pumps. Surface preparation involves scarifying tools, surface preparation grinders, and concrete cutting saws, while epoxy injection gun systems and chiseling hammers are crucial for specific repair tasks. High-pressure washout tools and sealant application brushes round out the list of must-haves. As you start your project, make sure you've got the right tools for the job, and you'll be well on your way to a successful repair.
Key Takeaways
• Crack injection equipment, including high-quality injection guns and durable injection ports, is essential for effective concrete repair.
• Grout pumps with high-flow delivery, such as piston, diaphragm, and rotor stator pumps, are necessary for efficient concrete repair.
• Hose management systems with compatible fittings and regular maintenance support high-flow delivery and reduce downtime.
• Surface preparation tools, including concrete scarifying tools and surface preparation grinders, are crucial for removing deteriorated surfaces and ensuring strong bonds.
• Epoxy injection systems and techniques, including precision mixing and curing processes, are vital for achieving strong bonds and durable seals in concrete repair.
Crack Injection Equipment Essentials
You'll need a reliable crack injection equipment setup to effectively repair concrete cracks, which consists of a few essential components.
First, you'll require a high-quality injection gun that can withstand the pressure and flow rate required for effective crack sealing. This gun should be capable of delivering a consistent flow of injection materials, such as polyurethane or epoxy, into the crack.
Next, you'll need a series of injection ports or packers that are specifically designed to seal the crack and direct the flow of materials. These ports should be durable and able to withstand the pressure of the injection process.
Additionally, you'll need a supply of injection materials that are suitable for the type of crack you're repairing. These materials should be able to bond strongly with the concrete and provide a durable, long-lasting seal.
Finally, you'll need a reliable pressure source, such as a compressor or pump, to power the injection gun and deliver the materials into the crack.
With these essential components in place, you'll be well-equipped to tackle even the most challenging crack sealing projects.
Grout Pumps for High-Flow Delivery
When you're tackling concrete repair projects that require high-flow grout delivery, you need a reliable grout pump that can handle the demands of the job.
To guarantee efficient and effective grout placement, you'll want to take into account key factors such as pump selection criteria, grout flow control, and hose management systems.
Pump Selection Criteria
Selecting the right grout pump for high-flow delivery involves evaluating key criteria, including flow rate, pressure, and pump type, to confirm efficient and effective concrete repair.
You need to determine the required flow rate based on the size of the area to be repaired and the type of grout being used. Pressure requirements will depend on the distance and height the grout needs to be pumped.
When it comes to pump types, you have a choice between piston, diaphragm, and rotor stator pumps. Each has its advantages and disadvantages, and the right choice will depend on your specific needs.
For instance, piston pumps are ideal for high-pressure applications, while diaphragm pumps are better suited for lower-pressure jobs. Rotor stator pumps are versatile and can handle a wide range of flow rates and pressures.
Regardless of the pump type you choose, regular pump maintenance is essential to guarantee peak performance and extend the lifespan of the pump.
You should regularly check and replace worn-out parts, clean the pump, and perform routine testing to verify it's functioning as expected.
Grout Flow Control
Grout Flow Control (Grout Pumps for High-Flow Delivery)
Your grout pump's flow control system plays a critical role in achieving high-flow delivery, as it allows you to regulate the grout flow rate to match the specific requirements of your concrete repair project. This is particularly important when working with grouts of varying viscosities, as you need to ascertain the correct flow rate to achieve ideal results.
To achieve high-flow delivery, you'll want to take into account the following factors:
| Grout Viscosity | Flow Rate |
|---|---|
| Low (thin) | High flow rate (up to 10 gpm) |
| Medium | Medium flow rate (5-7 gpm) |
| High (thick) | Low flow rate (less than 5 gpm) |
Hose Management Systems
You'll need a reliable hose management system to support high-flow delivery, as it enables you to maintain a steady grout supply while minimizing downtime and reducing the risk of clogs. A well-designed hose management system guarantees that your grout pump operates efficiently, allowing you to focus on the repair task at hand.
When selecting a hose management system, consider the type of hose that best suits your application. For example, rubber hoses are ideal for high-pressure applications, while PVC hoses are better suited for lower-pressure uses. Additionally, verify that your hose fittings are compatible with your grout pump and hose type. Properly sized and configured hose fittings can greatly reduce the risk of clogs and leaks.
A well-maintained hose management system is essential for achieving high-flow delivery and guaranteeing successful concrete repairs. By investing in a high-quality hose management system, you'll be able to work more efficiently and effectively, ultimately leading to better repair outcomes.
Concrete Scarifying Tool Options
When tackling concrete repair, scarifying tools prove essential for removing deteriorated surfaces, old coatings, and other unwanted materials, allowing you to create a solid foundation for subsequent applications.
These tools help you achieve the desired surface texture, which is vital for ensuring a strong bond between the old and new concrete.
When selecting a scarifying tool, you'll need to take into account the type of machine and surface texture options. There are three main scarifying machine types:
-
Walk-behind scarifiers, ideal for smaller areas and tight spaces
-
Ride-on scarifiers, suitable for larger areas and high-production applications
-
Hand-held scarifiers, perfect for detail work and small repairs
Each machine type offers varying levels of power, productivity, and maneuverability, so it's important to choose the right one for your specific project needs.
Additionally, you'll need to decide on the desired surface texture, which can range from a light, smooth finish to a more aggressive, textured profile.
Epoxy Injection Gun Systems
When it comes to epoxy injection gun systems, you'll need to understand the components that make up the gun itself, as well as the epoxy mixing process that guarantees a strong bond.
You'll also need to master various injection techniques to effectively fill cracks and voids.
Gun System Components
Epoxy injection gun systems, an essential component of concrete repair, consist of several key parts that work together to effectively deliver epoxy resin into cracks and voids.
As you work with epoxy injection gun systems, it's vital to understand the components that make up the system. This knowledge will enable you to troubleshoot issues, perform routine gun system maintenance, and select the right gun system accessories for your specific needs.
Here are some key components you'll want to familiarize yourself with:
-
Pistols and injectors: These are the handheld devices that dispense the epoxy resin into the crack or void. They come in various sizes and styles to accommodate different repair scenarios.
-
Hoses and tubes: These connect the pistol or injector to the resin source, allowing you to reach remote areas or navigate complex geometries.
-
Resin cartridges and cylinders: These contain the epoxy resin, which is pressurized and dispensed through the system as needed.
Epoxy Mixing Process
With your epoxy injection gun system fully assembled and ready to go, you'll next need to mix the epoxy resin to the correct ratio and consistency, a process that requires precision and attention to detail.
To achieve ideal results, it's crucial to master epoxy mixing techniques. Start by confirming your mixing surface is clean and dry, then accurately measure the resin and hardener components according to the manufacturer's instructions. Mix the components thoroughly, scraping the sides and bottom of the mixing container to prevent unmixed material. The ideal mixing ratio is typically 1:1 or 2:1, but always follow the manufacturer's guidelines. The mixed epoxy should have a consistent color and texture, with no streaks or lumps.
Once mixed, the epoxy will begin to cure, a process that can take anywhere from a few minutes to several hours, depending on the specific product and environmental conditions. Be aware of the epoxy curing times to guarantee you have sufficient working time to complete the injection process.
Proper mixing and curing are critical to achieving a strong, durable bond, so take your time and focus on getting it right.
Injection Techniques Mastery
By mastering the proper injection techniques, you'll be able to effectively deliver the mixed epoxy resin into the concrete crack or void, guaranteeing a strong and lasting repair.
This is where the epoxy injection gun system comes into play, allowing you to precisely control the flow of repair materials into the damaged area.
To achieve mastery over injection techniques, focus on the following key aspects:
-
Gun angle and positioning: Hold the gun at a 45-degree angle to guarantee the epoxy flows smoothly into the crack or void.
-
Pressure control: Regulate the pressure to prevent over- or under-injection, which can lead to poor bonding or material waste.
-
Flow rate management: Monitor the flow rate to guarantee the epoxy is dispensed at the ideal speed for the specific repair application.
High-Pressure Washout Tools Needed
You'll need a high-pressure washer capable of generating at least 3,000 pounds per square inch (psi) to effectively blast away dirt, grime, and loose concrete debris from the damaged area.
This high-pressure washout tool is essential for surface cleaning techniques that demand precision and power. There are different pressure washer types to evaluate, including electric, gasoline, or diesel-powered machines. When selecting a pressure washer, assess the size of the area to be cleaned, the level of dirt and grime, and the type of concrete surface you're working with.
As you prepare for the high-pressure washout, verify you're wearing protective gear, including gloves, safety glasses, and a face mask.
Position the nozzle at a 45-degree angle, about 12 inches from the surface, and move it in a sweeping motion to avoid damaging the concrete. Maintain a consistent distance to prevent uneven cleaning and to achieve the best results. Remember to test the pressure washer on a small, inconspicuous area first to verify the correct pressure setting and to avoid damaging the surrounding concrete.
Surface Preparation Grinder Choices
Selecting the right surface preparation grinder is vital for efficiently removing old coatings, rough surfaces, and other imperfections, allowing for a strong bond between the concrete and the repair material. You'll need a grinder that can handle the specific demands of your project, and there are several surface grinder types to take into account.
When choosing a surface preparation grinder, reflect on the following key factors:
-
Walk-behind grinders: Ideal for large, open areas and offer high productivity.
-
Handheld grinders: Perfect for smaller, more intricate areas and provide excellent maneuverability.
-
Ride-on grinders: Suitable for large, industrial-scale projects and offer enhanced operator comfort.
It's also important to evaluate the preparation techniques you'll be using. Will you be using dry or wet grinding methods? Do you need to remove thick coatings or just lightly etch the surface?
Concrete Cutting Saw Requirements
When tackling concrete repair projects, you need a concrete cutting saw that can efficiently cut through damaged concrete, removing broken or deteriorated sections to make way for fresh material. The right saw can make all the difference in the quality and speed of your repairs.
There are several concrete saw types to choose from, each suited for specific tasks and conditions. Blade selection is also critical, as it affects the saw's performance and lifespan. Here's a quick guide to help you make the right choice:
| Concrete Saw Type | Best For |
|---|---|
| Walk-behind saws | Large areas, straight cuts |
| Handheld saws | Small areas, curved cuts |
| Ring saws | Tight spaces, precise cuts |
| Concrete chain saws | Heavy-duty cutting, demolition |
When selecting a blade, consider the type of concrete, its hardness, and the saw's power. Diamond blades are ideal for hard concrete, while abrasive blades work better for softer materials. Always follow the manufacturer's recommendations and safety guidelines to guarantee effective and safe cutting.
Chiseling Hammer Tool Selection
Frequently, concrete repair projects require the precise removal of damaged or deteriorated material, and that's where a chiseling hammer tool comes into play. When selecting a chiseling hammer, you'll want to evaluate the type of chisel and the weight of the hammer. The right combination will make all the difference in effectively removing material without causing further damage.
Here are some key factors to assess when choosing a chiseling hammer tool:
-
Chisel types: Flat chisels are ideal for removing large areas of material, while pointed chisels are better suited for more precise removals. You may also want to contemplate using a claw chisel for removing material from tight spaces.
-
Hammer weights: Lighter hammers (2-4 lbs) are perfect for smaller, more delicate projects, while heavier hammers (6-8 lbs) are better suited for larger, more demanding tasks.
-
Handle material and grip: Look for handles made from durable materials like fiberglass or steel, and contemplate a handle with a comfortable grip to reduce fatigue.
Sealant Application Brush Types
You'll need the right sealant application brush to guarantee a smooth, even coat on your concrete repair project, especially after precisely removing damaged material with a chiseling hammer tool. The brush you choose will greatly impact the quality of your sealant application techniques.
Natural bristle brushes are ideal for applying solvent-based sealants, as they absorb excess material and prevent drips. Synthetic brushes, on the other hand, are better suited for water-based sealants, as they resist absorption and maintain their shape.
When selecting a brush, consider the type of sealant you're using, the surface texture, and the desired finish. For instance, a foam brush is perfect for applying sealant to rough or porous surfaces, while a nylon brush is better for smooth surfaces.
It's also essential to choose a brush with the right bristle length and stiffness to achieve the desired coating thickness.
Frequently Asked Questions
How Do I Choose the Right Concrete Repair Tool for My Specific Job?
When selecting the right concrete repair tool for your specific job, you'll need to take into account the types of tools available and the selecting criteria that matter most.
First, identify the repair task: is it patching, resurfacing, or structural repair?
Then, assess the concrete's condition, size, and accessibility.
What Safety Precautions Should I Take When Using Concrete Repair Tools?
'An ounce of prevention is worth a pound of cure' - this adage rings especially true when working with concrete repair tools.
You should always prioritize safety, and that starts with wearing the right gear. Make certain you're equipped with protective eyewear, a dust mask, and gloves to shield yourself from flying debris and harsh chemicals.
Additionally, ascertain the work area is well-ventilated and clear of tripping hazards. By taking these precautions, you'll be able to focus on the task at hand without compromising your well-being.
Can I Rent Concrete Repair Tools Instead of Buying Them?
When considering concrete repair, you're likely looking for cost-effective solutions.
Renting tools can be a viable option, especially for one-time or infrequent projects.
You'll find rental options for specialized equipment like grinders, drills, and saws at local equipment suppliers or online platforms.
Before renting, make sure you understand the tool's operation, safety features, and maintenance requirements to avoid additional costs or downtime.
How Do I Properly Clean and Maintain My Concrete Repair Tools?
You've got a treasure trove of tools at your disposal, but if you don't clean and maintain them, they'll be as useful as a bucket of rusty nails!
To keep your tools in top shape, prioritize tool cleaning after each use. Wipe down surfaces with a dry cloth, and store them in a dry place.
Regularly lubricate moving parts and sharpen cutting edges.
Follow these maintenance tips to extend the life of your tools and guarantee they continue to deliver precision results.
Are There Any Certifications for Concrete Repair Tool Operators?
As you take your concrete repair skills to the next level, you're likely wondering if there are certifications for tool operators. The answer is yes!
Look for certification programs that offer operator training, which typically cover safety protocols, equipment operation, and repair techniques. These programs will help you master the tools and demonstrate your expertise.
Conclusion
You've navigated the rough terrain of concrete repair, and now you're standing at the summit, equipped with the best tools for the job.
Your toolbox is a treasure chest, overflowing with the essentials: crack injection equipment, grout pumps, scarifying tools, epoxy injection guns, high-pressure washout tools, surface preparation grinders, concrete cutting saws, chiseling hammers, and sealant application brushes.
With these trusty companions, you're ready to conquer even the most challenging concrete repair projects, like a master builder crafting a masterpiece.
Related Posts
-

Essential Power Tools for DIY Concrete Sculpting
As you begin DIY concrete sculpting, you'll need a strategic selection of power tools to achieve professional-grade r...
-

What Tools Do You Need for Concrete Flooring
You'll need a thorough arsenal of specialized tools to achieve a high-quality, professional-looking concrete floor, i...
-

10 Best Tools for Sealed Concrete Finishing Success
When it comes to sealed concrete finishing success, you need a robust arsenal of specialized tools. Start with essent...


