Essential Tools for Concrete Wall Covering Projects
Share
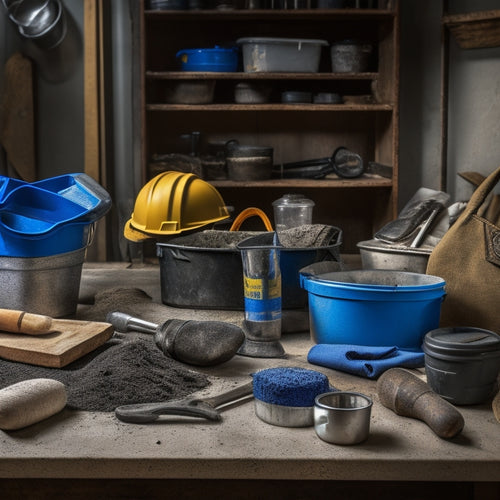
When tackling a concrete wall covering project, you'll need a range of essential tools and equipment. For cleaning and surface preparation, invest in a wire brush, scrub brush, dustpan, broom, vacuum cleaner, and pressure washer or degreaser. For measuring and marking, use a laser level, tape measure, laser distance meter, precision leveling devices, and high-quality pencil or marker. Additionally, equip yourself with adhesive and fastening tools like notched trowels, roller applicators, and brushes. Don't forget safety gear like dust masks, safety glasses, gloves, and protective clothing. From here, you can move on to selecting the right fastening systems and techniques to guarantee a successful project.
Key Takeaways
• Cleaning and surface preparation tools, such as wire brushes and scrub brushes, are essential for removing dirt and old adhesives.
• Accurate measurement tools, like laser levels and tape measures, ensure wall covering is installed level and plumb.
• Adhesive and fastening tools, including notched trowels and roller applicators, facilitate uniform adhesive application and secure fastening.
• Safety and protection gear, such as dust masks and safety glasses, protect workers from injury and ensure job site well-being.
• Surface assessment and preparation techniques, including cleaning, surface texture evaluation, and moisture assessment, ensure a strong bond between the wall and covering.
Cleaning and Debri Removal Tools
You'll need a wire brush or a scrub brush to remove dirt, grime, and old adhesives from the concrete wall before applying a new covering. These brushes are vital cleaning tools for effective debris removal, ensuring a smooth surface for your new covering. Use a wire brush for tougher grime and a scrub brush for lighter dirt buildup. When cleaning, work from the top of the wall down to prevent dirt and debris from spreading to clean areas.
Proper debris disposal is essential to maintain a clean workspace and prevent re-depositing dirt onto the wall. Use a dustpan and broom or a vacuum cleaner to collect debris as you clean. Dispose of collected debris in a designated area, keeping your workspace organized and safe.
Effective cleaning techniques, such as using a gentle scrubbing motion and working in sections, will help you achieve a clean surface. By following these steps, you'll be well-prepared to apply your new concrete wall covering, ensuring a strong bond and a professional finish.
Surface Preparation and Repair
After cleaning the wall, inspect it for cracks, holes, and other imperfections that may affect the adhesion of your new concrete wall covering. This surface assessment is essential to identify areas that require repair before applying the covering.
Take note of any cracks, holes, or uneven surfaces that need attention. For cracks, you'll need a concrete patching compound and a putty knife to fill them in. Use a level to guarantee the filled area is even with the surrounding surface.
For holes, use a concrete filler or an epoxy-based patching compound, depending on the hole's size and depth.
When it comes to uneven surfaces, you may need to use a concrete grinder or a scarifier to smooth out the area. Be sure to wear protective gear, including gloves, safety glasses, and a dust mask, when operating power tools.
Measuring and Marking Essentials
When it comes to measuring and marking your concrete wall, you'll need the right tools to guarantee accuracy and precision.
You'll want to invest in accurate measurement tools, such as a laser level or a high-quality tape measure, to get precise readings.
Accurate Measurement Tools
Measurements are the foundation of a successful concrete wall covering project, and accurate measurement tools are essential for guaranteeing that your design is transferred correctly to the wall. You'll need tools that provide precise measurements to guarantee a flawless installation.
For digital measuring, consider investing in a laser distance meter. This handy tool can measure distances up to 100 feet with an accuracy of ±1/16 inch. It's perfect for calculating room dimensions, measuring wall lengths, and determining the layout of your design.
Another essential tool is a precision leveling device, such as a spirit level or laser level. These tools guarantee that your wall covering is installed perfectly level, which is critical for achieving a professional-looking finish.
When choosing a precision leveling device, look for one with high accuracy and a durable design. You'll also need a tape measure, which should be rugged and have clear, easy-to-read markings.
With these accurate measurement tools, you'll be able to transfer your design to the wall with confidence, guaranteeing a successful concrete wall covering project.
Marking Surface Prep
You'll need a set of measuring and marking essentials to accurately transfer your design to the wall, starting with a high-quality pencil or marker specifically designed for marking concrete surfaces. This is vital, as the wrong tool can lead to inaccurate markings that affect the entire project. When choosing a marker, consider the surface texture of your concrete wall, as some markers may not perform well on rough or porous surfaces.
To guarantee precise markings, don't forget to add the following essentials to your toolkit:
-
A sturdy straightedge or ruler for creating straight lines and edges
-
A level to make sure your markings are perfectly horizontal or vertical
-
A chalk line reel for creating long, accurate lines
-
A marking gauge for precise, repetitive markings
-
An eraser or correction fluid for correcting mistakes or removing unwanted marks
Safety and Protection Gear
As you prepare for your concrete wall covering project, don't overlook the importance of safety and protection gear. Two essential components of your safety and protection gear are a dust mask and safety glasses, which protect your respiratory system and eyes from debris and dust generated during concrete wall covering projects. These protective equipment must meet safety regulations to guarantee your well-being on the job site.
In addition to a dust mask and safety glasses, you should also wear long-sleeved shirts, long pants, and steel-toed boots to prevent skin and foot injuries. Gloves are also a must-have to provide grip and protection for your hands.
Remember, safety regulations are in place for a reason, so don't take shortcuts when it comes to protective equipment. By wearing the right gear, you can minimize the risk of injury and guarantee a successful project.
Always prioritize your safety and the safety of those around you to get the job done efficiently and effectively.
Power Tools for Surface Prep
With your safety gear in place, you're ready to move on to the surface preparation phase, where power tools like grinders, sanders, and scarifiers take center stage. These tools are essential for achieving the desired surface texture, which is critical for a successful concrete wall covering project.
Here are some power tools you'll need for surface prep:
-
Grinders: Use these for aggressive grinding techniques to remove old adhesives, rough surfaces, or to level uneven concrete.
-
Sanders: Employ these for finer surface textures, such as smoothing out rough spots or feathering edges.
-
Scarifiers: Utilize these for removing thick, old coatings or to create a rough surface for better adhesion.
-
Concrete planers: These are ideal for removing old, deteriorated concrete or to create a smooth surface.
-
Dustless sanding systems: These tools minimize dust and debris, making the surface prep process cleaner and more efficient.
Adhesive and Fastening Tools
When you're working with concrete wall coverings, you'll need to decide on an adhesive application method that suits your project's specific requirements.
You'll also need to choose a fastening system that guarantees a secure hold, taking into account factors like weight and moisture levels.
Adhesive Application Methods
You'll need to choose the right adhesive application method for your concrete wall covering project, depending on the specific requirements of your job and the type of adhesive you're using.
Different adhesive types require different application techniques to guarantee a strong and durable bond.
Here are some common adhesive application methods to take into account:
-
Notched trowel: Use a notched trowel to apply adhesive to the back of the wall covering material in a consistent, uniform pattern.
-
Roller applicator: Use a roller applicator to apply adhesive to large areas quickly and evenly.
-
Brush application: Use a brush to apply adhesive to small or intricate areas, or for more precise control.
-
Spray adhesive: Use a spray adhesive for fast and easy application, especially for large or complex projects.
-
Trowel and spreader: Use a trowel and spreader to apply adhesive to the wall surface, then spread it evenly with a spreader.
Fastening System Options
Two primary fastening system options are available for securing your concrete wall covering: mechanical fasteners and adhesive-based systems, each with its own set of tools and benefits. Mechanical fasteners, such as anchors and screws, provide a strong hold and are suitable for heavy loads. Adhesive-based systems, on the other hand, offer a more discreet and flexible solution.
When selecting a fastening system, consider the type of wall anchor, fastening material, and load-bearing capacity required for your project. Here's a comparison of the two options:
| Fastening System | Characteristics |
|---|---|
| Mechanical Fasteners | High load-bearing capacity, suitable for heavy loads, visible anchors |
| Adhesive-Based Systems | Discreet, flexible, suitable for lighter loads, easy to install |
| Wall Anchor Types | Plastic, metal, and chemical anchors available for different applications |
| Fastening Material Selection | Consider corrosion resistance, strength, and durability when choosing materials |
| Load-Bearing Capacity | Calculate the weight and stress of the wall covering to ascertain the fastening system can support it |
Surface Preparation Needs
Preparing the concrete wall surface is essential to guaranteeing a strong bond between the wall covering and the fastening system. Clean and degrease the surface to remove dirt, oil, or old adhesives that might interfere with the bonding process.
You'll need to evaluate the surface texture to determine the best adhesive and fastening system for your project. Perform a moisture assessment to guarantee the surface is dry enough for the wall covering. If the surface is too porous, you may need to apply a primer or sealant to achieve a strong bond.
Here are some essential tools you'll need for surface preparation:
-
A pressure washer or degreaser to clean the surface
-
A wire brush or scrubber to remove dirt and old adhesives
-
A surface texture evaluation kit to determine the surface roughness
-
A moisture meter to assess the surface moisture level
-
A primer or sealant to prepare the surface for the wall covering
Frequently Asked Questions
How Do I Ensure a Strong Bond Between the Wall and the Covering Material?
To guarantee a strong bond between the wall and covering material, you'll need to focus on surface preparation and employ effective bonding techniques, such as cleaning, priming, and applying an adhesive specifically designed for the materials involved.
Can I Reuse Old Adhesive or Fasteners for a New Project?
Don't dare to dodge due diligence: carefully consider adhesive longevity and fastener compatibility before reusing old materials for your new project, as degraded adhesives or mismatched fasteners can compromise the entire installation's integrity.
What's the Best Way to Handle Corners and Edges During Installation?
When handling corners and edges during installation, you'll want to focus on precise corner treatments and thorough edge sealing to guarantee a watertight seal and prevent damage to the wall covering or underlying concrete.
How Do I Prevent Mold and Mildew Growth Behind the Covering Material?
"Imagine a damp, dark cave behind your wall covering - a perfect habitat for mold and mildew. You prevent this by ensuring a proper moisture barrier and ventilation system, allowing air to circulate and dry out any excess moisture."
Can I Use a Concrete Wall Covering Over Existing Tile or Brick?
You can install a concrete wall covering over existing tile or brick, but you'll need to use proper tile removal techniques or brick surface preparation to guarantee a strong bond and prevent future issues.
Conclusion
With your arsenal of essential tools, you're ready to transform concrete walls into stunning masterpieces.
The cleaning and debris removal tools will sweep away imperfections, while surface preparation and repair will smooth out rough edges.
Measuring and marking essentials will guide your every move.
Safety and protection gear will shield you from harm, while power tools for surface prep will blast away obstacles.
Finally, adhesive and fastening tools will secure your design in place.
Now, release your creativity and watch your vision come to life!
Related Posts
-

5 Tools Needed for Quick Fix Concrete Mixing
You'll need five essential tools to tackle a quick fix concrete mixing project efficiently. First, you'll require a s...
-

Top Tools for Mixing Concrete at Home
When mixing concrete at home, you'll need a range of tools to guarantee a successful operation. Start with essential ...
-

Why You Need These Concrete Overlay Tools
When tackling a concrete overlay project, you need the right tools to achieve a flawless finish and avoid costly mist...


