Top Tools for Decorative Concrete Stenciling Success
To achieve success in decorative concrete stenciling, you'll need to strategically select specialized tools covering every step from surface preparation to finishing touches. Start with concrete stencil pattern designs that fit your project's purpose, location, and intended use. Guarantee proper surface preparation with power washing, chemical cleaning, and substrate evaluations. Then, choose the right base coat application tools like roller extension poles and brushes. Don't forget stencil adhesive options, placement guides, and overlay material mixers that balance cement, aggregate, water, and additives. With these essential tools, you'll be well on your way to creating stunning, long-lasting designs - and there's more to discover to take your project to the next level.
Key Takeaways
• Select the right stencil pattern design based on project purpose, location, and intended use, considering durability and non-slip textures for high-traffic areas.
• Ensure proper surface preparation by cleaning, filling cracks, grinding, and checking moisture levels to ensure adhesion of the stencil design.
• Choose the right base coat application tools, such as roller extension poles and brushes, to maintain control and quality while minimizing physical strain.
• Select the appropriate stencil adhesive option based on project needs, ensuring compatibility with the stencil material and surface preparation.
• Use the right overlay material mixers and consistency control methods to achieve the desired performance and aesthetic effects in decorative concrete stenciling.
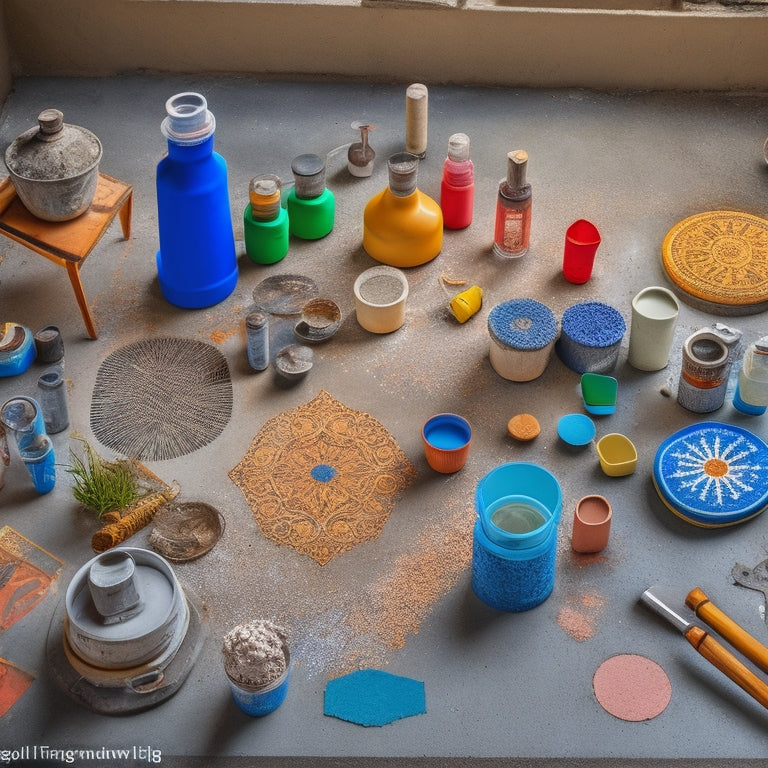
Concrete Stencil Pattern Designs
You can choose from a vast array of concrete stencil pattern designs, ranging from simple textures and borders to intricate stone and tile patterns that mimic natural materials.
With so many options, you're bound to find a design that fits your project's unique style and aesthetic. To stay on top of the latest trends, consider exploring creative pattern ideas that incorporate geometric shapes, organic motifs, or distressed finishes.
Stencil design trends often lean towards realistic representations of natural stone, wood, or other materials, so don't be afraid to get creative and experiment with different combinations.
When selecting a stencil design, consider the project's purpose, location, and intended use. For high-traffic areas, choose a design that can withstand heavy wear and tear.
In areas prone to moisture, opt for a design that incorporates a non-slip texture or finish. By choosing the right stencil design, you can guarantee a safe and visually appealing finish that meets your project's specific needs.
Remember to always follow safety guidelines and manufacturer instructions when working with decorative concrete stenciling tools to guarantee a successful and accident-free project.
Surface Preparation Essentials
Before applying decorative concrete stenciling tools, confirm the concrete surface is properly prepared to achieve a successful and long-lasting finish. You must confirm the surface is clean, dry, and free of any contaminants that could affect the adhesion of your stencil design.
To achieve this, you'll need to employ effective surface cleaning techniques, such as power washing or chemical cleaning, to remove dirt, oil, or other substances that may be present on the surface. Additionally, you should conduct substrate evaluation methods to determine the surface's porosity, texture, and moisture levels, which will help you choose the right stencil design and application method.
Here are some essential surface preparation tasks to complete before applying decorative concrete stenciling tools:
-
Remove any existing sealers or coatings
-
Fill any cracks or joints with a suitable filler
-
Grind the surface to achieve the desired texture
-
Check for moisture issues and address them accordingly
-
Perform a thorough cleaning of the surface using a degreaser or other cleaning solution
Base Coat Application Tools
When applying a base coat to your concrete project, you'll need the right tools to achieve a smooth, even finish.
You'll want to contemplate using roller extension poles to reach larger areas and guarantee consistent coverage.
Roller Extension Poles
Achieving uniform base coat coverage on large decorative concrete projects becomes much more manageable with the use of roller extension poles. These poles allow applicators to reach distant areas without sacrificing quality or control.
When selecting a roller extension pole, consider the type of roller you're using, as some poles are specifically designed for certain roller types. For instance, microfiber rollers work best with lightweight poles, while heavy-duty rollers require sturdier poles.
Here are some key benefits of using roller extension poles:
-
Increased reach: Extend your reach without the need for ladders or scaffolding, reducing the risk of falls and injuries.
-
Improved efficiency: Cover larger areas in less time, reducing the overall project duration.
-
Enhanced control: Maintain control over the roller, even at extended lengths, ensuring a smooth and even application.
-
Reduced fatigue: Avoid straining and fatigue by minimizing the need for repetitive stretching and bending.
-
Customization: Choose from various pole lengths and materials to suit your specific project needs.
Brush Selection Guide
You'll need the right brush to complement your roller extension pole, as the wrong one can compromise the uniformity of your base coat application. When selecting a brush, consider the type and bristle material that best suits your project's requirements.
Natural bristle brushes, like China bristle or pure bristle, are ideal for applying oil-based coatings and solvents, while synthetic bristle brushes, such as nylon or polyester, are better suited for water-based coatings and acrylics.
For decorative concrete stenciling, you'll likely need a brush with stiffer bristles to handle thick, heavy coatings. Angled-cut brushes are perfect for cutting in and creating sharp edges, while flat-cut brushes are better for applying even, uniform coats.
Look for brushes with flagged or 'split' ends, as these allow for better paint pickup and release. Always choose a brush that's specifically designed for your coating type to guarantee a smooth, even application and to prevent damage to the brush or surrounding surfaces.
Stencil Adhesive Options
Selecting the right stencil adhesive is essential to guaranteeing a strong bond between the stencil and the concrete surface, as it directly impacts the quality of the final design. You want to choose an adhesive that complements your stencil type and provides the necessary durability for your project.
When selecting a stencil adhesive, consider the following factors:
-
Adhesive type: Spray, brush, or roller-applied adhesives each have their own strengths and weaknesses. Spray adhesives are great for large areas, while brush-applied adhesives offer more control.
-
Adhesive durability: Choose an adhesive that can withstand the wear and tear of your project, from foot traffic to weather exposure.
-
Stencil material compatibility: Confirm the adhesive is compatible with your stencil material, whether it's plastic, metal, or paper.
-
Concrete surface preparation: Prepare the concrete surface properly to guarantee a strong bond between the stencil and the concrete.
-
Safety considerations: Always follow safety guidelines when working with adhesives, and choose products with low VOCs (volatile organic compounds) for a healthier work environment.
Stencil Placement Guides
With your stencil adhesive applied, you're ready to position your stencil accurately, and that's where stencil placement guides come into play, guaranteeing precise alignment and minimizing errors.
These guides help you achieve professional-looking results by facilitating stencil alignment techniques, such as registration marks, grid systems, or laser levels. By using stencil placement guides, you can ascertain that your design is correctly positioned, symmetrical, and free from distortions.
When choosing a stencil placement guide, consider the complexity of your design, the size of your stencil, and the surface you're working on. Some guides are specifically designed for intricate patterns, while others are better suited for large, simple designs.
It's also essential to select a guide that allows for easy stencil removal methods, such as a hinge system or a removable tab, to prevent damage to your stencil or the concrete surface.
Overlay Material Mixers
When working with overlay material mixers, you'll need to evaluate the mixing ratio options that best suit your project's requirements.
You'll want to select a mixer that allows for precise control over the ratio of cement to aggregate, as well as the amount of water and additives.
Mixing Ratio Options
You'll need to carefully balance the ratio of polymer to aggregate in your overlay material mix to achieve the desired consistency and performance. This delicate balance guarantees your decorative concrete stenciling project turns out as envisioned. A general rule of thumb is to maintain a water to cement ratio between 0.4 and 0.6 to prevent excessive water absorption, which can lead to delamination or staining issues.
When it comes to mixing ratio options, consider the following:
-
Polymer-rich mix: Ideal for thin, detailed stencil designs, this mix ratio leans towards a higher polymer content for improved flexibility and adhesion.
-
Aggregate-rich mix: Suitable for thicker, more textured stencil designs, this mix ratio prioritizes aggregate for added strength and durability.
-
Standard mix: A balanced ratio of polymer to aggregate, this mix is versatile and suitable for most stencil designs.
-
Pigment-intensive mix: When working with vibrant, highly pigmented colors, adjust the mix ratio to accommodate the increased pigment load.
-
Custom mix: Experiment with unique ratio combinations to achieve specific performance characteristics or aesthetic effects.
Remember to always follow the manufacturer's instructions and recommended mixing ratios for your specific overlay material to guarantee a successful decorative concrete stenciling project.
Consistency Control Methods
Achieving uniform consistency in your overlay material mix is crucial, and that's where the right mixer comes in - a critical component in controlling the final product's performance and aesthetic. You'll want to verify that your mixer can handle the specific requirements of your decorative concrete stenciling project. This is where overlay material mixers come into play, providing you with the necessary tools to achieve color consistency and texture uniformity.
When selecting an overlay material mixer, consider the following key features:
| Mixer Type | Benefits | Considerations |
|---|---|---|
| Drum Mixers | High-volume capacity, fast mixing | Limited control over mixing intensity, potential for material segregation |
| Pan Mixers | Precise control over mixing intensity, easy cleaning | Lower capacity, slower mixing times |
| Vertical Mixers | High-shear mixing, reduced material segregation | Higher cost, complex operation |
| Twin-Shaft Mixers | High-volume capacity, fast mixing, reduced segregation | Higher cost, larger footprint |
| Planetary Mixers | Precise control, gentle mixing, easy cleaning | Lower capacity, slower mixing times |
Trowel and Squeegee Tools
Use a combination of trowel and squeegee tools to evenly distribute and remove excess concrete overlay material, ensuring a smooth, even surface for stenciling. Mastering trowel techniques is essential, as it directly affects the final result. Hold the trowel at a 45-degree angle and use long, sweeping motions to spread the material evenly. Apply gentle pressure to avoid creating air pockets.
To maintain a clean and efficient workspace, prioritize squeegee maintenance. Regularly clean the squeegee blade with soap and water to prevent material buildup. Store the squeegee in a dry area to prevent rust or corrosion.
Here are some additional tips for effective trowel and squeegee tool use:
-
Always wear protective gear, including gloves and safety glasses, when working with concrete overlay materials.
-
Use a trowel with a sturdy handle and a flexible blade for best control.
-
For large areas, consider using a squeegee with a longer handle for increased leverage.
-
Keep a spare squeegee blade on hand in case of damage or wear.
-
Practice trowel techniques on a small, inconspicuous area before applying the concrete overlay material to your main project.
Sealant Application Systems
After preparing your concrete surface with a smooth, even layer of overlay material, it's time to apply a sealant to protect and enhance the decorative design. This is where sealant application systems come into play.
When choosing a sealant application system, you'll want to take into account the type of sprayer that best suits your project. There are several sprayer types to choose from, including HVLP (high-volume, low-pressure) sprayers, compressed air sprayers, and electric sprayers. Each has its own advantages and disadvantages, so it's important to select the one that will provide the most even, consistent coverage for your specific design.
Once you've selected your sprayer, it's vital to follow the manufacturer's instructions for application and drying times to guarantee proper sealant curing. This may involve applying multiple thin coats, allowing each coat to dry completely before applying the next.
Additionally, make sure to work in a well-ventilated area, wear protective gear, and follow all safety precautions to avoid exposure to harmful chemicals. By using the right sealant application system and following proper protocols, you'll be able to achieve a durable, long-lasting finish that showcases your decorative design.
Finishing Touch Accessories
With your decorative concrete design now sealed and protected, you're ready to add the finishing touches with specialized accessories that can further enhance its visual appeal. These accessories not only elevate the aesthetic of your design but also provide a professional touch to your work.
To take your decorative concrete stenciling project to the next level, consider the following finishing touch options:
-
Stencil cleaning brushes: Invest in high-quality brushes specifically designed for stencil cleaning techniques to guarantee your stencils remain in pristine condition for future use.
-
Sealant applicator pads: Use these pads to evenly apply sealants, guaranteeing a consistent finish and reducing the risk of over-saturation.
-
Texture mats: Add unique textures to your design with mats that create intricate patterns and designs.
-
Stamping tools: Use these tools to add depth and dimension to your design, creating a realistic, three-dimensional appearance.
-
Finishing sprays: Enhance the color and sheen of your design with specialized sprays that provide a protective barrier and UV resistance.
Frequently Asked Questions
Can I Use a Stencil on Newly Poured Concrete?
When you're wondering if you can use a stencil on newly poured concrete, the answer is, it depends.
You'll need to wait until the concrete has reached a certain level of curing, typically 24-48 hours, depending on the mix and environmental conditions.
Make sure the stencil materials you're using won't bond with the still-curing concrete, causing damage or delamination.
Always follow the manufacturer's instructions and take necessary safety precautions to avoid accidents.
How Do I Achieve a Consistent Stencil Pattern Repeat?
When achieving a consistent stencil pattern repeat, you'll want to master stencil alignment techniques and pattern scaling methods.
Start by dividing your concrete surface into sections, using a grid or chalk lines to guide your stencil placement.
Guarantee precise alignment by using registration marks or a stencil with built-in alignment aids.
Next, scale your pattern to fit each section, using a calculator or digital tool to maintain uniformity and avoid costly mistakes.
What Is the Ideal Temperature for Stencil Application?
You're on the cusp of stencil mastery, but one misstep could ruin everything.
The ideal temperature for stencil application is essential, as it can make or break your design. If it's too hot, the stencil adhesive can melt, causing a blurry mess. Too cold, and it won't stick at all.
Aim for a comfortable 60-70°F (15-21°C) range, where temperature effects are minimal, ensuring a crisp, clean pattern.
Get it just right, and your stencil art will be nothing short of perfection.
Can I Reuse Decorative Concrete Stencils?
When you're done with your decorative concrete stencil, can you reuse it?
Yes, but you'll need to properly clean and maintain it.
Gently wash the stencil with soap and water, then dry it thoroughly to prevent damage.
Store it in a flat, secure area, away from direct sunlight and moisture.
Proper stencil maintenance and storage will extend its lifespan, ensuring it remains a valuable tool for your next project.
How Long Does Stencil Adhesive Take to Dry Completely?
Imagine a stopwatch ticking away, as you enthusiastically wait for your stencil adhesive to dry completely. You're not alone!
The drying time depends on the type of adhesive you're using - water-based, solvent-based, or hybrid. In ideal drying conditions (70-80°F, 50-60% humidity), water-based adhesives take around 30 minutes to an hour, while solvent-based ones can take up to 24 hours.
Make sure to follow the manufacturer's instructions and take necessary safety precautions to avoid any mishaps.
Conclusion
As you master the art of decorative concrete stenciling, remember that the right tools are the keys to accessing a treasure trove of designs.
With these top tools in your arsenal, you'll be well-equipped to tackle even the most complex projects.
Your stenciled creations will be the crowning jewel of any space, and with practice, you'll be able to conjure up breathtaking masterpieces that leave a lasting impression.
Related Posts
-
10 Must-Have Tools for Concrete Repair Organization
You'll need a solid organization system to keep your concrete repair tools and materials within easy reach, protected...
-

Reinforcement Tools Checklist for Concrete Block Walls
You'll need a range of reinforcement materials, including horizontal and vertical rebar, fiber mesh, and anchor bolts...
-

Top Mixing Tools for DIY Concrete Block Laying
When it comes to DIY concrete block laying, the right mixing tools are vital for a strong and durable structure. You'...


