Top Mixing Tools for DIY Concrete Block Laying
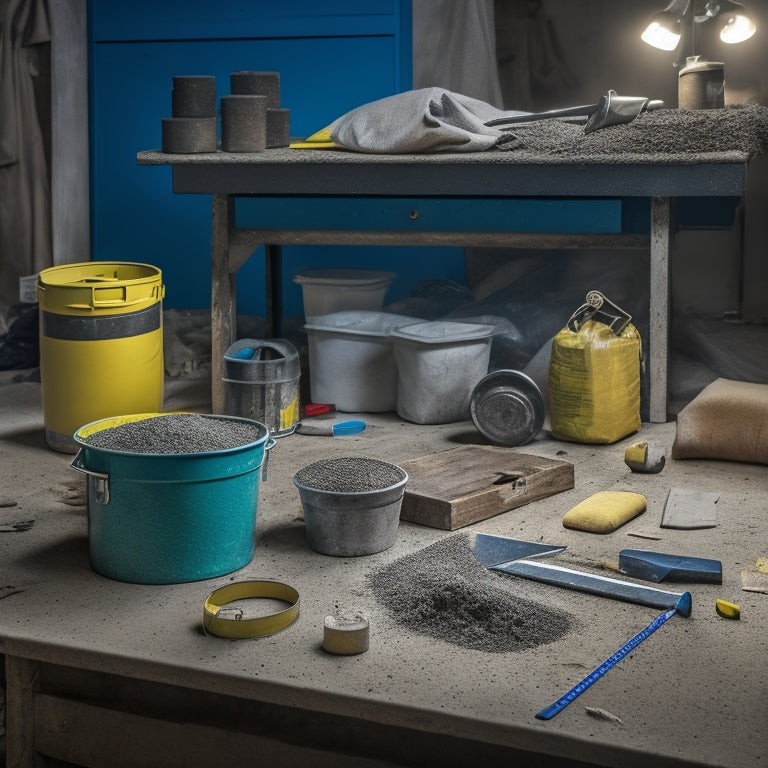
When it comes to DIY concrete block laying, the right mixing tools are vital for a strong and durable structure. You'll need a reliable mixing bucket, ideally 3-4 gallons in size, made from heavy-duty plastic or steel with reinforced handles and a sturdy base. A concrete mixing paddle is also indispensable, with options ranging from stainless steel to wooden, each with its pros and cons. Power mixing equipment, like electric mixing drill bits or cordless mixing drills, can streamline the process. Additionally, consider investing in hand tamping tools, leveling tools, and safety gear to guarantee a successful project - and to master each of these tools, you'll want to explore their unique features and applications.
Key Takeaways
• Choose a mixing bucket with a sturdy base, reinforced handle, and durable material (heavy-duty plastic or steel) for stability and ease of transport.
• Select a concrete mixing paddle based on material options (stainless steel, fiberglass, wooden, plastic, or aluminum) considering durability, weight, and cost.
• Power mixing equipment like electric mixing drill bits, cordless mixing drills, or battery-powered mixing tools enhance efficiency, but consider compatibility, torque, and speed control.
• Compaction and leveling tools, including hand tamping tools, spirit level, laser level, and scraping tools, ensure uniform compaction and accurate leveling.
• Always wear safety gear, such as gloves, protective eyewear, dust mask/respirator, work boots, and long-sleeved clothing, to protect yourself from harmful particles and caustic substances.
Mixing Bucket Essentials
You'll need a sturdy mixing bucket with a few essential features to efficiently mix and transport your DIY concrete block laying mixture.
The bucket's size is vital, as it determines the batch size of your mixture. Common mixing bucket sizes range from 2 to 5 gallons, with 3-4 gallons being a popular choice for most DIY projects.
When selecting a mixing bucket, consider the material it's made of. Heavy-duty plastic or steel buckets are ideal, as they can withstand the rigors of mixing and transporting heavy concrete. Avoid using thin, flimsy buckets that may crack or break under the weight of the mixture.
Additionally, look for buckets with reinforced handles and a sturdy base to guarantee stability and ease of transportation.
A well-designed mixing bucket will help you achieve a consistent, high-quality mixture, which is essential for strong and durable concrete blocks. By choosing the right mixing bucket, you'll be able to focus on laying blocks with confidence and precision.
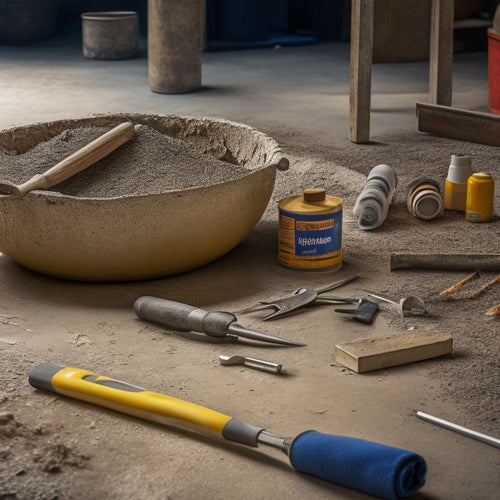
Concrete Mixing Paddle Options
A sturdy concrete mixing paddle is essential for effectively blending the ingredients and scraping the sides and bottom of the mixing bucket, ensuring a uniform consistency throughout the mixture. When selecting a paddle, you'll need to evaluate the material type and size. Here's a breakdown of your options:
| Paddle Material | Pros | Cons |
|---|---|---|
| Stainless Steel | Durable, resistant to corrosion, easy to clean | Heavy, expensive |
| Fiberglass | Lightweight, affordable, resistant to corrosion | May break or bend with heavy use |
| Wood | Inexpensive, easy to handle | Prone to splintering, absorbs moisture |
| Plastic | Lightweight, affordable, easy to clean | May break or bend with heavy use |
| Aluminum | Lightweight, affordable, corrosion-resistant | May bend with heavy use |
When it comes to size, assess the capacity of your mixing bucket and the size of your concrete blocks. A larger paddle may be necessary for larger buckets and blocks, while a smaller paddle may be more suitable for smaller projects. Ultimately, the right paddle for you will depend on your specific needs and preferences. By choosing the right paddle, you'll be able to mix and lay your concrete blocks with ease and precision.
Hand Tamping Tool Necessities
When selecting a hand tamping tool, you'll need to take into account several key factors to guarantee you're getting the right one for the job.
You'll want to think about the design of the tamping head, as it can greatly impact the effectiveness of the tool.
Additionally, you'll need to take into account the length of the handle and develop efficient tamping techniques to get the best results.
Tamping Head Designs Matter
Specific tamping head designs greatly impact the effectiveness of hand tamping tools in achieving compact, uniform concrete block laying.
When you're choosing a hand tamping tool, you need to take into account the tamping head materials and shapes. The materials used can affect the tool's durability and performance. For instance, tamping heads made from heavy-duty steel or aluminum can withstand the rigors of repeated use, while those made from lighter materials may need more frequent replacement.
The shape of the tamping head is also significant, as it determines the surface area in contact with the concrete. A flat, rectangular head is ideal for compacting large areas, while a rounded or curved head is better suited for corners and edges.
You'll also want to take into account the size of the tamping head, as larger heads can cover more ground but may be heavier and more difficult to maneuver.
Proper Tamper Handle Length
You'll find that the handle length of your hand tamping tool is equally important as the tamping head design, as it affects your leverage, comfort, and overall control during concrete block laying. A handle that's too short can lead to fatigue and reduced precision, while one that's too long can be unwieldy and difficult to maneuver.
| Handle Length | Effect on Performance |
|---|---|
| Too Short | Reduced leverage, fatigue, and precision |
| Ideal | Comfortable grip, efficient tamping, and control |
| Too Long | Unwieldy, difficult to maneuver, and reduced accuracy |
Ideal handle length is vital for effective tamping handle ergonomics. A handle that's between 24 and 30 inches long is generally considered best, as it provides a comfortable grip and sufficient leverage without being too cumbersome. When choosing a hand tamping tool, consider your personal preferences and the specific demands of your concrete block laying project. Select a tool with an ideal handle length to guarantee you have the power and control you need to get the job done efficiently and effectively.
Efficient Tamping Techniques Needed
To achieve uniform compaction and prevent air pockets, it's vital to master efficient tamping techniques that guarantee consistent pressure and coverage with each strike of the hand tamping tool.
You'll need to focus on proper tamping surface preparation, ensuring the area is clear of debris and excess mortar.
Next, adopt a best tamping technique by holding the tool at a 45-degree angle, striking the surface with the flat edge of the blade.
Apply gentle to moderate pressure, increasing force as needed, but avoid over-tamping, which can displace surrounding material.
Keep your strokes consistent, working in sections to cover the entire surface. It's important to maintain a consistent pace, taking care not to rush or drag the tool, as this can create unevenness.
Leveling and Scraping Tools
As you begin your DIY concrete block laying project, you'll need the right tools to guarantee a strong and level foundation. A leveling tool, such as a spirit level or laser level, is essential for guaranteeing your project starts with a perfectly horizontal foundation. This tool will help you achieve accurate leveling techniques, which are critical for a stable structure.
To complement your leveling tool, you'll also need a scraper to remove excess mortar and debris from the blocks. There are various scraping methods to choose from, including manual scrapers and power scrapers. The right scraper will depend on the size of your project and your personal preference.
Here's a breakdown of some common leveling and scraping tools:
| Tool | Description | Purpose |
|---|---|---|
| Spirit Level | Measures horizontal and vertical levels | Guarantees accurate leveling |
| Laser Level | Projects a level line or plane | Provides precise leveling |
| Manual Scraper | Handheld tool for removing excess mortar | Cleans blocks and prepares for laying |
| Power Scraper | Electric or pneumatic scraper for large projects | Efficiently removes mortar and debris |
| Tamping Scraper | Combines tamping and scraping functions | Compacts and cleans blocks simultaneously |
Worksite Measuring and Marking
Measuring and marking your worksite accurately assures that your DIY concrete block laying project stays on track and meets the required specifications. To achieve this, you'll need to employ effective measuring techniques.
Start by using a tape measure or a laser distance meter to take precise measurements of your worksite. Make sure to record these measurements accurately to avoid mistakes later on.
Next, you'll need to transfer these measurements to the site using marking strategies. Chalk lines, spray paint, or marking gauges are all effective tools for marking your layout. When marking, confirm that you're using a level to guarantee that your lines are straight and level.
It's also essential to double-check your measurements and markings to avoid errors. By investing time in accurate measuring and marking, you'll be able to lay your concrete blocks with confidence, knowing that your project is on track to meet the required specifications.
Safety Gear for Mixing Concrete
Before you start mixing concrete, you'll need to gear up with essential safety equipment to protect yourself from the hazards associated with handling cement and aggregate materials. You'll be working with caustic substances, heavy objects, and potentially hazardous dust, so it's vital to prioritize your safety.
First and foremost, invest in a pair of durable gloves that can withstand the rough handling of concrete blocks and the harsh effects of cement. Look for gloves with puncture-resistant palms and fingers, as well as a water-resistant coating to prevent skin irritation.
Next, don't forget to wear protective eyewear to shield your eyes from flying debris and splashes of concrete. Choose eyewear with shatter-resistant lenses and a secure fit to make sure they stay in place.
Finally, consider wearing a dust mask or respirator to prevent inhaling harmful particles.
Power Mixing Equipment Alternatives
When you're working on a DIY concrete block laying project, you'll need reliable power mixing equipment to get the job done efficiently.
You're likely considering electric mixing drill bits as a viable option, but you should also explore cordless mixing drill options and battery-powered mixing tools as alternatives.
Electric Mixing Drill Bits
You can opt for electric mixing drill bits as a cost-effective and space-saving alternative to power mixing equipment, allowing for efficient mixing of small to moderate batches of concrete. These drill bits are designed to be used with your existing electric drill, making them a convenient option for DIY concrete block laying projects.
When choosing an electric mixing drill bit, ascertain its compatibility with your drill's motor power and speed. A mixing drill bit with a high-torque capacity and adjustable speed setting will provide better mixing results.
Regular maintenance is essential to extend the lifespan of your electric mixing drill bit. Clean the bit thoroughly after each use, and store it in a dry place.
Inspect the bit for signs of wear and tear, such as worn-out paddles or damaged shafts, and replace it if necessary. By following these guidelines, you can achieve professional-grade mixing results with your electric mixing drill bit.
With proper care and maintenance, this cost-effective alternative will become an indispensable tool in your DIY concrete block laying arsenal.
Cordless Mixing Drill Options
How do cordless mixing drill options compare to their electric counterparts regarding power, convenience, and overall mixing performance for DIY concrete block laying projects? You'll be pleased to know that cordless mixing drill options have made significant strides in recent years, offering a range of benefits that make them a viable alternative to electric mixing drills.
Here are three key advantages of cordless mixing drill options:
-
Increased Portability: Cordless mixing drill options offer greater mobility, allowing you to move freely around the job site without being tethered to a power outlet.
-
Reduced Fatigue: With cordless drill features like adjustable torque and speed control, you can work for longer periods without experiencing fatigue, ensuring a more efficient mixing process.
-
Improved Convenience: Battery benefits, such as longer runtime and quick charging, minimize downtime and allow you to focus on the task at hand.
When it comes to power, cordless mixing drill options have caught up with their electric counterparts, offering sufficient torque and speed to handle demanding mixing tasks.
Battery Powered Mixing Tools
Tackling heavy mixing tasks with battery-powered mixing tools has become a viable alternative to traditional power mixing equipment, offering a range of benefits and advantages for DIY concrete block laying projects. As you consider this option, you'll want to evaluate the key factors that impact performance: battery type, mixing capacity, and power output.
Here's a breakdown of some popular battery-powered mixing tools:
| Tool | Battery Type | Mixing Capacity |
|---|---|---|
| DeWalt 20V Max Mixer | Lithium-Ion | 5 gal |
| Makita XRM09 18V LXT Mixer | Lithium-Ion | 4 gal |
| Bosch 12V Max Mixer | Lithium-Ion | 3 gal |
| Ryobi 18V One+ Mixer | Nickel-Cadmium | 2 gal |
When choosing a battery-powered mixing tool, consider the type of battery and its lifespan. Lithium-Ion batteries tend to offer longer runtime and faster charging times, making them a popular choice for heavy-duty mixing tasks. Additionally, evaluate the mixing capacity of each tool, ensuring it can handle the volume of concrete you need to mix for your project. By selecting the right battery-powered mixing tool, you'll be able to tackle your DIY concrete block laying project with confidence and efficiency.
Frequently Asked Questions
Can I Mix Concrete in a Metal Bucket With a Rusty Interior?
When you're considering mixing concrete, be cautious about using a metal bucket with a rusty interior. Rust can contaminate your mix, compromising its strength and durability.
Furthermore, rusty particles can react with the cement, leading to unwanted chemical reactions. For mixing safety, it's best to opt for a clean, rust-free bucket to guarantee a strong and reliable concrete mix.
You don't want to risk weakening your structure, so prioritize a safe and reliable mixing environment.
How Do I Prevent Concrete From Sticking to My Mixing Tools?
Like Achilles' heel, concrete's sticky nature can be your downfall. To prevent it from clinging to your mixing tools, you'll need to outsmart it.
Before starting, apply a thin layer of oil or silicone-based lubricant to your tools. After mixing, clean them promptly with soap and water to prevent concrete residue removal headaches.
Regular mixing tool maintenance, such as wire-brushing and re-oiling, will keep them in top condition and concrete-free.
What Is the Ideal Temperature for Mixing and Laying Concrete?
You need to guarantee ideal curing conditions for your concrete.
The ideal temperature for mixing and laying concrete falls between 50°F and 70°F (10°C and 21°C).
Temperature effects can greatly impact concrete's strength and durability.
If it's too hot, hydration accelerates, leading to weak spots.
If it's too cold, hydration slows, delaying setting.
You must maintain a stable temperature range to achieve the best results.
Can I Reuse Leftover Mixed Concrete From a Previous Project?
You've got leftover mixed concrete from a previous project, and you're wondering if you can reuse it. The answer is, it's not recommended.
Concrete has a limited workability time, and once it's mixed, it starts to set. Reusing it can compromise its strength and quality.
Instead, consider exploring concrete disposal methods or finding alternative uses for leftover concrete, such as creating decorative items or filling small gaps.
How Long Does It Take for Mixed Concrete to Fully Harden?
You're wondering how long it takes for mixed concrete to fully harden. The answer depends on the curing time and drying process.
Typically, concrete reaches its initial set within 1-2 hours, but it can take up to 28 days to fully cure.
Factors like temperature, humidity, and mix design influence the process. You'll notice significant strength gain within 7-10 days, but it's crucial to allow the full 28 days for peak durability.
Conclusion
As you wrap up your DIY concrete block laying project, remember that having the right mixing tools is like having a well-oiled machine - each piece works in harmony to produce a solid foundation.
Just as a master chef relies on quality utensils to craft a culinary masterpiece, you need these essential tools to build a sturdy structure that will stand the test of time.
With these top mixing tools, you'll be laying blocks like a pro in no time.
Related Posts
-
Top Tools for Repairing Cracked Concrete Surfaces
When tackling a cracked concrete surface repair, you'll need the right tools to guarantee a durable fix. Start with e...
-

Essential Tools for Epoxy Concrete Floor Repair
You'll need a thorough arsenal of specialized tools to guarantee a successful epoxy concrete floor repair. Floor prep...
-
7 Best Tools for Concrete Block Construction
You'll need a solid foundation, precise cutting, and seamless finishing to guarantee your concrete block construction...


