
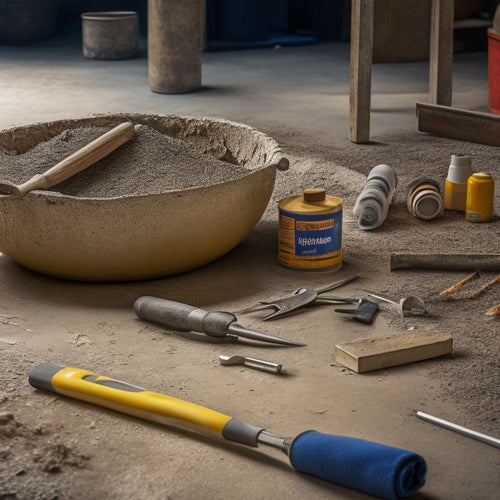
Top Tools for Building Concrete Planter Walls
As you begin building a concrete planter wall, you'll need a strategic arsenal of specialized tools to guarantee a sturdy and visually appealing structure. Start with essential safety gear, including safety goggles, work gloves, and a dust mask, to protect yourself from hazards. Then, employ measuring and marking tools, such as tape measures and chalk lines, to achieve precise measurements. You'll also need tools for breaking and cutting cinder blocks, mixing and applying adhesives, and leveling and aligning blocks. As you progress, discover the importance of specialized tools for corners and finishing touches, and learn how to master each step to achieve a stunning planter wall that will elevate your outdoor space.
Key Takeaways
• Essential safety gear, including safety goggles, work gloves, and a dust mask, is crucial for protecting yourself from hazards.
• Accurate measurements and marking tools, such as tape measures and chalk lines, are vital for achieving a well-constructed planter wall.
• Breaking and cutting cinder blocks require the right tools, including hammers, chisels, and circular saws, as well as proper cutting techniques.
• Mixing and applying adhesives correctly, including choosing the right type and following mixing guidelines, is critical for a strong bond between blocks.
• Leveling and aligning blocks, using tools like levels and string lines, is necessary to ensure a stable and aesthetically pleasing planter wall.
Essential Safety Gear Needed
As you prepare to build concrete planter walls, donning essential safety gear is crucial to protecting yourself from the hazards associated with mixing, pouring, and finishing concrete.
You'll need to shield your eyes from flying debris and chemical splashes with safety goggles that meet ANSI standards. These goggles should have a snug fit, anti-fog coating, and provide 180-degree peripheral vision.
Next, don work gloves that offer grip, dexterity, and puncture resistance. Look for gloves made from durable materials like synthetic leather or Kevlar, with reinforced palms and fingertips. A good pair of gloves will prevent cuts, abrasions, and chemical burns while allowing you to maintain control over your tools.
Additionally, consider a dust mask or respirator to filter out airborne particles and silica dust. Don't forget to wear long sleeves, long pants, and closed-toe shoes to prevent skin exposure.
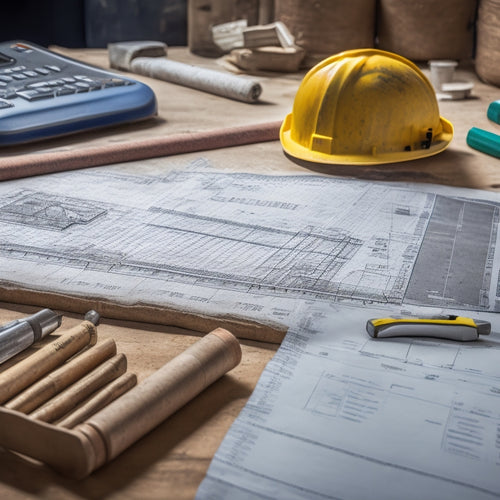
Measuring and Marking Tools
With your safety gear in place, you're ready to start preparing the site. This begins with accurately measuring and marking the area where your concrete planter walls will take shape.
To achieve precise measurements, you'll need reliable tape measures. Invest in a high-quality, 25-foot tape measure that can withstand rough handling and provide accurate readings.
Next, use chalk lines to mark the area where your walls will be built. Chalk lines are essential for creating straight lines and defining the boundaries of your planter walls. They're especially useful when working with large areas or complex designs.
To create a chalk line, simply snap the string to create a straight line, and then use a level to guarantee it's perfectly horizontal or vertical. This will give you a clear guide for building your walls, ensuring they're straight, level, and perfectly aligned.
Breaking and Cutting Cinder Blocks
You'll need to break and cut cinder blocks to fit your planter wall design, and a hammer and chisel or a block splitter are the essential tools for this task.
When choosing a cinder block type, consider the density and texture you need for your project. Standard blocks are suitable for most projects, but you may prefer lightweight blocks for smaller walls or heavy-duty blocks for larger structures.
To break cinder blocks, position the block on a stable surface and tap gently with a hammer along the score line. For more precise cuts, use a block splitter, which applies even pressure to split the block. Alternatively, use a circular saw or a masonry blade to cut blocks. When cutting, always wear protective gear, including gloves, safety glasses, and a dust mask.
For curved or irregular cuts, use a hammer and chisel to knock out small pieces of the block. This technique requires patience and control, but yields precise results.
Mixing and Applying Adhesives
Once you've cut and fitted your cinder blocks, it's time to secure them in place with a strong adhesive, which requires precise mixing and application to guarantee a durable bond.
You'll need to choose the right adhesive type for your project, considering factors like environmental conditions, block type, and desired strength. Popular options include epoxy-based, polyurethane-based, and acrylic-based adhesives.
Before applying the adhesive, verify your blocks are clean and dry. Mix the adhesive according to the manufacturer's instructions, taking care to achieve the correct consistency.
Apply the adhesive to the blocks using a notched trowel or spreader, holding it at a 45-degree angle to achieve ideal coverage. Apply even pressure to verify a strong bond, working in small sections to maintain control.
Use a level and straightedge to check the block's alignment and make adjustments as needed. By following these application techniques, you'll achieve a strong, long-lasting bond that will support your planter wall's weight and withstand the elements.
Leveling and Aligning Blocks
As you begin constructing your concrete planter wall, you'll need to guarantee each block is precisely positioned to achieve a sturdy and visually appealing structure.
You'll want to start by checking the heights of your blocks, making sure they're uniform and even.
Next, you'll align the faces of the blocks, verifying that they're straight and true, with no deviations or wobbles.
Check Block Heights
With the footing in place, confirm the first course of blocks is perfectly level by checking block heights and making adjustments as necessary to achieve a uniform plane. This vital step guarantees your planter wall's stability and aesthetic appeal.
As you lay each block, use a level to verify its height relative to the surrounding blocks. Make adjustments by adding or removing material from beneath the block, if needed. It's important to maintain a consistent block height, as variations can lead to an uneven, unattractive wall.
From an aesthetic perspective, uniform block heights create a sense of harmony and visual balance. When blocks are level, the wall's lines appear clean and sharp, contributing to a professional-looking finish.
Conversely, uneven block heights can detract from the wall's overall appeal, making it appear amateurish. By taking the time to meticulously check and adjust block heights, you'll be rewarded with a beautiful, structurally sound planter wall that meets your high standards.
Align Block Faces
You'll assure a visually appealing planter wall by aligning block faces, which involves leveling and aligning blocks to create a uniform facade. To achieve this, you'll need to employ precise block alignment techniques.
Start by checking the block's position and making adjustments as necessary. Use a level to assure the block is perfectly horizontal, and a string line to guide your alignment.
Next, use a rubber mallet to tap the block into place, making sure it's snug against the previous block. For added precision, utilize tools for precision such as a laser level or a precision spirit level. These tools will help you detect even the slightest deviations, allowing you to make precise adjustments.
Remember to work methodically, checking and re-checking your alignment as you go. By taking the time to align your block faces, you'll create a planter wall that exudes professionalism and sophistication.
Verify Straight Lines
Verifying straight lines involves meticulously checking the block's position and making adjustments to guarantee the planter wall's facade remains uniform and visually appealing.
You'll need to confirm line accuracy by checking the blocks' alignment with a level and a string line. This step is essential, as even slight deviations can affect the overall aesthetic of your planter wall.
To achieve visual alignment, start by setting a string line along the top of the wall, using it as a reference point for each block.
Then, use a level to check the block's position, making adjustments as needed. You may need to tap the block gently with a rubber mallet to get it into place.
Repeat this process for each block, working your way along the wall. Remember, precision is key – take your time and make adjustments in small increments to avoid over-correction.
Filling and Finishing Touches
As you move into the final stages of your concrete planter wall project, you'll focus on filling and finishing touches that elevate the overall appearance and durability of your structure.
Now it's time to apply the final layer of grout to fill any gaps between the blocks, making sure to wipe away excess material for a clean finish.
Next, you'll seal the surface to protect it from the elements and bring out the beauty of your handiwork.
Final Grout Application
With all joints and gaps between the concrete blocks meticulously cleaned and prepared, it's time to apply the final layer of grout, guaranteeing a seamless, visually appealing finish.
To achieve this, you'll need to get the grout consistency just right - not too runny, not too thick. Aim for a mix that's similar to toothpaste, allowing you to easily fill the gaps without excessive squeezing out.
When applying the grout, use a grout float to spread it evenly, working in small sections to maintain control. Hold the float at a 45-degree angle, pressing it firmly into the gaps to guarantee complete filling.
Use a gentle, sweeping motion to remove excess grout, taking care not to press too hard and dislodge the material. For tight spaces, switch to a grout stick or old toothbrush to get into those hard-to-reach areas.
As you work, regularly clean your tools and wash your hands to prevent grout from drying on them.
Sealing the Surface
You'll now apply a sealer to protect your concrete planter wall's surface, guaranteeing the grout and blocks remain intact while accentuating the wall's natural beauty. This vital step prevents water and dirt from seeping into the cracks, maintaining the wall's integrity and appearance.
Before applying the sealer, prepare the surface by cleaning it thoroughly with a pressure washer to remove any dirt, grime, or efflorescence. This guarantees a strong bond between the sealer and the concrete.
Here are your sealing product options:
-
Acrylic sealers: Provide a clear, non-yellowing finish and are easy to apply.
-
Silane-based sealers: Offer superior protection against water and stains, but may require multiple coats.
-
Siloxane-based sealers: Combine the benefits of acrylic and silane-based sealers, offering a durable, water-repellent finish.
Choose a sealer that suits your project's requirements, and follow the manufacturer's instructions for application. Remember to test the sealer on a small, inconspicuous area first to guarantee the desired outcome.
With the right sealer and surface preparation techniques, your concrete planter wall will remain beautiful and durable for years to come.
Specialized Tools for Corners
Forming clean, precise corners is a crucial aspect of building concrete planter walls, and specialized tools are essential for achieving professional-looking results.
You'll need corner-specific tools to create crisp, 90-degree angles that don't compromise the structural integrity of your planter. Corner chisels are must-haves for this task. These handheld tools allow you to carefully chip away excess concrete, creating a smooth, even surface. For more aggressive corner shaping, angle grinders come in handy. With their rotating abrasive discs, they can quickly remove excess material and create a precise, angular edge.
When working with corner chisels, make sure to hold them at a 45-degree angle and apply gentle, controlled pressure. This will help you avoid damaging the surrounding concrete.
Angle grinders, on the other hand, require more force, but be cautious not to over-grind, as this can lead to uneven surfaces.
Frequently Asked Questions
How Do I Prevent Water Seepage Through the Planter Walls?
When building a planter wall, you'll want to prevent water seepage to guarantee the structure's longevity.
To do this, you'll need to implement effective waterproofing techniques. Start by applying a waterproofing membrane to the wall's exterior, followed by a drainage solution like a French drain or a drainage mat.
This will direct water away from the wall, reducing the risk of seepage and damage.
Can I Use a Mixture of Old and New Cinder Blocks?
Like a master builder of ancient Rome, you're constructing a planter wall that'll stand the test of time. Now, you're wondering if mixing old and new cinder blocks is a viable option.
The answer lies in cinder block durability. Old blocks may be weathered, affecting their structural integrity. However, if you're going for a distressed, rustic look, it might just work.
Aesthetic considerations aside, it's crucial to confirm the old blocks are sturdy enough to support the weight of the planter and its contents.
What Is the Ideal Block Size for a Curved Planter Wall?
When designing a curved planter wall, you'll want to choose blocks that complement the curved design.
Opt for blocks with dimensions that allow for flexibility, such as 4' or 6' wide, 8' or 10' long, and 2' or 4' high.
These block dimensions will enable you to create smooth, flowing curves without sacrificing structural integrity.
How Do I Ensure the Wall Remains Stable Over Time?
To guarantee your curved planter wall remains stable over time, you'll want to take into account the soil composition behind it.
Make sure the soil isn't prone to erosion or settling, which can cause the wall to shift.
Implement drainage solutions, like a French drain or weep holes, to direct water away from the wall.
This will prevent waterlogged soil and reduce pressure on the structure.
Are There Any Specific Building Codes for Planter Walls?
When designing your planter wall, you'll want to familiarize yourself with local building regulations that govern planter wall design.
These codes vary by region, so research the specific requirements for your area.
You'll need to take into account factors like load-bearing capacity, drainage, and structural integrity to guarantee your wall remains safe and stable.
Don't assume that because it's a decorative feature, it's exempt from building codes - you'll need to comply to avoid costly revisions down the line.
Conclusion
You've made it to the finish line!
With these exceptional tools in your arsenal, you're now a master builder of concrete planter walls.
You've conquered the unforgiving world of cinder blocks, tamed the messy beast of adhesives, and emerged victorious with a stunning planter wall that's the envy of the neighborhood.
Your friends will be green with envy (just like your lush plants) as they gaze upon your architectural masterpiece.
Related Posts
-
Top Tools for Repairing Cracked Concrete Surfaces
When tackling a cracked concrete surface repair, you'll need the right tools to guarantee a durable fix. Start with e...
-

Top Concrete Resurfacing Tools for a Pro Finish
When it comes to achieving a professional finish in concrete resurfacing projects, you require the right set of speci...
-
5 Tips for Accurate Concrete Measurement Tools
To guarantee accurate concrete measurement, you'll want to calibrate your measuring tools regularly, choosing a frequ...


