Tools Needed for DIY Concrete Edging Projects
Share
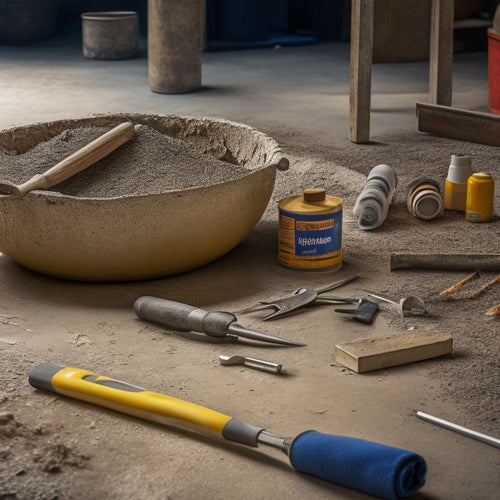
You'll need a range of specialized tools and equipment to tackle a DIY concrete edging project, including a level, shovel, and spirit level for preparation, as well as cutting tools like a masonry saw, circular saw, and angle grinder for precise cuts. For drilling, you'll require a high-torque drill and masonry or concrete bits, while mixing and pouring concrete calls for a reliable mixing stick, pouring bucket, and tamping tool. Finishing and smoothing tools, like edge trowels and surface floats, will help refine your edging, and don't forget essential safety gear like gloves and safety glasses. Now, take the next step to create a professional-looking edge.
Key Takeaways
• Essential tools for DIY concrete edging projects include a level, shovel, spirit level, and safety gear for preparation and site clearing.
• Cutting and drilling tools like masonry saws, circular saws, and hammer drills are necessary for precise cuts and holes in concrete blocks.
• Mixing and pouring concrete requires a reliable mixing stick, trowel, and bucket, as well as a pouring spout and tamping tool for smooth finishing.
• Finishing and smoothing tools like edge trowels, edging chisels, and surface floats are crucial for refining edges and surfaces for a professional look.
• Personal protective equipment such as safety glasses, dust masks, gloves, and steel-toed boots are vital for protecting yourself from concrete-related hazards.
DIY Cinder Block Edging Essentials
To create a sturdy and visually appealing DIY cinder block edging, you'll need to gather necessary materials and tools, including a level, a shovel, and a spirit level. These tools will guarantee your edging is perfectly aligned and level, which is critical for achieving ideal cinder block aesthetics. Cinder block durability is also dependent on proper installation, so it's essential to get it right from the start.
Next, you'll need to prepare the site by clearing the area of any debris and vegetation. This will give you a clean slate to work with and prevent any obstructions from interfering with your edging.
You'll also need to mark out the area where you want to install the edging, using a string line and stakes to guide your shovel. With these necessary steps completed, you'll be ready to start laying your cinder blocks, confident that your edging will be both durable and visually appealing.
Power Tool Reviews for DIYERS
Three essential power tools you'll want to contemplate for your DIY cinder block edging project are a circular saw, a rotary hammer, and a demolition hammer, each designed to tackle specific tasks with precision and efficiency.
As you prepare to cut, grind, and break concrete, you'll appreciate the raw power these tools bring to the job site. Consider cordless saws for their convenience and portability, allowing you to make precise cuts without the hassle of cords. For tougher tasks, a rotary hammer or demolition hammer will be your go-to tools. These heavy-hitters can chisel and break concrete with ease, making quick work of even the most challenging tasks.
When it comes to grinding and polishing, angle grinders are a must-have. With their high-speed rotating discs, you'll be able to smooth out rough edges and create a professional-looking finish.
Look for tools with adjustable speed settings and ergonomic grips to minimize fatigue and maximize control. With these power tools in your arsenal, you'll be well-equipped to tackle even the most demanding DIY cinder block edging projects.
Cinder Block Cutting Requirements
When cutting cinder blocks, you'll typically need to make precise cuts at exactly 90-degree angles to guarantee a clean, professional-looking joint. This requires the right tools and techniques, depending on the type of cinder block you're working with.
| Cinder Block Type | Cutting Technique | Required Tool |
|---|---|---|
| Standard Cinder Block | Straight Cut | Masonry Saw or Circular Saw |
| Split-Face Cinder Block | Angled Cut | Angle Grinder or Tile Saw |
| Retaining Wall Cinder Block | Curved Cut | Reciprocating Saw or Jigsaw |
For standard cinder blocks, a masonry saw or circular saw will make straight cuts with ease. Split-face cinder blocks require angled cuts, which can be achieved with an angle grinder or tile saw. Retaining wall cinder blocks often require curved cuts, making a reciprocating saw or jigsaw the best option. Regardless of the type, it's crucial to use the correct cutting technique to avoid damaging the block or compromising the structural integrity of your edging project. By choosing the right tool and technique, you'll guarantee a precise cut every time, resulting in a professional-looking finish that will elevate your DIY concrete edging project.
Edging Project Drilling Needs
Edging Project Drilling Needs
Drilling precise holes for edging projects requires attention to detail, as misaligned or oversized holes can compromise the structural integrity of your concrete edging. You'll need to master specific drilling techniques to guarantee accurate holes that fit snugly around your edging materials.
For instance, you'll want to use a drill with a high torque output to penetrate dense concrete. A hammer drill or rotary hammer drill is ideal for this task, as they provide the necessary power to break through tough concrete.
When choosing a drill type, consider the size and type of holes you need to create. A cordless drill is convenient for smaller holes, while a corded drill provides more power for larger holes.
Don't forget to select the right drill bits, such as masonry bits or concrete bits, designed specifically for drilling into concrete. With the right drill and techniques, you'll be able to create precise holes that guarantee a professional-looking finish for your concrete edging project.
Mixing and Pouring Concrete Tools
As you prepare to mix and pour concrete for your edging project, you'll need to gather the right tools to guarantee a smooth, successful process.
You'll require a mixing bucket that meets specific requirements, as well as essential tools for mixing the concrete to the perfect consistency.
With the right tools in hand, you'll be able to pour the concrete with confidence, achieving a professional-looking finish.
Concrete Mixing Essentials
You'll need a set of reliable mixing and pouring tools to guarantee a smooth, consistent concrete mix for your edging project. A sturdy mixing stick or trowel is essential for combining cement, sand, and water.
Invest in a mixing paddle or drill bit attachment to efficiently mix large batches. Don't overlook the benefits of concrete additives, such as air-entraining agents or retarding agents, which can improve workability, strength, and durability.
When it comes to mixing techniques, a thorough overview is vital. Start by adding the correct amount of water to the mixer, then gradually introduce the dry ingredients. Use a figure-eight pattern to guarantee thorough mixing, avoiding over-mixing which can lead to weak concrete.
For a more uniform mix, consider using a concrete mixer or mixing drum. Finally, have a pouring bucket with a spout or chute ready to transport the mixed concrete to your edging project site.
With these essentials in place, you'll be well on your way to creating a professional-looking concrete edging that will last for years to come.
Mixing Bucket Requirements
Select a sturdy mixing bucket with a capacity that matches your project's scale to confirm efficient mixing and minimize waste. A suitable bucket is essential for achieving the right concrete consistency, which is critical for a successful edging project.
When choosing a mixing bucket, consider the following factors:
-
Material: Opt for buckets made from heavy-duty plastic, steel, or fiberglass, as they can withstand the rigors of mixing and pouring concrete.
-
Size: Ascertain the bucket's capacity aligns with the volume of concrete you need to mix. A larger bucket may be necessary for larger projects.
-
Shape: A bucket with a wide mouth and a flat bottom provides easier access for mixing and scraping the sides.
-
Rim design: A bucket with a rolled rim or a sturdy handle facilitates easy pouring and minimizes spills.
-
Non-stick coating: A non-stick coating or a smooth interior surface helps prevent concrete from sticking to the bucket, making mixing and cleaning easier.
Pouring Concrete Tools
With concrete mixed to the perfect consistency, it's time to pour it into your edging molds using the right tools to secure a smooth, bubble-free flow. Mastering concrete pouring techniques relies on having the essential pouring tools at your disposal. You'll need a sturdy pouring bucket or a pouring pot to contain and transport the mixed concrete. A pouring spout or chute will help direct the flow of concrete, reducing spills and mess.
| Tool | Purpose | Importance |
|---|---|---|
| Pouring Bucket/Pot | Contain and transport mixed concrete | High |
| Pouring Spout/Chute | Direct concrete flow, reduce spills | High |
| Tamping Tool | Remove air pockets, compact concrete | Medium |
| Leveling Tool | Secure even concrete surface | Medium |
| Gloves/Protective Gear | Protect yourself from concrete splashes | Low |
When pouring, use a steady, continuous motion to fill the mold. Use your tamping tool to remove air pockets and compact the concrete. Finally, use a leveling tool to secure an even surface. Don't forget to wear gloves and protective gear to shield yourself from concrete splashes. By following these steps and using the right tools, you'll achieve a professional-looking finish for your DIY concrete edging project.
Finishing and Smoothing Tools Needed
As you move on to the finishing stage of your DIY concrete edging project, you'll need to focus on refining the edges and surfaces to achieve a professional-looking result.
To do this, you'll require a set of specialized tools that can help you create clean lines and a smooth finish.
You'll be working with edge profiling tools to define the edges and surface smoothening options to eliminate any imperfections.
Edge Profiling Tools
You'll need a range of edge profiling tools to refine and smooth out your concrete edging, ensuring a precise, professional-looking finish. These tools will help you achieve the desired edge design and texture options, making your DIY project stand out.
To get started, you'll need the following edge profiling tools:
-
Edge trowels: Used to shape and smooth out the concrete edge, these trowels come in various sizes and angles to fit your specific needs.
-
Edging chisels: Perfect for creating sharp, clean edges, these chisels are designed for precision and control.
-
Concrete profiler: This tool helps to refine the edge profile, removing any excess concrete and leaving a smooth finish.
-
Edge shavers: Used to shave off excess concrete and create a clean, sharp edge, these shavers are a must-have for any DIY concrete edging project.
-
Edge floats: These floats help to smooth out the edge, removing any imperfections and leaving a professional-looking finish.
With these edge profiling tools in your arsenal, you'll be able to achieve a precise, professional-looking finish that complements your concrete edging design and texture options.
Surface Smoothening Options
After refining your concrete edging's profile, it's time to focus on surface smoothening, where a range of finishing and smoothing tools come into play to eliminate any imperfections and produce a glossy, polished finish.
You'll need to employ various smoothing techniques to achieve the desired surface textures. For a high-gloss finish, use a steel trowel to remove any excess concrete and flatten the surface. Next, switch to a power float, which will help to further refine the surface and remove any minor imperfections.
To achieve a smooth, matte finish, you can use a wood or resin float. These tools will help to remove any remaining imperfections and leave your concrete edging with a uniform surface texture.
If you're looking for a more rustic, textured finish, consider using a stiff-bristled broom or a texture mat to create unique patterns and designs.
Whatever your desired finish, having the right smoothing tools at your disposal will guarantee a professional-looking result that adds value to your outdoor space.
Safety Equipment for Concrete Work
Wearing personal protective equipment (PPE) is vital when working with concrete, as it shields you from harsh chemicals, heavy materials, and physical hazards that can cause serious injuries.
As you commence your DIY concrete edging project, it's important to prioritize your safety above all else. Familiarize yourself with safety guidelines and invest in the right gear to guarantee your well-being.
Here are the essential safety equipment you should have:
-
Safety glasses: Protect your eyes from flying debris and chemical splashes.
-
Dust mask: Prevent inhalation of concrete dust and other airborne particles.
-
Gloves: Shield your hands from harsh chemicals, abrasions, and cuts.
-
Steel-toed boots: Protect your feet from heavy materials and tools.
-
Long-sleeved clothing: Cover your skin from skin irritants and abrasions.
Frequently Asked Questions
Can I Use a Hammer Drill for Mixing Concrete?
When you're mixing concrete, you might wonder if a hammer drill can get the job done.
The answer is yes, you can use a hammer drill for mixing concrete, but be aware of its limitations.
Hammer drills offer benefits like increased torque and speed, which can help with mixing.
However, they're not ideal for large batches or thick mixes.
Master concrete mixing techniques by using the right tool for the task, and you'll achieve a stronger, more consistent finish.
How Do I Prevent Concrete From Staining My Driveway?
When working with concrete, you'll want to prevent stains on your driveway. To do so, lay down a drop cloth or plastic sheeting around the area where you'll be pouring the concrete. This barrier will catch any spills or splatters, making cleanup a breeze.
Additionally, apply a concrete stain-preventing sealant to your driveway before starting the project. This proactive approach to driveway maintenance will save you time and hassle in the long run.
What Is the Ideal Temperature for Working With Concrete?
When you're working with concrete, you're aiming for ideal curing conditions.
Temperature effects play an essential role in this process. Ideally, you'll want to work in temperatures between 50°F and 75°F (10°C and 24°C). This range allows for proper hydration and strength development.
Anything outside this range can lead to compromised results, so make certain you're monitoring the temperature to guarantee a strong, durable finish.
Can I Use a Regular Saw to Cut Concrete Pavers?
You might think you can use a regular saw to cut concrete pavers, but don't even think about it.
That'd be like trying to cut through a rock with a butter knife.
You'll need a specialized saw designed for paver cutting, like a diamond blade saw or a masonry saw.
These saw types are built to handle the intense friction and heat generated when cutting through concrete, ensuring a clean cut and saving you from frustration.
Do I Need to Seal My Concrete Edging After Completion?
You're wondering if sealing your concrete edging is necessary after completion. The answer is yes, and here's why.
Sealing offers benefits like enhanced durability, stain resistance, and a glossy finish.
To achieve this, you'll need to master various sealing techniques, such as applying a concrete sealer with a roller or sprayer, or using a brush for more intricate areas.
Conclusion
Now that you've gathered all the necessary tools, you're ready to bring your DIY concrete edging project to life.
As you envision the sleek, modern lines and rustic charm of cinder blocks blending seamlessly with your garden or patio, can you almost smell the freshly poured concrete and hear the sound of your new outdoor space coming together?
With the right tools in hand, the only limit is your imagination.
Related Posts
-

What Tools Do You Need for Concrete Success
For concrete success, you'll need a range of essential power tools, including rotary hammers, angle grinders, concret...
-

Top Tools for Repairing Cracked Concrete Surfaces
When tackling a cracked concrete surface repair, you'll need the right tools to guarantee a durable fix. Start with e...
-

7 Best Tools for Concrete Block Construction
You'll need a solid foundation, precise cutting, and seamless finishing to guarantee your concrete block construction...


