Restoration Tools Checklist for Sealed Concrete Floors
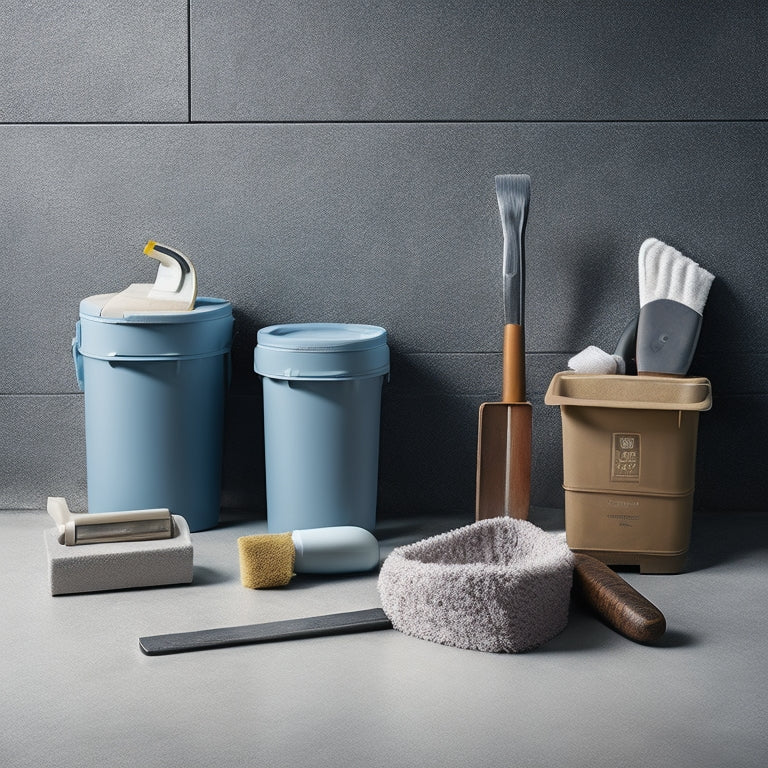
You'll need a thorough toolkit to restore your sealed concrete floors to their original glory, and that starts with understanding the various tools and materials required for each stage of the process. From essential cleaning equipment like reliable mops and soft-bristled brushes, to floor preparation tools for removing old coatings, and surface repair materials like epoxy-based patching compounds, you'll need to be well-equipped. You'll also require sealer removal options, grinding and polishing tools, edging and corner tools, and protective coating systems to guarantee a job well done. With the right tools and expertise, you'll be poised to achieve a showroom finish that lasts.
Key Takeaways
• Essential cleaning equipment includes a reliable mop, soft-bristled brush, non-abrasive scrubber, and eco-friendly cleaning solutions.
• Floor preparation tools involve cleaning, degreasing, and removing old coatings, with specialized tools for complete removal.
• Surface repair materials like epoxy-based patching compounds and polyurethane fillers require proper application techniques and adhesion testing.
• Sealer removal options include mechanical, solvent-based, stripping agents, and heat-based removal methods, each with specific safety precautions.
• Protective coating systems like Epoxy, Polyurethane, and Acrylic shield against wear, tear, and environmental elements, requiring proper surface prep and application.
Essential Cleaning Equipment
You'll need a reliable arsenal of essential cleaning equipment to effectively remove dirt, grime, and other substances from sealed concrete floors. This includes a sturdy mop with a microfiber head, which can pick up dirt and grime without leaving streaks or residue.
A soft-bristled brush is also necessary for gentle scrubbing and reaching tight spaces. For tougher stains, a scrubber with a non-abrasive scrubbing surface is vital. When it comes to cleaning solutions, opt for eco-friendly products that are specifically designed for sealed concrete floors. These products are gentle on the floor's finish while still providing effective cleaning power.
In terms of maintenance tips, it's important to clean your sealed concrete floors regularly to prevent dirt and grime from building up. Dry sweeping or vacuuming daily can help reduce the amount of dirt that gets ground into the floor.
Additionally, clean up spills immediately to prevent them from becoming stubborn stains. By following these tips and using the right cleaning equipment, you'll be able to keep your sealed concrete floors looking their best.
Floor Preparation Tools
When preparing a sealed concrete floor for restoration, you'll need to focus on two critical points: cleaning the surface and removing old coatings.
You'll want to guarantee the floor is free of dirt, grime, and other substances that can interfere with the restoration process.
Cleaning the Surface
Before applying any restoration treatments, thoroughly clean the sealed concrete floor surface to remove dirt, grime, and old coatings that can hinder the bonding process.
You'll need to employ effective cleaning techniques to guarantee a strong bond between the existing surface and the new treatment. Start by sweeping or blowing away any loose debris, followed by a thorough mopping with a cleaning solution specifically designed for concrete. Avoid using harsh chemicals or abrasive materials that can damage the surface or compromise its integrity.
As part of your surface maintenance routine, consider using a degreaser to break down any oil or grease stains. For more stubborn stains, you may need to use a more aggressive cleaning solution or consult with a professional.
Remember to always follow the manufacturer's instructions and take necessary safety precautions when using cleaning products.
Removing Old Coatings
To guarantee a successful restoration, old coatings and adhesives must be completely removed from the sealed concrete floor surface using specialized floor preparation tools. This step is critical, as any remaining coating or adhesive can compromise the bond between the new coating and the concrete, leading to premature failure.
You'll need to identify the type of coating on your floor, as different coating types require specific removal techniques. For example, epoxy or polyurethane coatings may require a chemical stripper, while acrylic or latex coatings can be removed mechanically with a scraper or grinder. Adhesives, such as those used for tile or carpet, may require a specialized adhesive remover.
When selecting a removal technique, consider the condition and type of your concrete floor, as well as the coating's thickness and age. Always follow the manufacturer's instructions for the removal product or equipment, and take necessary safety precautions to protect yourself and the surrounding area.
Surface Repair Materials
When it comes to repairing surface imperfections on sealed concrete floors, you'll need to choose the right material for the job.
You'll likely consider epoxy-based patching compounds, which offer exceptional bonding strength and durability.
Alternatively, polyurethane filler options can provide a flexible, impact-resistant solution for filling gaps and cracks.
Epoxy-Based Patching Compounds
You'll reach for epoxy-based patching compounds to repair surface imperfections, fill cracks, and rebuild damaged areas on your sealed concrete floors. These compounds offer exceptional bonding strength, durability, and resistance to chemicals and abrasion.
When selecting an epoxy-based patching compound, consider the specific requirements of your project, including the size and depth of the repair area, the type of concrete, and the desired finish.
To guarantee a successful repair, it's important to follow proper epoxy application techniques. This includes preparing the substrate by cleaning and profiling the surface, mixing the epoxy components accurately, and applying the compound at the recommended temperature and humidity levels.
Additionally, perform epoxy adhesion testing to verify the bond strength between the epoxy and the concrete substrate. This can be done using standardized tests such as the pull-off test or the shear test.
Polyurethane Filler Options
Polyurethane filler options, designed for surface repair, offer a versatile range of materials that effectively address minor imperfections, scratches, and wear marks on sealed concrete floors. When selecting a polyurethane filler, you'll want to assess the specific needs of your project. For instance, some polyurethane applications require a high-gloss finish, while others demand a matte finish to match the surrounding area.
You'll also want to evaluate the filler's longevity, as some polyurethane fillers are more prone to wear and tear than others. Look for products with high abrasion resistance and UV stability to guarantee the filler lasts for years to come.
Additionally, contemplate the color and consistency of the filler, as it should match the surrounding concrete as closely as possible. By choosing the right polyurethane filler, you can achieve a seamless repair that blends flawlessly with the surrounding surface.
With the right tools and techniques, you'll be able to restore your sealed concrete floor to its original glory.
Sealer Removal Options
By evaluating the type and condition of the existing sealer, you can select the most effective removal method for your sealed concrete floor. This essential step guarantees a successful restoration process. When choosing a removal method, take into account factors like the sealer's age, type, and adhesion to the concrete.
Here are some sealer removal options to take into account:
-
Mechanical removal: Use a floor scraper or grinder to physically remove the sealer.
-
Solvent-based removal: Apply eco-friendly solvents to break down the sealer, then scrape it off. Maintain proper chemical safety precautions when working with solvents.
-
Stripping agents: Apply a specialized stripping agent to dissolve the sealer, then rinse and scrub the floor.
-
Heat-based removal: Use heat guns or infrared heaters to soften the sealer, making it easier to remove.
-
Chemical-based removal: Apply a chemical remover specifically designed for the type of sealer on your floor.
Remember to always follow the manufacturer's instructions and take necessary safety precautions when using these removal methods.
Grinding and Polishing Tools
With the sealer removed, you can now proceed to refine your concrete floor's surface using a range of grinding and polishing tools specifically designed to produce a high-gloss finish.
Diamond grinding is an essential step in the process, as it helps to remove imperfections, old coatings, and surface scratches. You'll need to select the right diamond grinding tool based on the level of aggression required, with more aggressive tools used for heavy scratches and less aggressive tools for finer polishing.
Once you've completed the diamond grinding process, you can move on to concrete polishing. This involves using progressively finer polishing compounds to achieve the desired level of shine. You'll need to work through a series of grit levels, starting with coarse compounds and gradually moving to finer ones.
This process not only enhances the appearance of your floor but also helps to harden and densify the concrete, making it more resistant to stains and wear. By using the right grinding and polishing tools, you'll be able to achieve a high-gloss finish that showcases your concrete floor's natural beauty.
Edging and Corner Tools
When refining the edges and corners of your sealed concrete floor, you'll need specialized tools to guarantee a seamless blend with the surrounding surface and prevent unsightly scratches or damage.
Edging techniques require precision and control to achieve a smooth, even finish. To master these techniques, you'll need the right corner tools in your arsenal.
Here are some essential tools to add to your collection:
-
Edging wheels: Designed for precise control, these wheels are perfect for creating sharp, clean edges.
-
Corner grinders: Compact and versatile, these grinders are ideal for reaching tight spaces and corners.
-
Edge profiler: This tool helps create a uniform edge profile, ensuring a seamless blend with the surrounding surface.
-
Corner polishers: These polishers are specifically designed for polishing and refining corners, eliminating scratches and imperfections.
-
Edge guards: These protective guards prevent damage to adjacent surfaces, allowing you to focus on perfecting your edging techniques.
Protective Coating Systems
Implementing a protective coating system is essential to maintaining the integrity and appearance of your sealed concrete floor, as it shields the surface from wear, tear, and environmental elements. A well-chosen coating system can greatly enhance surface durability, making it more resistant to scratches, cracks, and fading. When selecting a coating system, consider factors such as traffic volume, exposure to chemicals, and desired aesthetic.
Here's a comparison of popular coating systems for sealed concrete floors:
| Coating System | Key Benefits |
|---|---|
| Epoxy | High-gloss finish, excellent chemical resistance |
| Polyurethane | Flexible, abrasion-resistant, and UV-stable |
| Acrylic | Water-based, low-VOC, and easy to apply |
| Polyaspartic | Rapid curing, high-build, and excellent durability |
| Urethane | High-gloss, chemical-resistant, and flexible |
When applying a coating system, verify proper surface preparation, including cleaning, degreasing, and etching. Follow the manufacturer's instructions for coating application, and consider factors such as temperature, humidity, and substrate conditions to achieve ideal results. By selecting the right coating system and following best practices, you can extend the lifespan of your sealed concrete floor and maintain its appearance.
Safety and Protective Gear
You must wear appropriate safety gear and follow strict protocols to prevent injuries and exposure to hazardous materials when working with restoration tools and coatings for sealed concrete floors.
It's essential to prioritize your safety and the safety of others on the job site.
To guarantee a safe working environment, make sure to wear:
-
Gloves: to prevent skin irritation and cuts from abrasive materials
-
Safety glasses: to protect your eyes from chemical splashes and debris
-
Respirator: to prevent inhalation of hazardous fumes and particles
-
Steel-toed boots: to prevent foot injuries from heavy objects and tools
-
Protective clothing: such as long-sleeved shirts, pants, and a hat to prevent skin exposure to chemicals and abrasive materials
Frequently Asked Questions
Can I Use Household Cleaners on Sealed Concrete Floors?
When it comes to cleaning your sealed concrete floors, you're better off avoiding household cleaners.
While it might be tempting to grab a bottle of all-purpose cleaner or glass cleaner, these products can damage the sealant or leave residue.
Instead, you should opt for safe cleaning methods and mild cleaners specifically designed for sealed floors.
Look for pH-neutral cleaners or those labeled as 'safe for sealed concrete' to guarantee a sparkling clean floor that remains protected.
How Often Should I Reapply Sealant to Maintain Protection?
Imagine your sealant as a protective shield, defending your concrete floor from the harsh realities of daily wear and tear.
But, just like a knight's armor needs regular polishing, your sealant requires reapplication to maintain its strength.
The frequency of reapplication depends on the sealant's longevity, which can range from 1 to 10 years.
Establish a maintenance schedule to guarantee you reapply every 2-5 years, or as recommended by the manufacturer, to keep your floor's armor strong and its protection intact.
Are All Sealed Concrete Floors Suitable for High-Gloss Finishes?
When considering a high-gloss finish, you'll want to guarantee your sealed concrete floor is compatible.
Not all floors are suitable, as some may exhibit imperfections or porosity issues that hinder the finish's adhesion or appearance.
High-gloss benefits, such as enhanced durability and ease of maintenance, are only achievable if the floor's surface is properly prepared and compatible with the finish.
You'll need to assess your floor's condition and choose a finish that's tailored to its specific needs.
Can I Restore a Sealed Floor With Existing Coatings Intact?
As you navigate the complex labyrinth of restoration, you'll encounter a vital fork in the road: can you revive a sealed floor without stripping its existing coatings?
The answer lies in a meticulous coating assessment, where you'll dissect the layers to determine their viability.
Then, you'll need to employ targeted restoration techniques to revive the floor without compromising its integrity.
Do I Need to Evacuate the Area During Sealer Removal?
When performing sealer removal, you'll need to take necessary safety precautions to guarantee a safe working environment.
Depending on the sealer removal techniques you choose, you may need to evacuate the area to prevent inhalation of harmful fumes or exposure to chemicals.
Always read the manufacturer's instructions and follow recommended safety protocols to minimize risks.
Take necessary measures to ventilate the area, wear protective gear, and consider containing the work zone to prevent contamination.
Conclusion
You've got the right tools, and now you're ready to restore your sealed concrete floor to its former glory.
With essential cleaning equipment, floor preparation tools, and surface repair materials, you'll tackle imperfections with ease.
Remove old sealers with confidence, grind and polish with precision, and finish with a protective coating system.
Don't forget edging and corner tools for a seamless finish.
Finally, prioritize safety and protective gear to guarantee a successful, stress-free project that leaves your floor looking brand new.
Related Posts
-
What Tools Do I Need for Concrete Block Laying
You'll need a thorough set of tools to guarantee accurate, efficient, and professional concrete block laying. Essenti...
-
7 Best Tools for Concrete Block Construction
You'll need a solid foundation, precise cutting, and seamless finishing to guarantee your concrete block construction...
-
Why These Concrete Tools Are Always in Demand
You rely on a set of trusted concrete tools to deliver high-quality results, and it's not surprising - these tools ar...


