Concrete Floor Repair Tools for DIY Beginners
Share
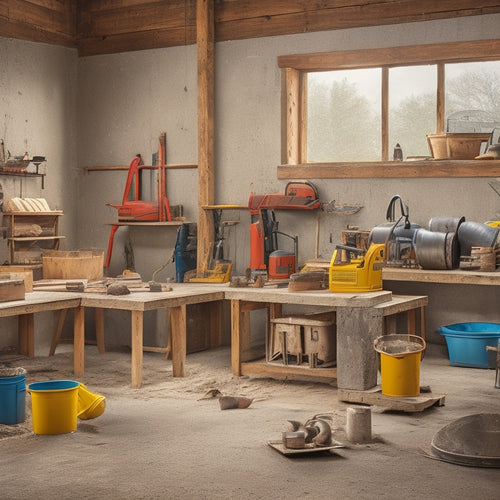
You'll need a range of tools to repair your concrete floor, including removal tools like hammers, chisels, and scrapers, as well as application tools like mixing buckets, trowels, and floats. For crack repair, you'll require a crack chaser saw, epoxy injection kit, and injection ports. Don't forget safety gear like protective clothing, gloves, and respirators. To prepare the floor surface, you'll need grinding tools and adhesive removers. Once you have these essential tools, you can start repairing your concrete floor - and discover the specific techniques and best practices to achieve a professional-looking finish.
Key Takeaways
• Essential tools for concrete repair include removal tools, application tools, and safety gear to ensure a successful DIY project.
• Crack preparation involves widening cracks with a crack chaser saw or blade to create a clean repair surface.
• Safety guidelines should be followed during all repair processes, including wearing protective clothing, hand protection, and respiratory protection.
• Filling deep cracks requires evaluating the crack's width, depth, and length, and using specialized filling materials for strong adhesion.
• Finishing and smoothing tools, such as trowels, floats, and grinders, are necessary for achieving a uniform and refined surface.
Essential Tools for Concrete Repair
When tackling a concrete floor repair project, you'll need a range of essential tools to secure a successful and long-lasting fix. A well-planned DIY project requires careful consideration of the necessary equipment to execute concrete repair techniques effectively.
Begin by gathering the fundamental tools, including a hammer, chisel, and scraper, which will enable you to remove damaged or deteriorated concrete. A wire brush and broom will help you clean the area, preparing it for the repair process.
Next, you'll need a mixing bucket, trowel, and float to apply and smooth out the new concrete. A level and straightedge will guarantee accurate and even application. Don't forget a putty knife for filling small cracks and crevices.
Safety Gear for DIY Beginners
When you start a concrete floor repair project, you'll need to prioritize your safety above all else. You'll be working with harsh chemicals, heavy tools, and rough surfaces, so it's essential that you wear the right protective gear.
You'll need to focus on three key areas:
-
Protective gear essentials
-
Eye and face shield
-
Respiratory protection
These measures will guarantee you're well-protected from potential hazards.
Protective Gear Essentials
You'll need a range of protective gear essentials to safeguard yourself from potential hazards when tackling concrete floor repair projects. As a DIY beginner, it's vital to prioritize your safety above all else.
Start by investing in high-quality protective clothing, including long-sleeved shirts, pants, and a dust-resistant jacket. These will shield you from harsh chemicals, abrasive materials, and flying debris.
Next, don't forget to wear safety gloves, which are specifically designed to provide grip, dexterity, and protection for your hands. Look for gloves made from durable materials like leather, synthetic fabrics, or a combination of both. They should also feature reinforced palms, fingers, and thumbs to prevent cuts, abrasions, and punctures.
Additionally, consider wearing knee pads, steel-toed boots, and a dust mask to further minimize your exposure to hazards.
Eye and Face Shield
In addition to protecting your skin and hands, safeguarding your eyes and face from concrete dust, debris, and chemical splashes is equally important, which is where an eye and face shield comes into play. This essential safety gear guarantees you're well-protected from potential hazards, allowing you to focus on the task at hand.
When choosing an eye and face shield, consider the following factors:
| Feature | Description | Importance |
|---|---|---|
| Lens Material | Polycarbonate or Trivex lenses provide impact resistance | High |
| Frame Style | Adjustable frames guarantee a comfortable, secure fit | Medium |
| Shield Coverage | Full-face shields offer maximum protection, while half-face shields provide more visibility | High |
Respiratory Protection Needed
How can you prevent airborne contaminants from infiltrating your respiratory system while working on concrete floor repairs, a vital consideration for DIY beginners? Respiratory hazards are a significant concern when dealing with concrete dust, silica particles, and other airborne pollutants. Inhaling these particles can lead to severe health issues, such as silicosis and lung cancer.
To mitigate these risks, you'll need the right protective equipment. When selecting respiratory protection, consider the type of concrete floor repair task you're performing. For low-to-moderate dust generation, a half-face respirator with a HEPA filter or a dust mask with a filter can provide adequate protection.
For more intense dust generation, such as grinding or sawing, a full-face respirator or a powered air-purifying respirator (PAPR) is recommended. Remember to always follow the manufacturer's instructions for fitting, maintenance, and use of your respiratory protection equipment.
It's also essential to guarantee a proper seal and fit to prevent air leaks. By taking these precautions, you'll be well-protected from respiratory hazards and can focus on completing your concrete floor repair project safely and effectively.
Concrete Crack Repair Tools
With cracks in concrete floors being a common issue, a range of specialized tools is essential for effective concrete crack repair. You'll need the right equipment to guarantee a strong and durable bond between the crack's edges.
Here are the must-have tools for DIY beginners like you:
-
Crack chaser saw or blade: This tool helps to widen the crack and remove any debris, creating a clean surface for repair.
-
Epoxy injection kit: This kit includes the necessary materials for epoxy injection, a popular method for crack sealing. It usually consists of epoxy resin, hardener, and injection ports.
-
Crack sealing paste: A specialized paste used to fill and seal cracks, providing a strong and flexible bond.
- Injection ports and accessories: These tools help to direct the epoxy injection material into the crack, guaranteeing a precise and controlled application.
Remember to always follow safety guidelines and manufacturer instructions when using these tools.
Floor Surface Preparation Tools
When preparing a concrete floor for repair, you'll need to tackle three critical tasks to guarantee a successful outcome.
You'll need to remove old adhesive residue that can interfere with new coatings.
Additionally, you'll need to grind down high spots to create a level surface.
Finally, it's essential to fill deep cracks to prevent further damage.
Remove Old Adhesive
You'll need to effectively remove old adhesive from the concrete floor surface to secure a strong bond between the new material and the substrate. This vital step guarantees that the new adhesive or coating adheres properly, resulting in a durable and long-lasting repair.
To achieve this, you'll need to employ the right adhesive removal techniques and surface cleaning methods. Here are some essential tools to get the job done:
-
Adhesive removers: Chemical-based products that break down and dissolve old adhesives, making them easy to scrape off.
-
Scrapers: Rigid or flexible tools used to scrape off the removed adhesive, taking care not to gouge the concrete surface.
-
Wire brushes: Stiff-bristled brushes that help remove remaining adhesive residue and roughen the surface for better bonding.
- Solvent cleaners: Specialized cleaners that remove any remaining adhesive residue, dirt, or oils, securing a clean surface for the new application.
Grind Down High Spots
After removing the old adhesive, several high spots on the concrete floor surface likely remain, and these imperfections must be ground down to achieve a uniform surface.
To identify these high spots, you'll need to visually inspect the floor, looking for areas that are slightly raised or uneven. You can also use a straightedge or level to help detect any deviations from the floor's plane.
Once you've located the high spots, it's time to break out the grinding tools. For DIY beginners, a walk-behind grinder or a handheld grinder with a diamond cup wheel is a good starting point.
These tools will allow you to efficiently grind down the high spots, removing a small amount of concrete at a time. When grinding, work in small, overlapping sections, using a consistent, back-and-forth motion.
Be sure to keep the grinder level and maintain a steady pace to avoid creating new imperfections. By employing these grinding techniques, you'll be able to effectively remove high spots and create a smooth, even surface that's ready for the next stage of repair.
Fill Deep Cracks
With the high spots on the concrete floor surface now ground down to a uniform level, your attention turns to filling deep cracks that still mar the floor's surface.
Before you begin filling, you need to assess the cracks to determine the best repair techniques. This involves evaluating the width, depth, and length of each crack, as well as the surrounding concrete's condition.
Here are the essential steps to fill deep cracks:
-
Clean the crack: Use a wire brush or broom to remove dirt, debris, and old filler material from the crack.
-
Prepare the surface: Use a grinder or sandpaper to roughen the surface around the crack, ensuring a strong bond between the old concrete and the new filler.
-
Apply the filler: Use a concrete patching compound or epoxy-based filler, following the manufacturer's instructions for application and drying times.
- Finish and seal: Once the filler is dry, use a grinder or sandpaper to smooth the surface, and apply a concrete sealer to protect the repair from future damage.
Filling and Patching Tools
Filling and Patching Tools
Fill deep cracks and holes with patching compounds using a putty knife or trowel, applying even pressure to force the material into the damaged area. As you fill, make certain to press the compound firmly into the crack or hole, feathering it out towards the edges to create a seamless finish.
For larger holes, you may need to apply multiple layers of compound, allowing each layer to dry before applying the next. When working with patching compounds, it's vital to follow the manufacturer's instructions for mixing and application.
Mastering these repair techniques will guarantee a strong and durable bond between the compound and the surrounding concrete. To achieve a professional-looking finish, use a putty knife or trowel to smooth out the filled area, feathering it out towards the edges.
Finishing and Smoothing Tools
You'll need to switch to finishing and smoothing tools to refine the repaired area, removing any excess material and creating a uniform surface. This stage requires attention to detail and the right tools to attain a professional finish.
To achieve a smooth, even surface, you'll need the following finishing and smoothing tools:
-
Trowels: Used to spread and smooth out finishing products, such as concrete overlays or epoxy coatings.
-
Floats: Employed to remove excess material and create a uniform surface, often used in conjunction with trowels.
-
Grinders: Utilized to refine the surface, removing small imperfections and creating a high-gloss finish.
- Polishing pads: Used to apply final touches, adding a layer of shine and protection to the repaired area.
Mastering these smoothing techniques and selecting the right finishing products will guarantee a seamless repair that blends in with the surrounding concrete.
Frequently Asked Questions
How Long Does Concrete Take to Fully Cure After Repair?
When you're waiting for concrete to fully cure after a repair, you're fundamentally waiting for the curing process to complete.
This process can take anywhere from a few days to several weeks, depending on the repair techniques and environmental conditions.
Typically, you can expect the concrete to reach 90% strength within 7-10 days, but it may take up to 28 days to reach its full strength.
Can I Use Concrete Repair Tools on Freshly Poured Concrete?
In medieval times, knights wouldn't rush into battle without their armor; similarly, you shouldn't rush into repairing freshly poured concrete without the right tools.
When it comes to fresh concrete applications, it's essential to guarantee the repair material compatibility.
You'll need to wait until the concrete has reached its initial set, typically within 24-48 hours, before applying repair tools.
Premature use can compromise the bond between the new and old concrete, leading to further damage.
Do I Need to Prime the Concrete Before Applying a Finish?
When applying a finish, you'll likely need to prime the concrete first. This essential step guarantees a strong bond between the concrete and your chosen finish.
Familiarize yourself with various priming techniques, such as acid etching or applying a bonding agent, to select the best approach for your project.
With the right primer, you'll access a range of finish options, from epoxy coatings to decorative overlays, and achieve a professional-looking result that lasts.
What Is the Ideal Temperature for Concrete Repair and Finishing?
Are you prepared to tackle the nuances of concrete repair?
When it comes to achieving best results, ideal temperature plays a significant role.
You'll want to verify the concrete temperature is between 50°F and 90°F (10°C and 32°C) for ideal curing conditions.
Temperatures outside this range can compromise the concrete's strength, durability, and finish.
Keep in mind that extreme temperatures can slow or accelerate the curing process, affecting the overall quality of your repair.
Can I Use Concrete Repair Tools on Vertical or Overhead Surfaces?
When dealing with vertical or overhead surfaces, you'll need to adapt your techniques to guarantee a successful repair.
Working on vertical surfaces requires specialized techniques, such as using a trowel with a longer handle or an extension pole to reach high areas.
Overhead repair challenges, like gravity working against you, demand extra care and patience. You'll need to adjust your application and finishing methods to prevent material from sagging or falling off.
Conclusion
As you stand back to admire your handiwork, the once-cracked concrete floor now shines like new, a demonstration of your DIY prowess.
The tools of the trade, carefully selected and wielded, have transformed the surface from rough to smooth, from worn to renewed.
With each step, the floor creaks softly, a satisfying echo of your labor.
The result is a surface that's not only functional but also a work of art, a reflection of your dedication to the craft of concrete floor repair.
Related Posts
-

What Tools to Rent for a Concrete Home Reno
When tackling a concrete home renovation, you'll need to rent a variety of specialized tools to get the job done. For...
-

Top Concrete Resurfacing Tools for a Pro Finish
When it comes to achieving a professional finish in concrete resurfacing projects, you require the right set of speci...
-

Why You Need These Concrete Overlay Tools
When tackling a concrete overlay project, you need the right tools to achieve a flawless finish and avoid costly mist...


