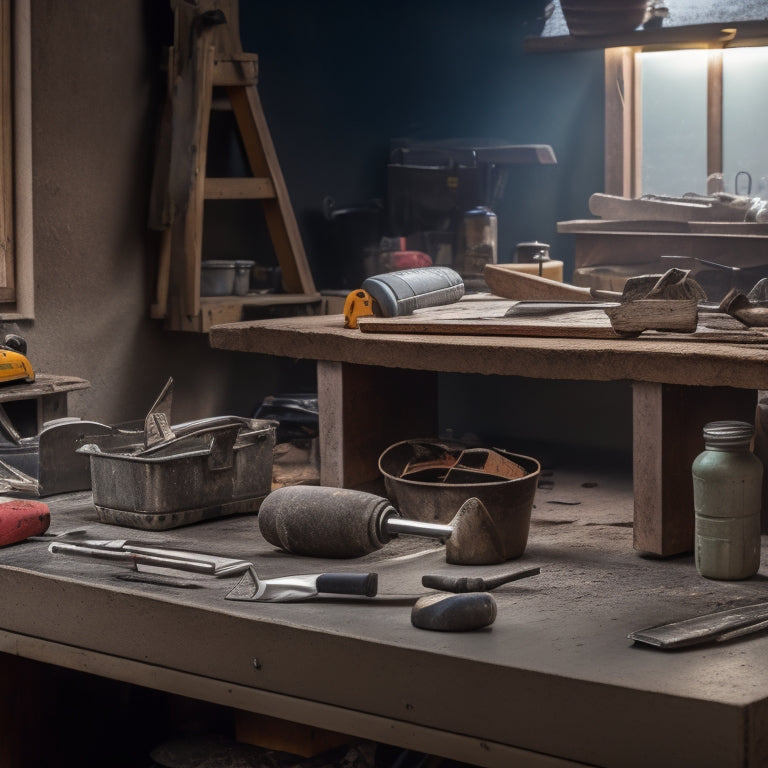
Concrete Edging Tools You'll Need for a DIY Project
To tackle a DIY concrete edging project, you'll need a range of essential tools. Start with safety gear like durable gloves, safety glasses, and a dust mask to protect yourself from injuries. For measuring and marking, use a reliable tape measure, chalk line, and flexible measuring tape to guarantee precision. Digging and excavation require a shovel, pickaxe, and rake, while concrete block cutting demands a diamond blade saw and safety gear. Edging and shaping tools like trowels, edgers, and jointers will help you achieve the desired finish. Now that you've got the tools, it's time to master the techniques to bring your project to life.
Key Takeaways
• Essential safety gear, including gloves, safety glasses, and dust masks, is necessary to prevent injuries during concrete edging.
• Measuring and marking tools, such as tape measures and chalk lines, ensure accurate cuts and edges in your DIY project.
• Digging and excavation tools, including shovels, pickaxes, and rakes, are required for creating trenches and preparing the soil for concrete installation.
• Concrete block cutting tools, like diamond blades and masonry saws, are necessary for cutting and shaping concrete blocks to fit your design.
• Leveling and compacting tools, such as laser levels and vibratory plate compactors, ensure a stable and even surface for your concrete edging project.
Essential Safety Gear
Wearing essential safety gear, including durable gloves, safety glasses, and a dust mask, is important to protecting yourself from the hazards associated with concrete edging tools.
You'll be working with powerful equipment that can generate debris, dust, and noise, so it's significant to follow strict safety guidelines to avoid injuries. Your hands, eyes, and respiratory system are particularly vulnerable, so make sure you're equipped with the right protective equipment.
When choosing your safety gear, look for products that meet industry standards for durability and effectiveness.
Your gloves should be puncture-resistant and provide grip, while your safety glasses should have shatter-resistant lenses and a snug fit. A dust mask with a HEPA filter will help you breathe easily while keeping dust and debris out of your lungs.
Measuring and Marking Tools
Before you start edging, take precise measurements and mark the area where you'll be working to guarantee accurate cuts and a professional-looking finish.
To do this, you'll need a reliable tape measure that can withstand the demands of outdoor use. Look for one with a durable casing, clear markings, and a sturdy hook that can latch onto objects.
Next, use a chalk line to mark the area where you'll be edging. This will give you a clear visual guide to follow as you work. Make sure to snap the line tightly to create a sharp, defined mark. You can also use the tape measure to double-check your markings and confirm they're accurate.
When marking curves or irregular shapes, consider using a flexible measuring tape or a curved chalk line. These tools will allow you to create smooth, precise markings that follow the contours of your design.
Digging and Excavation Tools
When you're preparing to lay concrete edging, you'll need to break through the ground and remove soil to create a trench.
You'll require the right digging and excavation tools to get the job done efficiently, and that's where ground breaking equipment comes in.
You'll also need to take into account soil removal methods and depth control measures to guarantee a successful project outcome.
Ground Breaking Equipment
You'll need a set of reliable ground breaking equipment to efficiently dig and excavate the area for your concrete edging project. This is a vital step in preparing the ground for your edging installation, as it allows you to create a stable and even surface. To achieve this, you'll need to employ effective ground preparation techniques and soil stabilization methods.
Here are the essential ground breaking equipment you'll need:
-
Shovel: A sturdy shovel is necessary for digging and removing soil, as well as creating a clean edge for your concrete edging.
-
Pickaxe: A pickaxe is perfect for breaking up compacted soil and rocks, making it easier to excavate the area.
-
Rake: A rake helps to level and smooth out the soil, ensuring a stable foundation for your concrete edging.
Soil Removal Methods
Dig into the soil with the right tools to efficiently remove dirt and debris, making way for your concrete edging installation. When it comes to soil removal, you'll need a combination of digging and excavation tools to get the job done. A shovel is a must-have for scooping out loose soil, while a pickaxe or breaker bar will come in handy for breaking up compacted soil or rocks. A trenching shovel or trenching tool is ideal for creating narrow trenches for your edging.
As you dig, keep in mind soil stabilization techniques to prevent erosion and guarantee the surrounding soil remains stable. This may involve installing erosion control methods such as geotextiles or landscape fabric to prevent soil migration.
Additionally, consider the soil type and moisture levels to determine the best approach for excavation. By using the right tools and techniques, you'll be able to efficiently remove soil and create a stable foundation for your concrete edging.
Remember to always follow safety guidelines when working with digging and excavation tools to avoid injuries.
Depth Control Measures
To achieve precise depth control, utilize digging and excavation tools with built-in measuring capabilities or attach depth indicators to guarantee accurate excavation depths for your concrete edging project. This is vital, as uneven depths can compromise the structural integrity of your edging.
Here are some essential tools to help you maintain precise depth control:
-
Depth gauges: These attach to your digging tools, providing real-time depth measurements, ensuring you reach the desired depth without over- or under-digging.
-
Laser levels: These project a level line, allowing you to accurately measure and mark the desired depth.
-
Tamping tools with built-in depth measurement: These tools not only compact the soil but also provide a precise measurement of the depth, helping you achieve uniform compaction.
Concrete Block Cutting Tools
When cutting concrete blocks, you'll need to prioritize safety above all else - that means taking the right precautions to avoid injuries and damage to your tools.
Next, you'll want to focus on sizing and shaping your blocks to fit your project's specific needs.
Cutting Concrete Safely
Using the right concrete block cutting tools and following proper safety protocols is crucial for achieving clean cuts and avoiding injuries.
When it comes to cutting concrete, you'll need to master concrete cutting techniques that prioritize your safety above all else.
Here are some safety training tips to keep in mind:
-
Wear protective gear: Always wear safety glasses, gloves, and a dust mask to protect yourself from flying debris and concrete dust.
-
Use the right blade: Choose a diamond blade specifically designed for concrete cutting, and verify it's properly secured to the saw.
-
Keep a safe distance: Maintain a safe distance from the cutting area to avoid getting hit by flying particles or getting caught in the saw's kickback.
Block Sizing and Shaping
You'll need to accurately size and shape your concrete blocks to fit your DIY project's design specifications. To achieve this, invest in a few essential concrete block cutting tools. A diamond blade saw or a masonry saw will allow you to make precise cuts in your concrete blocks. For more intricate cuts or curved edges, consider using a concrete block splitter or a masonry chisel.
Remember to always follow block design principles, taking into account the block's texture, color, and pattern, to guarantee a cohesive look.
When sizing and shaping your blocks, consider the edge texture options you want to achieve. Do you want a smooth, bullnose edge or a more rustic, rock-faced edge? Your edge texture choice won't only affect the aesthetic of your project but also influence the overall durability and functionality.
Edge Finishing Techniques
With your blocks sized and shaped, it's time to focus on refining their edges through various finishing techniques that enhance their appearance and durability. This is where you can get creative and add a personal touch to your concrete edging project.
Edge finishing techniques can make or break the overall look of your design, so it's important to choose the right method for your project.
Here are three edge finishing techniques to take into account:
-
Bullnosing: This technique involves rounding the edge of the concrete block to create a smooth, curved surface. It's perfect for creating a decorative border or adding a touch of sophistication to your design.
-
Chamfering: This technique involves beveling the edge of the concrete block to create a 45-degree angle. It's great for creating a modern, industrial look or adding visual interest to your design.
-
Radius edge: This technique involves creating a rounded edge with a specific radius to match your design's curve. It's ideal for creating a seamless, flowing look in your concrete edging.
Edging and Shaping Tools
Trowels, edgers, and jointers are essential tools for creating clean lines, smooth curves, and precise angles in your concrete DIY project. You'll use these tools to refine your edging techniques and shape materials to achieve the desired form. Here's a brief overview of each tool and their applications:
| Tool | Function | Application |
|---|---|---|
| Trowel | Smoothen and shape concrete | Finishing edges, creating curves |
| Edger | Create clean edges and lines | Defining boundaries, creating patterns |
| Jointer | Refine and smooth joints | Creating seamless connections |
When selecting edging and shaping tools, consider the type of concrete you're working with, the desired finish, and the level of precision required. For example, a trowel with a curved blade is ideal for creating smooth, rounded edges, while an edger with a straight blade is better suited for creating clean, straight lines. By choosing the right tools for your project, you'll be able to achieve professional-looking results with ease.
Leveling and Compacting Tools
Now that you've refined your edging techniques, it's time to focus on ensuring a stable and even foundation by using leveling and compacting tools to prepare your concrete surface for finishing. This critical step will determine the overall quality of your project, so it's crucial to get it right.
To achieve a smooth, even surface, you'll need the following leveling and compacting tools:
-
Laser Level: This tool emits a precise, level beam to help you identify any deviations from the desired plane. It's vital for ensuring your concrete surface is perfectly horizontal or vertical.
-
Vibratory Plate Compactor: This machine uses vibrations to compact and settle the concrete, eliminating air pockets and ensuring a solid bond between the concrete and the subbase.
-
Hand Tamper: A manual tool used to compact and level small areas, ideal for working around obstructions or in tight spaces.
Mastering compaction techniques and leveling strategies will guarantee a strong, durable foundation for your concrete project. By using these tools, you'll be able to achieve a professional-looking finish that will last for years to come.
Finishing and Sealing Tools
You'll need a range of specialized tools to accomplish a smooth, attractive finish and long-lasting protection for your concrete surface. For a professional-looking finish, you'll require tools that can help you apply finishing products and master various sealing techniques.
Here are some essential finishing and sealing tools you'll need:
| Tool | Description |
|---|---|
| Edger | Used to create a clean, defined edge around the concrete surface |
| Trowel | Applies and smooths out finishing products, such as sealers and coatings |
| Sealer Applicator | Evenly distributes sealers and coatings to guarantee uniform coverage |
| Broom or Roller | Applies textured finishes, such as broom finishes or stamped patterns |
With these tools, you'll be able to accomplish a high-quality finish that enhances the appearance and durability of your concrete surface. Remember to choose the right tools for your specific project, and don't hesitate to experiment with different finishing products and sealing techniques to achieve the desired look. By mastering these tools and techniques, you'll be able to create a stunning and long-lasting concrete surface that exceeds your expectations.
Frequently Asked Questions
Can I Use a Regular Shovel for Digging in Hard Soil?
You'll struggle to dig in hard soil with a regular shovel, as it'll only lead to frustration and fatigue.
Consider shovel alternatives, like a pickaxe or trenching shovel, designed for breaking up compacted soil.
Before you start digging, prepare the soil by loosening it with a fork or tiller.
This soil preparation will make your digging process much easier and more efficient, saving you time and energy in the long run.
How Do I Prevent Concrete From Sticking to My Tools?
You're wise to wonder how to prevent concrete from sticking to your tools.
The theory is that a well-maintained tool is less likely to bond with concrete. It's true! Regular tool maintenance, including cleaning and lubricating, reduces the likelihood of concrete release agents failing.
Apply a concrete release agent to your tools before use, and you'll find it's much easier to remove excess concrete. This simple step will save you time and frustration in the long run.
What's the Best Way to Dispose of Leftover Concrete?
When you're left with leftover concrete, you'll want to dispose of it responsibly.
You're not stuck with it, though! Look into concrete recycling options in your area, as many facilities accept leftover concrete for reuse in construction projects.
If that's not an option, you can also dispose of it through your regular waste management company, but be sure to follow their guidelines for leftover concrete disposal.
Can I Reuse Concrete Edging Blocks From an Old Project?
Imagine you're a master builder, constructing a new castle from the stones of an old fortress. You're wondering if you can reuse concrete edging blocks from a previous project.
The answer is yes! Reusing them can save you time and money, reducing waste and preserving resources.
Just make certain to inspect each block for damage and clean them thoroughly before reinstalling.
Follow proper installation tips, such as leveling and spacing, to guarantee a sturdy and visually appealing finish.
Do I Need to Seal My Concrete Edging Immediately After Installation?
You're wondering if you need to seal your concrete edging immediately after installation. The answer is, it depends.
If you're working in a high-traffic area or exposed to harsh weather, sealing soon after installation is a good idea.
However, if the edging will be protected from the elements, you can delay sealing for a few weeks.
Mastering sealing techniques requires patience, so wait until the concrete has fully cured before applying a sealant, ensuring a strong, long-lasting bond.
Conclusion
You've made it to the final stretch! With these concrete edging tools in your arsenal, you're ready to tackle that DIY project like a pro.
Remember, a well-executed edging job is the icing on the cake, and with the right tools, you'll be the master baker of your outdoor space.
Don't let your hard work crumble – get the job done with precision and finesse, and you'll be enjoying your beautifully edged concrete in no time!
Related Posts
-
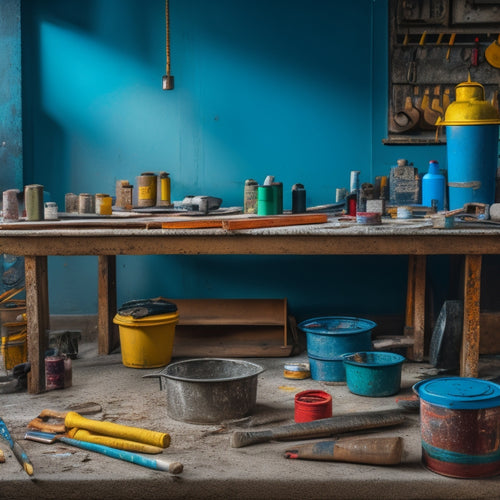
Essential Tools for Painting Concrete Walls
When painting concrete walls, you'll need a range of specialized tools to achieve a professional-looking finish. Star...
-

What Tools to Rent for a Concrete Home Reno
When tackling a concrete home renovation, you'll need to rent a variety of specialized tools to get the job done. For...
-

Reinforcement Tools Checklist for Concrete Block Walls
You'll need a range of reinforcement materials, including horizontal and vertical rebar, fiber mesh, and anchor bolts...


