
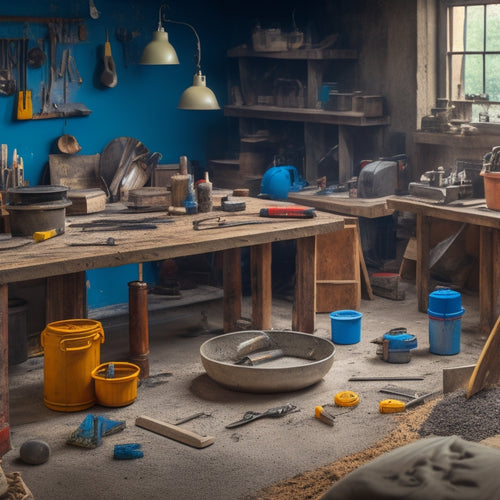
5 Crucial Tools for Building With Concrete Blocks
When building with concrete blocks, you'll need a spirit level to guarantee perfect horizontal and plumb alignment. A laser level projects a level line for precise block alignment, while a measuring tape is essential for double-checking measurements and site marking. A masonry saw makes straight cuts on solid blocks, and a block splitter applies pressure to hollow blocks for clean splitting. Finally, a trowel is vital for achieving a smooth surface on the concrete blocks. With these five tools, you'll be well on your way to a strong, stable, and visually appealing structure - and that's just the beginning of what you can accomplish.
Key Takeaways
• A spirit level ensures blocks are perfectly horizontal and plumb, providing a solid foundation for the structure.
• A laser level projects a level line for precise block alignment, saving time and reducing errors.
• A masonry saw is essential for making straight cuts on solid blocks, allowing for custom-fit pieces and clean joints.
• A trowel is vital for achieving a smooth surface on the concrete blocks, and is used in conjunction with floats for different stages.
• A mixing bucket and stick or trowel are necessary for effectively blending mortar to the correct consistency, similar to toothpaste.
Leveling and Alignment Tools
You'll need a spirit level and a laser level to guarantee your concrete block foundation is perfectly horizontal and plumb, as even slight deviations can compromise the structural integrity of your entire project.
Don't risk a wonky foundation, or you'll be cursing your DIY skills (or lack thereof) for years to come! A laser level will project a level line or plane, ensuring your blocks are aligned with precision.
Meanwhile, an alignment laser will give you a precise reference point for checking your work. But don't forget the humble measuring tape – it's still essential for double-checking your measurements and marking out the site.
And let's not overlook the trusty chalk line, which will help you snap a straight line and keep your blocks in line (pun intended).
With these tools in your arsenal, you'll be well on your way to building a foundation that's as solid as a rock (or, you know, a concrete block).
Block Cutting and Shaping
Three essential tools are required for block cutting and shaping: a masonry saw, a block splitter, and a carbide-tipped scraper.
You'll be using these tools to transform raw concrete blocks into custom-fit pieces that'll make your structure look like a pro built it.
When it comes to cutting, you'll need to decide on the best technique for the block type you're working with. For instance, if you're dealing with solid blocks, you'll want to use a masonry saw for straight cuts.
But if you're working with hollow blocks, a block splitter is the way to go. This tool applies pressure to the block, causing it to split along the desired line.
And for those pesky corners and edges, a carbide-tipped scraper is your best friend. It'll help you smooth out rough spots and achieve a professional finish.
Mortar Mixing and Application
With the blocks cut and shaped to fit, it's time to focus on mixing and applying the mortar that will hold your structure together.
You'll want to get the mortar consistency just right - not too runny, not too thick. Aim for a mix that's similar to toothpaste; it should hold its shape when pressed but still be easy to spread.
Now, let's talk application techniques. You'll need a sturdy mixing bucket, a mixing stick or trowel, and a level to guarantee your mortar lines are straight.
Start by laying down a layer of mortar on the block, holding the trowel at a 45-degree angle. Spread it evenly, using long, smooth strokes to fill the gap. Don't overfill - you want just enough to cover the block's surface.
Use your level to check your work, making adjustments as needed. With a little practice, you'll be a pro at mixing and applying mortar in no time!
Block Laying and Setting
Your concrete block structure takes shape as you begin laying and setting blocks, carefully verifying each one is aligned, leveled, and securely fastened to the course below. This is where the magic happens, and your block laying techniques come into play.
You'll want to use a spirit level to verify each block is perfectly horizontal, and a string line to keep your courses straight. Don't forget to tap each block gently into place with a rubber mallet to avoid damaging the surrounding blocks.
As you set each block, use a level to check its position and make adjustments as needed. Your block setting strategies will also come into play here, such as using a 'lead block' to establish a straight line, or using a 'bond beam' to add extra strength to your structure.
Remember to work methodically, taking your time to verify each block is perfectly placed. With patience and practice, you'll be a pro at block laying and setting in no time!
Finishing and Smoothing Tools
Finishing your concrete block structure demands a range of specialized tools to achieve a smooth, professional-looking finish. You've worked hard to lay those blocks, and now it's time to make them shine!
To get started, you'll need a trusty trowel, which is the unsung hero of concrete finishing. Mastering trowel techniques is essential for achieving a smooth surface. You'll also need a variety of floats, including a bull float, fresno, and finishing trowel, to tackle different stages of surface preparation.
As you work, remember that surface preparation is key. Remove any excess mortar, and use a wire brush to scrub away any imperfections. A damp sponge or towel can help to remove excess water and prevent staining.
With the right tools and techniques, you'll be able to achieve a finish that's both durable and visually stunning. So, don't be afraid to get creative and experiment with different trowel strokes and patterns – after all, practice makes perfect!
With these finishing and smoothing tools in your arsenal, you'll be well on your way to creating a concrete block masterpiece that will make you proud.
Frequently Asked Questions
How Often Should I Clean My Tools to Prevent Rust and Damage?
You're smart to think about tool maintenance!
To prevent rust and damage, you should clean your tools after every use, especially if they've been exposed to moisture or harsh chemicals.
Give them a quick wipe-down with a dry cloth, and for more thorough cleaning, use a wire brush and some soap.
Don't forget to dry them thoroughly, and apply a rust-inhibiting coating for extra protection.
Trust us, your tools will thank you!
Can I Use Regular Gloves Instead of Specialized Concrete-Handling Gloves?
You're wondering if you can get away with using regular gloves like a makeshift superhero cape to save your hands from concrete's harsh grip.
Think again! Regular gloves are like paper towels against a concrete tidal wave - they won't provide sufficient hand protection.
Specialized concrete-handling gloves are made with durable, abrasion-resistant materials that can withstand the rough handling.
Don't risk your hands; invest in the right gear for the job.
What Is the Ideal Storage Temperature for Concrete Blocks?
When storing concrete blocks, you're probably wondering what's the magic number for ideal conditions.
Well, here's the deal: you'll want to keep them between 40°F and 80°F (4°C to 27°C).
Why? Temperature effects can be brutal - freezing temps can cause cracking, while scorching heat can lead to excessive drying.
How Do I Dispose of Leftover Concrete and Mortar Materials?
You're not alone in wondering what to do with leftover concrete and mortar materials, much like the ancient Romans who pondered the fate of their empire's crumbling infrastructure.
When it's time to dispose of these materials, you'll want to reflect on environmental considerations and explore recycling options.
Don't just dump them; instead, separate them and take them to a recycling center or a facility that accepts construction waste.
You'll be doing the planet a solid (pun intended)!
Are There Any Specific Safety Regulations I Need to Follow On-Site?
You're wise to wonder about on-site safety!
Before you start building, you'll need to conduct regular site inspections to identify potential hazards.
Don't forget to suit up with the right personal protective equipment (PPE) - we're talking hard hats, safety glasses, gloves, and steel-toed boots.
Conclusion
As you stand back to admire your concrete block masterpiece, the fruits of your labor come into sharp focus.
The carefully laid blocks, the precision-cut edges, and the smooth, even finish all blend together in perfect harmony.
You've orchestrated a symphony of concrete, with each tool playing its vital role.
The result is a structure that's as sturdy as a fortress and as beautiful as a work of art.
Your concrete block creation stands tall, a reflection of your skill and attention to detail.
Related Posts
-

What Tools to Rent for a Concrete Home Reno
When tackling a concrete home renovation, you'll need to rent a variety of specialized tools to get the job done. For...
-

Top Concrete Resurfacing Tools for a Pro Finish
When it comes to achieving a professional finish in concrete resurfacing projects, you require the right set of speci...
-
Budget-Friendly Tools for DIY Decorative Concrete Profiling
You can achieve professional-grade decorative concrete results on a budget by investing in the right combination of e...


