10 Must-Have Tools for DIY Concrete Repair
Share
When tackling DIY concrete repair, you'll need a strategic combination of tools to get the job done efficiently and effectively. For measuring and marking, you'll require a reliable tape measure, digital caliper, and high-quality marker. Safety gear like safety goggles, work gloves, and a respirator mask are essential for protection. Power tools such as concrete mixers, power saws, and drills will help with efficient repair, while hand tools like edgers, trowels, and float will give you a professional finish. Other must-haves include tamping and compacting tools, smoothing and finishing tools, and reinforcement and anchoring tools. Now that you have the essentials, it's time to dive deeper into the specifics of each tool and how to use them to achieve a successful repair.
Key Takeaways
• A reliable tape measure or laser distance meter is essential for accurate damage assessment and measurement of cracks.
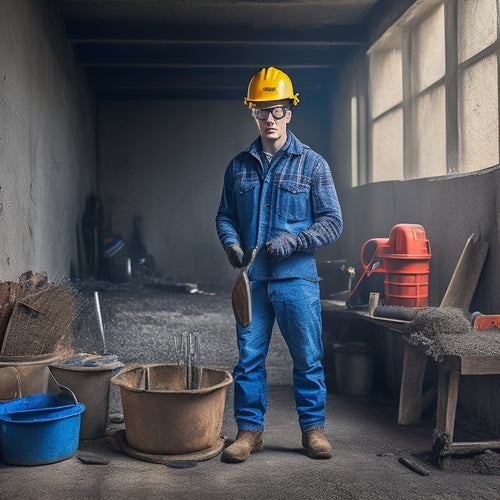
• Safety goggles, work gloves, and a respirator mask are must-haves for protecting yourself from debris, chemical splashes, and airborne particles.
• A concrete mixer, power saw, drill, and grinder are necessary power tools for efficient concrete repair and preparation.
• Hand tools like a trowel, float, and edger are crucial for finishing touches, smoothing, and leveling concrete surfaces.
• A set of specialized tools, including reinforcement and anchoring tools, is necessary for restoring structural integrity and achieving a professional finish.
Measuring and Marking Tools Needed
When preparing to tackle a concrete repair project, measuring and marking the damaged area accurately is essential. Having the right tools for the task guarantees you're getting precise readings and clear markings.
You'll need a reliable tape measure or laser distance meter to determine the extent of the damage. For measuring techniques that require more precision, consider investing in a digital caliper or micrometer. These tools will help you accurately assess the depth and width of cracks or holes.
To ascertain marking accuracy, you'll need a high-quality marker or chalk line. These tools will allow you to clearly define the repair area, ensuring that your patching materials stay within the designated zone. A marking gauge or combination square can also be useful for creating precise lines and angles.
Essential Safety Gear for Protection
As you prepare to tackle the concrete repair, you'll need to gear up with the right safety equipment to protect yourself from the hazards associated with working with concrete and repair materials.
Concrete dust, flying debris, and harsh chemicals can pose serious threats to your health and well-being. To guarantee a safe and successful repair, don't skip out on these essential safety gear:
-
Safety Goggles: Protect your eyes from flying debris and chemical splashes.
-
Work Gloves: Guard your hands against cuts, abrasions, and chemical exposure.
-
Respirator Masks: Breathe easy with protection from airborne dust and particles.
- Knee Pads: Save your knees from the wear and tear of kneeling on hard surfaces.
Additionally, consider wearing a hard hat, ear protection, high-visibility vests, and steel-toed boots to further minimize risks.
Power Tools for Efficient Repair
You'll need a range of power tools to efficiently mix, apply, and finish your concrete repair materials, guaranteeing a strong and durable bond. These tools will help you complete tasks quickly and accurately, saving you time and effort in the long run.
Here are some essential power tools for DIY concrete repair:
| Tool | Function | Importance |
|---|---|---|
| Concrete Mixers | Mix and blend concrete materials | High |
| Power Saws | Cut and shape concrete, metal, and wood | High |
| Drills | Drill holes for anchors and mixing | Medium |
| Grinders | Smooth and polish concrete surfaces | Medium |
| Sanders | Refine and finish concrete surfaces | Low |
With these power tools, you'll be well-equipped to tackle most concrete repair projects. Remember to always follow safety guidelines and manufacturer instructions when operating power tools. By investing in these essential tools, you'll guarantee a professional-looking finish and a long-lasting repair.
Hand Tools for Finishing Touches
When you're nearing the end of your concrete repair project, you'll need to switch to hand tools to achieve a professional-looking finish.
You'll use edging and smoothing tools to remove any excess material and create a seamless joint.
Next, you'll move on to texturing and finishing tools to add the final details and achieve the desired surface texture.
Edging and Smoothing Tools
Use edging and smoothing tools to refine the concrete surface, creating a professional-looking finish by removing excess material and imperfections.
As you work on your DIY concrete repair, mastering edging techniques and smoothing methods is vital to achieve a flawless finish. With the right tools, you'll be able to remove excess concrete, smooth out rough edges, and create a surface that's both visually appealing and durable.
Here are the essential edging and smoothing tools you'll need:
-
Edger: A handheld tool with a curved or angled blade, used to remove excess concrete and create a clean edge.
-
Trowel: A flat, handheld tool used to smooth and flatten the concrete surface, removing minor imperfections.
-
Float: A long, flat tool used to smooth and level the concrete surface, creating a uniform finish.
- Steel trowel: A handheld tool with a flat, steel blade, used to smooth and polish the concrete surface, removing minor imperfections and creating a high-gloss finish.
Texturing and Finishing
To add the final touches to your DIY concrete repair, employ hand tools for texturing and finishing to create a unique, visually appealing surface that complements the surrounding environment.
With the right tools, you can achieve a professional-looking finish that enhances the overall aesthetic of your concrete repair.
For texturing, you'll need a set of stamping tools that allow you to create patterns and designs on the concrete surface. These tools come in various shapes and sizes and can be used to create anything from subtle, natural-looking textures to bold, geometric patterns.
Practice different stamping techniques to achieve the desired effect, and don't be afraid to experiment with different tools and techniques.
When it comes to color application, you'll need a range of tools to achieve a seamless, professional-looking finish. From trowels and floats to sponges and brushes, each tool plays an important role in applying color evenly and consistently.
Cleaning and Preparing Surfaces
Remove dirt, oil, and other substances from the concrete surface by sweeping or blowing it clean, as even slight contaminants can compromise the bond between old and new concrete. This vital step in surface cleaning guarantees a strong and durable repair.
To prepare the surface, you'll need to employ various techniques to create an ideal bonding environment. Here are some essential preparation techniques to master:
-
Power washing: Use a pressure washer to remove dirt, grime, and oil from the surface. Be cautious not to etch the concrete.
-
Acid etching: Apply a mild acid solution to open up the concrete's pores, allowing for a stronger bond. Always follow safety guidelines and manufacturer instructions.
-
Mechanical scarifying: Use a scarifier or grinder to remove laitance, a weak layer of concrete, and create a rough surface for bonding.
- Dust removal: Thoroughly vacuum or blow away any remaining dust or debris to prevent it from interfering with the repair process.
Mixing and Applying Materials
When mixing and applying concrete repair materials, you'll need to get the ratio just right and master the techniques for a strong, long-lasting fix.
You'll learn how to achieve the perfect mix, avoiding common mistakes that can lead to a weak or brittle repair.
Mixing Ratio Essentials
You'll need to get the mixing ratio just right, as it's critical to achieving a strong, durable, and long-lasting concrete repair.
The mixing ratio refers to the proportion of cement, sand, and water in your concrete mix. Getting it wrong can lead to a weak, crumbling, or discolored repair that's prone to failure.
To guarantee material compatibility, follow these essential mixing ratio guidelines:
-
Cement-to-sand ratio: Aim for a ratio of 1 part cement to 2-3 parts sand. This provides a strong bond and ideal workability.
-
Water-to-cement ratio: Keep the water content between 0.4 and 0.6 times the weight of the cement. Excessive water can lead to a weak, porous repair.
-
Aggregate-to-cement ratio: Confirm the total aggregate (sand and gravel) is between 3 and 5 times the weight of the cement.
- Additives and admixtures: Always follow the manufacturer's instructions when adding chemicals or supplementary materials to your mix.
Applying Material Techniques
Mix your concrete repair material in a clean, dry bucket, using a drill and paddle or a mixing stick to combine the ingredients in the correct sequence. It's essential to follow the manufacturer's instructions for the recommended mixing ratio and technique to guarantee a strong, durable bond.
| Application Techniques | Surface Preparation | Tools Required |
|---|---|---|
| Troweling | Clean, dry surface | Trowel, mixing stick |
| Pouring | Free of oil, grease, or old adhesive | Bucket, pouring spout |
| Finishing | Smooth, even surface | Finishing trowel, edger |
| Bonding | Etched or roughened surface | Bonding agent, brush |
| Texturing | Prepared surface with desired texture | Texturing tool, gloves |
Once you've mixed the material, it's time to apply it to the repair area. Use the appropriate application techniques, such as troweling or pouring, to achieve a smooth, even surface. Make sure to prepare the surface properly, taking into account factors like cleanliness, dryness, and texture. By following these steps and using the right tools, you'll be able to achieve a professional-looking finish that will last for years to come.
Tamping and Compacting Tools
Tamping and compacting tools are essential for ensuring a strong, stable bond between new and old concrete by removing air pockets and excess water.
As you work on your DIY concrete repair project, you'll need to employ effective tamping methods and compaction techniques to achieve a solid foundation.
To get the job done, you'll need the following tools:
-
Hand tamper: A handheld tool used to compact and flatten the surface of the concrete.
-
Plate compactor: A heavy-duty tool that uses vibration to compact the concrete, ideal for larger areas.
-
Tamper bar: A long, flat tool used to compact and level the concrete, especially in tight spaces.
- Compaction wheel: A wheel attached to a handle, used to compact and smooth out the concrete surface.
Smoothing and Finishing Tools
When you're ready to smooth and finish your concrete repair, you'll need the right tools to achieve a professional-looking result.
You'll likely reach for a trowel to create a smooth, even finish, and an edger to define clean lines and edges.
Trowels for Smooth Finishes
Finishing your concrete repair job with a smooth, even surface requires selecting the right trowel, a tool designed to apply and spread material evenly, allowing you to achieve a high-quality finish. When it comes to trowels, you'll find various types suited for specific tasks.
Here are some essential trowel types and techniques to master:
-
V-notched trowel: Ideal for applying and spreading epoxy or polyurethane-based coatings.
-
Finishing trowel: Used for final smoothing and flattening of the surface.
-
Pooling trowel: Designed for applying and spreading thick, heavy materials like concrete patching compounds.
- Notched trowel: Suitable for applying and spreading thin, medium-viscosity materials like self-leveling compounds.
Mastering trowel techniques is just as vital as choosing the right tool. Practice different strokes, such as sweeping, pushing, and pulling, to achieve a uniform finish.
Remember to hold the trowel at a 45-degree angle and apply gentle to moderate pressure, depending on the material and surface. By selecting the right trowel and honing your techniques, you'll be able to achieve a professional-looking finish that will last.
Edgers for Clean Lines
You'll need a reliable edger to create clean lines and sharp changes between the repaired area and the surrounding concrete surface. A good edger helps you achieve a seamless shift, making the repair virtually invisible.
When choosing an edger, consider the type of concrete you're working with and the design options you want to achieve. For instance, a steel edger is ideal for creating sharp, crisp lines, while a rubber edger is better suited for rounded edges and curved surfaces.
Mastering edging techniques is essential for a professional-looking finish. Practice different strokes and pressures to achieve the desired effect. Use a gentle touch for subtle shifts and apply more pressure for sharper lines.
Don't be afraid to experiment with different edging techniques to find what works best for your project. Remember, a well-executed edge can make or break the entire repair.
Reinforcement and Anchoring Tools
For effective concrete repair, you're going to need reinforcement and anchoring tools to restore structural integrity and prevent further damage. These tools will help you strengthen the concrete and guarantee that it can withstand various types of stress and pressure.
Here are some essential reinforcement and anchoring tools you should have in your toolkit:
-
Rebar cutters and benders: For cutting and bending rebar to the desired shape and size for concrete reinforcement.
-
Anchor installation kits: For securely installing anchors into the concrete to provide a strong hold for bolts and screws.
-
Concrete reinforcement mesh: A metal mesh that adds strength and durability to the concrete, preventing cracks and breaks.
- Epoxy-based anchor adhesives: A strong adhesive for bonding anchors to the concrete, assuring a secure hold.
Specialized Tools for Unique Tasks
When tackling complex concrete repair projects, specialized tools are often required to address unique tasks that demand precision and accuracy. You'll need tools that can help you achieve specific results, whether it's mixing specialized concrete blends or removing old concrete to make way for new repairs.
For instance, specialized mixers are a must-have when working with high-strength or fiber-reinforced concrete. These mixers are designed to handle the unique demands of these materials, ensuring a consistent and strong finish.
Similarly, concrete chisels are essential for removing old or damaged concrete, allowing you to create a clean surface for new repairs. These chisels come in various shapes and sizes, each designed for specific tasks, such as breaking up thick concrete or scraping away thin layers of old adhesive.
Frequently Asked Questions
Can I Use a Regular Drill for Mixing Concrete Repair Material?
When it comes to mixing concrete repair material, you'll want to choose the right drill for the job. A regular drill won't cut it, as it can't handle the thick, heavy mixture.
Instead, you'll need a drill with a high-torque motor and a mixing paddle attachment. This combo will allow you to use efficient mixing techniques, like slow and steady revolutions, to achieve a smooth, consistent mix.
Do I Need to Prime the Surface Before Applying Repair Compound?
Imagine a smooth, even canvas waiting for your artistic touch - that's what you want your concrete surface to be before applying repair compound.
You'll need to prime the surface, ensuring a strong bond between old and new. Proper surface preparation is key; it's not just about slapping on the repair compound.
Clean, roughen, and degrease the area to create an ideal surface for the repair compound to adhere to. Anything less, and you're risking a weak, failing repair.
Can I Use a Regular Hammer for Tapping in Anchor Bolts?
When tapping in anchor bolts, you'll want to avoid using a regular hammer, as it can damage the surrounding concrete or bend the bolt.
Instead, opt for a hammer specifically designed for setting anchor bolts, like a ball-peen or sledgehammer.
For precision, consider using a bolt setter or an impact wrench with a socket adapter.
This will guarantee a secure hold and prevent damage to the anchor bolt types you're working with.
How Do I Prevent Discoloration When Using Different Repair Materials?
You're about to tackle a DIY concrete repair project that's a million times more essential than winning a Pulitzer Prize!
When using different repair materials, preventing discoloration is key. To avoid an eyesore, you'll need to master the art of color matching.
Guarantee a flawless blend by preparing the surface meticulously, cleaning it thoroughly, and applying a primer. This will help the new material bond seamlessly, maintaining the original color and texture.
With surface preparation and color matching down pat, you'll be a DIY concrete repair rockstar!
Are There Any Eco-Friendly Concrete Repair Material Options Available?
When it comes to eco-friendly concrete repair material options, you'll be pleased to know there are several sustainable options available.
You can opt for green materials like recycled aggregate, fly ash, or slag cement, which reduce the carbon footprint of your repair.
Additionally, consider using plant-based concrete alternatives, like hempcrete or bamboo-based mixes, which offer impressive strength and durability.
Conclusion
You've got the right tools for the job, and now it's time to get to work.
With these 10 must-have tools for DIY concrete repair, you'll be able to tackle even the toughest projects.
Just remember, proper preparation and execution are key.
Take, for example, the case of a homeowner who used these tools to repair a cracked driveway, resulting in a durable and visually appealing finish that withstood harsh weather conditions for years to come.
Related Posts
-

What Tools Do I Need for Concrete Wall Repair
As you prepare for a concrete wall repair job, you'll need a variety of tools to guarantee a successful outcome. Star...
-

Essential Tools for Concrete Wall Covering Projects
When tackling a concrete wall covering project, you'll need a range of essential tools and equipment. For cleaning an...
-

What Tools Do I Need for Concrete Block Laying
You'll need a thorough set of tools to guarantee accurate, efficient, and professional concrete block laying. Essenti...


