
10 Must-Have Tools for Concrete Block Repair
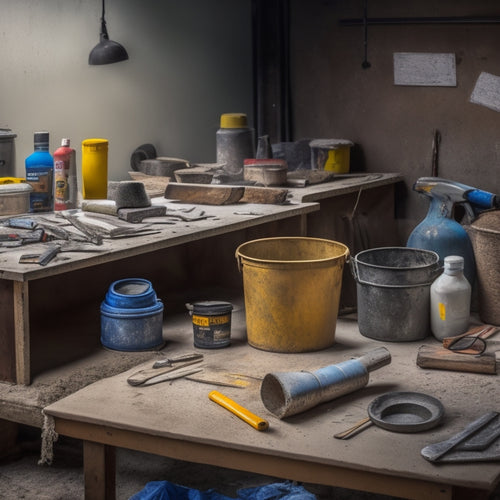
When tackling concrete block repair, you'll need the right tools to guarantee a successful job. Start with essential safety gear like safety goggles, dust masks, and protective clothing to prevent injuries. A block saw, hammer, and chisel set are must-haves for cutting, shaping, and removing debris. A mixing bucket and mortar mix ratios guide help you prepare the perfect mortar, while a level and grout float assure accurate alignment and gap filling. Don't forget a sealant applicator for waterproofing, and a storage container to keep everything organized. With these 10 tools, you'll be well-equipped to tackle any concrete block repair - and mastering their use is just the beginning.
Key Takeaways
• Essential safety gear includes goggles, dust masks, protective clothing, and foot protection to prevent injuries and health risks.
• Cutting and shaping tools like block saws, hammers, and chisel sets help remove damaged blocks and prepare surfaces for repair.
• Mortar preparation tools, including mixing buckets and mortar mix ratios, enable the creation of strong and consistent mortar for durable repairs.
• Surface finishing tools like trowels and grout floats help achieve smooth, even surfaces and prevent air pockets and unevenness.
• Alignment and waterproofing tools, such as levels and sealant applicators, ensure structural integrity and prevent water infiltration in concrete block repairs.
Essential Safety Gear for Protection
When working on concrete block repair, you'll frequently find yourself handling heavy blocks, mixing cement, and using power tools, making it essential to wear important safety gear to protect yourself from potential hazards.
Safety goggles are a must-have to shield your eyes from flying debris, cement dust, and other particles that can cause serious injury. Make certain they fit snugly and have anti-fog coatings to guarantee clear visibility.
Additionally, a dust mask is critical for protecting your respiratory system from inhaling cement dust, silica, and other airborne particles that can lead to respiratory problems. Look for a mask with a HEPA filter or one that's specifically designed for concrete work.
Don't forget to wear gloves, a long-sleeved shirt, and pants to prevent skin contact with harsh chemicals and abrasive materials. Steel-toed boots or safety shoes with slip-resistant soles are also necessary to prevent foot injuries.
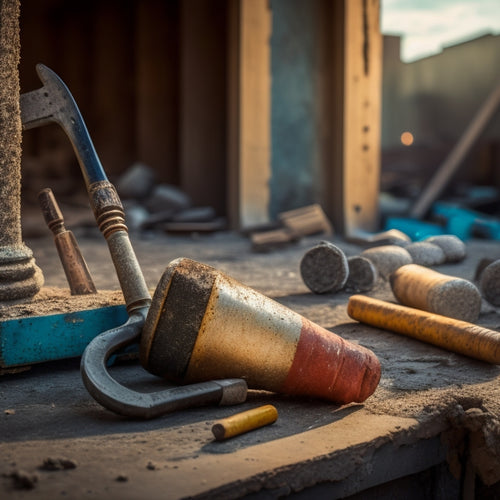
Block Saw for Precise Cutting
With your safety gear in place, you'll need a reliable block saw to make precise cuts in the concrete blocks. This tool is vital for concrete block repair, as it allows you to remove damaged or crumbling blocks and replace them with new ones.
When choosing a block saw, consider the type of blocks you'll be working with, as different saws are designed for specific block types. For example, a saw with a diamond-coated blade is ideal for cutting through dense, heavy blocks, while a saw with a carbide-tipped blade is better suited for lighter, more porous blocks.
To achieve precise cuts, it's important to master various cutting techniques. One technique is to use a slow, steady motion, applying gentle pressure to the saw. This helps prevent the blade from binding or kicking back.
Another technique is to use a push-pull motion, which helps to reduce vibration and increase accuracy. By combining the right saw with the right cutting techniques, you'll be able to make clean, precise cuts that guarantee a strong and durable repair.
Hammer for Tapping and Shaping
When you're repairing concrete blocks, a hammer is an essential tool for tapping and shaping.
You'll use it to tap out loose debris that's accumulated in the blocks, ensuring a solid foundation for your repairs.
With a few precise strikes, you'll also shape block edges clean and remove excess mortar, preparing the surface for a strong, long-lasting bond.
Tapping Out Loose Debris
You'll need to tap out any loose debris from the damaged area using a hammer, carefully dislodging any crumbling concrete or loose aggregate that could interfere with the repair process. This is an essential step in loose debris removal, as it guarantees a clean surface for the repair.
As you tap out the debris, use debris assessment techniques to identify areas that require more attention. Look for signs of structural weakness, such as cracks or crumbling concrete, and make a mental note to address these areas first.
Using your hammer, gently tap around the perimeter of the damaged area to dislodge any loose material. Be careful not to apply too much pressure, as this can cause further damage to the surrounding concrete.
Continue tapping until you've removed all loose debris, taking care to brush away any remaining dust or particles. With the area clean, you can now proceed to the next step in the repair process.
Shaping Block Edges Clean
Shaping Block Edges Clean
Tapping the hammer against the block edges helps to shape them clean by dislodging any remaining debris or rough spots, creating a uniform surface for the repair. As you work on shaping the edges, you'll notice that it is crucial to use the right edge profiling techniques to achieve a smooth finish. This step is critical in block finishing methods, as it guarantees a strong bond between the old and new concrete.
| Technique | Description | Effectiveness |
|---|---|---|
| Light Tapping | Gentle taps to dislodge debris | 7/10 |
| Firm Striking | More forceful strikes to shape edges | 9/10 |
| Angled Blows | Strikes at an angle to remove stubborn debris | 8/10 |
When shaping block edges clean, you'll need to experiment with different techniques to find what works best for your specific repair. Remember to always wear protective gear, including gloves and safety glasses, to prevent injury. By mastering these edge profiling techniques, you'll be able to achieve a professional-looking finish that will last for years to come.
Removing Excess Mortar
Using a hammer, carefully chip away excess mortar from the block's surface, taking care not to damage the surrounding concrete. This is an important step in mortar removal techniques, ensuring a smooth surface for further repair or finishing. As you tap and shape, work in small sections to maintain control and avoid spreading the excess mortar.
Next, switch to a more aggressive tool, like a chisel or scraper, to remove larger chunks of mortar. Be cautious not to gouge the concrete, as this can lead to further damage. For finer cleanup, use a wire brush or stiff-bristled broom to sweep away remaining debris. These tools for cleanup are vital in preparing the surface for new mortar or other finishes.
Remember to wear protective gear, including gloves, safety glasses, and a dust mask, to shield yourself from flying particles and debris. By following these steps and using the right tools, you'll be able to efficiently remove excess mortar and achieve a clean, even surface for your concrete block repair project.
Chisel Set for Removing Debris
A sturdy chisel set is essential for effectively dislodging and removing debris that's accumulated in the damaged concrete block. You'll need a variety of chisel types to tackle different types of debris, including flat chisels for scraping, pointed chisels for digging, and claw chisels for pulling. Having the right chisel for the job will make the process much easier and efficient.
When choosing a chisel set, look for high-carbon steel or tungsten carbide-tipped chisels, which are durable and resistant to wear. It's also important to take into account the handle material and grip, as you'll be using these chisels for extended periods.
Proper chisel maintenance is also vital to extend the life of your tools. After each use, clean your chisels with a wire brush to remove any debris or residue. Regularly sharpen your chisels to maintain their effectiveness, and store them in a dry place to prevent rust.
Mixing Bucket for Mortar Prep
When it comes to mixing mortar, you'll need a reliable bucket that can handle the job.
You'll want to contemplate the size of your bucket, as it'll impact the ratio of your mortar mix, and ultimately, the quality of your repairs.
Bucket Size Matters
What's the ideal capacity for a mixing bucket to efficiently prepare mortar for concrete block repair?
As a professional, you know that having the right tools is essential for a successful project. When it comes to mixing buckets, the capacity matters. A bucket that's too small will require frequent refills, wasting time and increasing the risk of inconsistent mixes. On the other hand, a bucket that's too large can be cumbersome and difficult to handle.
Here are some key considerations for choosing the right bucket capacity:
-
A 5-gallon bucket is a good starting point for small to medium-sized projects, allowing you to mix about 1-2 bags of mortar at a time.
-
For larger projects, consider a 10- or 15-gallon bucket to increase efficiency and reduce mixing time.
** Look for buckets made from heavy-duty materials, such as polyethylene or steel, that can withstand the rigors of mixing and hauling heavy mortar.
** Consider a bucket with a non-slip handle and a spout or pouring lip to make it easier to transfer the mixed mortar to your work area.
Mortar Mix Ratios
With your mixing bucket ready, you're now set to prepare the mortar, and that starts with getting the mix ratio right.
The ideal mortar mix ratio depends on the type of mortar you're using and the specific requirements of your concrete block repair project. For instance, a general-purpose mortar mix typically consists of one part cement to three parts sand, while a high-strength mortar mix might be one part cement to two parts sand. It's important to understand the different mortar mix types, such as Type S, Type N, and Type M, each with its own unique characteristics and uses.
When it comes to mixing techniques, you'll want to make sure you're using the right amount of water and mixing the ingredients in the correct order. Start by adding the dry ingredients to the bucket, followed by the water, and mix until you achieve a consistent, workable paste.
Avoid over-mixing, as this can lead to a weak and brittle mortar. By mastering the art of mortar mix ratios and mixing techniques, you'll be well on your way to achieving a strong and durable concrete block repair.
Cleaning the Bucket
You'll need to thoroughly clean your mixing bucket to prevent any residual mortar or debris from contaminating your fresh mix. This essential step is often overlooked, but it's important for ensuring the quality of your concrete block repair. Effective cleaning methods are significant for maintaining your bucket and preventing the buildup of old mortar, which can affect the consistency and strength of your new mix.
Here are some bucket maintenance tips to keep in mind:
-
Scrape out as much excess mortar as possible from the previous mix, using a sturdy trowel or scraper.
-
Rinse the bucket with clean water to remove any loose debris or dust.
-
Use a wire brush or scrubber to remove stubborn mortar residue and stains.
- Dry the bucket thoroughly with a clean towel or cloth to prevent water spots and rust.
Trowel for Smoothening Surfaces
Select a high-carbon steel trowel with a flat, rectangular blade and a comfortable, cushioned grip to effectively smoothen surfaces during concrete block repair.
This type of trowel will allow you to achieve a smooth, even surface finish, which is essential for a professional-looking repair.
When using your trowel, employ proper trowel techniques to avoid creating air pockets or unevenness.
Hold the trowel at a 45-degree angle and apply gentle to moderate pressure, depending on the surface finish you're aiming for.
For a smooth finish, use long, sweeping strokes, while a more textured finish requires shorter, more abrupt strokes.
Remember to keep your trowel clean and dry to prevent mortar from sticking to it.
By mastering these trowel techniques, you'll be able to achieve a surface finish that's both aesthetically pleasing and durable.
With the right trowel and techniques, you'll be able to produce high-quality surface finishes that will make your concrete block repairs stand out.
Level for Accurate Alignment
How accurately can you guarantee your concrete blocks are aligned without a reliable level, an essential tool for detecting even the slightest deviations from true horizontal or vertical planes?
As a concrete block repair expert, you know that precise alignment is fundamental for a structurally sound and aesthetically pleasing finish. That's why having the right level is imperative to your success.
When it comes to level types, you have several options to choose from, each suited to specific alignment techniques. Here are a few:
-
Laser levels: Ideal for large, open spaces, these levels project a precise level line or plane, allowing you to quickly identify deviations.
-
Digital levels: Offering high accuracy and ease of use, digital levels are perfect for smaller, more intricate projects.
-
Torpedo levels: Compact and versatile, torpedo levels are great for tight spaces and measuring angles.
- Optical levels: Designed for precision and accuracy, optical levels are ideal for critical alignment tasks.
Grout Float for Filling Gaps
What precision do you achieve in filling gaps between concrete blocks without a grout float, a crucial tool that helps you efficiently spread and smooth grout for a professional finish?
A grout float is a must-have tool for any concrete block repair project, allowing you to achieve a smooth, even surface. By using proper grout float techniques, you can ascertain that the grout is evenly distributed and that the surface is free of air pockets and imperfections.
To get the most out of your grout float, it's vital to perform regular maintenance, such as cleaning and storing it properly. This will help prevent the buildup of grout residue and extend the life of the tool.
With a well-maintained grout float, you'll be able to achieve a high-quality finish that will last for years to come. By mastering grout float techniques and performing regular maintenance, you'll be able to take your concrete block repair skills to the next level and produce professional-looking results.
Sealant Applicator for Waterproofing
You'll achieve a watertight seal with a sealant applicator, a precision tool designed to dispense the perfect amount of sealant into gaps and joints between concrete blocks. This tool is essential for ensuring the longevity of your concrete block repair by preventing water infiltration.
With a sealant applicator, you'll have complete control over the amount of sealant used, eliminating waste and mess.
When selecting a sealant applicator, consider the following factors:
-
Sealant types: Choose an applicator compatible with your preferred sealant type, whether it's silicone, polyurethane, or acrylic.
-
Application techniques: Opt for an applicator that allows for precise control over the flow rate, ensuring a smooth, even application.
-
Nozzle design: A nozzle with a narrow tip and adjustable flow control will help you reach tight spaces and achieve a professional finish.
- Ergonomic design: Look for an applicator with a comfortable grip and balanced design to reduce fatigue during extended use.
Storage Container for Organization
A well-organized storage container keeps your concrete block repair tools and materials within easy reach, streamlining your workflow and saving valuable time on the job site. As a concrete block repair professional, you understand the importance of having the right tools at your fingertips.
A storage container is more than just a box; it's a key component of your workflow. By investing in a high-quality storage container, you'll be able to keep your tools and materials organized, protected, and easily accessible.
When selecting a storage container, consider the size and type of tools you need to store. Look for containers with dividers, compartments, and labels to help you stay organized. Implementing effective storage solutions and organizational tips will help you stay focused on the task at hand.
A well-organized storage container will also help you identify what tools you need to restock or replace, ensuring you're always prepared for the next job. By keeping your tools and materials organized, you'll be able to complete projects efficiently and effectively, earning you a reputation as a reliable and skilled concrete block repair expert.
Frequently Asked Questions
What Is the Best Type of Concrete Block for Repair Projects?
When selecting the best concrete block for your repair project, you'll want to take into account the specific requirements of the job.
Look for blocks made from high-strength, low-absorption concrete that can withstand exposure to the elements.
For load-bearing applications, you'll need blocks with a compressive strength of at least 2,000 psi.
Additionally, take into account blocks with a textured finish to guarantee a secure bond with the existing structure.
Can I Use a Regular Hammer Instead of a Specialized One?
As you wield your trusty hammer, it's like grasping a magic wand, revealing the secrets of concrete block repair.
But, can you really use a regular hammer instead of a specialized one? The answer lies in the nuances of hammer types and repair techniques.
A regular hammer might get the job done, but it may not provide the precision and control you need for intricate repairs.
Invest in a specialized hammer, and you'll be amazed at the difference it makes in your work.
How Do I Know Which Chisel Size to Use for My Project?
When selecting the right chisel size for your project, you'll want to take into account the type of chisel you need and the specific requirements of your job.
There are various chisel types, including flat, point, and claw chisels, each suited for different tasks.
Refer to your project guidelines to determine the appropriate chisel size and type for the task at hand.
You'll be able to tackle your concrete block repair with confidence once you've got the right tools for the job.
What's the Difference Between a Grout Float and a Trowel?
As you immerse yourself in the world of concrete block repair, you'll find yourself waltzing with two dance partners: the grout float and the trowel.
Think of the grout float as a gentle whisperer, smoothing out excess grout with a soft, sweeping motion.
On the other hand, the trowel is a bold, assertive partner, using its angled edge to scoop and spread material with precision.
Mastering the usage and techniques of these two tools will elevate your concrete repair skills, making you the maestro of the job site.
Can I Use a Sealant Applicator for Other Types of Sealants?
You're wondering if you can use a sealant applicator for other types of sealants. The answer is yes, you can!
Most sealant applicators are designed to be versatile, allowing you to work with various sealant types. From silicone to polyurethane, these applicators can handle different viscosities and consistencies.
You'll just need to adjust the applicator's nozzle and pressure to suit the specific sealant you're working with. With the right applicator, you'll have the flexibility to take on a wide range of projects.
Conclusion
You've made it to the final stretch!
With these 10 must-have tools for concrete block repair, you'll be unstoppable - a master builder capable of tackling even the most intimidating projects.
From precise cutting to waterproofing, you'll be equipped to tackle every challenge that comes your way.
Remember, a job well done is only as good as the tools you use, so don't skimp on the essentials.
Related Posts
-
3 Best Tools to Buy for Concrete Repair Online
When buying tools for concrete repair online, you'll want to research multiple retailer options to find the best prod...
-

Top Tools for Mixing Concrete at Home
When mixing concrete at home, you'll need a range of tools to guarantee a successful operation. Start with essential ...
-
5 Tips for Splitting Concrete With Second-Hand Tools
When splitting concrete with second-hand tools, you'll need to be strategic to avoid wasting time, money, and putting...


