10 Must-Have DIY Concrete Repair Tools for Beginners
Share
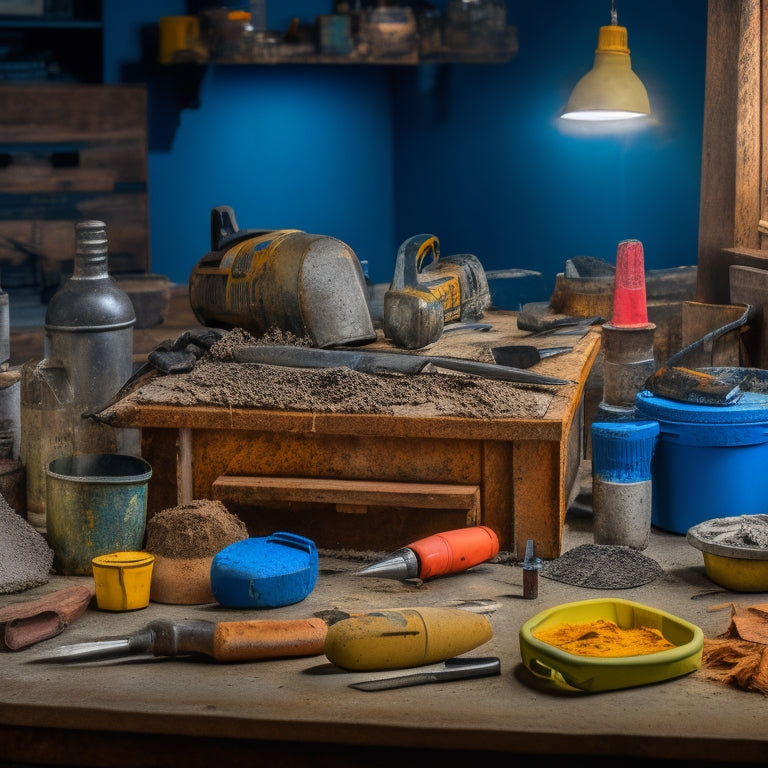
When starting a DIY concrete repair project, you'll need essential safety gear like safety goggles, dust masks, and heavy-duty gloves to protect yourself from debris and harsh chemicals. Next, invest in concrete crack injection tools, such as epoxy injection guns and mixing sticks, to properly fill cracks. You'll also need epoxy filler application tools, concrete patching compound tools, and power washing and cleaning tools to prepare the surface. Additionally, sealant removal and prep tools, as well as surface preparation tools, are vital for a successful repair. With these must-have tools, you'll be well-equipped to tackle your project and achieve a professional-grade finish - and there's more to explore to guarantee your project's success.
Key Takeaways
• Essential safety gear, including safety goggles, dust masks, and heavy-duty gloves, is crucial for protecting yourself during concrete repair.
• A concrete crack injection tool, such as an epoxy injection gun, is necessary for filling cracks and ensuring a strong bond.
• Epoxy filler application tools, like mixing sticks and application brushes, are vital for combining and spreading epoxy filler evenly.
• A putty knife, trowel, and float are necessary for applying and smoothing out patching compound for a professional finish.
• A pressure washer and surface cleaner are required for cleaning and preparing the surface for successful concrete repairs.
Essential Safety Gear for Beginners
You'll need to invest in five essential safety gear items before starting any concrete repair project to prevent injuries and secure a successful outcome. These must-haves will protect you from hazardous materials, airborne particles, and physical harm.
First, safety goggles are a top priority. They'll shield your eyes from flying debris, chemical splashes, and other projectiles.
Next, dust masks are vital for filtering out harmful particles and preventing respiratory issues.
You'll also need heavy-duty gloves to safeguard your hands from cuts, abrasions, and harsh chemicals.
A long-sleeved shirt and pants will protect your skin from skin irritants and abrasions.
Finally, steel-toed boots will guarantee your feet are safe from heavy objects and tools.
Don't skip these critical safety items, as they'll make all the difference between a successful project and a trip to the emergency room.
Concrete Crack Injection Tools
With your safety gear in place, it's time to focus on the specialized tools required for concrete crack injection, a critical step in repairing cracks and preventing further damage.
Crack injection involves filling cracks with epoxy resin to strengthen and stabilize the concrete. To do this effectively, you'll need the right tools.
Here are the must-have tools for concrete crack injection:
-
Epoxy injection gun: This handheld tool allows you to inject epoxy resin into the crack at high pressure, ensuring it reaches the entire length of the crack.
-
Injection ports: These small, removable devices are inserted into the crack at regular intervals, providing a pathway for the epoxy resin to flow through.
-
Mixing stick and buckets: You'll need a mixing stick to combine the epoxy resin and hardener, and buckets to mix and store the epoxy.
With these tools, you'll be able to successfully inject epoxy resin into the crack, repairing and strengthening the concrete.
Remember to follow the manufacturer's instructions for the epoxy resin and to test the tools before starting the repair.
Epoxy Filler Application Tools
When applying epoxy filler, you'll need the right tools to guarantee a successful repair.
You'll be mixing and applying epoxy, filling deep cracks efficiently, and smoothening rough surfaces to achieve a seamless finish.
To get started, you'll want to gather the necessary tools to tackle these critical steps.
Mixing and Applying Epoxy
Mix epoxy filler and hardener in a well-ventilated area, following the manufacturer's instructions for the correct ratio and mixing time to guarantee a strong, durable bond. Proper epoxy mixing is vital for a successful repair.
You'll need a few essential tools to make certain of a smooth, consistent application. Here are the must-haves for mixing and applying epoxy:
-
Mixing sticks or paddles: Use these to combine the epoxy filler and hardener thoroughly, scraping the sides and bottom of the mixing container to prevent uneven curing.
-
Application brushes or squeegees: These tools help you spread the mixed epoxy evenly and smoothly, allowing for a strong bond between the concrete and the filler.
-
Gloves and safety goggles: Protective gear is a must when working with epoxy, as it can be hazardous to your skin and eyes.
Remember to work in a well-ventilated area, and avoid applying epoxy in direct sunlight or extreme temperatures. By following these guidelines and using the right tools, you'll achieve a professional-looking repair that will last.
Filling Deep Cracks Efficiently
Filling deep cracks efficiently requires using the right epoxy filler application tools to guarantee the filler reaches the bottom of the crack and adheres properly to the surrounding concrete. You'll need a combination of tools to obtain a successful repair.
Start with a crack assessment to determine the depth and width of the crack. This will help you choose the right filling technique and tools.
For deep cracks, you'll need a tool that can deliver the epoxy filler to the bottom of the crack, such as an epoxy injection gun or a crack injection tool. These tools allow you to inject the filler under pressure, ensuring it reaches the entire depth of the crack.
Additionally, use a mixing stick or trowel to spread the filler evenly and remove any excess material. For wider cracks, consider using a fill-and-finish tool that can both fill and smooth the surface in one step.
Smoothening Rough Surfaces
You'll need a set of specialized epoxy filler application tools to effectively smooth out rough surfaces, ensuring a uniform finish and strong bond between the repair material and surrounding concrete.
When it comes to smoothening rough surfaces, having the right tools is vital for achieving professional-looking results.
Here are three essential tools you'll need for epoxy filler application:
-
Trowel: A high-quality trowel is necessary for applying and spreading epoxy filler evenly, allowing you to achieve a uniform surface texture. Look for a trowel with a flexible blade that won't leave marks or scratches on the surface.
-
Squeegee: A squeegee is perfect for removing excess epoxy filler and achieving a smooth, even finish. Its rubber blade is gentle on the surface, making it ideal for surface leveling techniques.
-
Scraper: A scraper is necessary for removing any excess filler that has dried or hardened. Its flat, rigid blade makes it perfect for surface texture enhancement, allowing you to achieve a smooth, even finish.
Concrete Patching Compound Tools
Concrete Patching Compound Tools
Several essential tools are required to effectively apply and finish concrete patching compounds, ensuring a strong and durable repair. As you work on patching techniques, you'll need to select the right compound for the job, and then prepare it for application. Here are the must-have tools for the task:
| Tool | Description |
|---|---|
| Putty Knife | For scooping and applying patching compound to the repair area |
| Trowel | For spreading and smoothing out the compound |
| Float | For finishing and texturing the repaired surface |
| Edger | For creating clean edges and definition around the repair |
With these tools, you'll be able to properly mix, apply, and finish your concrete patching compound. Remember to choose a compound that matches the color and texture of the surrounding concrete, and follow the manufacturer's instructions for application and drying times. By using the right tools and techniques, you'll achieve a professional-looking repair that will last for years to come.
Power Washing and Cleaning Tools
Proper surface preparation is essential before applying a concrete repair, and that's where power washing and cleaning tools come into play. These tools allow you to blast away dirt, grime, and old coatings to create a clean slate for your repair.
As a DIYer, you'll need the right tools to get the job done effectively. Here are some must-haves for your power washing and cleaning arsenal:
-
Pressure Washer: A pressure washer is a powerful tool that uses high-pressure water jets to remove dirt, grime, and old coatings from the concrete surface. Look for a washer with a minimum of 1,500 PSI and a wide fan tip for efficient cleaning.
-
Surface Cleaner: A surface cleaner is a specialized tool that attaches to your pressure washer, allowing you to clean large areas quickly and easily. It's ideal for cleaning driveways, sidewalks, and other large concrete surfaces.
-
Brushes and Scrubbers: For tougher cleaning jobs, you'll need a set of sturdy brushes and scrubbers to remove stubborn dirt and grime. Look for brushes with stiff bristles and scrubbers with abrasive surfaces to get the job done.
Concrete Sealant Applicator Guns
When you're working with concrete sealant applicator guns, you'll need to choose the right type for your specific project, and that's where understanding the differences between them comes in.
You'll also want to keep your gun in top condition with regular maintenance to guarantee consistent results.
Types of Sealant Guns
You'll typically find three main types of sealant guns on the market, each designed to tackle specific concrete repair tasks with varying levels of precision and ease. When choosing the right sealant gun for your DIY concrete repair project, it's crucial to take into account the type of sealant you're working with and the level of control you need.
Here are the three main types of sealant guns:
-
Manual Sealant Guns: These guns rely on manual pressure to dispense sealant, offering more control over the application process. They're ideal for small-scale repairs and work well with low-to-medium viscosity sealants.
-
Electric Sealant Guns: Electric guns use a motor to pump out sealant, providing a faster and more consistent application. They're better suited for larger projects and work well with high-viscosity sealants.
-
Pneumatic Sealant Guns: These guns use compressed air to dispense sealant, offering a high level of precision and control. They're typically used for commercial-scale projects and work well with a wide range of sealant types.
When selecting a sealant gun, take into account the manual vs. electric aspect, as well as the type of sealant you're working with. This will guarantee you get the best results for your DIY concrete repair project.
Gun Maintenance Tips
To guarantee peak performance and extend the lifespan of your concrete sealant applicator gun, regular cleaning and maintenance are essential after each use. Regardless of the gun type you're using, whether it's a manual, pneumatic, or electric gun, proper gun care is vital.
Start by wiping down the gun with a clean, dry cloth to remove any excess sealant or debris. Next, disassemble the gun and soak the parts in a solvent, such as mineral spirits or acetone, to dissolve any dried sealant. Use a soft-bristled brush to gently scrub away any stubborn residue.
Once the parts are clean, reassemble the gun and apply a thin layer of lubricant to the moving parts to keep them running smoothly. Regularly inspect the gun's seals and O-rings for signs of wear and replace them as needed.
Sealant Flow Control
Your concrete sealant applicator gun's sealant flow control system plays an important role in achieving a smooth, even application, allowing you to regulate the amount of sealant dispensed onto the concrete surface. This control is vital, as it directly affects the quality of the sealant application.
A well-designed sealant flow control system guarantees that you can adjust the flow rate to suit the specific sealant viscosity and the surface you're working on.
To get the most out of your sealant applicator gun, consider the following key aspects of sealant flow control:
-
Flow rate adjustment: Look for a gun that allows you to adjust the flow rate to suit the specific sealant viscosity and application requirements.
-
Sealant pressure control: Verify the gun has a reliable pressure control system to maintain a consistent sealant flow, even when working with thicker sealants.
-
Precision nozzle design: A well-designed nozzle will help you achieve an even sealant application, reducing waste and providing a professional finish.
Sealant Removal and Prep Tools
Remove old sealants and coatings using a variety of tools designed to scrape, grind, or dissolve the existing layer, making way for a new application. You'll need to choose the right tool for the type of sealant you're dealing with. For example, epoxy-based sealants may require a different removal technique than acrylic-based ones.
Here's a breakdown of common sealant types and their corresponding removal techniques:
| Sealant Type | Removal Technique |
|---|---|
| Epoxy-based | Grinding or scraping |
| Acrylic-based | Solvent-based dissolving |
| Polyurethane-based | Mechanical scraping |
| Silicone-based | Heat-based dissolving |
When selecting a removal tool, consider the surface you're working with and the type of sealant you're removing. A scraper or grinder may be sufficient for concrete surfaces, while a solvent-based dissolver may be better suited for epoxy-based sealants on metal or wood. Remember to always follow safety guidelines and manufacturer instructions when working with these tools. By choosing the right tool for the job, you'll guarantee a clean and effective removal process, setting yourself up for a successful concrete repair.
Concrete Surface Preparation Tools
When preparing a concrete surface for repair, you'll need to guarantee it's free of dirt, debris, and old sealant residue.
You'll then remove any existing sealant and grind down rough edges to create a smooth surface.
Clean the Surface
You'll need to sweep away any loose debris, dirt, or oil from the concrete surface using a stiff-bristled broom or a leaf blower to prevent contaminants from interfering with the repair process. This vital step in surface preparation guarantees a strong bond between the old concrete and the new repair material.
To further clean the surface, employ the following cleaning techniques:
-
Wire brush: Use a wire brush to scrub away stubborn dirt, grime, or old adhesive residue from the concrete surface. This will help create a rough texture for the repair material to adhere to.
-
Pressure washer: Employ a pressure washer to remove dirt, oil, or grease from the surface. Be cautious not to use excessive pressure, which can damage the concrete.
-
Solvent-based cleaners: Apply solvent-based cleaners to dissolve and remove oil or grease spots. Make sure to follow the manufacturer's instructions and take necessary safety precautions.
Remove Old Sealant
To guarantee a strong bond between the old concrete and the new repair material, scrape off any existing sealant or old adhesive residue from the surface using a concrete scraper or putty knife. This step is vital in surface preparation methods, as it guarantees a clean slate for the new repair material to adhere to. You'll want to use a gentle yet firm motion to remove the old sealant, taking care not to gouge the underlying concrete.
When it comes to sealant removal techniques, it's important to be thorough and meticulous. Any remaining residue can compromise the integrity of the new repair, leading to premature failure. As you work, inspect the surface regularly to confirm all old sealant has been removed.
If necessary, use a wire brush or scrubber to remove any stubborn residue. Once you've completed this step, you'll be ready to move on to the next phase of your DIY concrete repair project.
Grind Down Edges
With the old sealant removed, grab your angle grinder or concrete edger and grind down any rough edges or uneven surfaces to create a uniform base for the repair material.
Proper edge preparation is essential for a successful concrete repair. You'll want to use concrete grinding techniques to smooth out the surface, ensuring a strong bond between the old and new concrete.
Here are some important edge preparation methods to keep in mind:
-
Grind at an angle: Hold your grinder at a 45-degree angle to the surface, working in small sections to prevent creating scratches or swirl marks.
-
Use the correct grit: Start with a coarse grit (around 16-20) to remove rough edges, then progress to finer grits (up to 40-60) for a smoother finish.
-
Work in small sections: Divide the area into smaller sections, completing each one before moving on to the next to maintain evenness and prevent uneven grinding.
Mixing and Measuring Tools
Your concrete repair project's success hinges on accurately mixing and measuring the repair compound, making high-quality mixing and measuring tools vital components of your DIY toolkit.
To achieve ideal mixing techniques, you'll need a sturdy mixing bucket, a mixing stick or trowel, and a drill with a mixing paddle attachment. These tools will help you combine the repair compound with the right amount of water, guaranteeing a consistent and strong bond.
Measuring accuracy is also important, as excessive or insufficient water can compromise the repair. Invest in a high-quality measuring cup or scale to secure precise measurements. Digital scales are particularly useful, as they provide exact readings and can be easily converted between units.
When measuring, make sure to follow the manufacturer's instructions and take into account factors like temperature and humidity, which can affect the compound's consistency.
Finishing and Smoothing Tools
You'll need a range of specialized tools to achieve a smooth, even finish and a professional-looking repair, including trowels, edgers, and floats. These finishing and smoothing tools are essential for achieving the desired texture and appearance of your concrete repair.
When it comes to finishing techniques, you'll rely on these tools to apply the final layer of concrete, remove excess material, and create a uniform surface.
Here are three vital tools you'll need for smoothing applications:
-
Trowel: A trowel is used to apply and smooth out the final layer of concrete, allowing you to achieve a uniform finish.
-
Edger: An edger is a specialized tool used to create a clean, defined edge around the repair area, ensuring a seamless changeover between the new and existing concrete.
-
Float: A float is a long, flat tool used to smooth out the surface of the concrete, removing any imperfections or air pockets.
Frequently Asked Questions
Can I Use Household Items as Substitutes for Concrete Repair Tools?
You might be tempted to use household items as substitutes for concrete repair tools, but be cautious.
While creative solutions can be appealing, they often compromise the quality of the repair. For instance, using a household hammer instead of a rubber mallet can damage the surrounding concrete.
Instead, focus on finding the right tools for the job. Invest in a few essential tools, and you'll get professional-looking results that last.
How Do I Store and Maintain My DIY Concrete Repair Tools?
As you wrap up your DIY concrete repair project, don't let your tools gather dust - literally!
You'll want to clean them meticulously to prevent rust and damage.
Invest in storage solutions like toolboxes, hooks, or pegboards to keep your gear organized and within reach.
Proper tool cleaning and storage will guarantee they remain in top condition, ready for your next project.
Are There Any Eco-Friendly Alternatives to Traditional Concrete Repair Tools?
When searching for eco-friendly alternatives to traditional concrete repair tools, you'll find sustainable materials that align with green practices.
Look for tools made from recycled materials or bioplastics, which reduce waste and carbon footprint.
Consider using hand tools with wooden or bamboo handles, sourced from responsibly managed forests.
Additionally, opt for tools with minimal packaging or those that use refillable containers to reduce single-use plastics.
Can I Rent Concrete Repair Tools Instead of Buying Them?
You're probably thinking you'll need a small fortune to get your hands on concrete repair tools, but hold on to your wallet!
Renting instead of buying is a viable option. Conduct a cost comparison and you'll find that renting can be a huge cost-saver, especially for one-time or infrequent projects.
Plus, you'll avoid storage hassles and get access to specialized tools without the hefty upfront investment. Weigh the rental benefits and you might just find it's the way to go.
How Often Should I Replace My DIY Concrete Repair Tools?
You'll need to replace your DIY concrete repair tools when they show signs of wear and tear.
The tool lifespan varies, but generally, you'll know it's time when you notice rust, corrosion, or broken parts.
Other replacement indicators include dull or worn-out edges, loose handles, or decreased performance.
Keep an eye out for these signs and replace your tools accordingly to guarantee effective and safe repairs.
Conclusion
You've got the skills, the knowledge, and now the tools to tackle any DIY concrete repair project that comes your way.
With these must-haves in your arsenal, you're ready to conquer cracks, craters, and crumbling surfaces like a pro.
Your concrete will shine like new, and you'll be the master of your domain.
So, grab your tools and get to work - your concrete is waiting for a fresh new face!
Related Posts
-

Top Concrete Resurfacing Tools for a Pro Finish
When it comes to achieving a professional finish in concrete resurfacing projects, you require the right set of speci...
-

Best Tools for Concrete Restoration and Repair
When tackling concrete restoration and repair projects, you need a range of reliable tools to achieve professional-gr...
-

5 Tips for Accurate Concrete Measurement Tools
To guarantee accurate concrete measurement, you'll want to calibrate your measuring tools regularly, choosing a frequ...


