
Why These Concrete Repair Tools Are a Lifesaver
You've likely encountered concrete damage that required costly repairs or even rebuilds, but with the right tools, you can extend the lifespan of your concrete structures and avoid such headaches. Essential tools like wire brushes, putty knives, and patching compounds help with minor repairs, while crack injection kits and epoxy solutions effectively fill hairline and structural cracks. Precise surface preparation and cleaning techniques guarantee a strong bond between old and new concrete. With the right tools and techniques, you'll be able to tackle even the most challenging concrete repairs - and by understanding the role of each tool, you'll be well on your way to becoming a concrete repair expert.
Key Takeaways
• Effective concrete repair tools ensure strong, lasting repairs, saving time and resources in the long run.
• Precise injection systems and epoxy solutions provide durable and watertight bonds, preventing further damage.
• Essential tools like wire brushes and putty knives enable efficient surface preparation, a critical step in concrete repair.
• The right tools and techniques help prevent accidents and injuries, making the repair process safer for workers.
• Quality concrete repair tools and methods allow for seamless blending with surrounding concrete, resulting in a visually appealing finish.
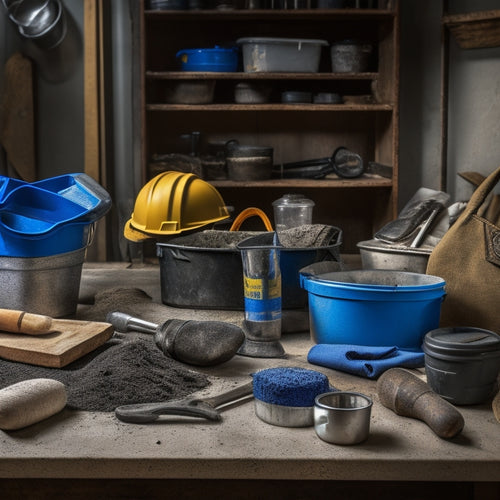
Essential Tools for Minor Repairs
You'll need a set of essential tools to tackle minor concrete repairs, including a wire brush, putty knife, and patching compound. These tools will help you prepare the area, remove damaged concrete, and apply a new layer of concrete.
When it comes to repair techniques, having the right tools is critical. A wire brush is perfect for cleaning the area and removing loose debris, while a putty knife is ideal for scraping away damaged concrete.
Proper tool maintenance is also important to guarantee your tools last longer and perform at their best. Regularly clean your tools with soap and water, and store them in a dry place to prevent rust. Additionally, inspect your tools regularly for signs of wear and tear, and replace them as needed.
Concrete Crack Injection Kits
When you're dealing with cracks in concrete, you need a reliable solution that gets the job done efficiently.
That's where concrete crack injection kits come in - they're designed to make crack filling a breeze.
With these kits, you'll have access to effective epoxy solutions and precise injection systems that guarantee a durable, long-lasting repair.
Crack Filling Made Easy
Crack filling becomes a straightforward process with the use of concrete crack injection kits, which provide an extensive solution for repairing cracks in concrete structures. These kits are designed to tackle various crack types, including hairline cracks, structural cracks, and corner cracks.
By using a concrete crack injection kit, you'll have access to a range of repair techniques tailored to address specific crack types. For instance, you can employ low-pressure injection for hairline cracks or high-pressure injection for deeper, more structural cracks.
When selecting a concrete crack injection kit, consider the type of crack you're dealing with, as well as the desired repair outcome. Kits typically include a specialized resin, injection ports, and other accessories.
Effective Epoxy Solutions
Effective epoxy solutions, such as those found in concrete crack injection kits, provide a reliable means of addressing a wide range of crack types and sizes.
You'll find that these epoxy applications are particularly useful for repairing structural cracks, as they offer exceptional bonding strength and durability. One of the epoxy advantages is its ability to penetrate deep into the crack, ensuring a strong and lasting repair.
When working with concrete crack injection kits, you'll appreciate the ease of use and minimal mess. The epoxy solutions are typically mixed and injected into the crack using a specialized tool, allowing for precise control over the application process.
This results in a strong, watertight bond that can withstand various environmental conditions.
Precise Injection Systems
You'll find that concrete crack injection kits, which are part of precise injection systems, offer a high degree of accuracy and control when repairing cracks in concrete structures. These kits allow you to target specific areas of damage, ensuring that the repair material is precisely injected into the crack. This results in a stronger, more durable repair that lasts longer.
When working with concrete crack injection kits, it is vital to master various injection techniques. This includes understanding the best pressure and flow rate for the specific repair material being used. Proper equipment maintenance is also important, as clogged nozzles or worn-out seals can compromise the integrity of the repair.
Here are some benefits of using precise injection systems:
| Benefits | Description |
|---|---|
| Increased Accuracy | Target specific areas of damage for a more effective repair |
| Improved Control | Regulate pressure and flow rate for best results |
| Enhanced Safety | Reduce the risk of accidents and injuries with controlled injection |
| Cost-Effective | Minimize waste and reduce the amount of repair material needed |
| Long-Lasting Repairs | Achieve stronger, more durable repairs that last longer |
Epoxy Patching Compound
Your epoxy patching compound selection will depend on the specific demands of the repair project, including the size and location of the damaged area, as well as the type of concrete involved.
For instance, you may require a high-strength epoxy for load-bearing structures or a fast-setting epoxy for areas with high foot traffic.
When applying the epoxy, it's essential to follow proper epoxy application techniques to guarantee a strong bond between the epoxy and the concrete. This may involve preparing the surface, mixing the epoxy according to the manufacturer's instructions, and applying it in thin layers.
You should also be aware of the epoxy curing times, as this will impact the repair schedule and the time it takes for the area to be fully functional again. Typically, epoxy curing times range from a few minutes to several hours, depending on the type of epoxy and environmental conditions.
Concrete Chiseling and Scraping
When conducting concrete chiseling and scraping, you'll need to tackle three key points to guarantee a successful repair.
First, you'll remove old, damaged concrete to create a solid base for the new material.
Next, you'll scrape off any debris and loose particles to prepare the surface for the next steps.
Remove Old Concrete
Removing old, deteriorated concrete is an essential step in the repair process, and it typically begins with concrete chiseling and scraping to break away the damaged material.
As you start the removal process, it's vital to prioritize demolition safety tips to guarantee a safe working environment. Begin by wearing protective gear, including gloves, safety glasses, and a dust mask. Before you start chiseling, survey the area to identify any hidden hazards, such as rebar or electrical conduits.
When selecting concrete removal techniques, consider the extent of the damage and the type of concrete you're working with. For smaller areas, hand tools like chisels and hammers may be sufficient. For larger areas, you may need to use power tools, such as jackhammers or saws.
Regardless of the tool you choose, make sure you're using the correct technique to avoid damaging the surrounding concrete or injuring yourself. By following these guidelines, you'll be able to effectively remove old concrete and create a solid foundation for your repair.
Scrape Off Debris
With the old concrete broken away, you'll need to scrape off the debris and residual material using a combination of chiseling and scraping tools to create a clean surface for repair. This vital step guarantees a strong bond between the old and new concrete, making your repair more durable and long-lasting.
To achieve this, you'll need to employ effective debris removal techniques and surface preparation strategies. Here are some essential tools and methods to take into account:
-
Chiseling hammers: Use these to break up and dislodge large chunks of debris.
-
Scraping tools: Employ flat, wide scrapers to remove residual material and smooth out the surface.
-
Wire brushes: Utilize these to sweep away fine particles and dust, guaranteeing a clean surface.
- Vacuum or blower: Finish by removing any remaining debris and dust using a vacuum or blower.
Smooth Out Surface
You'll need to aggressively chip away at the surface using concrete chiseling tools to dislodge any remaining fragments and rough spots, creating a uniform surface for repair. This step is essential in guaranteeing a smooth finish and preventing further damage. As you chisel, focus on removing any debris, old adhesives, or deteriorated concrete to achieve a clean slate.
Next, switch to scraping tools to refine the surface texture. Use a scraper or wire brush to remove any remaining imperfections, taking care not to gouge or scratch the surface. This will help create a stable base for the repair material to bond to. Remember to work in small sections, maintaining a consistent pattern to avoid creating unevenness.
When scraping, employ controlled, gentle strokes to avoid damaging the surrounding concrete. Your goal is to achieve a smooth, even surface texture, which will facilitate effective bonding and a durable repair.
Surface Cleaning and Preparation
Proper surface cleaning and preparation are crucial steps in guaranteeing a strong bond between the old concrete and the new repair material. You can't just slap on a new layer of concrete without making certain the surface is clean and ready. If you don't, you risk a weak bond, which can lead to further damage and safety hazards.
To guarantee a strong bond, follow these surface preparation techniques:
-
Remove dirt and debris: Use a pressure washer or broom to remove any loose particles from the surface.
-
Apply a cleaning solution: Choose a solution that's suitable for the type of concrete you're working with, and follow the manufacturer's instructions.
-
Scrub the surface: Use a stiff-bristled brush or scrubber to remove any remaining dirt or grime.
- Rinse thoroughly: Make sure to remove any remaining cleaning solution and debris from the surface.
Bonding Agent and Adhesives
After preparing the surface, apply a bonding agent to confirm a strong, lasting bond between the old concrete and the new repair material. This vital step guarantees the repair material adheres properly, reducing the risk of delamination and extending the lifespan of the repair.
When selecting a bonding agent, consider the type of concrete, environmental conditions, and the repair material being used. You'll want to choose an agent that's compatible with these factors to achieve the best bonding.
Proper application of the bonding agent is just as important as selecting the right one. Follow the manufacturer's instructions for mixing and applying the agent, and make sure the surface is clean and dry before application. This will help prevent any defects or weaknesses in the bond.
Effective bonding techniques involve applying the agent in a thin, uniform layer, allowing it to set according to the instructions, and then applying the repair material. By doing so, you'll create a strong, durable bond that will withstand the test of time.
Adhesive applications can make or break a concrete repair, so it's important to get it right.
Finishing and Smoothening Tools
Once the repair material has been applied, finishing and smoothening tools come into play to refine the surface texture and achieve a uniform appearance.
As you work on the concrete repair, these tools are essential to guarantee a smooth, even finish that blends seamlessly with the surrounding area.
When it comes to finishing techniques, you'll want to utilize the right tools for the job. Here are some essential smoothening methods to master:
-
Tamping tools: Used to remove excess material and achieve a uniform surface level.
-
Floats: Designed to smooth out the surface, removing any imperfections or air pockets.
-
Trowels: Ideal for applying and smoothening small areas of repair material.
- Power trowels: For larger areas, these tools provide a high-powered, efficient smoothening solution.
Frequently Asked Questions
Can I Use Concrete Repair Tools on Freshly Poured Concrete?
When working with fresh concrete, you should avoid using concrete repair tools immediately after pouring.
The curing process is critical, and introducing repair tools too soon can disrupt it.
Wait until the concrete has reached the initial set, usually within 24 to 48 hours, depending on the mix and environmental conditions.
Only then can you safely use repair tools to address any defects or issues, ensuring a strong and durable final product.
Do I Need Special Training to Use Concrete Repair Tools?
You might think that using concrete repair tools requires extensive training, but that's not entirely true.
While it's important to understand the basics of concrete repair, you don't need special training to use these tools.
However, you do need to take safety precautions seriously and maintain your tools properly.
Familiarize yourself with the tool's instructions, and always wear protective gear.
Regular tool maintenance is also vital to guarantee peak performance and prevent accidents.
Are Concrete Repair Tools Suitable for DIY Projects or Only Professionals?
When tackling DIY projects, you'll want to know if concrete repair tools are suitable for your level of expertise. The answer is, it depends on the tool selection.
While some tools, like epoxy injectors, are better suited for professionals, others, like patching compounds, are perfect for DIYers.
You'll need to assess your skills and the project's complexity to determine which tools are right for you.
Always prioritize safety and follow manufacturer instructions to guarantee a successful repair.
How Long Does It Take to See Results From Concrete Repair?
When you're tackling a concrete repair project, you're probably wondering how long it'll take to see results. The answer depends on the type of repair and materials used.
Generally, you can expect to see initial results within 24 to 48 hours, with full cure times ranging from a few days to several weeks.
Keep in mind that proper curing and drying are essential for long-term durability, so be patient and follow the manufacturer's instructions to guarantee a successful repair.
Can I Reuse Concrete Repair Tools After a Project Is Completed?
You're wondering if you can reuse those trusty concrete repair tools after wrapping up a project. The answer lies in tool maintenance.
Properly clean and store your tools in a dry place, away from direct sunlight, to extend their lifespan.
For project storage, consider labeling and organizing your tools by type, making it easier to access what you need for the next job.
Conclusion
As you wrap up your concrete repair project, you're just one misstep away from disaster. One overlooked crack, one uneven surface, and your hard work crumbles - literally.
But with these concrete repair tools in your arsenal, you'll be ready to tackle even the toughest challenges.
Your project's fate hangs in the balance - will you emerge victorious, or will it all come crashing down?
Related Posts
-
5 Tools Needed for Quick Fix Concrete Mixing
You'll need five essential tools to tackle a quick fix concrete mixing project efficiently. First, you'll require a s...
-
What Tools Do You Need for Concrete Flooring
You'll need a thorough arsenal of specialized tools to achieve a high-quality, professional-looking concrete floor, i...
-
Top Tools for Revamping Old Concrete Floors
You'll need a range of tools to revamp your old concrete floor, starting with epoxy, acrylic, or polyurethane paint, ...


