
What's the Best Timeline for Buying Concrete Tools
You should plan to purchase concrete tools at least 2-3 weeks before your project's start date to guarantee a seamless workflow, allowing for delivery, inspection, and testing of your equipment without delaying your project's progress. This timeline enables you to assess your project's scope and complexity, identify critical equipment needs, and stagger tool arrivals to avoid on-site congestion. By prioritizing your tool procurement, you'll avoid last-minute scrambles and guarantee your project stays on track. Now that you have a solid foundation for your tool-buying timeline, you're ready to dive deeper into the specifics of planning and budgeting for your concrete project.
Key Takeaways
• Schedule concrete tool delivery 2-3 weeks before project start to ensure timely arrival and site readiness.
• Research and budget for tools during the pre-construction planning phase to finalize selection and procurement.
• Prioritize critical equipment and stagger tool arrivals to avoid on-site congestion and accidents.
• Plan for tool maintenance time before using new equipment to prevent delays and issues.
• Track order status in real-time to prevent delays and ensure seamless project progression.
Pre-Construction Planning Phase
During the pre-construction planning phase, you'll identify the specific concrete tools and equipment required for your project, guaranteeing you're adequately prepared for the tasks ahead. This phase is vital in determining the tool selection criteria, which will ultimately impact the success of your project.
You'll need to assess the project's scope, complexity, and timeline to determine the necessary tools and equipment. Consider factors such as the type of concrete, the size of the area, and the desired finish to make informed decisions.
As you finalize your tool selection, you may need to make project timeline adjustments to accommodate the procurement and delivery of the necessary equipment. This could involve revising your project schedule to guarantee that all tools and equipment are available when needed.
Site Preparation and Cleanup
With your concrete tools and equipment in place, you'll now turn your attention to preparing the site, clearing any debris, and guaranteeing a clean slate for your project. This phase is critical to the success of your concrete project, as it sets the foundation for a safe and efficient workflow.
Here are the essential tasks to focus on during site preparation and cleanup:
-
Clear the area: Remove any obstacles, vegetation, or existing structures that may interfere with your project.
-
Remove debris: Dispose of any hazardous materials, trash, or construction waste that could pose a safety risk or compromise the quality of your concrete work.
-
Grading and leveling: Ascertain the site is level, compact, and even, creating a stable base for your concrete pour.
- Clean and prepare the substrate: Thoroughly clean the surface to prevent any contaminants or defects that could affect the bond between the concrete and the substrate.
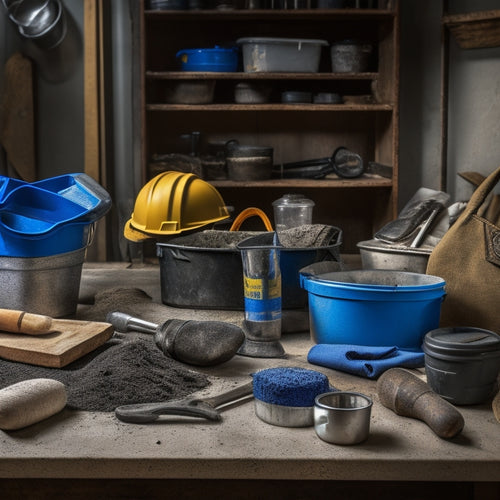
Tool Research and Budgeting
You'll need to research and select the right concrete tools and equipment for your project, considering factors like quality, durability, and cost to establish a realistic budget. This phase is essential in ensuring you have the necessary tools to complete your project efficiently and safely.
To make informed decisions, consider the following tool selection strategies and budget allocation tips:
| Tool Category | Selection Strategy | Budget Allocation Tip |
|---|---|---|
| Hand Tools | Prioritize ergonomics and grip comfort | Allocate 20-30% of budget |
| Power Tools | Consider cordless options for convenience | Allocate 40-50% of budget |
| Safety Gear | Choose gear that meets industry standards | Allocate 10-20% of budget |
| Miscellaneous | Invest in tool storage and maintenance | Allocate 10-20% of budget |
Ordering and Delivery Schedule
Now that you've finalized your tool choices and budget, it's time to turn your attention to ordering and delivery.
You'll need to plan delivery windows and schedule tool arrivals to guarantee a smooth workflow.
Planning Delivery Windows
Two to three weeks prior to your project's start date, schedule your concrete tool delivery to secure timely arrival and minimize delays. This allows you to plan for potential hiccups and guarantees you have the necessary tools to complete your project on schedule.
When planning your delivery window, consider the following:
-
Delivery expectations: Clearly communicate with your supplier about your project timeline and delivery requirements.
-
Contingency plans: Identify potential risks that could impact delivery, such as weather or supplier delays, and have a plan B in place.
-
Project dependencies: Confirm that your delivery schedule aligns with other project dependencies, such as labor and materials.
- Site readiness: Confirm that your site is ready to receive deliveries, with adequate storage and access for tools and materials.
Scheduling Tool Arrivals
With your delivery window planned, it's time to create a detailed ordering and delivery schedule to guarantee all necessary concrete tools arrive at your site in a logical and efficient sequence.
This schedule should prioritize tools based on your project's specific needs, making certain that critical equipment arrives first. Consider your supply chain and potential bottlenecks that could delay deliveries. By staggering arrivals, you can avoid congestion on-site and reduce the risk of accidents.
As you schedule tool arrivals, don't forget to factor in tool maintenance. You'll want to allow time for inspection and maintenance before putting new tools into use. This will help prevent equipment failures and make sure your team is working safely and efficiently.
A well-planned ordering and delivery schedule will also help you identify potential issues before they become major problems, giving you time to adjust your plan as needed. By taking a proactive approach, you can minimize delays and make certain your project stays on track.
Tracking Order Status
You'll need to establish a system for tracking order status to guarantee that all tools arrive on schedule and in the correct order, allowing you to quickly identify and address any potential delays or issues. This system should provide real-time updates on the status of your orders, enabling you to stay informed and take proactive measures if needed.
To secure seamless order tracking, consider the following:
-
Set up shipping notifications: Receive automatic updates on the status of your shipments, including expected delivery dates and any changes to the delivery schedule.
-
Designate a central tracking hub: Choose a single platform or tool to monitor all your orders, making it easier to access and analyze information.
-
Establish a communication plan: Define how you'll communicate with your team and suppliers regarding order status, ensuring everyone is on the same page.
- Regularly review and update your system: Assess your order tracking process regularly to identify areas for improvement and implement changes as needed.
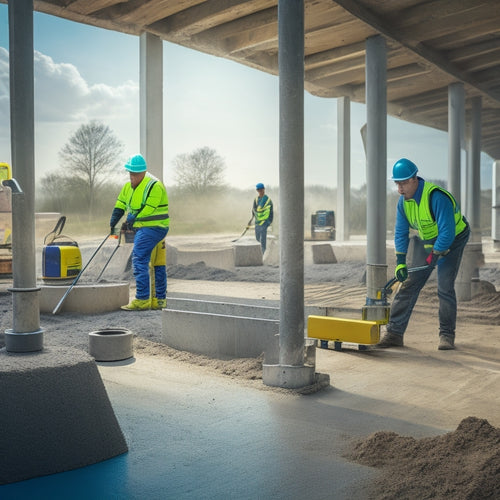
Foundation Work Begins
As you begin foundation work, you'll need to focus on three vital areas: site preparation essentials, concrete slab requirements, and excavation safety checks.
You're about to lay the groundwork for a solid structure, and it's essential to get these elements right.
Site Preparation Essentials
Before laying the foundation, thoroughly clear the site of debris, vegetation, and obstructions to secure a stable and level surface for concrete work. This vital step guarantees your project starts on a solid footing, literally.
To achieve this, you'll need to:
-
Conduct a thorough site assessment: Walk the site to identify potential hazards, such as underground utilities, unstable soil, or environmental concerns.
-
Perform a soil analysis: Test the soil's composition, density, and moisture levels to determine its load-bearing capacity and potential settlement issues.
-
Remove all debris and obstructions: Clear the site of rocks, trees, and other obstacles that could interfere with your foundation work or compromise the structural integrity of your project.
- Grading and compact the soil: Confirm the soil is even, compacted, and ready for concrete pouring.
Concrete Slab Requirements
With the site prepared, turning your attention to concrete slab requirements marks the beginning of foundation work, where a structurally sound base is essential to supporting the weight of your project.
As you design your concrete slab, you'll need to take into account two critical factors: slab thickness and load capacity.
The slab thickness will depend on the intended use of your project, as well as the soil conditions and local building codes. A thicker slab will provide greater strength and durability, but it will also increase the cost and weight of the concrete.
You'll also need to determine the load capacity required for your project. This involves calculating the maximum weight that the slab will need to support, including the weight of the building, occupants, and any equipment or materials.
A slab with sufficient load capacity will guarantee that your project remains safe and stable over time. By carefully taking into account these factors, you can create a concrete slab that provides a solid foundation for your project and meets all relevant safety standards.
Excavation Safety Checks
You're now ready to break ground, literally, and begin foundation work, starting with excavation safety checks to confirm a secure and stable environment for your project's concrete slab.
This critical step guarantees that you avoid common excavation hazards that can put your team and project at risk.
Before you start digging, make sure to:
-
Conduct a site survey to identify potential hazards such as underground utilities, nearby water sources, and unstable soil conditions.
-
Wear proper safety gear, including hard hats, safety glasses, gloves, and steel-toed boots to protect yourself and your team from falling objects and other hazards.
-
Check for unstable soil and take necessary measures to prevent soil collapse or landslides.
- Establish a safe exit route in case of an emergency, ensuring that you and your team can quickly evacuate the site.
Concrete Mixing and Pouring
Mixing and pouring concrete requires precision and attention to detail to achieve the desired strength, consistency, and finish. You'll need to select the right mixing techniques for your project, considering factors like the type of concrete, aggregate size, and environmental conditions. For example, you might use a slow-mixing technique for high-strength concrete or a rapid-mixing technique for fast-setting concrete.
When it comes to pouring methods, you'll need to guarantee a smooth, consistent flow to avoid defects like honeycombing or segregation. You can use techniques like screeding, tamping, or finishing to achieve the desired finish. It's also essential to maintain the correct temperature, humidity, and vibration levels during pouring to prevent defects.
Don't forget to wear personal protective equipment, such as gloves, safety glasses, and a dust mask, to protect yourself from the hazards of concrete mixing and pouring.
Tool Calibration and Testing
Before pouring concrete, calibrate and test your tools to confirm accurate measurements and ideal performance, as even slight deviations can compromise the entire project. You can't afford to skip this essential step, as it directly impacts the quality and safety of your construction.
Here are some important calibration and testing considerations:
-
Choose the right calibration methods: Select methods that align with your tools and project requirements. This may include laser leveling, optical plummet, or precision spirit leveling.
-
Establish a regular testing frequency: Regular testing confirms your tools remain accurate and reliable. Schedule testing at least once a month, or as recommended by the manufacturer.
-
Test in various environmental conditions: Tools can behave differently in varying temperatures, humidity, or light conditions. Test your tools in different environments to confirm they perform consistently.
- Keep records of calibration and testing: Maintain a log of your calibration and testing activities, including the results and any adjustments made. This helps you track your tools' performance and identify potential issues early on.
Project Midpoint Assessment
As you've calibrated and tested your tools, now it's time to evaluate the project's progress, identifying any discrepancies or areas for improvement at the midpoint to guarantee the final product meets your specifications.
This assessment is vital in ensuring you're on track to achieve your project goals. Take a closer look at your work so far, comparing it to your initial plans and expectations. Identify any deviations or potential issues that might impact the quality or safety of the final product.
Use this opportunity to perform routine tool maintenance, checking for wear and tear, and addressing any necessary repairs or replacements. This will prevent unexpected downtime or accidents that could compromise the project's success.
By evaluating your progress and maintaining your tools, you'll be able to adjust your strategy as needed, ensuring you stay on schedule and within budget.
Finishing Work and Touch-Ups
As you enter the final stages of your concrete project, you're likely focused on wrapping up the finishing work and touch-ups.
You'll need to apply a final coat, ensuring a smooth, even finish, and pay close attention to edges and corners where imperfections can be particularly noticeable.
Meanwhile, don't forget to tackle any last-minute repairs to guarantee a professional-looking outcome.
Final Coat Application
You apply the final coat of concrete sealer or finisher to achieve a uniform, high-gloss finish and to protect the surface from stains and damage. This is a critical step in the concrete finishing process, as it enhances the appearance and durability of the concrete.
To guarantee a successful final coat application, you must follow proper final coat techniques and surface preparation guidelines.
Here are some essential tips to keep in mind:
-
Clean the surface: Remove any dirt, dust, or debris that may interfere with the sealer or finisher's adhesion.
-
Check the weather: Apply the final coat in ideal weather conditions, avoiding extreme temperatures, wind, or humidity.
-
Use the right tool: Choose a high-quality roller or sprayer designed for concrete sealers or finishers.
- Follow the manufacturer's instructions: Read and follow the product's instructions for application rates, drying times, and recommended coats.
Edges and Corners
With the final coat applied, focus shifts to edges and corners, where meticulous finishing work and touch-ups are essential to achieving a professional, seamless appearance.
You'll need to verify that all edges are properly finished to prevent chipping or cracking. This involves using specialized tools, such as edge trowels or edgers, to create a smooth, rounded edge that blends seamlessly with the surrounding concrete.
Corner reinforcement is also critical, as these areas are prone to damage and wear. You'll want to use corner beads or other reinforcement materials to add strength and durability to these high-stress areas. When applying these materials, make sure to follow the manufacturer's instructions carefully to verify proper adhesion and performance.
As you work on edges and corners, remember to prioritize safety above all else. Wear protective gear, including gloves, safety glasses, and a dust mask, to prevent injury from flying debris or airborne particles.
Last-Minute Repairs
Final inspections often reveal minor imperfections that require last-minute repairs, which can make all the difference in achieving a flawless, professional-grade finish. As you're wrapping up your concrete project, it's crucial to allocate time for these unexpected touch-ups.
Remember, it's better to address these issues now than to risk compromising the integrity of your work.
Here are some common last-minute repairs you may need to make:
-
Filling small cracks: Use a quick-drying concrete patching compound to fill in any hairline cracks that have appeared.
-
Smoothing out bumps: Use a trowel or float to smooth out any uneven areas, ensuring a uniform finish.
-
Touching up stains: Address any stains or discolorations by applying a concrete stain remover or sealant.
- Emergency repairs: Be prepared to make quick fixes for unexpected issues, such as a burst pipe or electrical issue, to prevent further damage.
Final Walk-Through and Inspection
Concrete finishing tools are meticulously examined during this crucial stage to guarantee every aspect of the project meets the specified standards and quality expectations. As you conduct the final walk-through and inspection, you're ensuring that your concrete tools are in top condition, ready for the next project.
You'll want to scrutinize every tool, checking for any signs of wear or damage. This is your last chance to catch any defects or issues that could compromise the quality of your work or, more importantly, your safety. You're not just checking for functionality; you're ensuring that your tools meet the highest safety standards.
As part of your quality assurance process, you should also review your maintenance and repair records. Have you been keeping up with regular maintenance? Are there any tools that need to be replaced or repaired?
Frequently Asked Questions
Can I Rent Concrete Tools Instead of Buying Them?
You're considering renting concrete tools instead of buying them, which is a smart move. When you rent, you'll save on upfront costs and only pay for the tools when you need them.
Conduct a cost comparison to see the benefits of renting versus buying.
Rental benefits include reduced storage needs, access to specialized tools, and fewer maintenance worries.
Plus, rentals often come with safety training and support, giving you peace of mind on the job site.
How Often Should I Replace Worn-Out Concrete Tools?
You should replace worn-out concrete tools regularly to guarantee safety and efficiency on the job site.
Pay attention to tool maintenance and watch for replacement indicators like excessive wear, corrosion, or damage.
If you notice any of these signs, it's time to swap out the tool.
Don't risk your safety or the quality of your work by pushing a tool beyond its limits.
Replace it promptly to maintain a safe and productive work environment.
Are There Any Eco-Friendly Concrete Tool Options Available?
As you're replacing worn-out concrete tools, it's likely you're thinking about the environmental impact.
Coincidentally, many manufacturers are now shifting towards sustainable materials and tool recycling. You'll find eco-friendly concrete tool options made from recycled steel, bamboo, or bioplastics.
Look for tools with minimal packaging, designed for longevity, and recyclable at the end of their life cycle.
Can I Use Concrete Tools for Other Masonry Projects?
You're wondering if you can use concrete tools for other masonry projects. The answer is yes, but with caution.
Many concrete tools have alternative uses, such as trowels for applying adhesive or finishing coats. However, verify tool compatibility before switching between materials.
Always check the manufacturer's guidelines to avoid damaging tools or compromising safety.
Do Concrete Tools Come With a Manufacturer's Warranty?
When you invest in concrete tools, you're not just buying equipment - you're buying peace of mind.
Reputable manufacturers stand behind their products, offering warranties that safeguard your investment. Typically, these warranties cover defects in materials and workmanship, ensuring you're protected in case your tool fails.
Conclusion
As you near the end of your project, take a step back and assess the role concrete tools played in its success.
Did having the right tools at the right time make all the difference?
Can you imagine the delays and costs if you'd waited until the last minute to order that critical concrete mixer or trowel?
By following this timeline, you guaranteed your project stayed on track, and now you're enjoying the fruits of your labor - a reflection of the importance of careful planning and timely tool acquisition.
Related Posts
-
5 Tools Needed for Quick Fix Concrete Mixing
You'll need five essential tools to tackle a quick fix concrete mixing project efficiently. First, you'll require a s...
-
Ergonomic Concrete Tools for Tight Spaces
When you're tackling concrete work in tight spaces, ergonomic tools are your best bet for comfort and efficiency. The...
-
What Tools Ensure Precise Concrete Leveling Results
You need a range of specialized tools to achieve precise concrete leveling results. Laser leveling instruments provid...


