What Tools Do I Need for Laying Concrete Blocks
Share
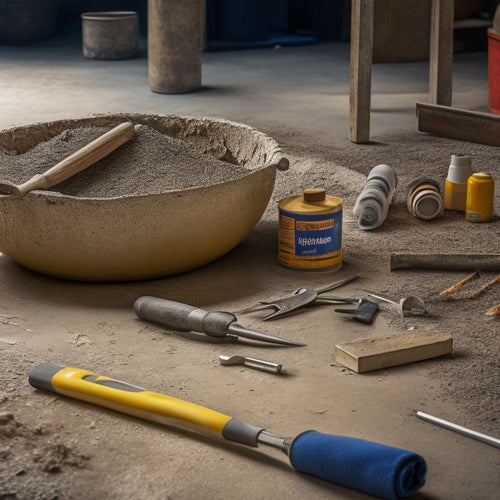
When laying concrete blocks, you'll need a range of essential tools to guarantee a successful project. Start with safety gear like hard hats, safety glasses, and dust masks, followed by measuring and marking tools such as spirit levels, string, and chalk lines. Mixing and pouring equipment, including buckets, mixing trowels, and wheelbarrows, are also vital. Additionally, you'll need laying and leveling tools, cutting and shaping tools, grouting and pointing tools, and cleaning and finishing tools. Finally, specialized block laying accessories like alignment gauges and corner clamps will help you achieve precision and accuracy. With these tools, you'll be well-equipped to tackle your project and achieve a durable, long-lasting structure. Now, it's time to dive deeper into the details to guarantee your project meets professional standards.
Key Takeaways
• Essential safety gear includes hard hats, safety glasses, dust masks, comfortable PPE, and gloves to prevent injuries.
• Measuring and marking tools like spirit levels, laser levels, and string and stakes ensure accurate block placement.
• Mixing and pouring equipment such as mixing buckets, mixing trowels, and wheelbarrows facilitate concrete preparation and transportation.
• Laying and leveling tools like tamping tools, spirit levels, and string lines guarantee a stable and even structure.
• Specialized tools for cutting, shaping, grouting, and pointing, as well as cleaning and finishing tools, are necessary for a professional-looking finish.
Essential Safety Gear
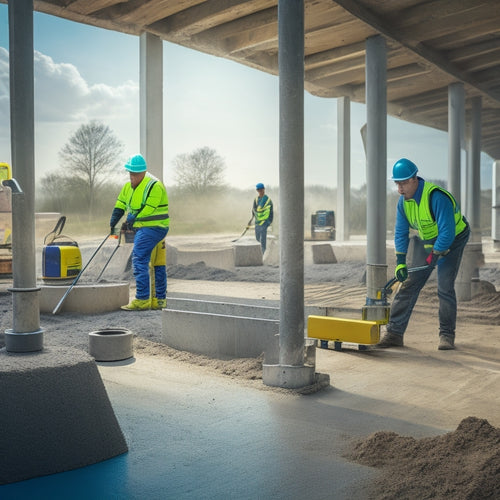
Wear personal protective equipment (PPE) like hard hats, safety glasses, and dust masks to shield yourself from falling objects, debris, and airborne particles when laying concrete blocks.
You'll be working with heavy materials and power tools, so it's vital to prioritize your safety. Hard hats will protect your head from falling objects, while safety glasses or goggles will safeguard your eyes from flying debris. Dust masks are essential for preventing the inhalation of dust and particles that can cause respiratory issues.
Make sure to choose PPE that fits comfortably and doesn't obstruct your vision or movement. You should also wear long-sleeved shirts, long pants, and closed-toe shoes to protect your skin from cuts and abrasions.
Don't forget to wear gloves to improve your grip and prevent blisters. By wearing the right safety gear, you'll be able to focus on the task at hand, confident that you're protected from potential hazards.
Measuring and Marking Tools
When laying concrete blocks, you'll need to verify your courses are level and aligned, and that's where measuring and marking tools come in.
You'll rely on these tools to take accurate measurements, assuring a structurally sound and visually appealing finished product.
Level and Alignment
You'll frequently use a combination of measuring and marking tools to guarantee level and alignment when laying concrete blocks, as even slight deviations can compromise the structural integrity of the entire project. This is essential for achieving block stability, as misaligned blocks can lead to structural weaknesses and even collapse.
To make certain of proper alignment, you'll rely on the following tools:
-
Spirit Level: This tool helps you determine if your blocks are perfectly horizontal or vertical, ensuring that your structure is plumb and level.
-
Laser Level: This device projects a level line or dot onto your work surface, allowing you to accurately transfer levels and align your blocks with precision.
-
String and Stakes: This simple yet effective technique involves stretching a string between stakes to create a straight line, guiding your block placement and ensuring alignment.
Accurate Measurements
Accurate measurements are critical in laying concrete blocks, and a suite of measuring and marking tools enables you to take precise block dimensions and mark their positions with confidence.
To achieve accurate measurements, you'll need precision tools that facilitate reliable measurement techniques. A 25-foot tape measure, for instance, allows you to measure large areas quickly and efficiently. A level and square guarantee that your blocks are properly aligned and plumb. A story pole, marked with the course heights, helps you maintain consistent vertical alignment.
Additionally, a chalk line and straightedge enable you to mark clean, straight lines on the footing or wall. When selecting measurement tools, look for high-quality, durable options that can withstand the demands of your project.
Mixing and Pouring Equipment
To guarantee a strong and durable concrete block structure, you need a reliable mixing and pouring equipment setup that can handle the demands of your project. This setup is essential for achieving the right consistency and strength in your concrete blocks.
When it comes to mixing, you'll need to master various mixing techniques to ascertain uniformity and consistency. This includes using the right mixing ratio, mixing speed, and mixing time.
Here are the essential mixing and pouring equipment you'll need:
-
Mixing Bucket or Drum: A sturdy, clean bucket or drum is necessary for mixing the concrete.
-
Mixing Trowel or Paddle: A mixing trowel or paddle is used to mix the concrete and achieve the right consistency.
-
Wheelbarrow or Mixing Cart: A wheelbarrow or mixing cart is necessary for transporting and pouring the mixed concrete into the block molds.
Laying and Leveling Tools
With your mixed concrete ready, lay the foundation for a sturdy structure by employing the right laying and leveling tools to guarantee precise block placement and alignment. This essential phase of block laying techniques demands attention to detail and the right equipment. Begin by preparing the surface, ensuring it's level, clean, and free of debris. Next, use a spirit level to verify the surface's evenness and a string line to guide your block placement.
| Tool | Purpose | Importance |
|---|---|---|
| Spirit Level | Verify surface evenness | High |
| String Line | Guide block placement | High |
| Tamping Tool | Compact and level blocks | Medium |
As you lay each block, use a tamping tool to compact and level it, ensuring a solid foundation. Remember, proper surface preparation and leveling are vital for a structurally sound building. By mastering these block laying techniques, you'll create a durable and long-lasting structure that serves its purpose.
Cutting and Shaping Tools
Cutting and shaping concrete blocks to fit around corners, curves, and other obstructions requires a set of specialized tools that enable you to make precise cuts and adjustments.
As you work on your project, you'll need to trim blocks to fit snugly around pipes, electrical outlets, and other obstacles.
To achieve professional-looking results, you'll need the following cutting and shaping tools:
-
Block cutter: A handheld or stationary device that allows you to score and snap blocks cleanly, making precise cuts with minimal waste.
-
Masonry saw: A specialized saw designed for cutting through concrete, brick, and other masonry materials, offering more control and accuracy than a traditional saw.
-
Chisel set: A set of sturdy, heat-treated chisels used to remove excess material, shape blocks, and make fine adjustments, ensuring a snug fit and smooth finish.
Mastering block cutting and shaping techniques takes practice, but with the right tools, you'll be able to tackle complex layouts and achieve a high-quality finish that meets your clients' expectations.
Grouting and Pointing Tools
You'll need a range of specialized tools to properly grout and point concrete blocks, guaranteeing a strong, durable, and visually appealing joint.
For grouting, you'll require a grout float, grout sponge, and grout bucket. The grout float helps spread and smooth out the grout, while the grout sponge is used to remove excess grout from the surface. The grout bucket is essential for mixing and transporting the grout.
When it comes to pointing, you'll need a pointing trowel, pointing gun, and joint rake. The pointing trowel is used to fill and smooth out the joints, while the pointing gun is ideal for filling small gaps and corners. The joint rake helps remove old or damaged grout from the joints, preparing them for new grout.
Mastering grouting techniques and pointing methods takes practice, but with the right tools, you'll be well on your way to achieving professional-looking results.
Remember to choose tools that fit comfortably in your hand and are suitable for the specific type of concrete blocks you're working with. By investing in these essential grouting and pointing tools, you'll guarantee a strong, durable, and visually appealing joint that will last for years to come.
Cleaning and Finishing Tools
When you're done laying concrete blocks, you'll need to focus on cleaning and finishing the job.
You'll use specialized tools to remove excess mortar from the blocks' surfaces and seal the joints to guarantee a professional-looking finish.
Remove Excess Mortar
Frequently, as you lay concrete blocks, excess mortar squeezes out between the joints, requiring immediate removal to guarantee a clean, professional finish. The key to effective removal lies in the mortar consistency and the techniques you employ.
To remove excess mortar, you'll need the following tools:
-
Joint scraper: A joint scraper is a must-have for removing excess mortar from between the joints. Its flat, wide blade allows for efficient scraping without damaging the surrounding blocks.
-
Mortar brush: A mortar brush is perfect for sweeping away loose mortar and debris from the joints. Its stiff bristles help to dislodge and remove excess material.
-
Wire brush: A wire brush is ideal for more stubborn mortar remnants. Its coarse bristles effectively scrub away hardened mortar, leaving the joints clean and ready for finishing.
Seal the Joints
With the excess mortar removed, your next step is to seal the joints, guaranteeing a strong bond between the concrete blocks and a clean, finished appearance.
To do this, you'll need a joint sealing tool, which helps to compress the sealant into the joint, assuring a tight seal. When selecting a sealant, consider the type of project and environmental conditions. For example, if you're working on an exterior project, choose a waterproofing product that can withstand weathering and erosion.
Apply the sealant using a consistent, even motion, taking care to fill the joint completely. Use a joint finishing tool to smooth out the sealant, feathering it out towards the edges.
Proper joint sealing techniques are essential to maintaining the structural integrity of your concrete block structure. By taking the time to properly seal the joints, you'll guarantee a strong, durable bond that will last for years to come.
Specialized Block Laying Accessories
You'll find that specialized block laying accessories, such as alignment tools and corner clamps, can greatly improve the accuracy and speed of your block laying process.
These tools are designed to help you master advanced block laying techniques and achieve professional-looking results. For instance, alignment tools guarantee that your blocks are properly aligned, while corner clamps secure the blocks in place, allowing you to focus on perfecting your mortar mixing methods.
Here are three essential specialized block laying accessories to take into account:
-
Block alignment gauges: These gauges guarantee that your blocks are perfectly aligned, both horizontally and vertically.
-
Corner clamps: These clamps secure the blocks in place, allowing you to focus on perfecting your mortar joints.
-
Leveling systems: These systems guarantee that your block walls are perfectly level, which is critical for structural integrity.
Frequently Asked Questions
Can I Lay Concrete Blocks in the Rain or During Freezing Temperatures?
When you're planning a block installation, it's essential to take into account the weather conditions.
You shouldn't lay concrete blocks in the rain or during freezing temperatures. Rain can cause the mortar to wash out, while freezing temps can prevent it from setting properly. Both scenarios can lead to a weak and unstable structure.
Instead, wait for dry, calm conditions with temperatures between 40°F and 90°F (4°C and 32°C) for best results.
How Do I Ensure the Blocks Fit Together Perfectly Without Gaps?
Imagine building a wall for a community center, where precision matters. To guarantee the blocks fit together perfectly without gaps, you'll need to master block alignment techniques.
Start by using a string line to guide your block placement, ensuring a straight and level course. Then, employ gap filling methods like buttering each block with mortar and tapping them into place with a trowel.
This attention to detail will yield a sturdy, professional-looking wall that serves the community with pride.
Do I Need to Cure the Concrete Blocks After Laying Them?
You'll need to cure the concrete blocks after laying them to guarantee strength and durability.
There are various curing methods, including spraying a curing compound, using a wet burlap, or applying a membrane.
It's essential to maintain ideal block moisture levels during the curing process, as excess moisture can lead to weaknesses.
You'll want to monitor the blocks' moisture levels and adjust your curing method accordingly to achieve a strong, long-lasting structure.
Can I Use Concrete Blocks for Building a Load-Bearing Wall?
As you commence building a load-bearing wall, remember that a strong foundation is like a sturdy anchor, holding everything in place.
When it comes to using concrete blocks, you'll need to guarantee they can handle the weight. Assess the load-bearing capacity of your block wall design, considering factors like block strength, mortar quality, and wall thickness.
With careful planning, your concrete block wall will stand strong, supporting the weight of your vision.
How Long Does It Take for Concrete Blocks to Fully Set and Harden?
When you lay concrete blocks, you'll want to know how long it takes for them to fully set and harden.
The setting time typically ranges from 15 minutes to an hour, depending on the mix and environmental conditions.
However, the curing process takes longer, usually 24 to 48 hours, during which the concrete reaches its maximum strength.
You should allow the blocks to cure completely before applying heavy loads or finishing touches.
Conclusion
You've got the blocks, now it's time to get to work! Laying concrete blocks requires precision and the right tools.
With the essentials in hand, you'll be building like a pro in no time. Think of it like baking a cake - you need the right ingredients and tools to get the perfect result.
With these tools, you'll be constructing a solid foundation that'll stand the test of time.
Related Posts
-

Top Tools for Repairing Cracked Concrete Surfaces
When tackling a cracked concrete surface repair, you'll need the right tools to guarantee a durable fix. Start with e...
-

Top Tools for Revamping Old Concrete Floors
You'll need a range of tools to revamp your old concrete floor, starting with epoxy, acrylic, or polyurethane paint, ...
-

What Tools Ensure Precise Concrete Leveling Results
You need a range of specialized tools to achieve precise concrete leveling results. Laser leveling instruments provid...


