What Tools Do I Need for Concrete Repairs
Share
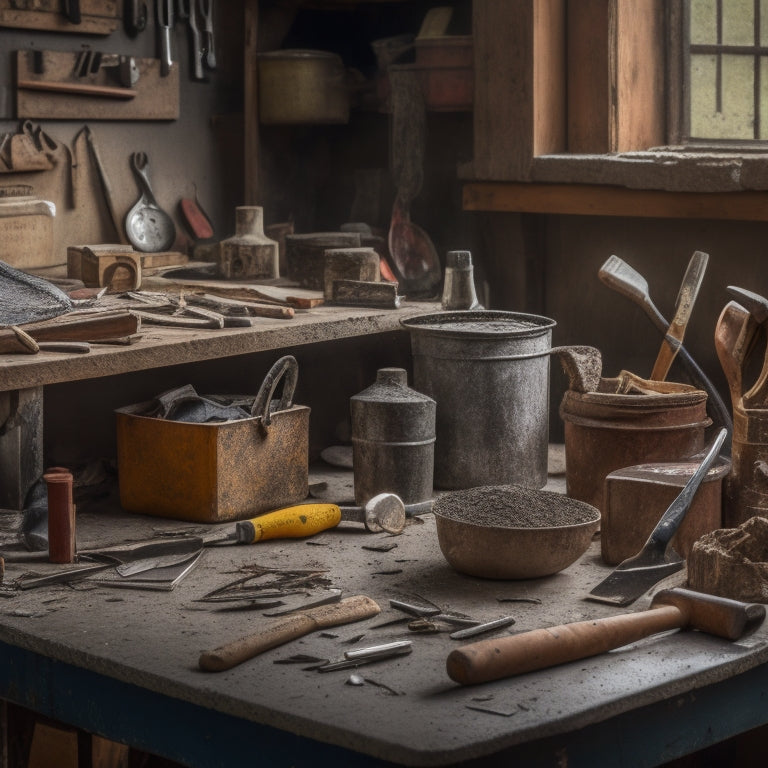
You'll need a thorough set of tools to guarantee a successful concrete repair. Start with essential safety gear, including hard hats, gloves, and respirators, along with mixing and measuring tools like buckets, sticks, and digital scales. Surface preparation equipment, such as wire brushes, scrapers, and pressure washers, is also necessary. Additionally, you'll require patching and filling tools, trowels, and finishing tools, as well as power tools for drilling and specialized repair accessories like injection ports and surface sealers. As you gather these tools, you'll be well on your way to tackling your concrete repair project, and understanding the intricacies of each tool will ultimately lead to a job well done.
Key Takeaways
- Essential safety gear, including hard hats and respirators, is required to protect yourself from hazards like silica dust and trip hazards.
- Mixing and measuring tools, such as buckets and digital scales, are necessary for accurately combining concrete repair ingredients.
- Surface preparation equipment, including wire brushes and pressure washers, is needed to remove debris and contaminants for a strong bond.
- Patching and filling tools, like trowels and joint knives, are required for applying and shaping repair compounds to specific areas.
- Specialized repair accessories, such as injection ports and crack repair tubes, can be used to enhance the precision and effectiveness of concrete repairs.
Essential Safety Gear Checklist
When tackling concrete repairs, you'll likely encounter hazardous materials, heavy equipment, and physically demanding tasks, making safety a top priority. To guarantee your well-being, it's vital to have the right personal protective equipment (PPE) and undergo safety training.
Your essential safety gear checklist should include hard hats, safety glasses, earplugs, dust masks, respirators, gloves, and steel-toed boots. Don't forget to inspect your equipment regularly to verify it's in good condition. Additionally, invest in a first aid kit and keep it on-site.
Safety training is equally important. Familiarize yourself with the hazards associated with concrete repairs, such as silica dust exposure, trip hazards, and equipment operation.
Learn about emergency procedures, including first aid and fire extinguisher use. Remember, safety training isn't a one-time event; it's an ongoing process that requires regular refreshers and updates.
Mixing and Measuring Tools
With your safety gear in place, you can focus on the task at hand - preparing the concrete for repair. Mixing and measuring tools are crucial for achieving the right consistency and strength in your repair material.
You'll need a mixing bucket or wheelbarrow to combine the concrete ingredients. A mixing stick or trowel is required for thorough mixing, and a mixing paddle can be used for larger batches. Measuring accuracy is critical, so invest in a digital scale or measuring cups to guarantee precise ratios of cement, sand, and water.
When it comes to mixing techniques, it's important to follow the manufacturer's instructions and mix in a consistent, thorough manner. Overmixing can lead to a weak or brittle repair, while under-mixing can result in a porous or uneven finish.
Surface Preparation Equipment
Three key tools are essential for surface preparation: a wire brush, a scraper, and a pressure washer. These tools enable you to properly assess the substrate and prepare it for repair. A wire brush helps remove loose debris and old coatings, while a scraper is used to remove thick, stubborn material. A pressure washer is necessary for cleaning the surface and removing dirt, grime, and oil.
| Tool | Purpose |
|---|---|
| Wire Brush | Remove loose debris and old coatings |
| Scraper | Remove thick, stubborn material |
| Pressure Washer | Clean the surface and remove dirt, grime, and oil |
When using these tools, it's vital to employ proper surface preparation techniques to guarantee a strong bond between the old and new concrete. This includes conducting a thorough substrate assessment to identify any cracks, voids, or other defects that need to be addressed before applying a repair material. By using the right tools and techniques, you can guarantee a successful repair that will last for years to come.
Patching and Filling Tools
Now that the surface is prepared, you're ready to move on to the next step: patching and filling. This stage requires specific tools to guarantee a strong and durable repair.
You'll need a variety of patching and filling tools, including trowels, putty knives, and joint knives. These tools allow you to apply and shape repair compounds to fill cracks, holes, and other defects.
When selecting a repair compound, choose one that's suitable for your specific repair. Some compounds are designed for vertical or overhead applications, while others are better suited for horizontal repairs.
Consider the surface bonding requirements and verify the compound you choose is compatible with the substrate.
You may also need a mixing stick or paddle to prepare the repair compound. A mixing bucket or container is also essential for mixing and applying the compound.
With the right patching and filling tools, you'll be able to create a strong, long-lasting repair that restores the integrity of the concrete surface.
Sealing and Coating Tools
When it comes to sealing and coating concrete, you'll need the right tools to secure a successful repair.
You'll have to decide on the best sealant application method for your project, whether it's brushing, rolling, or spraying.
To guarantee a uniform finish, you'll also need to measure the coating thickness accurately, which is where coating thickness gauges come into play.
Sealant Application Methods
Sealant application methods play a critical role in guaranteeing the longevity and effectiveness of concrete repairs. You'll need to choose the right sealant type for your specific project, as different sealants are suited for various substrates and environmental conditions. For instance, epoxy-based sealants are ideal for high-traffic areas, while acrylic-based sealants are better suited for exterior applications.
When it comes to application techniques, you'll need to decide between brushing, rolling, or spraying the sealant onto the concrete surface. Brushing is a good option for small, intricate areas, while rolling is better suited for larger surfaces. Spraying is often used for large-scale projects or when working with low-viscosity sealants.
Regardless of the application technique you choose, it's crucial to verify the sealant is applied evenly and consistently. You may need to use specialized tools, such as notched squeegees or lambswool applicators, to achieve the desired finish.
Additionally, make sure to follow the manufacturer's instructions for application rates, drying times, and any necessary surface preparation. By selecting the right sealant type and application technique, you'll be able to achieve a durable, long-lasting seal that protects your concrete repair from environmental stressors.
Coating Thickness Gauges
Guaranteeing the correct coating thickness is critical to achieving a successful seal or coating application, as it directly impacts the performance and longevity of the repair.
You'll need a reliable coating thickness gauge to measure the thickness of various coating types, including epoxies, polyurethanes, and acrylics.
When selecting a gauge, consider the specific application techniques you'll be using, such as spraying, brushing, or rolling. Different gauges are designed for specific coating types and application methods.
For instance, a gauge with a high measurement range may be necessary for thick, high-build coatings, while a gauge with high precision may be required for thin, decorative coatings.
Digital coating thickness gauges offer accurate and fast measurements, often with a high degree of precision (± 0.1 mils or better).
Some gauges also feature advanced functionality, such as memory storage, statistical analysis, and USB connectivity for data transfer.
Cleaning and Etching Tools
You'll need to start by removing loose debris from the concrete surface using a stiff-bristled broom, wire brush, or scraper to guarantee a clean slate for repair.
Next, you'll apply an etching solution to open up the concrete's pores and create a strong bond between the old and new concrete.
Remove Loose Debris
Removing loose debris from the concrete surface is a critical step in preparing it for repair, as it prevents old material from interfering with the bonding process of new materials. This guarantees a strong and durable bond between the old and new concrete, which is essential for a successful repair.
You'll need the right tools for effective debris removal and surface cleaning. Here's a breakdown of the essential tools you'll need:
| Tool | Description |
|---|---|
| Broom or blower | Removes loose debris, such as dirt, dust, and leaves, from the surface |
| Wire brush | Scrubs the surface to remove stubborn dirt and old material |
| Pressure washer | Cleans the surface with high-pressure water to remove dirt and grime |
| Vacuum or shop vac | Removes water and debris from the surface, leaving it clean and dry |
Apply Etching Solution
With the surface clean and dry, it's time to apply an etching solution to create a strong bond between the old concrete and the new repair material. This step is essential, as it guarantees the new material adheres properly to the existing concrete.
You'll need to choose an etching solution suitable for your specific repair job. Some common types include muriatic acid, phosphoric acid, and sodium hydroxide. Always follow the manufacturer's instructions and take necessary safety precautions when working with these chemicals.
To achieve ideal surface effects, use the following etching techniques:
-
Uniform application: Apply the etching solution evenly across the surface, avoiding puddles or uneven coverage.
-
Timed exposure: Allow the solution to sit on the surface for the recommended time, usually 10-15 minutes, to guarantee proper etching.
-
Thorough rinsing: Rinse the surface thoroughly with clean water to remove any residue and prevent further etching.
Trowels and Finishing Tools
Trowels and finishing tools are essential for achieving a smooth, even finish on concrete repairs. You'll need a range of trowels in various sizes and shapes to suit different tasks, from applying and spreading concrete to creating sharp edges and corners.
Mastering trowel techniques takes practice, but it's vital for achieving professional-looking results. Start with a V-notch trowel for applying and spreading concrete, then switch to a finishing trowel for smoothing and flattening the surface.
When it comes to finishing touches, you'll need a set of specialized tools. An edger is used to create sharp, clean edges along walls, curbs, and other boundaries.
A jointer or joint trowel helps to smooth and merge adjacent concrete surfaces. A float is used to remove excess water and air bubbles, leaving a smooth, even finish.
Power Tools for Drilling
Drill bits and drivers are the dynamic duo of power tools for drilling, allowing you to efficiently penetrate and prepare concrete for repairs.
When selecting a drill type, consider the task at hand and the type of concrete you're working with. For example, hammer drills are ideal for drilling into masonry, while rotary hammers are better suited for drilling into hard, dense concrete.
When it comes to bit selection, you'll want to choose the right type for the job. Here are three essential drill bits to have in your arsenal:
-
Masonry bits: These bits are designed for drilling into brick, block, and concrete. They're typically made of tungsten carbide and have a specialized tip that helps to reduce wear and tear.
-
Carbide-tipped bits: These bits are ideal for drilling into hard, abrasive materials like concrete. The carbide tip helps to extend the life of the bit and reduce the risk of damage.
-
Diamond-coated bits: These bits are perfect for drilling into extremely hard or abrasive materials. The diamond coating helps to reduce heat buildup and increase the bit's lifespan.
Specialized Repair Accessories
You've got the right drill bits, but now it's time to focus on the specialized repair accessories that'll help you get the job done efficiently. These accessories can make a significant difference in the quality and speed of your concrete repairs. When it comes to repairing cracks, you'll need accessory options like injection ports, crack repair tubes, and surface sealers. For more extensive repairs, you may require accessories like mixing paddles, finishing trowels, and edging tools.
| Accessory | Repair Technique | Purpose |
|---|---|---|
| Injection Ports | Crack injection | Deliver epoxy or polyurethane into cracks |
| Mixing Paddles | Mixing and blending | Combine materials for a strong bond |
| Finishing Trowels | Finishing and smoothing | Achieve a smooth, even surface |
Frequently Asked Questions
Can I Use Regular Cement for Concrete Repairs?
You shouldn't use regular cement for concrete repairs, as it lacks the necessary strength and durability; instead, opt for a specialized repair mix with precise mixing ratios, tailored to your specific repair techniques and requirements.
How Do I Know When to Replace My Tools?
You've heard the theory that tools last forever with proper maintenance, but is it true? In reality, you'll know it's time to replace your tools when you notice consistent repair indicators, such as excessive wear, corrosion, or decreased performance, making tool maintenance an essential task.
Can I Repair Concrete in Cold Weather?
When you're repairing concrete in cold weather, you'll need to take into account the slower curing process, ensuring proper temperature control and using accelerators or fast-setting mixes to achieve ideal strength, while also taking necessary precautions to prevent damage from freezing temperatures.
Do I Need a Permit for Concrete Repairs?
You'll need to determine if a permit is required for your concrete repairs by researching local regulations and evaluating your project's scope, as permits are typically required for larger, more complex repairs or those affecting structural integrity.
How Long Does Concrete Repair Typically Take?
You'll carefully calculate concrete repair duration, considering project complexity, as you meticulously manage multiple tasks, from prep to patching, to achieve a timely, high-quality fix, usually taking anywhere from a few hours to several days, depending on the scope.
Conclusion
You've made it this far, but don't think you're ready to tackle that concrete repair just yet. Remember, a successful repair requires more than just the right tools - it demands attention to detail, patience, and practice. As you gather your arsenal of equipment, don't forget the most critical tool of all: experience. Without it, even the best tools can't guarantee a lasting fix. So, take your time, learn from your mistakes, and only then will you be ready to conquer that concrete repair like a pro.
Related Posts
-

Top Tools for Mixing Concrete at Home
When mixing concrete at home, you'll need a range of tools to guarantee a successful operation. Start with essential ...
-

What Tools Do I Need for Concrete Block Laying
You'll need a thorough set of tools to guarantee accurate, efficient, and professional concrete block laying. Essenti...
-

10 Best Tools for Sealed Concrete Finishing Success
When it comes to sealed concrete finishing success, you need a robust arsenal of specialized tools. Start with essent...


