What Are the Essential Tools for Concrete Plastering
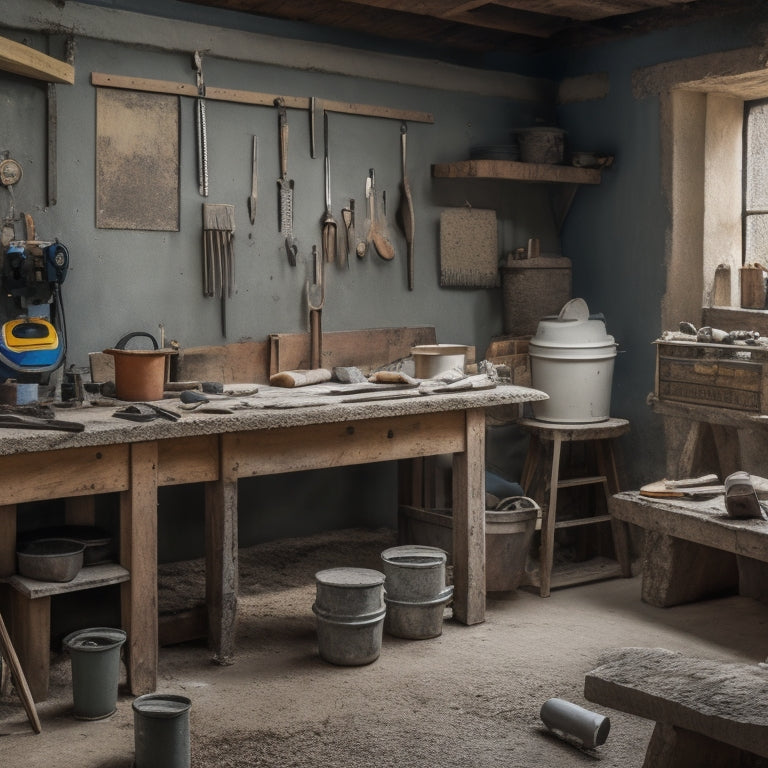
You'll need a solid arsenal of essential tools to tackle concrete plastering projects efficiently and effectively, with each tool serving a unique purpose in the process. Your toolkit should include a hawk and trowel for carrying and applying plaster, scrapers and edgers for refining surfaces and creating clean lines, floats and darbies for achieving a smooth finish, and mixing and applying equipment for efficient plaster application. Additionally, measuring and marking tools, finishing tools, safety gear, and cleanup and maintenance tools are vital for successful project execution. With these must-haves in your arsenal, you'll be well-equipped to tackle your next concrete plastering project – and masterful techniques await further exploration.
Key Takeaways
• Hawk and trowel are fundamental tools for carrying and applying plaster, with techniques like floating and pressing enhancing surface quality.
• Scrapers and edgers are crucial for refining surfaces, creating clean lines, and defined edges, contributing to overall surface quality.
• Floats and darbies are essential for achieving a smooth finish, with different types suited for rough or smooth surfaces.
• Mixing tools, including mixing drums and paddles, ensure efficient and consistent plaster application, with safety guidelines emphasizing protective gear and ventilation.
• Measuring and marking tools, such as laser levels, tape measures, and chalk lines, ensure precise dimensions and alignment in plastering projects.
Hawk and Trowel Essentials
You'll need a hawk and trowel, the most fundamental tools in concrete plastering, to successfully apply and smooth out the plaster mixture. These tools work in tandem to guarantee a smooth, even finish.
When it comes to hawk usage, hold the tool at a 45-degree angle, scooping up the right amount of plaster for each application. This allows for efficient and controlled distribution of the mixture.
As you apply the plaster, use your trowel to spread it evenly, holding it at a 20-degree angle. Utilize trowel techniques such as 'floating' and 'pressing' to remove excess water and air pockets, respectively. It's essential to maintain a consistent pressure and motion to avoid creating imperfections.
Remember to keep your tools clean and well-maintained to prevent contamination and guarantee a high-quality finish.
Scrapers and Edgers Explained
When working with concrete plaster, scrapers and edgers are vital tools for refining the surface and creating clean lines. They enable you to remove excess material, smooth out rough spots, and define edges with precision.
As you work, you'll find that scrapers come in various types, including putty knives, flat scrapers, and curved scrapers. Each type is designed for specific tasks, such as removing excess plaster or smoothing out bumps. It's important to choose the right scraper for the job to guarantee a smooth, even finish.
Edgers, on the other hand, are used to create clean, defined edges. You'll employ edger techniques like pushing, pulling, and feathering to achieve the desired edge. Pushing involves applying gentle pressure to remove excess material, while pulling involves using a steady, consistent motion to create a sharp edge. Feathering involves blending the edge with the surrounding surface for a seamless finish.
Floats and Darbies Required
Mastering the use of floats and darbies is vital for achieving a smooth, even finish, as these tools enable you to remove air pockets, flatten surfaces, and create a uniform base for further finishing.
You'll need to familiarize yourself with different float types, such as wooden, aluminum, or magnesium floats, each designed for specific tasks and surfaces. Wooden floats are ideal for rough, porous surfaces, while aluminum and magnesium floats are better suited for smoother, more refined finishes.
When using darbies, it's important to employ proper techniques to avoid creating uneven surfaces or swirl marks. Darby techniques involve holding the tool at a 45-degree angle and using long, sweeping motions to flatten and smooth the concrete. This helps to remove air pockets and create a uniform base for further finishing.
Remember to always keep your darby clean and well-maintained to guarantee a smooth, even finish.
Finishing Tools for Beginners
As you progress to the finishing stage of concrete plastering, you'll need to select the right trowel for the job and master various finishing techniques.
You'll want to choose a trowel that suits the specific type of concrete you're working with, considering factors like blade size, material, and handle type.
Trowel Selection Guide
You'll need to choose the right trowel for the job, considering factors like blade material, size, and handle type to guarantee a smooth, even finish in your concrete plastering project. There are several trowel types to choose from, including stainless steel, carbon steel, and resin-based blades. Each type has its own strengths and weaknesses, so it's vital to select the right one for your specific project.
When selecting a trowel, consider the size of the blade and the type of handle. A larger blade may be necessary for bigger projects, while a smaller blade is better suited for smaller areas. Handle types vary, including wooden, fiberglass, and steel handles, each offering a different level of comfort and durability.
Proper trowel maintenance is also important for achieving a smooth finish. Regularly clean and dry your trowel to prevent rust and corrosion. Store it in a dry place, away from direct sunlight.
Finishing Techniques Mastery
Frequently, beginners overlook the importance of finishing techniques in concrete plastering, but possessing the right tools and skills is essential to achieving a high-quality, professional-looking finish.
You'll need to master various techniques to produce a smooth, even surface that meets the desired texture application and surface aesthetics.
To get started, focus on developing the following essential skills:
-
Float finishing: Use a float to remove excess material, create a smooth surface, and achieve the desired texture.
-
Trowel finishing: Employ a trowel to apply and smooth out the plaster, ensuring an even distribution of material.
-
Edging and detailing: Use specialized tools, such as edgers and joint knives, to create clean lines, edges, and details that enhance the overall appearance.
Safety Gear for Plastering
Safety Gear for Plastering
Wearing the right safety gear is essential when plastering concrete, as it protects you from the hazardous materials and harsh conditions involved in the process.
You'll need protective eyewear, such as goggles or safety glasses, to shield your eyes from flying debris, dust, and splashes of cement. This is especially important when mixing or applying plaster, as the materials can be highly caustic.
Additionally, respirator masks are a must-have when working with concrete. The dust and particles released during the plastering process can be harmful if inhaled, and a respirator mask will filter out these hazardous substances.
Look for a mask with a HEPA filter or one that's specifically designed for concrete dust. Don't compromise on quality – invest in a reliable brand that meets industry standards.
Measuring and Marking Tools
Measuring and marking tools are vital for achieving accurate dimensions and layouts in concrete plastering projects, as they enable you to transfer precise calculations to the work surface.
To guarantee a successful project, you need to master various measuring techniques and marking strategies.
Some of the important measuring and marking tools you'll need include:
-
Laser levels: These tools project a level line or dot onto the surface, making sure your work is perfectly aligned and plumb.
-
Tape measures: Whether you're measuring distances, widths, or heights, a reliable tape measure is a must-have for any concrete plastering project.
-
Chalk lines: These tools allow you to create straight lines on the surface, making it easier to mark out areas for plastering.
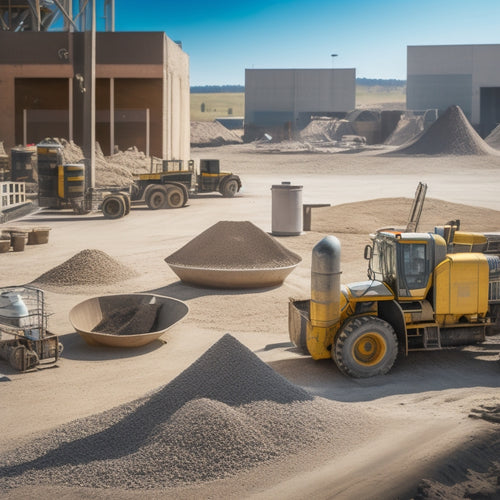
Mixing and Applying Equipment
When it comes to mixing and applying concrete plaster, you'll need the right equipment to get the job done efficiently and effectively.
You'll be working with a variety of tools that'll help you prepare, apply, and finish the concrete to achieve a smooth, even surface.
In this section, you'll learn about the essential mixing and applying equipment, including mixing drums and paddles, hand tools for finishing, and power trowels and edgers.
Mixing Drums and Paddles
You'll need a sturdy mixing drum and a reliable paddle to efficiently combine and apply concrete plaster to your surface. The right mixing drum and paddle can make all the difference in achieving a smooth, consistent finish.
When it comes to drum sizes, you'll want to evaluate the scope of your project and the amount of plaster you need to mix at one time. Common drum sizes range from 1-5 gallons, with larger drums often used for commercial projects.
When selecting a paddle, assess the type of plaster you're working with and the mixing demands of the job. There are three main types of paddles to contemplate:
-
Steel paddles: Heavy-duty and ideal for thick, high-strength plasters.
-
Fiberglass paddles: Lightweight and suitable for general-purpose plasters.
-
Poly paddles: Flexible and perfect for mixing smaller batches of specialized plasters.
Remember to always follow safety guidelines when mixing and applying concrete plaster, including wearing protective gear and working in a well-ventilated area.
Hand Tools for Finishing
With your mixing drum and paddle in hand, it's time to focus on the hand tools that'll help you achieve a smooth, even finish as you apply and finish the concrete plaster. The right hand tools will make all the difference in perfecting your plastering techniques.
First, you'll need a set of trowels in various sizes to apply and smooth out the plaster. A hawk, or mortar holder, will help you carry and hold the plaster as you work. A putty knife or joint knife is essential for filling in small gaps and applying plaster to tight spaces. Don't forget a level and straightedge to guarantee your work is perfectly aligned.
Regular tool maintenance is vital to guarantee your hand tools remain in top condition. Clean and dry your tools after each use to prevent rust and damage. Store them in a designated area to prevent loss or misplacement.
Power Trowels and Edgers
To efficiently mix and apply large quantities of concrete plaster, power trowels and edgers are essential pieces of equipment that can greatly reduce labor time and improve overall finish quality.
When it comes to power trowels, you'll need to decide which type is best suited for your project. You may opt for a walk-behind trowel for large areas or a ride-on trowel for even greater efficiency.
Consider the three main power trowel types: walk-behind, ride-on, and helicopter trowels, each designed for specific applications and surface areas.
Familiarize yourself with edger techniques, such as using an edger with a curved blade for rounded edges or an edger with a straight blade for straight edges.
Always follow the manufacturer's instructions and safety guidelines when operating power trowels and edgers to avoid accidents and guarantee a smooth finish.
Cleanup and Maintenance Tools
Concrete plastering projects generate substantial debris, and having the right cleanup and maintenance tools guarantees efficient removal of dust, dirt, and excess materials from your workspace. To maintain a clean and safe work environment, you'll need to invest in the following essential tools.
| Tool | Purpose |
|---|---|
| Broom and Dustpan | Sweeps and collects debris, dust, and dirt |
| Shop Vacuum | Removes fine particles and liquids from the floor |
| Mop and Bucket | Cleans the floor and removes excess water |
| Safety Goggles | Protects your eyes from dust and debris |
| Pressure Washer | Cleans equipment and tools |
Frequently Asked Questions
Can I Use a Regular Hammer for Concrete Plastering?
You're wondering if a regular hammer will do for concrete plastering? Not the best choice. A regular hammer can lead to uneven surfaces, and even damage to the surrounding area.
Instead, opt for a specialized hammer, like a lump hammer or a club hammer, designed for plastering techniques that require more force and control.
They'll help you achieve a smooth finish while ensuring your safety.
Do I Need to Prime the Surface Before Plastering?
As you prepare to commence your concrete plastering journey, imagine a strong foundation as the anchor that holds your masterpiece together.
And that anchor is priming. You'll need to prime the surface before plastering to guarantee a strong bond between the old and new layers.
Don't skip this essential step!
Employ effective priming techniques as part of your surface preparation to create a durable, long-lasting finish that can withstand the test of time.
How Do I Achieve a Smooth, Even Finish?
To achieve a smooth, even finish, you'll need to master trowel techniques and follow some essential finishing tips.
First, hold your trowel at a 20- to 30-degree angle and apply gentle pressure, feathering the plaster outwards from the center.
As you work, maintain a consistent motion and avoid applying too much pressure, which can create unevenness.
What Is the Ideal Temperature for Plastering?
Imagine you're working on a large-scale construction project in Dubai, where temperatures can soar up to 45°C (113°F).
In ideal plastering conditions, you'll want to maintain a temperature between 10°C to 30°C (50°F to 86°F) to guarantee proper hydration and setting.
Extreme temperatures can greatly impact the quality of your finish, as high heat can cause rapid drying, while low temperatures can slow down the hydration process.
Can I Plaster Over Existing Old Plasterwork?
You're wondering if it's possible to plaster over existing old plasterwork. The answer is yes, but it requires careful preparation.
You'll need to assess the condition of the old plaster and potentially remove loose or damaged areas using old plaster removal techniques.
Then, apply plaster adhesion techniques, such as bonding agents or mechanical keying, to guarantee a strong bond between the new and old surfaces. This will guarantee a safe and durable finish.
Conclusion
You've made it! With these essential tools for concrete plastering under your belt, you're ready to tackle any project.
Did you know that the global plastering market is expected to reach $61.5 billion by 2025? That's a lot of plaster!
Now, get out there and start building.
Remember, having the right tools is just the beginning - practice and patience will take you the rest of the way.
Related Posts
-

Top Tools for Mixing Concrete at Home
When mixing concrete at home, you'll need a range of tools to guarantee a successful operation. Start with essential ...
-

What Tools Ensure Strong Concrete Adhesion at Home
You'll need the right tools to guarantee strong concrete adhesion at home. For surface preparation, use concrete surf...
-
Why These Concrete Tools Are Always in Demand
You rely on a set of trusted concrete tools to deliver high-quality results, and it's not surprising - these tools ar...


