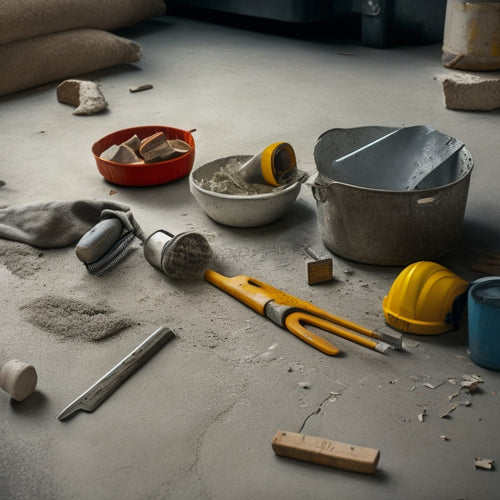
Top Tools for Painting Concrete Surfaces
Share
When painting concrete surfaces, you'll need the right tools to guarantee a professional-looking finish. Start by cleaning the surface with a pressure washer, then remove old paint with scrapers, and grind the concrete with an angle grinder to achieve the desired smoothness. Fill cracks with epoxy injectors, and sand the surface with an orbital sander to create a smooth finish. Use masking tape to protect areas, and apply primer with roller extensions. For efficient painting, switch to sprayers, and finally, seal the concrete with roller covers. Each tool plays a crucial role in the process, and understanding their applications is key to achieving a successful paint job - but that's only the beginning.
Key Takeaways
• Use pressure washers to clean concrete surfaces, setting the pressure washer to a wide fan tip and maintaining a 12-18 inch distance.
• Select angle grinders and diamond grinding wheels based on surface condition and desired smoothness for effective grinding.
• Employ epoxy injectors to fill cracks, choosing epoxy viscosity based on crack width and applying at a 45-degree angle.
• Utilize orbital sanders with dust collection systems to sand cured epoxy and create a smooth surface for painting.
• Apply primer using roller extensions and selecting primer type based on moisture levels and surface texture for optimal adhesion.
Cleaning Concrete With Pressure Washers
You'll need to blast away dirt, grime, and mildew with a pressure washer to properly clean your concrete surface, guaranteeing a strong bond between the concrete and subsequent paint or coatings.
When selecting a pressure washer, consider the type that best suits your needs. Electric pressure washers are ideal for smaller areas and provide a more environmentally friendly option, while gas-powered models offer more power and are better suited for larger surfaces.
Regardless of the type, it's crucial to choose the correct cleaning technique. Start by setting the pressure washer to a wide fan tip and holding it 12-18 inches away from the surface. Use a slow, overlapping pattern to clean the entire area, working from the top down to prevent dirt and debris from running onto clean areas.
Be cautious when using high-pressure settings, as they can damage the concrete or dislodge aggregate. Always wear protective gear, including gloves, safety glasses, and a face mask, to guarantee your safety during the cleaning process.
Removing Old Paint With Scrapers
Your scraper's blade must be sturdy enough to tackle the old paint, and its edge should be sharp to effectively remove the existing coat without gouging the underlying concrete surface.
When removing old paint, it's crucial to choose the right scraper technique for the type of paint you're dealing with. For example, if you're working with a water-based paint, a gentle scraping motion may be sufficient. However, if you're dealing with an oil-based paint, you'll need to use a more aggressive approach with a putty knife or a scraper with a replaceable blade.
Remember to always wear protective gear, including gloves, safety glasses, and a dust mask, to prevent injury and exposure to paint particles.
Hold the scraper at a 20- to 30-degree angle, and apply moderate pressure while scraping in sections. Avoid applying too much pressure, which can damage the concrete surface.
As you scrape, use a vacuum or a damp cloth to remove the debris and prevent it from spreading to clean areas.
Grinding Concrete With Angle Grinders
How aggressively do you need to grind the concrete surface to achieve a suitable finish for painting, and what type of angle grinder is best suited for the task? The answer depends on the surface's condition and the desired level of smoothness. To guarantee a safe and effective grinding process, it is crucial to choose the right angle grinder and diamond grinding wheels.
Here's a breakdown of the most common grinding wheel grits and their applications:
| Grit | Application |
|---|---|
| Coarse (16-24) | Removing thick layers of old paint or concrete |
| Medium (36-60) | Smoothening rough surfaces and removing imperfections |
| Fine (80-120) | Preparing surfaces for painting, achieving a high-gloss finish |
| Extra Fine (150-220) | Polishing and refining surfaces for high-traffic areas |
| Ultra Fine (240-320) | Achieving a mirror-like finish for decorative concrete |
Remember to always follow angle grinder safety guidelines, including wearing protective gear, maintaining a stable stance, and keeping the grinder at a 20-30° angle to avoid kickback. By selecting the right grit and following safety protocols, you'll be able to achieve a smooth, even finish that's perfect for painting.
Filling Cracks With Epoxy Injectors
After achieving a smooth surface through grinding, turn your attention to filling cracks with epoxy injectors to confirm a strong, durable bond between the concrete and paint.
You'll need to choose the right epoxy type for your specific project, considering factors like viscosity, pot life, and curing time. For example, low-viscosity epoxies are ideal for narrow cracks, while high-viscosity epoxies are better suited for wider gaps.
When it comes to injector techniques, you'll want to:
-
Use a low-pressure injector for smaller cracks to avoid overfilling.
-
Employ a high-pressure injector for larger cracks to confirm complete filling.
-
Inject epoxy at a 45-degree angle to prevent air bubbles from forming.
- Use a mixing stick to confirm thorough mixing of the epoxy components before injection.
Sanding Concrete With Orbital Sanders
With the epoxy fully cured, you're ready to move on to sanding the concrete surface using an orbital sander, an essential step in creating a smooth, even finish for painting.
When selecting an orbital sander, choose one with a dust collection system to minimize airborne particles and guarantee a safe working environment.
Prior to sanding, inspect the concrete surface for any debris or dust, and sweep or vacuum it clean.
Start with a coarse-grit sandpaper (about 80-100) and work your way up to finer grits (120-150) for a smooth finish.
Use gentle, overlapping strokes, applying moderate pressure, to avoid scratching the surface.
Regularly inspect the sandpaper for wear and replace it as needed to maintain effective sanding techniques.
Additionally, perform routine orbital sander maintenance, such as cleaning the dust collection system and checking the sanding pad for wear, to guarantee peak performance and extend the tool's lifespan.
Etching Concrete With Acid Etchers
You'll need to etch the sanded concrete surface to create a porous, rough texture that allows the paint to adhere properly. This process involves applying an acid etcher to the surface, which will break down the top layer of the concrete and create a rough texture for painting.
When etching with acid etchers, it's crucial to take safety precautions to avoid accidents. Here are some key considerations:
-
Wear protective gear, including gloves, safety glasses, and a face mask, to prevent skin and eye irritation.
-
Make sure the area is well-ventilated to prevent inhalation of acid fumes.
-
Mix the acid etcher according to the manufacturer's instructions to avoid over- or under-concentration.
- Neutralize the acid etcher with baking soda and water after the etching process to prevent further reaction.
Remember to always follow the manufacturer's instructions for the specific acid etcher you're using, and take necessary safety precautions to avoid accidents.
After etching, rinse the surface thoroughly with water to remove any residue, and let it dry before applying paint.
Taping off Areas With Masking Tape
Before applying paint to your concrete surface, mask off areas you want to protect from paint, such as trim, molding, and adjacent surfaces, using high-quality masking tape. This vital step guarantees a professional-looking finish and prevents unwanted paint spills. To achieve a seamless tape application, follow these masking techniques:
| Taping Technique | Description | Tips |
|---|---|---|
| Applying Tape | Press the tape firmly onto the surface, making sure it adheres well | Use a credit card or similar tool to apply even pressure |
| Creating Seals | Overlap tape strips by 1/4 inch to create a watertight seal | Inspect seals for any gaps or weaknesses |
| Removing Tape | Pull the tape back at a 45-degree angle to avoid paint lifting | Remove tape slowly and carefully to prevent paint from peeling |
Applying Primer With Roller Extensions
Your roller extension's long handle allows you to reach high areas and maintain a safe distance from the concrete surface, making it an ideal tool for applying primer to large, vertical surfaces.
When applying primer, it's crucial to use the right roller techniques to achieve a smooth, even coat.
Here are some tips to keep in mind:
-
Choose the right primer type for your concrete surface, considering factors like moisture levels and surface texture.
-
Load the roller with the recommended amount of primer to avoid drips and uneven coverage.
-
Work in sections, using long, even strokes to cover the entire area.
- Use a 'W' or 'M' pattern to guarantee complete coverage and prevent roller marks.
Painting Concrete With Sprayers
After priming your concrete surface, switch to a sprayer for a faster and more efficient way to apply paint, especially when covering large, complex areas or achieving a uniform finish.
When choosing a sprayer, consider the type of paint you're using and the surface you're painting. Airless sprayers are ideal for thick, high-build coatings, while HVLP (high-volume, low-pressure) sprayers work well with thinner paints and provide a finer finish.
When using a sprayer, it's crucial to maintain a consistent distance from the surface and move in a steady, back-and-forth motion to avoid creating uneven patterns. You can also adjust the sprayer's fan pattern and pressure to achieve the desired effect. For example, a narrow fan pattern is great for cutting in around edges, while a wider pattern is better suited for covering large areas.
Remember to always wear protective gear, including a mask, safety glasses, and gloves, and work in a well-ventilated area to avoid inhalation of paint fumes.
Sealing Concrete With Roller Covers
When sealing concrete, you'll often find that roller covers provide a more efficient and effective way to apply sealers, especially on smooth surfaces or when working with low-viscosity materials. This is because roller covers allow for a more even distribution of the sealer, reducing the risk of puddling or unevenness.
To get the best results, it's crucial to choose the right roller cover type for your specific project. Here are some key considerations:
-
Microfiber roller covers: Ideal for applying low-viscosity sealers, these covers provide a smooth, even finish.
-
Nylon roller covers: Suitable for thicker sealers, these covers are more durable and resistant to abrasion.
-
Woven roller covers: A good all-purpose option, these covers work well with a variety of sealer types and viscosities.
- Foam roller covers: Best for applying thin, even coats of sealer, these covers are a good choice for smaller projects.
Frequently Asked Questions
Can I Paint Over Oil-Based Stains on Concrete Surfaces?
When dealing with oil-based stains on concrete surfaces, you'll need to take extra precautions before painting. You can't simply paint over them, as the stain will bleed through the paint.
Instead, you'll need to properly remove the oil-based stain using a stain remover or a degreaser. Verify the surface is clean and dry before applying a concrete primer to create a suitable surface for painting.
Proper concrete surface preparation is key to a successful paint job, so don't skip this vital step.
Do I Need to Wear Protective Gear When Painting Concrete?
As you commence on this painting adventure, imagine yourself as a brave explorer venturing into uncharted territory.
But, unlike a fearless pioneer, you must armor yourself with protective gear to conquer the concrete jungle.
When painting, you'll encounter treacherous fumes and particles that can harm your eyes and lungs.
Don't underestimate the enemy - wear protective eyewear to shield your vision and a respiratory mask to filter the air.
Your safety is paramount, so gear up and paint on!
How Long Does It Take for Concrete Paint to Fully Cure?
When you apply concrete paint, you're probably wondering how long it takes to fully cure.
The curing time depends on factors like environmental conditions, paint type, and application thickness.
Typically, it takes 24 hours for the paint to dry to the touch, but it can take up to 7-14 days for it to fully cure and reach its maximum paint durability.
Make sure you follow the manufacturer's instructions and wait the recommended time before exposing the surface to heavy traffic or harsh conditions.
Can I Use House Paint on Concrete Surfaces?
When deciding if you can use house paint on concrete surfaces, consider the type of house paint and the surface preparation.
Not all house paints are suitable for concrete, as they may not provide adequate adhesion or durability.
Make certain the paint is specifically labeled for concrete use and follow the manufacturer's instructions.
Additionally, proper surface preparation, including cleaning and priming, is essential for a successful and safe application.
Is It Necessary to Prime All Concrete Surfaces Before Painting?
You think skipping primer is a great way to save time and effort? Think again! In reality, it's a recipe for disaster.
Not priming all concrete surfaces before painting can lead to a weak bond, peeling, and flaking.
You'll need to choose the right primer type for your surface, whether it's epoxy, acrylic, or polyurethane.
Proper surface preparation is key, so don't rush it. Clean, etch, and degrease the surface before applying a primer to guarantee a strong, long-lasting finish.
Conclusion
As you've made it through this list, it's likely you're about to tackle a concrete painting project. Coincidence? We think not!
With the right tools, like pressure washers, scrapers, angle grinders, epoxy injectors, orbital sanders, masking tape, roller extensions, sprayers, and roller covers, you'll be well-equipped to transform that drab concrete surface into a vibrant work of art.
Remember to stay methodical, and don't skip the prep work – a flawless finish is just around the corner!
Related Posts
-

Top 10 Concrete Repair Tools for Small Fixes
You'll need the right tools to tackle small concrete repairs efficiently and effectively. When it comes to small fixe...
-

5 Tips for Accurate Concrete Measurement Tools
To guarantee accurate concrete measurement, you'll want to calibrate your measuring tools regularly, choosing a frequ...
-

10 Best Tools for Sealed Concrete Finishing Success
When it comes to sealed concrete finishing success, you need a robust arsenal of specialized tools. Start with essent...


