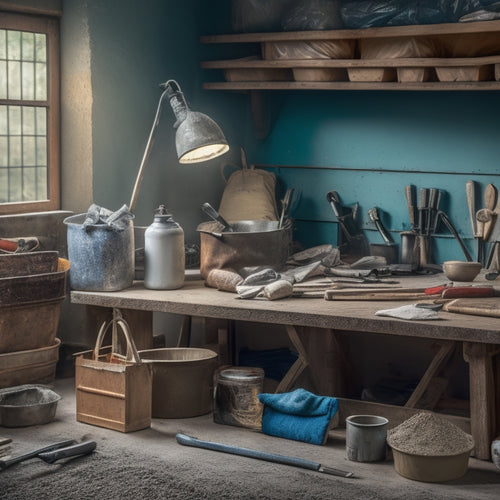
Top Tools for Laying Concrete Blocks Successfully
Share
To guarantee a successful concrete block laying project, you'll need a range of specialized tools. Start with essential safety gear, including personal protective equipment, thorough training, and regular inspections. Then, move on to measuring and marking tools like tape measures, chalk lines, levels, and squares. Next, focus on concrete mixing and handling tools, such as mixers, block transportation methods, and precision tools. Block laying and aligning tools, like string lines and laser levels, are also vital. With the right tools in hand, you'll be well on your way to a professional-grade finish; now, get ready to take your skills to the next level.
Key Takeaways
• Essential safety gear, including hard hats and safety glasses, is necessary to protect against falling objects and loud machinery.
• Measuring and marking tools, such as tape measures and chalk lines, ensure accurate block placement and structural integrity.
• A high-capacity concrete mixer and proper material quality control are crucial for optimal mix design and proportions.
• Leveling and straightening tools, including laser leveling devices and straight edge guides, ensure accurate block alignment and placement.
• Mastering cutting and shaping tools, such as block saws and grinders, enhances efficiency and accuracy in block laying.
Essential Safety Gear Required
You'll need to wear essential safety gear, including hard hats, safety glasses, earplugs, gloves, and steel-toed boots, to protect yourself from potential hazards when laying concrete blocks. This gear is vital in preventing injuries from falling objects, flying debris, and loud machinery.
Before starting the project, make sure you've undergone thorough safety training to identify potential hazards and take necessary precautions. Hazard identification is key in laying concrete blocks, as it helps you anticipate and mitigate risks. For instance, you'll need to be aware of tripping hazards, electrical hazards, and chemical exposure risks.
By wearing the right gear and being mindful of your surroundings, you'll be well-equipped to handle any situation that arises. Additionally, confirm that your gear is in good condition and regularly inspected to maintain its effectiveness.
Measuring and Marking Tools
Accurate measurements and clear markings are crucial to laying concrete blocks, and a set of reliable measuring and marking tools is fundamental to achieving precise alignments and joints. You'll need tools that provide accurate readings and clear markings to guarantee your blocks are laid correctly.
Here are the essential measuring and marking tools you'll need:
-
Tape measure: A 25-foot or 30-foot tape measure will allow you to measure distances and widths with precision.
-
Chalk line: A chalk line reel with a sturdy hook and a consistent chalk flow will help you create straight, visible lines on your substrate.
-
Level: A high-quality level will guarantee your blocks are laid on a perfectly horizontal or vertical plane.
- Square: A reliable square will help you achieve precise 90-degree angles and guarantee your blocks are properly aligned.
With these measuring and marking tools, you'll be able to create accurate layouts, mark precise locations, and guarantee your concrete blocks are laid with precision and accuracy.
Concrete Mixing and Handling
When you're preparing to lay concrete blocks, you'll need to make certain you're working with a well-mixed and consistent concrete batch.
To achieve this, you'll need to determine the ideal mix design and proportions for your specific project.
Additionally, select the right equipment and tooling, and implement quality control measures to guarantee material quality.
Mix Design and Proportions
Designing a mix with the right proportions of cement, sand, and aggregate is essential to achieving the desired strength and durability of your concrete blocks. You need to get it right from the start, as it's vital for the structural integrity of your project. Aggregate selection is a significant factor, as it affects the final product's texture, strength, and workability.
Here are the key considerations for your mix design:
-
Water cement ratio: Aim for a ratio between 0.4 and 0.6 to guarantee ideal strength and durability.
-
Cement content: Use the right type and amount of cement for your specific application, taking into account factors like exposure to weather and load-bearing requirements.
-
Aggregate proportion: Confirm the right balance of fine and coarse aggregate to achieve the desired texture and strength.
- Admixtures: Consider adding admixtures like air-entraining agents, retarding agents, or accelerators to enhance the mix's workability and performance.
Equipment and Tooling Needs
You'll need a range of specialized equipment and tools to efficiently mix, handle, and place your concrete blocks, guaranteeing a smooth workflow and high-quality results.
For mixing, invest in a high-capacity concrete mixer that can handle large batches. This will save you time and reduce labor costs.
When it comes to handling, you'll need block transportation methods such as forklifts, pallet jacks, or block carts to move blocks around the site. Ascertain you have a reliable and efficient way to transport blocks to the laying area.
Prior to laying, you'll need to prepare the site using site preparation techniques such as clearing debris, compacting the ground, and laying a level base course. A plate compactor or a hand tamper will come in handy for this task.
Additionally, you'll require a level, string lines, and a spirit level to guarantee accurate block placement.
Don't forget to invest in personal protective equipment (PPE) such as gloves, safety glasses, and a dust mask to protect yourself from potential hazards.
With the right equipment and tools, you'll be able to efficiently and effectively lay concrete blocks, resulting in a high-quality finish.
Material Quality Control
Proper material quality control begins with accurately proportioning and mixing concrete ingredients, as inconsistent mixes can lead to weak or damaged blocks. You must guarantee that the concrete is mixed and handled correctly to achieve the desired strength and durability.
To guarantee quality, you should:
-
Conduct material testing: Regularly test the concrete mix to guarantee it meets the required specifications and standards.
-
Maintain a clean and organized workspace: Keep the mixing area clean and free from contaminants to prevent defects in the blocks.
-
Use calibrated equipment: Guarantee that all mixing and handling equipment is properly calibrated and maintained to avoid inconsistencies.
- Implement quality assurance protocols: Establish and follow strict quality control procedures to identify and address any issues promptly.
Block Laying and Aligning
Frequently, accurately aligning and laying the first course of blocks sets the tone for a successful project, as it establishes a solid foundation for the entire structure. To achieve this, you'll need to master effective block placement techniques and block alignment strategies.
Here are some key considerations to keep in mind:
| Block Alignment Strategy | Block Placement Technique | Benefits |
|---|---|---|
| String line alignment | Place blocks along a string line, using a level to guarantee accuracy | Guarantees straight and level courses |
| Story pole alignment | Use a story pole to establish a reference point for each course | Helps maintain consistent block spacing |
| Laser level alignment | Utilize a laser level to project a level line for block placement | Increases accuracy and speed |
Leveling and Straightening Tools
When you're laying concrete blocks, ensuring they're perfectly level and straight is essential.
You'll need specialized tools to achieve this level of precision, and that's where leveling and straightening tools come in.
You'll be working with laser leveling devices and straight edge guides to guarantee a professional-looking finish.
Laser Leveling Devices
You'll find laser leveling devices, such as rotating lasers and line lasers, to be essential tools for ensuring accurate leveling and straightening of concrete blocks during construction. These devices provide laser accuracy, allowing you to achieve precise leveling techniques that guarantee a stable and even foundation.
Here are some key benefits of using laser leveling devices:
-
Self-leveling: Many laser leveling devices come with self-leveling capabilities, ensuring that the laser beam remains level even on uneven surfaces.
-
High accuracy: Laser leveling devices provide accurate readings, allowing you to make precise adjustments to your concrete blocks.
-
Long-range capability: Some laser leveling devices can project a level line over long distances, making it easier to level large areas.
- Versatility: Laser leveling devices can be used for a variety of applications, including leveling, aligning, and plumbing.
Straight Edge Guides
To guarantee perfectly aligned and level concrete blocks, you should always use straight edge guides, which are specifically designed for leveling and straightening tasks. These guides guarantee that your blocks are laid in a straight line, preventing deviations that can lead to structural weaknesses.
When selecting straight edge materials, consider factors such as durability, rust resistance, and ease of use. Aluminum and fiberglass are popular choices due to their lightweight and corrosion-resistant properties.
Here are some key considerations for guide installation techniques:
| Guide Type | Installation Technique | Advantages |
|---|---|---|
| Fixed Guides | Attach to substrate using screws or adhesives | Provides permanent reference point |
| Adjustable Guides | Clamp to substrate, allowing for adjustments | Accommodates varying block sizes |
| Magnetic Guides | Adhere to metal substrates using magnetic force | Quick and easy installation |
| String Lines | Create a taut string line to guide block placement | Cost-effective and versatile |
Cutting and Shaping Tools
Concrete block laying often requires cutting and shaping blocks to fit around obstructions, fill gaps, or create curved surfaces. As you work on your project, you'll need the right cutting and shaping tools to get the job done efficiently and accurately.
Here are some essential tools you'll need to master cutting techniques and shaping methods:
-
Block saw: A block saw is a must-have for cutting concrete blocks to size. You can choose from electric or manual saws, depending on your preference and the scale of your project.
-
Masonry chisel: A masonry chisel is perfect for removing small amounts of material from blocks or breaking them apart. You can use it to create curved surfaces or remove excess material.
-
Grinder: A grinder is ideal for shaping and smoothing out block surfaces. You can use it to remove excess material, create rounded edges, or polish surfaces.
- Pointing trowel: A pointing trowel is a handheld tool used to shape and smooth out small areas of concrete. It's perfect for filling gaps or creating small curves.
Mortar and Grout Application
With the blocks cut and shaped to fit your design, it's crucial to focus on applying the mortar and grout that will hold them together.
You'll need to choose the right type of mortar for your project, considering factors like compressive strength, workability, and durability. Common mortar types include Type S, Type N, and epoxy-based mortars.
Once you've selected your mortar, it's important to prepare the surface of the blocks and the work area. Clean and dampen the blocks, and remove any debris or excess mortar from previous applications.
When applying mortar, use a level and a notched trowel to spread it evenly and achieve the correct consistency.
For grouting, you'll need to decide on a grout technique that suits your project's requirements. Common grout techniques include sponging, bucket grouting, and grout pumping.
Regardless of the technique, make sure you follow the manufacturer's instructions and wait the recommended time for the grout to set.
Finishing and Smoothing Tools
You'll need a range of specialized tools to finish and smooth the concrete block surface, guaranteeing a professional-grade appearance and durability. As you work on the final stages of your project, attention to detail is significant to achieve a flawless finish.
To achieve a smooth, even surface, you'll require the following essential tools:
-
Trowel: A high-quality trowel is fundamental for applying and smoothing out mortar and grout. Mastering trowel techniques will help you achieve a uniform finish.
-
Float: A float helps to smooth out the surface, removing any excess mortar or grout. Use it to create a level, even finish.
-
Edger: An edger is used to create clean, defined edges and corners. It's indispensable for adding the finishing touches to your project.
- Grout sponge: A grout sponge is necessary for cleaning excess grout from the surface of the blocks. It helps to prevent staining and guarantees a professional finish.
Frequently Asked Questions
How Do I Prevent Mortar From Staining My Skin and Clothes?
When working with mortar, you must prioritize mortar safety to avoid stubborn stains on your skin and clothes.
You'll need protective gear, including long-sleeved shirts, pants, and gloves, to create a barrier between your skin and the alkaline mixture.
Don't forget to wear a face mask, safety goggles, and a hat to protect your face and hair.
Can I Use a Regular Shovel for Mixing Concrete?
You've dodged the mortar stain bullet, now it's time to tackle mixing concrete.
When it comes to mixing, you might think a regular shovel will do the trick, but think again.
You'll need a shovel specifically designed for mixing, like a square-edged shovel or a mixing hoe, to effectively combine cement, sand, and water.
Using the right shovel type and mixing techniques, like the 'fold and turn' method, will guarantee a consistent, strong mix.
What's the Best Way to Clean My Tools After Use?
When you're done with your concrete project, you'll want to prioritize tool maintenance to extend their lifespan.
Cleaning your tools is essential, and you'll need the right cleaning solutions for the job. Start by scrubbing off excess concrete with a stiff-bristled brush.
Then soak your tools in a mixture of water and mild detergent. For tough residue, try a specialized concrete cleaner.
Rinse thoroughly and dry to prevent rust. By following these steps, you'll keep your tools in top condition for the next project.
How Often Should I Water Concrete Blocks During Curing?
When it comes to curing concrete blocks, you'll want to guarantee ideal moisture retention.
Aim to water them 2-3 times a day, depending on ambient temperature and humidity.
As you master curing techniques, keep an eye on the blocks' surface – it should remain damp, but not soaked.
Overwatering can lead to weakness, so strike a balance.
Can I Lay Concrete Blocks in Extreme Weather Conditions?
Imagine trying to build a house on a stormy beach, with waves crashing against the foundation. That's what it's like to lay concrete blocks in extreme weather conditions.
You can't control the weather, but you can take extreme weather precautions.
Temperature effects are essential: avoid laying blocks in direct sunlight above 90°F (32°C) or in freezing temperatures below 40°F (4°C).
Conclusion
You've made it to the finish line! With these top tools for laying concrete blocks, you'll be building like a pro in no time.
Remember, having the right tools is like having a superpower - it's the difference between a mediocre wall and a masterpiece that'll last for centuries.
Don't skimp on the essentials; invest in these must-haves and you'll be constructing structures that'll make the ancient Egyptians jealous!
Related Posts
-

10 Must-Have Tools for Small Concrete Projects
When tackling small concrete projects, you'll need a range of essential tools to achieve professional-grade results. ...
-

Top Tools for Revamping Old Concrete Floors
You'll need a range of tools to revamp your old concrete floor, starting with epoxy, acrylic, or polyurethane paint, ...
-

Essential Power Tools for Concrete Block Construction
When building with concrete blocks, you'll need a range of power tools to cut, drill, mix, and finish the blocks to g...


