Top Tools for Epoxy Concrete Repair Success
Share
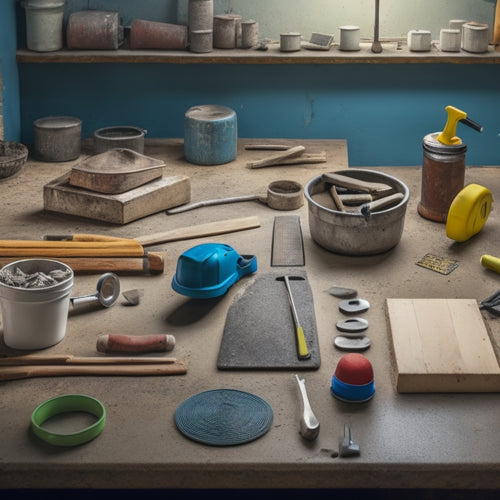
You'll need a range of specialized tools to guarantee a successful epoxy concrete repair. Start with accurate mixing and measuring tools, like digital scales and mixing pots, to guarantee the right epoxy ratio. Next, select high-quality application tools, such as notched trowels, squeegees, and brushes, to achieve a smooth finish. Don't forget surface preparation tools, like grinding equipment and dust removers, as well as concrete crack injection tools, like high-pressure pumps and injection ports. With the right tools and a solid understanding of epoxy concrete repair best practices, you'll be well on your way to a durable, long-lasting fix - and that's just the beginning of what you'll discover.
Key Takeaways
• Accurate measurement of epoxy resin and hardener is crucial, and digital scales or measuring cups ensure precise mixing ratios.
• A mixing stick or paddle with sturdy construction is necessary for thorough blending of components and preventing air introduction.
• Notched trowels, squeegees, and spreader blades are essential for applying epoxy to large areas and achieving a smooth finish.
• Proper surface preparation and cleaning, including removing old adhesive and grinding the surface smooth, are critical for strong bond creation.
• Safety equipment, such as safety goggles, chemical gloves, and respirator masks, are vital for protecting against hazardous materials and fumes during epoxy handling.
Essential Mixing and Measuring Tools
Your epoxy concrete repair kit should include a set of essential mixing and measuring tools to guarantee accurate ratios and thorough blending of the epoxy resin and hardener. This is vital, as improper mixing can lead to compromised bonding strength and repair failure.
You'll need a digital scale or measuring cups to verify measuring accuracy, as even slight deviations can affect the epoxy's performance. A mixing stick or paddle is also necessary for thorough blending, and you may want to take into account a mixing pot or container with measurement markings to simplify the process.
When it comes to mixing techniques, you'll want to adopt a thorough and consistent approach. Start by mixing the epoxy resin and hardener in a well-ventilated area, then blend the components in a circular motion, scraping the sides and bottom of the mixing container to confirm all material is fully incorporated.
Avoid whipping or introducing air into the mixture, as this can create bubbles and weaken the bond. By following these guidelines and using the right tools, you'll be able to achieve ideal mixing accuracy and a successful epoxy concrete repair.
High-Quality Epoxy Application Tools
Once you've mixed the epoxy resin and hardener to the correct ratio, you'll need a set of high-quality epoxy application tools to guarantee a smooth, even, and controlled application onto the concrete surface.
This is where your epoxy application techniques will shine, and the right tools will make all the difference. You'll want to invest in tools that assure proper surface adhesion methods, allowing the epoxy to bond strongly with the concrete.
Here are some essential epoxy application tools you should consider:
-
Notched trowels: For applying epoxy to large areas, notched trowels help spread the material evenly and prevent pooling.
-
Squeegees: These tools are perfect for removing excess epoxy and achieving a smooth finish.
-
Brushes and rollers: For smaller areas or intricate details, brushes and rollers provide precision and control.
- Spreader blades: These tools help you apply an even, consistent layer of epoxy, assuring a strong bond between the epoxy and concrete.
With these high-quality epoxy application tools in your arsenal, you'll be well on your way to achieving a successful epoxy concrete repair.
Surface Preparation and Cleaning
When preparing a surface for epoxy concrete repair, you'll need to start by removing any old adhesive or residue that may be present. This is a critical step, as any remaining adhesive can compromise the bond between the old concrete and the new epoxy.
Next, you'll need to grind the surface smooth to create a strong, even base for the repair.
Remove Old Adhesive
Scrape off old adhesive residue using a putty knife or scraper, taking care to avoid gouging the surrounding concrete surface. This step is essential in guaranteeing a strong bond between the new epoxy and the concrete. You'll want to remove as much of the old adhesive as possible to create a clean surface for the repair.
When it comes to adhesive removal techniques, you'll face challenges such as:
-
Tough residue: Old adhesive can be stubborn and difficult to remove, requiring patience and persistence.
-
Delicate surfaces: Be gentle when scraping to avoid damaging the surrounding concrete or aggregate.
-
Hidden areas: Make sure to inspect and clean all areas, including corners and crevices, to confirm a thorough removal.
- Adhesive residue thickness: Varying thicknesses of residue may require different removal approaches, so be prepared to adapt your technique.
Grind Surface Smooth
Switch to a wire brush or grinder to grind the surface smooth, feathering the edges of the repair area to create a seamless connection with the surrounding concrete. This step is vital in surface preparation, as it guarantees a strong bond between the old and new materials.
Use a series of grinding techniques, starting with a coarse grit and progressing to finer grits, to achieve a smooth finish. Be careful not to over-grind, as this can create scratches or swirl marks that can compromise the epoxy's adhesion.
As you grind, pay attention to the surface profile, making sure it's even and free of imperfections.
Use a vacuum or blower to remove any dust or debris generated during the grinding process. This will prevent contamination and guarantee a clean surface for the epoxy application.
Concrete Crack Injection Tools
You'll need a set of specialized tools to inject epoxy into concrete cracks, including a pump, injection ports, and a mixing stick to guarantee a successful repair. These tools will help you accurately diagnose the crack and choose the right epoxy formulation type for the job.
Effective crack diagnosis techniques involve understanding the cause and extent of the crack, as well as the surrounding concrete's condition.
To secure a successful injection, you'll need:
-
A high-pressure pump capable of delivering the epoxy mixture at the required pressure and volume
-
Injection ports that can be securely attached to the concrete surface, allowing for precise control over the epoxy flow
-
A mixing stick for thoroughly blending the epoxy components, ensuring a consistent and strong bond
- A selection of epoxy formulation types, each suited to specific crack types, temperatures, and environmental conditions
Epoxy Injection Gun Essentials
When it comes to epoxy injection gun essentials, you'll need to focus on two critical aspects to guarantee a successful concrete repair job.
First, you'll need to select the right gun for the task, considering factors such as injection pressure, epoxy flow rate, and mixing efficiency.
Gun Selection Criteria
Selecting the right epoxy injection gun is critical, as it directly impacts the efficiency and effectiveness of your concrete repair project. You'll want to take into account several key factors to guarantee you choose the best gun for your specific needs.
When evaluating gun types, take into account the following essential features:
-
Pressure capacity: Verify the gun can handle the required pressure for your project, as specified by the epoxy manufacturer.
-
Material compatibility: Confirm the gun is compatible with the specific epoxy material you're using, as some guns are designed for specific products.
-
Flow control: Look for guns with adjustable flow control to regulate the epoxy flow rate and prevent over- or under-injection.
- Ergonomics and durability: Choose a gun with a comfortable grip and durable construction to withstand repeated use and minimize fatigue.
Proper Gun Maintenance
To guarantee your epoxy injection gun continues to perform at its best and extends its lifespan, regular maintenance is essential, starting with a thorough cleaning of the gun's components after each use.
You'll need to disassemble the gun and clean each part, including the nozzle, hose, and cylinder, using appropriate gun cleaning techniques. Pay special attention to the nozzle, as it's prone to clogging; use a solvent or cleaning solution to remove any dried epoxy residue. For nozzle maintenance tips, consider soaking the nozzle in a cleaning solution for several hours or overnight to loosen stubborn epoxy.
When reassembling the gun, confirm all parts are securely tightened to prevent leaks or damage. Regularly inspect the gun's seals and O-rings, replacing them as needed to maintain a tight seal. Additionally, lubricate moving parts to reduce friction and prevent wear.
Mixing Sticks and Paddles Overview
You'll need a sturdy mixing stick or paddle to effectively combine epoxy resin and hardener, guaranteeing a strong bond with the concrete.
A good mixing stick or paddle is vital for achieving the right consistency and preventing air pockets, which can lead to a weak bond.
When selecting a mixing stick or paddle, consider the following factors:
-
Materials: Paddles made from durable materials like stainless steel or fiberglass are ideal for withstanding the rigors of mixing epoxy.
-
Size and shape: Choose a paddle that's the right size for your mixing container and has a shape that allows for efficient mixing.
-
Ergonomics: A comfortable grip is essential for reducing fatigue during extended mixing sessions.
- Mixing techniques: Familiarize yourself with various mixing techniques, such as the 'figure-eight' pattern, to guarantee thorough mixing and minimize air entrapment.
Safety Equipment for Epoxy Handling
Safety Equipment for Epoxy Handling
When handling epoxy resin and hardener, wear essential safety equipment to protect yourself from skin irritation, inhalation hazards, and eye damage. You don't want to compromise your health or compromise the quality of your repair job.
| Safety Item | Protection Against | Why It's Essential |
|---|---|---|
| Safety Goggles | Eye damage from splashes or spills | Eyes are irreplaceable; protect them from epoxy resin and hardener |
| Chemical Gloves | Skin irritation and absorption | Prevent epoxy from penetrating your skin and causing irritation or worse |
| Respirator Mask | Inhalation of harmful fumes | Breathe easy knowing you're protected from epoxy's hazardous vapors |
Curing and Finishing Tools Needed
With your safety gear in place, you're ready to move on to the next stage of epoxy concrete repair: preparing the necessary tools for curing and finishing the epoxy mixture. This is where the magic happens, and your repair job takes shape.
To guarantee a successful outcome, you'll need the right curing and finishing tools.
Here are some essential tools you won't want to skip:
-
Heat lamps or curing blankets: These tools help control the temperature and humidity levels, allowing for ideal curing techniques.
-
Finishing trowels or squeegees: These are used to apply even pressure and remove excess epoxy, guaranteeing a smooth finish.
-
Rags or absorbent pads: These are necessary for cleaning up spills and wiping down surfaces.
- Sandpaper or polishing pads: These are used to add the final finishing touches, removing any imperfections and achieving a high-gloss finish.
Frequently Asked Questions
Can I Use Epoxy Concrete Repair for Structural Damage?
When dealing with structural damage, you need to exercise caution before using epoxy concrete repair.
First, you'll need to conduct an epoxy strength assessment to determine the material's load-bearing capacity.
Next, perform a thorough structural integrity evaluation to identify the extent of the damage.
If the damage is extensive, it may be necessary to consult with a structural engineer to guarantee the repair won't compromise the overall structure.
How Long Does Epoxy Concrete Repair Typically Last?
Savvy specialists scrutinize epoxy's staying power, and you should too.
The lifespan of epoxy concrete repair depends on various factors, including the type of epoxy, environmental conditions, and maintenance requirements.
When properly applied and maintained, epoxy repairs can last for decades, even up to 20 years or more.
However, neglecting regular inspections and upkeep can greatly reduce its lifespan.
You'll want to factor in these variables to guarantee your epoxy repair stands the test of time.
Can I Apply Epoxy Over Oil-Based Stains or Paints?
When applying epoxy over oil-based stains or paints, you'll face epoxy adhesion challenges.
To overcome these, focus on surface preparation techniques. Make certain the surface is free of contaminants and old coatings by mechanically abrading or using a solvent-based cleaner.
Then, apply a bonding primer to promote epoxy adhesion. This vital step will help prevent delamination and guarantee a strong, long-lasting bond.
Is Epoxy Concrete Repair Suitable for Outdoor Applications?
When you're considering epoxy concrete repair for outdoor applications, think of a scenario like this: a parking garage with cracks and spalls.
You'll want to guarantee the epoxy can withstand harsh weather conditions. Fortunately, many epoxies are designed with weather resistance in mind.
However, it's essential you properly prepare the surface by cleaning and profiling it to guarantee a strong bond.
Can I Mix and Match Epoxy Products From Different Manufacturers?
When considering epoxy products from different manufacturers, you shouldn't assume they're compatible.
In fact, mixing and matching can lead to disappointing results or even project failure. Always consult the manufacturer guidelines for each product to guarantee epoxy compatibility.
Look for specific recommendations on mixing, application, and curing times. By following these guidelines, you'll avoid potential chemical reactions that can compromise the repair's integrity and longevity.
Conclusion
You've assembled the ultimate toolkit for epoxy concrete repair, and now you're ready to tackle even the toughest projects.
With these top tools at your disposal, you'll be the master conductor of a symphony of repair, orchestrating a flawless performance of mixing, applying, and curing.
Remember, a successful repair is like a perfectly crafted puzzle - every piece must fit together seamlessly, and with these tools, you'll have all the right pieces in place.
Related Posts
-

Must-Have Tools for Laying Concrete Tiles
When laying concrete tiles, you'll need a range of essential tools to get the job done right. Start with subfloor pre...
-

5 Tips for Accurate Concrete Measurement Tools
To guarantee accurate concrete measurement, you'll want to calibrate your measuring tools regularly, choosing a frequ...
-

Why These Concrete Tools Are Always in Demand
You rely on a set of trusted concrete tools to deliver high-quality results, and it's not surprising - these tools ar...


