
Top Tools for DIY Decorative Concrete Overlays
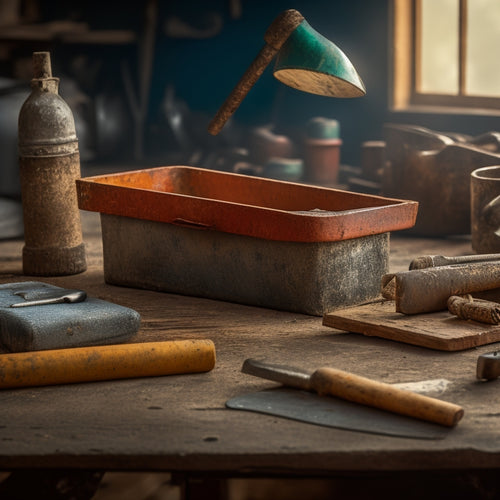
You'll need a strategic arsenal of specialized tools to achieve professional-looking results in your DIY decorative concrete overlay project. For mixing and measuring, invest in a digital scale, mixing bucket, sturdy mixing stick/trowel, measuring cup/scoop, and safety gear like gloves and safety goggles. Surface preparation requires tools like a substrate assessment kit, power washer, acid etcher, mechanical scrubber, and protective gear. For application and finishing, you'll need a power mixer, trowels, sprayers, rollers, and safety gear. Additionally, consider investing in stamping mats, pattern rollers, and various sealers to achieve your desired finish. As you assemble your toolkit, you'll be well on your way to unveiling a world of creative possibilities.
Key Takeaways
• A digital scale is essential for precise measuring of overlay materials and additives to achieve desired results.
• A mixing bucket, sturdy mixing stick/trowel, and measuring cup/scoop are necessary for combining and applying overlay materials.
• Safety gear, including gloves, safety goggles, and respirators, is required to prevent skin and eye irritation during surface preparation and application.
• Stamping mats and pattern rollers are necessary for creating textures and patterns that mimic natural materials like stone or wood.
• A variety of sealers, including acrylic, polyurethane, epoxy, and silane, are available to enhance appearance and protect the overlay from water, UV rays, and chemicals.
Essential Mixing and Measuring Tools
You'll need a set of vital mixing and measuring tools to secure accurate proportions and a successful decorative concrete overlay project. A digital scale with high precision (0.01g or 0.001oz) is a must-have for measuring the overlay material, hardener, and other additives. Confirm the scale is calibrated regularly to maintain measuring accuracy.
A mixing bucket or paddle mixer is necessary for combining the overlay material with the hardener and water. It's essential to mix according to the manufacturer's recommended mixing ratios to avoid compromising the overlay's strength and durability.
Invest in a sturdy mixing stick or trowel for scraping the sides and bottom of the mixing bucket. You'll also need a clean, dry measuring cup or scoop for accurately measuring the water and additives.
Don't forget a pair of gloves and safety goggles to protect yourself from skin and eye irritation. With these vital tools, you'll be able to achieve the perfect mix, securing a strong and long-lasting decorative concrete overlay.
Surface Preparation and Cleaning
With your mixing and measuring tools ready, turn your attention to the concrete surface, where thorough preparation and cleaning are essential to guarantee a strong bond between the old concrete and the new decorative overlay.
You'll need to assess the substrate's condition using methods such as visual inspection, moisture testing, and sounding to identify any cracks, delamination, or other defects.
Next, use surface cleaning techniques like power washing, acid etching, or mechanical scrubbing to remove dirt, oil, and other contaminants that could compromise the bond.
Make certain to wear protective gear, including gloves, safety glasses, and a respirator, when working with harsh chemicals or power equipment.
Remove any existing coatings, sealers, or adhesives, and fill in any cracks or holes with a compatible patching compound.
Finally, allow the surface to dry completely before applying the overlay.
Remember, a clean and well-prepared surface is critical to achieving a successful and long-lasting decorative concrete overlay.
Take your time and do it right to guarantee a beautiful, durable finish.
Overlay Application and Finishing
The DIY decorative concrete overlay application and finishing techniques are essential for achieving a professional look in your project. You want to ensure you apply these techniques correctly for both aesthetics and safety. Here are four key steps to consider:
-
Surface Preparation: Always start with a clean, dry surface. Remove any debris, oil, or old coatings to ensure proper adhesion of the overlay.
-
Mixing the Overlay: Follow the manufacturer's instructions closely when mixing your overlay material. Use a power mixer to achieve a uniform consistency, and wear safety gear to protect yourself from dust and splashes.
-
Application Methods: Choose the right overlay techniques for your project, whether it's troweling, spraying, or rolling. Make sure to apply evenly and work in manageable sections.
- Finishing Touches: Once the overlay is applied, focus on the finishing touches. This may include polishing, sealing, or adding decorative elements. Ensure you allow adequate curing time to enhance durability.
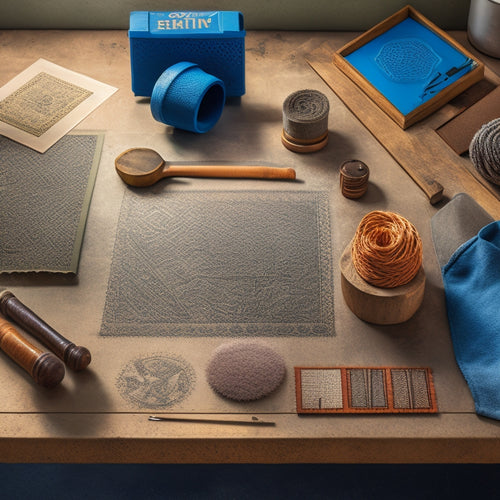
Texturing and Pattern Creation Tools
Now that you've mastered the overlay application and finishing techniques, it's time to add some personality to your decorative concrete overlay with texturing and pattern creation tools. These tools will help you achieve unique, high-end looks that'll make your project stand out.
For stamping techniques, you'll need a set of stamping mats or texture skins that mimic natural stone, wood, or other patterns. These mats are made of durable rubber or polyurethane and come in various sizes and designs. To create more intricate patterns, use pattern rollers, which feature interchangeable design inserts. These rollers are perfect for creating borders, accents, or entire fields of patterned concrete.
When working with texturing and pattern creation tools, remember to follow safety guidelines. Wear protective gear, including gloves, safety glasses, and a dust mask, to minimize exposure to dust and debris.
Verify the overlay is at the correct temperature and consistency for texturing and patterning. Finally, practice your stamping and rolling techniques on a small test area before applying them to your entire project.
With the right tools and techniques, you'll be able to achieve stunning, one-of-a-kind decorative concrete overlays that showcase your creativity and skill.
Sealing and Protective Coatings
Your decorative concrete overlay's beauty and durability rely heavily on a thorough sealing and application of protective coatings, which safeguard it against the elements and everyday wear and tear.
A good sealer not only enhances the appearance of your overlay but also protects it from damage caused by water, UV rays, and chemical spills.
When it comes to choosing the right sealer, you'll want to evaluate the following:
-
Acrylic sealers: Provide a high-gloss finish and are easy to apply, but may not offer the same level of protection as other sealer types.
-
Polyurethane sealers: Offer excellent chemical resistance and durability, but can be more difficult to apply and may yellow over time.
-
Epoxy sealers: Provide a strong, chemical-resistant finish, but can be expensive and have a strong odor.
- Silane sealers: Penetrate deep into the concrete to provide long-lasting protection, but may not offer the same level of aesthetic enhancement as other sealer types.
Frequently Asked Questions
Can I Use Decorative Concrete Overlays on Existing Epoxy or Polyurethane Floors?
Yes, you can use decorative concrete overlays on existing epoxy or polyurethane floors, but you need to ensure compatibility first. Epoxy surfaces can be tricky since they might not bond well with certain overlays. For polyurethane, adhesion is generally better, but proper surface preparation is crucial. Make sure to clean and roughen the surface to promote a strong bond, ensuring your decorative overlay looks great and lasts long.
Are Decorative Concrete Overlays Suitable for Outdoor or High-Traffic Areas?
When considering decorative concrete overlays for outdoor or high-traffic areas, you'll want to prioritize weather resistance and surface durability.
You're looking for a finish that can withstand harsh weather conditions, heavy foot traffic, and potential scratches or spills.
Look for overlays specifically designed for outdoor or commercial use, as they're formulated to provide enhanced durability and resistance to the elements.
Can I Customize the Color and Finish to Match My Interior Design?
When it comes to customizing the color and finish of your decorative concrete overlay, you've got a world of options.
You can experiment with advanced color blending techniques to match your interior design perfectly.
Plus, you'll have access to a range of finish options, from matte to glossy.
How Long Does a Decorative Concrete Overlay Project Typically Take to Complete?
Imagine you're overseeing a commercial flooring project where a client expects a sleek finish in just three days.
To meet this tight project timeline, you meticulously plan the installation process, ensuring you prepare the surface, apply the overlay, and allow for proper curing.
Do Decorative Concrete Overlays Require Special Maintenance or Upkeep?
When it comes to maintaining your decorative concrete overlay, you'll want to stay on top of regular upkeep to guarantee its longevity.
You'll need to seal your overlay every 2-3 years, depending on the level of foot traffic and exposure to the elements.
Additionally, you should perform daily maintenance by sweeping and mopping regularly to prevent dirt buildup.
Conclusion
You've got the skills, the know-how, and the right tools to create stunning DIY decorative concrete overlays.
Now, it's time to put it all together and 'seal the deal' with a professional-looking finish.
Remember, attention to detail is key, so take your time and don't rush through the process.
With practice and patience, you'll be well on your way to creating beautiful, long-lasting overlays that will leave a lasting impression.
Related Posts
-
Smart Guide to Buying Used Concrete Hand Tools
You're about to buy used concrete hand tools, and you need to get it right. Dedicate time to identify the tools you n...
-

What Tools Ensure Strong Concrete Adhesion at Home
You'll need the right tools to guarantee strong concrete adhesion at home. For surface preparation, use concrete surf...
-
5 Best Tools for Stamping Concrete Walls
When it comes to stamping concrete walls, you'll need a range of specialized tools to achieve the desired texture and...


