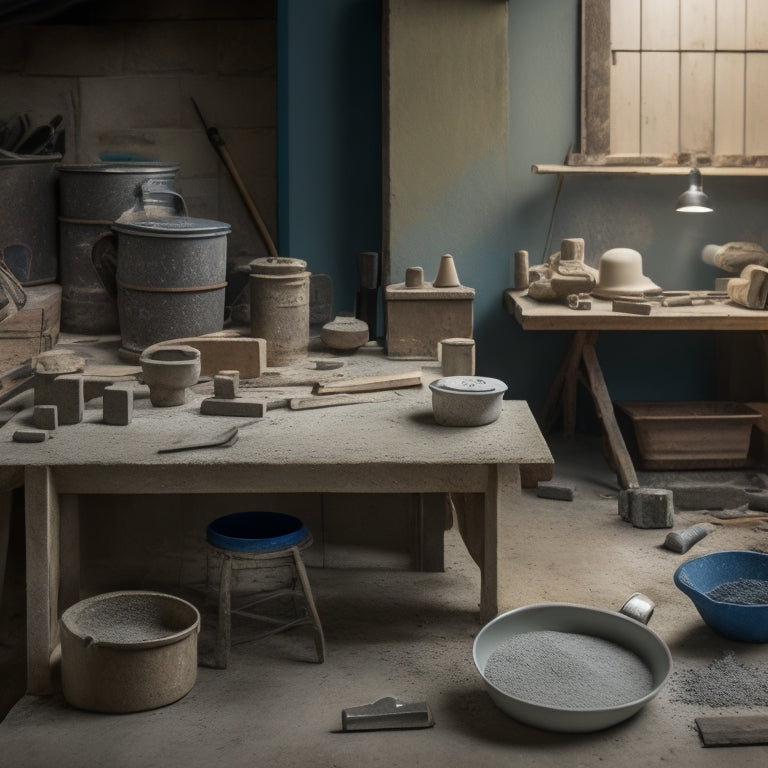
Top Tools for DIY Concrete Tile Success
You'll need a range of specialized tools to achieve professional-looking DIY concrete tiles. Start with essential safety gear like goggles, respirator masks, and heavy-duty gloves. Then, move on to measuring and marking tools, including tape measures, squares, and levels. Mixing and pouring equipment, such as mixing buckets and pouring jugs, are also vital. Don't forget tamping and finishing tools, like hand tampers and vibrating tables, to guarantee a smooth finish. Cutting and shaping tools, edging and jointing tools, sanding and polishing tools, lifting and handling equipment, and cleaning and maintenance tools are also necessary. With these tools, you'll be well on your way to creating stunning DIY concrete tiles that showcase your craftsmanship.
Key Takeaways
• Essential safety gear, including goggles, respirator masks, and heavy-duty gloves, protects DIYers from concrete-related hazards.
• Measuring and marking tools, like tape measures and squares, ensure accurate tile placement and prevent costly mistakes.
• Mixing and pouring equipment, such as mixing buckets and pouring jugs, help achieve a consistent concrete mixture and even distribution.
• Tamping and finishing tools, including hand tampers and finishing trowels, guarantee a smooth, bubble-free surface and professional finish.
• Cutting and shaping tools, featuring tile saws and handheld nippers, enable DIYers to make precise cuts and achieve desired tile shapes.
Essential Safety Gear Requirements
As you prepare to commence on your DIY concrete tile project, don your essential safety gear to shield yourself from the hazards that come with working with concrete and heavy tools.
Safety goggles are a must-have to protect your eyes from flying debris and concrete particles. Make sure they fit snugly and provide unobstructed peripheral vision.
Respirator masks are another vital piece of equipment, as they filter out harmful dust and particles that can cause respiratory issues. Opt for a mask with a HEPA filter for maximum protection.
Don't forget to wear durable, heavy-duty gloves to safeguard your hands from abrasions and cuts. Steel-toed boots are also essential to prevent foot injuries from heavy tools or falling objects.
Finally, wear a long-sleeved shirt and pants to prevent skin exposure to concrete and other materials.
Measuring and Marking Tools
You'll need a set of precise measuring and marking tools to confirm accurate cuts, layouts, and patterns in your DIY concrete tile project. Measuring techniques are essential to guarantee that your tiles fit together seamlessly, and marking precision is critical to achieve the desired design.
Here are some important tools you'll need:
| Tool | Description |
|---|---|
| Tape Measure | For measuring lengths, widths, and heights of your tile and workspace |
| Square | Guarantees accurate 90-degree angles and straight lines |
| Level | Confirms your tile is perfectly horizontal or vertical |
| Pencil and Straightedge | For marking precise lines and patterns on your tile |
With these tools, you'll be able to achieve professional-looking results. Remember to always double-check your measurements to avoid mistakes. By combining these measuring and marking tools with the right techniques, you'll be able to create stunning concrete tiles that will elevate your DIY project.
Mixing and Pouring Equipment
When crafting DIY concrete tiles, having the right mixing and pouring equipment is vital to achieving a consistent, high-quality finish.
You'll need a mixing bucket or drum that's large enough to hold your concrete mixture, as well as a mixing tool, such as a drill with a mixing paddle attachment or a manual mixing stick. A mixing stick with a rubber edge can help scrape the sides and bottom of the bucket, guaranteeing all ingredients are well incorporated.
Mastering mixing techniques is essential to achieving a uniform consistency. Start by adding dry ingredients to the bucket, followed by wet ingredients, and mix in a circular motion, working your way up and down the bucket. Avoid overmixing, as this can lead to a weak or porous finish.
For pouring methods, consider using a pouring jug or a bucket with a spout to control the flow of concrete into your mold. This will help prevent spills and guarantee an even distribution of the mixture.
Tamping and Finishing Tools
Tamp the freshly poured concrete into your mold using a tamping tool, such as a hand tamper or a vibrating table, to eliminate air pockets and secure a dense, even finish. This vital step guarantees that your concrete tile turns out smooth and uniform.
There are various types of tampers to choose from, each suited for specific tasks and mold sizes. Here are some essential tamping and finishing tools to have in your DIY concrete tile toolkit:
-
Hand tamper: A manual tool used to press and flatten small batches of concrete.
-
Vibrating table: A motorized tool that vibrates the mold to remove air bubbles and compact the concrete.
-
Tamping rod: A long, thin tool used to reach into deeper molds and remove air pockets.
- Finishing trowel: A flat, handheld tool used to smooth and flatten the surface of the concrete tile.
Mastering these tamping and finishing techniques will take your DIY concrete tile project to the next level.
Cutting and Shaping Tools
Once you've achieved a smooth, even finish with your tamping and finishing tools, it's time to focus on cutting and shaping your concrete tile to fit your desired design and dimensions.
You'll need to master various tile cutting techniques to get the job done. For straight cuts, a tile saw or a circular saw with a diamond blade is your best bet. These power tools will make quick work of cutting your tile to size.
For curved or irregular cuts, you'll need to switch to a handheld tile nippers or a tile cutter. These shaping tool options will give you the precision and control you need to achieve intricate designs.
When cutting, always wear protective gear, including safety glasses and a dust mask. Keep your tools well-lubricated to prevent overheating and extend their lifespan. It's also essential to score your tile before cutting to prevent chipping or cracking.
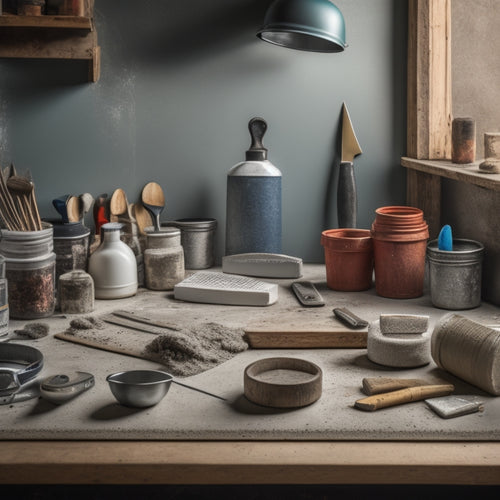
Grouting and Sealing Tools
Mastering the art of grouting and sealing is crucial to protecting your concrete tile and achieving a professional-looking finish. It's important to have the right tools for the job.
You'll need to choose the right grout color to match your tile's aesthetic, and then apply it with precision to guarantee a seamless finish.
Here are the essential tools you'll need for grouting and sealing:
-
Grout float: A rubber float with a flat edge, used to spread and smooth out grout between tiles.
-
Grout sponge: A dense, porous sponge used to remove excess grout from the surface of the tiles.
-
Sealing brush or roller: A tool used to apply sealant evenly and consistently across the tile surface, assuring maximum protection.
- Sealant applicator bottle: A bottle with a precision nozzle, used to apply sealant directly into joints and corners.
Edging and Jointing Tools
When working with concrete tiles, you'll need to decide on the type of edge you want to achieve, whether it's a straight cut, a bullnose, or something more decorative.
To guarantee professional-looking results, you'll also need to use joint spacer tools to maintain even gaps between tiles.
Edge Type Options
You'll need to decide on an edge type that suits your DIY concrete tile project, as it greatly impacts the overall aesthetic and functionality of your finished product. The edge profile you choose will affect the overall look, durability, and maintenance requirements of your tiles.
When it comes to tile edge styles, you have several edge profile options to evaluate:
-
Straight Edge: A clean, simple edge profile that works well with modern designs.
-
Beveled Edge: A 45-degree angle edge that adds a touch of sophistication and helps to reduce chipping.
-
Bullnose Edge: A curved edge profile that provides a smooth, rounded finish and is ideal for high-traffic areas.
- Pencil Edge: A rounded edge with a subtle curve, often used in traditional or rustic designs.
Each edge type has its own unique characteristics, and the right choice will depend on your project's specific needs and desired aesthetic.
Joint Spacer Tools
With your edge type selected, it's time to focus on the tools that will help you achieve precise spacing and clean joints in your DIY concrete tile project, starting with joint spacer tools. These tools are essential for creating uniform gaps between tiles, guaranteeing a professional-looking finish. Joint spacers offer several benefits, including improved drainage, reduced risk of cracking, and enhanced overall aesthetics.
When selecting joint spacers, consider the material and size that suits your project best. Here are some common options:
| Joint Spacer Material | Thickness Options | Benefits |
|---|---|---|
| Plastic | 1/8', 1/4', 1/2' | Inexpensive, easy to use, and suitable for most projects |
| Metal | 1/8', 1/4' | Durable, ideal for heavy-traffic areas, and resistant to compression |
| Foam | 1/8', 1/4' | Soft, flexible, and perfect for irregularly shaped tiles or curved surfaces |
Remember to choose joint spacers that complement your tile size and edge type. By using the right joint spacer tools, you'll guarantee accurate spacing and a beautiful, long-lasting finish for your DIY concrete tile project.
Finishing Edges Clean
Precision edging and jointing tools are essential for finishing your DIY concrete tile project with clean, professional-looking edges that showcase your attention to detail.
You'll want to invest in the right tools to achieve a flawless finish, and we've got you sorted.
When it comes to edge finishing techniques, having the right tools can make all the difference. Here are four must-haves for achieving clean edges:
-
Edge trowels: Perfect for creating a smooth, even edge, these trowels are designed for precision and control.
-
Joint scrapers: These tools are ideal for removing excess concrete and debris from joints, ensuring a clean finish.
-
Edge shapers: Use these to create a crisp, defined edge that adds a professional touch to your DIY project.
- Rubber edging tools: For a more subtle, rounded edge, these tools are the perfect choice.
Sanding and Polishing Tools
When it comes to sanding and polishing your DIY concrete tiles, you'll need the right tools to achieve a professional finish.
You'll start by using coarse grit sandpaper to remove imperfections and smooth out the surface, then progress to higher grits for a higher sheen.
Next, you'll apply a high-gloss polish to bring out the full beauty of your tiles, and we'll guide you through the process step-by-step.
Coarse Grit Sandpaper Uses
You'll be using coarse grit sandpaper to aggressively remove material and smooth out rough surfaces, an essential step in preparing your DIY concrete tiles for subsequent polishing and sealing. This stage of surface preparation is critical, as it sets the foundation for a successful finish.
Here are some key uses for coarse grit sandpaper in your DIY concrete tile project:
-
Removing imperfections: Use coarse grit sandpaper to eliminate any air bubbles, pits, or other defects that may have formed during the concrete curing process.
-
Smoothing out rough edges: Coarse grit sandpaper is perfect for rounding out sharp edges and creating a uniform surface.
-
Removing old adhesive or coatings: If you're refinishing existing concrete tiles, coarse grit sandpaper can help remove old adhesive or coatings, ensuring a strong bond with new sealants.
- Creating a surface profile: By using coarse grit sandpaper, you can create a surface profile that's ideal for subsequent polishing and sealing, allowing for better adhesion and a more even finish.
High-Gloss Polish Application
To achieve a high-gloss polish on your DIY concrete tiles, start by selecting the right sanding and polishing tools, as this stage requires a gradual progression of finer grits and specialized abrasives to produce a mirror-like finish.
| Grit Level | Description |
|---|---|
| 1000 | Initial polishing stage, removes minor scratches |
| 1500 | Intermediate polishing, enhances clarity |
| 2000 | Fine polishing, refines surface smoothness |
| 3000 | High-gloss polishing, achieves mirror-like finish |
| Polishing Compound | Final stage, adds extreme shine and protection |
When applying a high-gloss polish, remember that it's all about the details. Use a consistent, overlapping pattern to guarantee even coverage. Work in small sections, and avoid applying too much pressure, which can create scratches or swirl marks. The high gloss benefits are undeniable, as it not only enhances the appearance of your concrete tiles but also provides an added layer of protection against stains and wear. By mastering the application techniques outlined above, you'll be able to achieve a showroom-quality finish that will leave a lasting impression.
Lifting and Handling Equipment
For safe and efficient concrete tile production, invest in lifting and handling equipment specifically designed to maneuver heavy, bulky, and fragile materials with precision and control.
As you work with concrete tiles, you'll quickly realize that lifting techniques and handling safety are vital to avoiding injuries and damages. To guarantee a successful outcome, you'll need the right tools for the job.
Here are some essential lifting and handling equipment you should consider:
-
Pneumatic Lift Tables: These tables use compressed air to lift heavy loads, reducing strain on your back and increasing productivity.
-
Vacuum Lifters: These devices use suction cups to lift and move tiles, reducing the risk of damage and injury.
-
Tile Grippers: These handheld tools provide a secure grip on tiles, allowing you to lift and maneuver them with confidence.
- Dollies and Trolleys: These carts and platforms make it easy to transport heavy tiles around your workspace, reducing the risk of accidents and injuries.
Cleaning and Maintenance Tools
Properly cleaning and maintaining your equipment is essential to extending its lifespan and ensuring consistent, high-quality concrete tile production.
You'll need a range of cleaning and maintenance tools to keep your equipment in top condition. For starters, invest in a pressure washer to remove stubborn concrete residue from your molds and equipment. You'll also need a soft-bristled brush to gently scrub away any remaining debris. Additionally, a cleaning solution specifically designed for concrete equipment will help break down and remove tough stains.
To stay on top of maintenance, create a schedule that outlines regular cleaning and inspection tasks. This will help you identify and address any issues before they become major problems. Develop a routine for cleaning your molds, mixing equipment, and other tools to prevent the buildup of concrete residue and debris.
Frequently Asked Questions
Can I Use a Regular Drill to Mix Concrete Tile Mixture?
When mixing concrete tile mixture, you'll need more power than a regular drill can provide. Invest in a heavy-duty drill with high torque or a mixing paddle to guarantee proper mixing techniques, avoiding air pockets and achieving a consistent blend.
How Do I Achieve Uniform Color in My DIY Concrete Tiles?
To achieve uniform color in your DIY concrete tiles, you'll need to master color mixing and pigment selection. You'll want to use a high-quality, consistent pigment and mix it thoroughly with the correct ratio of cement and water.
Can I Make Large Format Concrete Tiles Without Special Equipment?
You're trying to tame a giant, crafting large format concrete tiles without special equipment. You can do it, but be prepared to wrestle with massive molds and tightly control concrete tile curing to prevent warping and cracking.
Are There Any Eco-Friendly Grout Options for Concrete Tiles?
You'll find eco-friendly grout options that align with your sustainable materials ethos by exploring grout alternatives, such as epoxy-based grouts, lime-based grouts, or even geopolymers, which offer reduced environmental impact without compromising performance.
Can I Use Concrete Tiles Outdoors in Freezing Temperatures?
Like a fortress built on solid ground, your outdoor concrete tiles must withstand freezing temperatures. You can use them outdoors if you guarantee freeze resistance and outdoor durability by selecting the right mix design, curing process, and sealant.
Conclusion
As you stand back to admire your handiwork, the fruits of your labor transform into a stunning mosaic of color and texture.
Your DIY concrete tiles, once mere mix of cement, sand, and water, now radiate an aura of sophistication and style.
The truth is, with the right tools, the impossible becomes possible, and the ordinary becomes extraordinary.
With every carefully crafted tile, you've not only created a functional piece of art but also a tribute to your unwavering dedication to DIY excellence.
Related Posts
-
Essential Tools for Concrete Wall Covering Projects
When tackling a concrete wall covering project, you'll need a range of essential tools and equipment. For cleaning an...
-

Why These Tools Are Crucial for Concrete Patio
You're about to commence on a concrete patio project, and having the right tools is vital to achieving professional-l...
-

Free Design Tools for Concrete House Planning
You can kick-start your concrete house planning project without breaking the bank, as there are several free design t...


