
Top Tools for Concrete Overlay Success
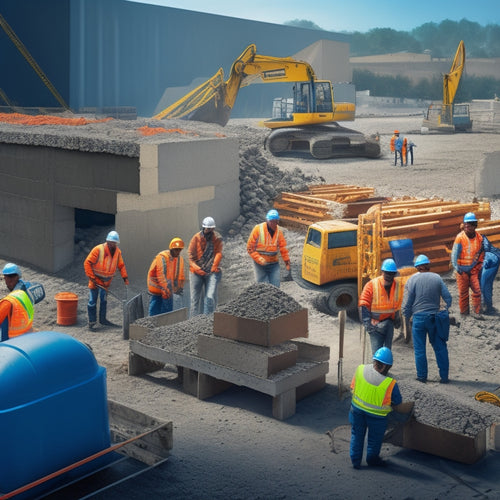
You're about to begin a concrete overlay project, and the difference between success and failure lies in the tools you choose. From surface preparation essentials like shot blasting and grinding to mixing and blending tools that guarantee uniformity, every step requires the right equipment. You'll need primer and bonding agents, overlay material application tools, tamping and compaction tools, and finishing and texturing tools like power trowels and high-speed burnishers. Don't forget edging and detailing tools, protective coating applicators, and cleanup and safety equipment. With these top tools, you'll be well on your way to achieving a successful, long-lasting concrete overlay - and that's just the foundation.
Key Takeaways
• Surface preparation is crucial, involving thorough cleaning, substrate evaluation, and repair of cracks and defects for a strong bond.
• Choosing the right mixing and blending tools, such as mechanical mixers or automated blenders, ensures a uniform concrete mix and quality finish.
• Applying a high-quality primer or bonding agent and conducting bond tests ensures a strong bond between the overlay and substrate.
• Selecting the right overlay material and application method, such as manual or mechanical, is critical for achieving a smooth, even finish.
• Having the right finishing and texturing tools, such as power trowels and texture mats, helps achieve the desired appearance and texture of the overlay.
Surface Preparation Essentials
Before applying a concrete overlay, you must thoroughly clean and prepare the existing substrate to secure a strong, durable bond between the old and new surfaces. This vital step is often overlooked, but it's essential for a successful overlay.
You'll need to conduct a surface assessment to identify any cracks, unevenness, or other defects that could compromise the bond. This involves a visual inspection, as well as testing for moisture, pH levels, and other factors that could affect the overlay's performance.
Next, you'll need to perform a substrate evaluation to determine the best preparation method. This may involve shot blasting, grinding, or acid etching to create a rough, porous surface for the overlay to adhere to.
You'll also need to repair any cracks or defects, and ascertain the substrate is level and even. By taking the time to properly prepare the surface, you'll guarantee a strong, long-lasting bond between the old and new surfaces.
This attention to detail will pay off in the long run, saving you time, money, and headaches down the line.
Mixing and Blending Tools
When it comes to achieving a strong, durable concrete overlay, you'll need to get the mixing and blending process just right.
You'll want to contemplate the blending system options that best fit your project's specific needs, whether that's a mechanical mixer or a manual mixing method.
Blending System Options
You'll need to select the right blending system options to guarantee a uniform and consistent mix of your concrete overlay materials. This is where the quality of your final product is determined. With the right blending techniques, you can ascertain that your color additives are evenly distributed, resulting in a flawless finish.
When choosing a blending system, consider the type of materials you're working with, the size of your project, and the level of precision you require.
For small to medium-sized projects, a manual or semi-automatic blender may suffice. However, for larger projects or those requiring high precision, an automated blender is the way to go. These systems can handle large batches of material and ascertain consistent blending, even with complex mix designs.
Additionally, automated blenders often come equipped with advanced features such as programmable recipes and real-time monitoring, allowing you to fine-tune your blending process and make adjustments on the fly.
Proper Mixing Techniques
With your blending system in place, it's time to focus on the proper mixing techniques that will guarantee your concrete overlay materials are thoroughly combined and aerated, resulting in a strong, durable bond.
You'll want to verify you're using the correct mixing ratios for your specific application, taking into account factors like aggregate size and type, cement content, and water requirements.
Don't skimp on consistency checks, either - regular inspections will help you identify and address any issues before they become major problems.
As you mix, pay attention to the material's workability, slump, and flow. You're aiming for a smooth, even consistency that's neither too stiff nor too soupy.
Use your mixing tools to break down any clumps or aggregates, and avoid over-mixing, which can lead to a weak, porous finish.
Primer and Bonding Agents
When you're preparing a concrete surface for an overlay, you'll need to ascertain it's properly primed and bonded to guarantee a strong, long-lasting finish.
You'll want to focus on surface preparation essentials, such as cleaning and profiling the substrate, to create an ideal bonding surface.
Surface Preparation Essentials
Proper surface preparation is vital to achieving a successful concrete overlay, and applying a high-quality primer or bonding agent is an essential step in guaranteeing a strong, long-lasting bond between the existing substrate and the new overlay material.
You'll want to conduct a thorough surface assessment to identify any cracks, unevenness, or other defects that could compromise the bond. This assessment will help you determine the best course of action for repairing or preparing the surface.
Next, you'll need to perform moisture testing to verify the substrate is dry enough to accept the overlay. Excessive moisture can cause the overlay to delaminate or fail prematurely, so it's essential to get this step right.
Once you've completed these steps, you can apply the primer or bonding agent according to the manufacturer's instructions. This will create a strong, chemical bond between the substrate and the overlay, ensuring a durable and long-lasting result.
Bond Strength Enhancement
By selecting the right primer or bonding agent for your concrete overlay project, you can greatly enhance the bond strength between the existing substrate and the new overlay material, guaranteeing a durable and long-lasting result. This is vital, as a weak bond can lead to delamination, cracks, and other issues down the line.
To achieve the best surface adhesion, it is important to choose a primer or bonding agent that's compatible with your specific project requirements. Here are some key factors to take into account:
| Primer/Bonding Agent Type | Key Characteristics |
|---|---|
| Epoxy-based | High-strength bonding, excellent chemical resistance |
| Acrylic-based | Fast-drying, versatile, and easy to apply |
| Polyurethane-based | Flexible, abrasion-resistant, and suitable for high-traffic areas |
| Silane-based | Excellent bonding to concrete, good chemical resistance |
When selecting a primer or bonding agent, be sure to follow the manufacturer's instructions and perform bond test methods, such as pull-off tests or shear tests, to verify the desired level of bond strength. By doing so, you'll be confident in the durability and performance of your concrete overlay project.
Overlay Material Application
You'll achieve a superior bond between the old concrete and the new overlay material by applying a primer or bonding agent to the prepared substrate. This guarantees a strong, durable bond that can withstand heavy foot or vehicle traffic.
Next, select the right overlay material type for your project, whether it's a self-leveling compound, a stampable overlay, or a thin-bonded overlay. Each type has its own unique characteristics, so choose wisely based on your project's specific needs.
When it comes to application techniques, you'll need to decide between manual or mechanical application methods. Manual application involves using a trowel or squeegee to spread the material, while mechanical application uses specialized equipment like pumps or sprayers to achieve a uniform finish.
Regardless of the method you choose, make sure to follow the manufacturer's instructions and apply the material at the recommended thickness to guarantee ideal results. By doing so, you'll be able to achieve a smooth, even finish that will last for years to come.
Tamping and Compaction Tools
Six essential tamping and compaction tools are at your disposal to guarantee the newly applied overlay material settles and hardens evenly.
You'll need a combination of these tools to achieve ideal results, as each one serves a specific purpose in the tamping and compaction process.
Start with a bull float, which helps to remove excess water and flatten the surface.
Then, use a darby to further flatten and smooth out the material.
Next, employ a hand tamper or power tamper to compact the material, especially in areas with high foot traffic or heavy loads.
For smaller areas, a tamping rod or spiked roller can be used to guarantee thorough compaction.
To achieve ideal density, you may need to use a plate compactor or roller compactor, depending on the specific compaction methods required for your project.
Finishing and Texturing Tools
With the overlay material compacted and settled, it's time to focus on refining its surface appearance using a range of finishing and texturing tools that will give your concrete overlay its desired look and functionality.
You'll need to choose the right tools to achieve the desired texture, pattern, and finish. For a smooth, high-gloss finish, you'll reach for a power trowel or a high-speed burnisher. If you're aiming for a more textured look, a stamp or a stenciler will help you achieve that.
When it comes to texturing techniques, you'll want to experiment with different tools and methods to get the desired effect. A texture mat or a stamp can add depth and visual interest to your overlay, while a broom or a tamping tool can create a more subtle texture.
Don't forget to add the finishing touches, such as sealing the overlay to protect it from the elements and enhance its appearance.
With the right finishing and texturing tools, you'll be able to achieve a professional-looking finish that meets your design vision.
Edging and Detailing Tools
As you move on to the finer details of your concrete overlay, turn your attention to edging and detailing tools, which will help you create crisp, clean edges and refine the overall appearance of your design. These tools are essential for achieving a professional finish and making your design stand out.
To master edging techniques, you'll need the right tools for the job. Here are some must-haves:
| Tool | Purpose | Benefit |
|---|---|---|
| Edging trowel | Create clean, sharp edges | Defines boundaries between different design elements |
| Detailing brushes | Refine small areas and details | Adds texture and visual interest |
| Edging scraper | Remove excess material and smooth edges | Guarantees a seamless finish |
| Profiling tools | Shape and refine edges | Creates a polished, high-end look |
Protective Coating Applicators
You'll need to apply a protective coating to seal and shield your beautifully crafted concrete overlay, which is where specialized applicators come into play. These applicators are designed to guarantee a smooth, even application of the coating, resulting in a durable and long-lasting finish.
When selecting a protective coating applicator, consider the type of coating you're using and the specific requirements of the application. For example, some coatings may require a specialized roller or brush to achieve the desired texture and finish.
To achieve peak coating durability, it's crucial to master various application techniques. This may include using the correct pressure, speed, and direction when applying the coating.
You'll also need to verify the surface is properly prepared, clean, and dry before application. By using the right applicator and mastering the correct application techniques, you can achieve a high-performance coating that will protect your concrete overlay from the elements and extend its lifespan.
With the right tools and techniques, you'll be able to deliver a high-quality finish that will impress clients and set you apart from the competition.
Cleanup and Safety Equipment
During concrete overlay projects, it's essential to have a range of cleanup and safety equipment on hand to minimize risks, prevent accidents, and maintain a tidy workspace. You'll want to invest in reliable tools that support efficient cleanup methods, such as pressure washers, scrub brushes, and solvent-resistant mops. These will help you remove excess material, clean equipment, and prepare surfaces for subsequent coats.
Don't overlook safety protocols, either. You'll need personal protective equipment (PPE) like gloves, safety glasses, and respirators to shield yourself from hazardous materials and airborne particles. Additionally, consider investing in spill containment systems, fire extinguishers, and first aid kits to mitigate potential hazards.
By prioritizing cleanup and safety, you'll create a more controlled environment that allows you to focus on achieving a high-quality concrete overlay.
Frequently Asked Questions
Can I Use a Concrete Overlay on a Wooden Surface?
You're wondering if you can apply a concrete overlay on a wooden surface. The short answer is, it's possible, but you'll need to guarantee proper overlay adhesion.
The wooden substrate must be thoroughly prepared, and a suitable bonding agent applied to create a strong bond between the wood and the overlay.
This requires meticulous surface preparation and the right materials to prevent delamination.
How Do I Fix a Delaminated Concrete Overlay?
You're dealing with a delaminated concrete overlay, which can occur due to inadequate surface prep, poor bonding, or excessive moisture.
To fix it, you'll need to identify the underlying cause of delamination. Then, you can apply repair techniques like grinding, scarifying, or applying a bonding agent to re-establish a strong bond between the overlay and substrate.
Ascertain a thorough cleaning and drying process before reapplying a new layer of concrete overlay, following proper installation procedures to prevent future delamination.
What Is the Recommended Overlay Thickness for Outdoor Use?
When specifying an overlay for outdoor use, you'll need to evaluate overlay thickness carefully.
For exterior applications, a minimum thickness of 1/4 inch is recommended, but this can vary depending on factors like traffic, climate, and substrate condition.
You should also follow outdoor application guidelines, such as ensuring proper drainage and slope, to prevent water infiltration and delamination.
Can I Apply a Concrete Overlay Over Existing Epoxy Coatings?
You're considering applying a concrete overlay over an existing epoxy coating, but you need to guarantee the epoxy adhesion is strong enough to support the new layer.
Proper surface preparation is essential - you'll need to thoroughly clean and profile the epoxy surface to create a strong bond.
If the epoxy is old, damaged, or poorly applied, it may not provide a suitable base for the overlay, and you may need to remove it before proceeding.
How Long Does a Concrete Overlay Last Before Needing Replacement?
You're wondering how long a concrete overlay lasts before needing replacement. The overlay's lifespan largely depends on factors like traffic, climate, and maintenance.
With proper care, an overlay can last 10-20 years or more. You'll want to seal it regularly, clean it frequently, and avoid harsh chemicals.
Conclusion
You've now got the top tools for concrete overlay success at your fingertips.
But here's the million-dollar question: do these tools really make a difference in the long run?
Research suggests that using the right tools can increase overlay lifespan by up to 30%.
By investing in these essential tools, you're not just ensuring a successful project - you're future-proofing your concrete overlay for years to come.
Related Posts
-

Top Concrete Resurfacing Tools for a Pro Finish
When it comes to achieving a professional finish in concrete resurfacing projects, you require the right set of speci...
-
7 Best Tools for Concrete Block Construction
You'll need a solid foundation, precise cutting, and seamless finishing to guarantee your concrete block construction...
-
5 Tips for Accurate Concrete Measurement Tools
To guarantee accurate concrete measurement, you'll want to calibrate your measuring tools regularly, choosing a frequ...


