
Top Grouting Tools for Concrete Block Repair
You'll need a range of specialized tools and materials to guarantee a successful concrete block repair, including grout floats, paddles, and finishing tools, as well as essential gear for cleaning, preparation, and safety. A grout float, sponge, and finishing tool are must-haves for application, while a mixing bucket, measuring cup, and trowel/putty knife are necessary for preparation. Don't forget a clean water source, wire brushes, and pressure washers for thorough cleaning. As you tackle your concrete block repair, mastering these tools and techniques will be vital - and there's more to explore to take your repair skills to the next level.
Key Takeaways
• A grout float, sponge, and finishing tool are essential for applying and smoothing grout in concrete block repairs.
• A mixing bucket, measuring cup, and trowel/putty knife are necessary for preparing and mixing grout to the right consistency.
• Wire brushes, pressure washers, and surface scrubbers are crucial for cleaning and preparing surfaces for strong grout bonding.
• A paddle or grout spreader, such as a stainless steel or aluminum paddle, is necessary for mixing and applying grout efficiently.
• A jointer's trowel, grout float, and grout sponge are vital for pointing, finishing, and cleaning grout in tight spaces and large areas.
Essential Grouting Materials Needed
You'll need to gather the following essential grouting materials to guarantee a successful concrete block repair. First, choose a grout that matches the color of your concrete blocks. Grout color selection is vital to ensure a seamless blend with the surrounding area. Select a grout that's specifically designed for concrete block repairs, as it'll provide the necessary strength and durability.
Next, prepare the necessary tools for grout application techniques. You'll need a grout float, a grout sponge, and a grout finishing tool. The grout float helps spread the grout evenly, while the sponge is used to remove excess grout from the surface. The grout finishing tool is essential for creating a smooth, even finish.
Additionally, make certain you have a mixing bucket, a measuring cup, and a trowel or putty knife for mixing and applying the grout. It's also important to have a clean water source nearby to clean your tools and wash away excess grout.
With these essential materials, you'll be well-equipped to tackle your concrete block repair project with confidence and precision.
Grout Mixers and Paddles
When you're preparing to repair concrete blocks, you'll need to mix grout efficiently to achieve the right consistency.
You'll want to choose a paddle material that can withstand the demands of mixing, and consider options like stainless steel or fiberglass.
Mixing Grout Efficiently
With a grout mixer or paddle, you can efficiently combine cement, sand, and water to achieve a consistent, workable grout mix. This is essential for successful concrete block repair, as a well-mixed grout guarantees strong bonds and minimizes the risk of cracks and failures.
To optimize your grout mixing techniques, follow these efficient mixing methods:
-
Start with a clean mixing surface: Remove any debris or old grout residue to prevent contamination and guarantee a smooth mixing process.
-
Use the right mixing ratio: Follow the manufacturer's instructions for the correct proportion of cement, sand, and water to achieve the desired consistency.
-
Mix in small batches: Divide your grout mixture into manageable quantities to maintain control and prevent over-mixing, which can lead to a weak or brittle grout.
Paddle Material Options
Your grout mixer or paddle's material plays an essential role in efficiently mixing grout, as it directly affects the tool's durability, ease of cleaning, and overall performance.
When selecting a paddle material, consider the type of grout you're working with and the level of abrasion resistance you need. Stainless steel paddles, for instance, offer superior durability and resistance to corrosion, making them ideal for mixing heavy-bodied grouts. Aluminum paddles, on the other hand, are lightweight and suitable for general-purpose grouting tasks.
It's also vital to guarantee paddle compatibility with your mixing drum or bucket to prevent damage and ensure efficient mixing. Look for paddles with reinforced handles and ergonomic grips to reduce fatigue and improve control.
When evaluating paddle durability, consider the material's ability to withstand wear and tear from abrasive grout particles and repeated cleaning. By choosing the right paddle material, you can optimize your grouting process, reduce downtime, and achieve professional-grade results.
Consistency Control Tips
Achieving consistent grout mixes relies on your ability to control the mixing process, and a well-maintained grout mixer and paddle play an important role in this effort.
To guarantee consistency, you need to pay attention to the factors that affect your grout mix. Here are some tips to help you achieve the perfect blend:
-
Monitor moisture levels: Moisture control is vital in grout mixing. Confirm your mixer and paddle are clean and dry before use, and avoid adding excessive water to the mix. This will prevent uneven hydration and inconsistent grout strength.
-
Regulate temperature effects: Temperature affects the setting time and strength of your grout. Mix your grout in a temperature-controlled environment, and avoid mixing in extreme temperatures (below 50°F or above 90°F).
-
Maintain a consistent mixing pattern: Develop a consistent mixing pattern to guarantee all ingredients are well incorporated. This will help prevent lumps, uneven color, and inconsistent strength.
Cementitious Grout Options
You'll find that cementitious grout options, which rely on a mixture of cement, sand, and water, are ideal for repairing cracks and voids in concrete block structures due to their high compressive strength and durability.
These grouts are particularly well-suited for structural repairs, as they can withstand heavy loads and harsh environmental conditions.
When selecting a cementitious grout, you'll want to take into account the type and its performance factors.
There are several cementitious grout types to choose from, including sulfate-resistant, high-early strength, and low-shrinkage grouts. Each type is designed to address specific repair challenges, such as high-sulfate environments or rapid-strength gain requirements.
Grout performance factors to take into account include flowability, compressive strength, and bond strength.
By understanding these factors, you can select the right grout for your specific repair project and guarantee a strong, durable bond between the grout and the surrounding concrete.
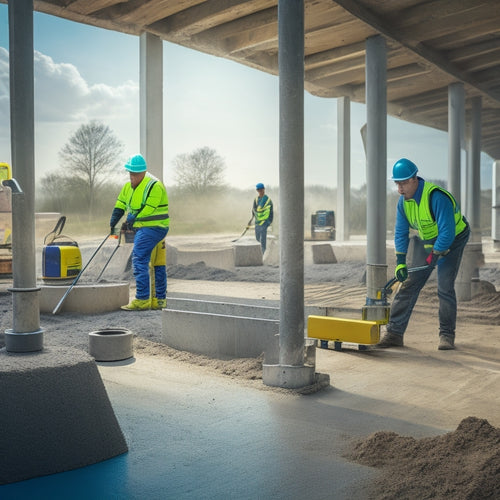
Cleaning and Preparation Tools
The surface of the concrete block structure must be thoroughly cleaned and prepared before applying grout to ascertain a strong bond. A range of specialized tools is necessary to accomplish this critical step. As you prepare to repair your concrete block structure, you'll need to invest in the right cleaning and preparation tools to guarantee a successful outcome.
Here are three essential tools you'll need:
-
Wire brushes: These sturdy brushes are perfect for removing dirt, debris, and old grout from the surface of the concrete blocks. They come in various sizes and are ideal for reaching into tight spaces.
-
Pressure washers: A pressure washer is a powerful tool for cleaning the surface of the concrete blocks. It can blast away dirt, grime, and other substances that might interfere with the bonding process.
-
Surface scrubbers: These handheld tools are designed for heavy-duty cleaning and are perfect for removing stubborn dirt and grime from the surface of the concrete blocks. They often feature sturdy bristles or abrasive pads that can tackle even the toughest cleaning tasks.
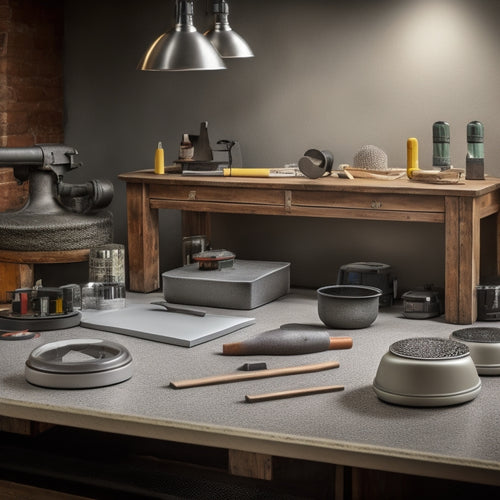
Grout Floats and Trowels
As you prepare to apply grout to your concrete block repair, you'll need to select the right grout spreader for the job.
You'll find that there are different types of grout spreaders, each designed for specific tasks and grout consistencies.
Now, let's examine the key characteristics of these tools, including float blade angles, to guarantee you're making the most effective choice for your project.
Grout Spreader Types
Select a grout spreader that suits your concrete block repair project, choosing from two primary types: grout floats and trowels, each designed for specific grouting tasks. You'll want to take into account the grout spreader designs and materials that will give you the best results.
Here are three key factors to take into account when choosing a grout spreader:
-
Grout spreader materials: Look for durable, rust-resistant materials like stainless steel or heavy-duty plastic. These will withstand the demands of your project and provide a smooth, even grout spread.
-
Grout spreader designs: Grout floats typically have a flat, rectangular blade, while trowels have a curved or angled blade. Floats are ideal for spreading large quantities of grout, while trowels are better suited for smaller areas or precision work.
-
Handle type and comfort: Choose a grout spreader with a comfortable, ergonomic handle that fits your grip. This will reduce fatigue and allow you to work efficiently.
Float Blade Angles
You'll find that the blade angle of your grout float or trowel greatly impacts the quality of your grout spread, with different angles suited to specific tasks and grout types.
A steeper angle, typically between 60-80 degrees, is ideal for pushing grout into tight spaces and joints, while a shallower angle, around 30-50 degrees, is better suited for spreading grout over larger areas. It's vital to choose the right float blade type for your project, as it will affect the final result.
Regular float blade maintenance is also significant to guarantee peak performance. Dull or clogged blades can lead to uneven grout distribution and a poor finish.
Clean your blades regularly with a wire brush or solvent to remove dried grout and debris. Additionally, store your blades in a dry place to prevent rust or corrosion.
Pointing and Finishing Tools
Precision is key when it comes to pointing and finishing tools, which are specifically designed to refine and perfect the joints between concrete blocks. These tools help you achieve a professional-looking finish, and mastering them will elevate your concrete block repair skills.
To get the best results, you'll need the right tools for the job. Here are three essential pointing and finishing tools to add to your toolkit:
-
Jointer's trowel: A jointer's trowel is perfect for applying and smoothing out grout in tight spaces. Its curved blade and offset handle make it easy to maneuver in tight joints.
-
Grout float: A grout float is used to spread and smooth out grout, removing excess material and leaving a smooth finish. Look for a float with a rubber blade for the best results.
-
Grout sponge: A grout sponge is used to remove excess grout from the surface of the blocks, leaving a clean finish. Use it to wipe away excess grout and achieve a professional-looking finish.
Safety Gear and Protective Wear
As you begin concrete block repair, safeguarding yourself against potential hazards is essential, and investing in the right safety gear and protective wear is critical to ensuring a successful and injury-free project.
You'll be working with grout, concrete, and potentially hazardous materials, so it's important to protect yourself from dust, debris, and chemicals.
First and foremost, safety goggles are a must-have. They'll shield your eyes from flying particles, dust, and other debris that can cause serious injury. Look for goggles with scratch-resistant lenses and a comfortable, snug fit.
Protective gloves are also essential. They'll protect your hands from harsh chemicals, abrasives, and rough surfaces. Opt for gloves with a grip-resistant palm and fingers, and a breathable material to keep your hands cool and dry.
Don't forget to wear long-sleeved shirts, long pants, and closed-toe shoes to protect your skin from exposure to hazardous materials. A dust mask or respirator can also be a good investment, especially when working with dusty or chemical-laden materials.
Grout Removal and Chiseling
With the safety gear in place, turn your attention to removing the old, deteriorated grout from between the concrete blocks, a process that typically involves chiseling and scraping away the unwanted material. This significant step requires patience and precision, as you'll need to carefully remove the old grout without damaging the surrounding concrete.
Here are three essential grout removal techniques to master:
-
Chiseling with a hammer and chisel: This traditional method involves striking the chisel with a hammer to break away the old grout. Be sure to hold the chisel at a 20-30 degree angle to avoid damaging the concrete.
-
Using a grout saw: A grout saw is a handheld tool that allows for more precise control when removing grout. Its serrated blade is designed to cut through old grout without scratching the surrounding concrete.
-
Applying a grout remover: For tougher grout removal jobs, consider applying a grout remover to help break down the old material. This can make the chiseling process easier and more efficient.
Sealing and Curing Compounds
How do you guarantee the newly installed grout achieves perfect strength and durability, and what role do sealing and curing compounds play in this process?
These compounds are essential for making sure the grout cures properly, preventing water infiltration, and maintaining the structural integrity of the concrete block. Sealing and curing compounds work in tandem to safeguard the grout from environmental factors, such as temperature fluctuations and moisture exposure.
You can employ various sealing techniques to achieve excellent results. For instance, applying a waterproofing sealant to the grout surface can prevent water seepage and reduce the risk of damage. Additionally, using a penetrating sealer can help to strengthen the grout and provide long-term protection.
Curing methods, on the other hand, involve the application of a specialized compound to the grout surface, facilitating the hydration process and promoting uniform curing.
Frequently Asked Questions
Can I Use a Drill Mixer for Grout With Small Aggregates?
You're wondering if you can use a drill mixer for grout with small aggregates. The answer is yes, you can!
A drill mixer offers benefits like efficient mixing and reduced labor fatigue.
However, to achieve the right grout consistency, make sure to start with a slow speed and gradually increase as needed.
Also, add water gradually to avoid over-mixing, which can lead to a weak bond.
How Long Does It Take for Grout to Fully Cure?
Imagine a master chef carefully crafting a dish, waiting for the perfect blend of flavors to meld together.
Similarly, you're waiting for your grout to fully cure. The grout drying time depends on various factors affecting cure, such as temperature, humidity, and air circulation.
Typically, it takes around 24 hours for initial set, but full cure can take up to 28 days. You control the outcome by monitoring these factors, ensuring your grout reaches its maximum strength and durability.
What Is the Ideal Temperature for Grouting Concrete Blocks?
When you're grouting concrete blocks, you need to take into account the ideal temperature for optimal results.
You'll find that most grouting techniques are sensitive to temperature effects. Ideally, you should work within a range of 50°F to 90°F (10°C to 32°C). This allows the grout to flow smoothly and cure properly.
Avoid extreme temperatures, as they can affect the grout's consistency, leading to poor bonding and weakened structural integrity.
Can I Grout in Direct Sunlight or High Winds?
When you're planning to grout, avoid direct sunlight and high winds, as they can compromise the grouting techniques.
Direct sunlight can cause the grout to dry too quickly, leading to uneven color and texture. High winds can disrupt the grout's flow and consistency.
Instead, opt for shaded or covered areas with minimal wind exposure. By considering these weather considerations, you'll guarantee a smooth, professional-looking finish.
Do I Need to Seal Grout for Exterior Concrete Block Repairs?
When working on exterior concrete block repairs, you're probably wondering if you need to seal the grout. The answer is yes, you should.
Sealing grout provides numerous benefits, such as protecting it from water damage, stains, and erosion.
Exterior grout considerations are vital, as it's exposed to harsh weather conditions.
Conclusion
With the right repertoire of grouting tools, you're ready to revitalize rundown concrete block structures.
From mixing and matching to cleaning and curing, these top tools tackle tasks with precision and ease.
Mastering the art of grouting demands dedication, but with these essential instruments, you'll conquer cracks, crevices, and crumbling concrete with confidence.
Craft a cohesive concrete canvas, and complete your concrete block repair with finesse.
Related Posts
-

Why You Need Affordable Concrete Wall Construction Tools
You need affordable concrete wall construction tools to guarantee a profitable project, as the cost of equipment can ...
-
What Tools Ensure Precise Concrete Leveling Results
You need a range of specialized tools to achieve precise concrete leveling results. Laser leveling instruments provid...
-
10 Best Tools for Sealed Concrete Finishing Success
When it comes to sealed concrete finishing success, you need a robust arsenal of specialized tools. Start with essent...


