Top DIY Tools for Finishing Concrete Projects
Share
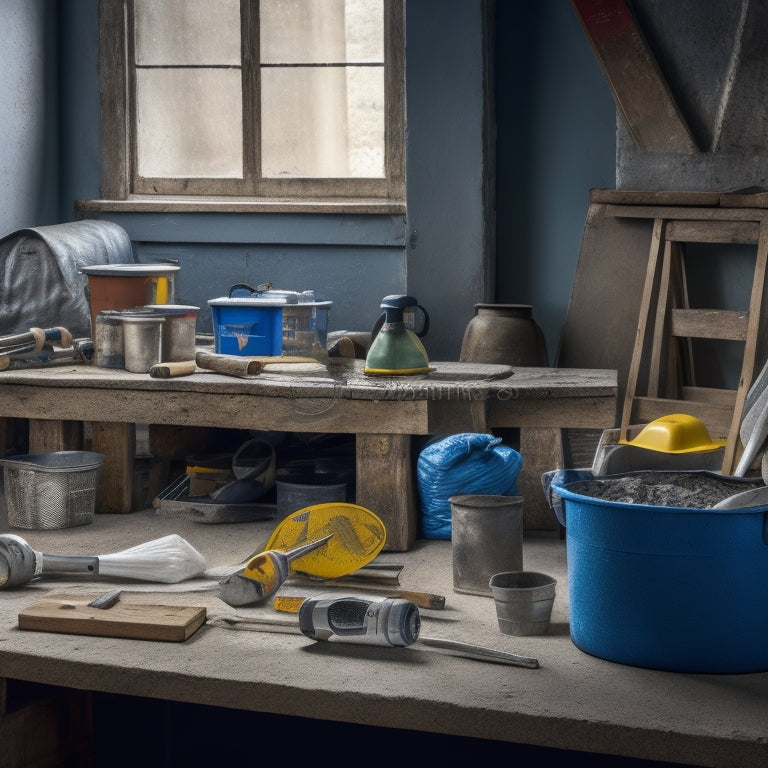
To achieve professional-grade finishes in your DIY concrete projects, you'll need an arsenal of specialized tools. For smooth finishes, start with essential trowels like finishing trowels, bull floats, and edging trowels. Edgers, such as hand edgers and walk-behind edgers, provide precise edge control for clean lines. Floats, including bull floats and darby floats, help create even surface finishing. Don't forget tamping tools for compacting mix, grouting and sealing essentials, and finishing brushes for textured looks. As you master these tools and techniques, you'll be able to access the full potential of your concrete projects and take your skills to the next level.
Key Takeaways
• For smooth finishes, essential trowels include finishing trowels, bull floats, and edging trowels, each serving a specific purpose in the concrete finishing process.
• Edgers provide precise edge control, removing excess concrete and preventing seepage, with options including hand edgers, walk-behind edgers, ride-on edgers, and electric edgers.
• Floats, such as bull floats and darby floats, help achieve even surface finishing by holding them at a 45-degree angle and applying gentle pressure in overlapping sections.
• Tamping tools, like heavy, flat base tools with sturdy handles, are necessary for compacting freshly poured concrete and eliminating air pockets.
• Grouting and sealing tools, including grout floats, grout sponges, and sealant applicators, protect concrete surfaces from stains, cracks, and damage.
Essential Trowels for Smooth Finishes
You'll need a variety of trowels in your toolkit to achieve a smooth, even finish on your concrete project, as different trowels serve specific purposes and are suited for particular stages of the finishing process. There are three main trowel types: finishing, bull float, and edging.
Finishing trowels, typically made of stainless steel or high-carbon steel, are used for the final stages of finishing, producing a smooth, even surface. Bull float trowels, with their long handles and large, flat blades, are designed for floating and leveling concrete. Edging trowels, characterized by their curved or angled blades, are used for creating clean edges and corners.
To master the art of concrete finishing, you'll need to develop proper trowel techniques. Start by holding the trowel at a 45-degree angle, with the blade almost flat on the concrete surface.
Apply gentle to moderate pressure, depending on the stage of the finishing process, and move the trowel in smooth, even strokes. Remember to always work in small sections, maintaining a consistent pattern to avoid creating air pockets or unevenness.
Edgers for Clean Concrete Lines
When you're working on a concrete project, you'll need an edger that provides precise edge control to achieve clean, defined lines.
You'll find that the right edger helps you create a smooth finish by removing excess concrete and preventing it from seeping between the forms.
Precise Edge Control
Precise Edge Control
Achieving crisp, clean concrete lines requires precise edge control, which is where edgers come into play, providing a defined boundary between the concrete and adjacent surfaces. As you work on your concrete project, you'll appreciate the importance of edgers in creating a professional-looking finish.
| Edger Type | Description |
|---|---|
| Hand Edger | Ideal for small areas and tight spaces, hand edgers are perfect for edge trimming and surface leveling. |
| Walk-Behind Edger | Suitable for larger areas, walk-behind edgers provide more power and control for precise edge control. |
| Ride-On Edger | For large commercial projects, ride-on edgers offer maximum power and efficiency for achieving clean concrete lines. |
| Electric Edger | A cost-effective option for small to medium-sized projects, electric edgers are quiet, lightweight, and easy to use. |
When choosing an edger, consider the size of your project, the surface type, and your personal comfort level with the equipment. Always follow safety guidelines and manufacturer instructions to guarantee a successful and safe concrete finishing experience. By selecting the right edger for your project, you'll achieve precise edge control and a professional-looking finish.
Smooth Finish Creation
To achieve a smooth finish, edgers play an essential role in creating clean concrete lines by removing excess material and consolidating the surface. When you use an edger correctly, it helps to refine the concrete's surface, preparing it for further smoothing techniques.
As you work, make sure to keep the edger's blade at a consistent angle, using a gentle, sweeping motion to remove any excess material. This helps to prevent creating air pockets or unevenness in the concrete.
When selecting an edger for your project, consider the type of finishing method you'll be using. For example, if you're planning a high-gloss finish, you'll want an edger with a finer blade to achieve a more precise surface. For a matte finish, a coarser blade may be more suitable.
Regardless of the finish you're aiming for, always prioritize safety when working with edgers. Wear protective gear, including gloves, safety glasses, and a dust mask, to prevent injury from flying debris or inhaling concrete dust.
Clean Line Formation
You'll need to master the art of clean line formation using edgers, as these tools are specifically designed to create sharp, defined edges and joints in your concrete project. Edgers come in various types, including walk-behind, ride-on, and handheld models, each suited for specific tasks and project sizes.
When choosing an edger, consider the type of concrete you're working with, the size of the area, and the desired finish. Proper cleaning techniques are also essential for achieving clean lines. Regularly clean your edger to prevent concrete buildup and maintain its performance.
Here's a comparison of popular edger types:
| Edger Type | Features |
|---|---|
| Walk-Behind | Ideal for large areas, high production rates, and heavy-duty use |
| Ride-On | Suitable for commercial projects, offers increased efficiency and comfort |
| Handheld | Perfect for small areas, tight spaces, and detailed work |
| Electric | Quiet, low-maintenance, and eco-friendly option |
| Gas-Powered | High-torque, suitable for heavy-duty applications and large areas |
Remember to always follow safety guidelines and line maintenance best practices when working with edgers to guarantee a professional finish and prevent accidents.
Floats for Even Surface Finishing
When you're working on a concrete project, achieving a smooth surface is essential, and that's where floats come in.
You'll use these tools to flatten and level the surface, ensuring it's even and consistent.
Smooth Surface Achieved
With a freshly poured concrete slab, you're now ready to utilize floats to achieve a smooth, even surface finish. This vital step in surface preparation is essential for a polished appearance.
As you begin, make sure you're wearing protective gear, including gloves, safety glasses, and a dust mask to avoid inhaling concrete dust.
Select a float that suits your project's size and type. There are two main types: bull floats and darby floats. Bull floats are ideal for larger areas, while darby floats are better suited for smaller, more intricate spaces.
Hold the float at a 45-degree angle and apply gentle pressure, working in overlapping sections to cover the entire surface. Use long, smooth strokes to push excess water and air pockets to the surface, allowing them to dissipate.
As you float the concrete, maintain a consistent pace to avoid creating unevenness. Stop periodically to inspect your progress, making adjustments as needed.
With each pass, you'll notice the surface becoming increasingly smooth and even. By following these steps, you'll achieve a professional-looking finish, setting the stage for a successful concrete project.
Finishing Edges Perfectly
Now that you've achieved a smooth surface finish using floats, focus on refining the edges to create a seamless, polished look. Finishing edges perfectly requires attention to detail and the right tools.
For edge treatment techniques, use an edger or a concrete edging tool to create a clean, defined edge. These tools are designed to remove excess concrete, creating a smooth shift between the concrete and the surrounding surface.
When finishing edges, it's important to wear protective gear, including gloves, safety glasses, and a dust mask. This will protect you from flying debris and concrete particles.
For corner finishing methods, use a corner trowel or a radius float to create a smooth, curved edge. Apply gentle pressure, working from the inside out to avoid creating air pockets or bubbles.
Remember to work slowly and methodically, taking your time to verify each edge is perfect. Use a level to check your work, making adjustments as needed.
Tamping Tools for Compacting Mix
You'll need a sturdy tamping tool to compact the freshly poured concrete, guaranteeing it's evenly distributed and free of air pockets. This pivotal step in the concrete finishing process requires the right tool to achieve a solid, stable surface.
When selecting a tamping tool, look for one with a heavy, flat base and a sturdy handle. This will provide the necessary force and control to compact the concrete effectively.
Mastering proper tamping techniques is essential to reap the compacting benefits. Start by holding the tool at a 45-degree angle and applying gentle to moderate pressure. Use a slow, deliberate motion to work the tool in a consistent pattern, covering the entire surface.
This will help eliminate air pockets and guarantee a dense, uniform finish. By compacting the concrete, you'll improve its strength, durability, and resistance to cracking. Additionally, a well-compacted surface will be less prone to water infiltration and damage.
With the right tamping tool and techniques, you'll achieve a professional-looking finish that will last for years to come.
Grouting and Sealing Essentials
Frequently, grouting and sealing are overlooked steps in concrete projects, but they're vital for protecting the surface from stains, cracks, and damage. You can't afford to skip these important steps, as they guarantee the longevity and appearance of your concrete creation.
To get it right, you'll need the right tools. Here are the grouting and sealing essentials you shouldn't skip:
-
Grout float: A grout float helps you spread grout evenly and remove excess material. Look for a float with a rubber edge to prevent scratching the concrete.
-
Grout sponge: A grout sponge is used to remove excess grout from the surface. Choose a sponge with a coarse texture to effectively remove grout haze.
-
Sealant selection: Select a sealant that suits your project's needs. Acrylic, polyurethane, and epoxy sealants are popular options, each with its own strengths and weaknesses.
- Sealant applicator: Use a sealant applicator to evenly apply the sealant to the concrete surface. This guarantees a uniform finish and prevents pooling.
Finishing Brushes for Textured Looks
With a grouted and sealed concrete surface in place, it's time to add texture and visual interest using finishing brushes, an essential tool for achieving unique, high-end looks.
You'll use these brushes to create textured patterns that add depth and character to your concrete project. When selecting a finishing brush, consider the type of texture you want to accomplish. For example, a stiffer brush will create more pronounced textures, while a softer brush will produce more subtle patterns.
To obtain creative finishes, experiment with different brush strokes and techniques. Try dragging the brush in various directions, or use a circular motion to create a swirling pattern. Always work in small sections, and use a level to verify your strokes are even and consistent.
Remember to wear protective gear, including gloves and safety glasses, to prevent injury from flying debris or brush bristles.
When you're finished, allow the concrete to set before applying a sealant to protect your textured design. With the right finishing brush and a little practice, you can accomplish professional-looking results that showcase your creativity and attention to detail.
Frequently Asked Questions
What Is the Ideal Temperature for Finishing Concrete Projects?
When working with concrete, you need to guarantee the ideal temperature for curing.
You should aim for temperatures between 50°F and 75°F (10°C and 24°C) for best results.
Avoid extreme temperatures, as they can affect the concrete's strength and integrity.
If it's too cold, curing slows down; if it's too hot, it accelerates, leading to weak spots.
How Do I Prevent Concrete From Drying Too Quickly?
When working with concrete, you'll want to prevent it from drying too quickly to guarantee a strong, durable finish.
To do this, you'll need to employ concrete curing techniques and moisture retention methods.
You can start by applying a curing compound to the surface, which helps retain moisture and reduce evaporation.
Additionally, use a misting system or fogging equipment to maintain a consistent level of humidity, guaranteeing your concrete cures slowly and evenly.
Can I Use a Drill to Mix Small Batches of Concrete?
You're wondering if you can use a drill to mix small batches of concrete. The answer is yes, but you'll need the right drill type.
A cordless drill or impact driver with a mixing paddle attachment is ideal. When mixing, use a slow, controlled pace to avoid introducing air pockets. Start with a low speed and gradually increase as needed.
Always wear protective gear, including gloves, safety glasses, and a dust mask, to guarantee your safety during the mixing process.
What Safety Gear Is Necessary for Working With Concrete?
Imagine watching a friend suffer from silicosis, a debilitating lung disease caused by inhaling concrete dust. You can avoid this by taking safety precautions seriously.
When working with concrete, you'll need protective eyewear with ANSI-approved lenses to shield your eyes from flying particles.
Additionally, wear a dust mask or respirator with a HEPA filter to prevent inhaling concrete dust.
Don't take risks - prioritize your health and safety above all else.
Can I Finish Concrete in the Rain or High Humidity?
When working with concrete, you need to be mindful of the weather conditions.
If you're planning to finish concrete in the rain or high humidity, think again. Moisture can severely impact concrete curing, leading to weak spots, cracks, and even structural issues.
You'll want to avoid finishing concrete in wet conditions to guarantee a strong, durable finish. Instead, wait for a dry spell to ensure proper curing and a successful project.
Conclusion
As you put the finishing touches on your concrete project, remember that the right tools are the unsung heroes of a job well done.
Like a medieval knight wielding Excalibur, you've conquered the concrete jungle with your trusty DIY arsenal.
Now, go forth and showcase your handiwork – the modern equivalent of a Renaissance masterpiece.
With these high-quality tools, your concrete creations will be the envy of the neighborhood, standing the test of time like an ancient Roman aqueduct.
Related Posts
-

7 Must-Have Tools for Concrete Repair Organization
To effectively organize your concrete repair projects, you'll need a thorough toolkit that includes a well-planned st...
-

Why These Tools Are Crucial for Concrete Patio
You're about to commence on a concrete patio project, and having the right tools is vital to achieving professional-l...
-

5 Tips for Splitting Concrete With Second-Hand Tools
When splitting concrete with second-hand tools, you'll need to be strategic to avoid wasting time, money, and putting...


