Surface Prep Tools for Concrete Masonry Walls
Share
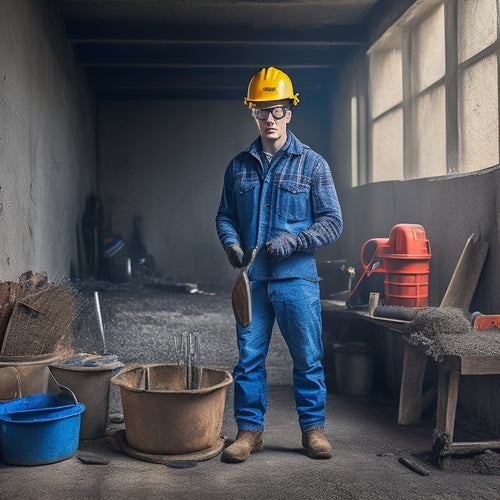
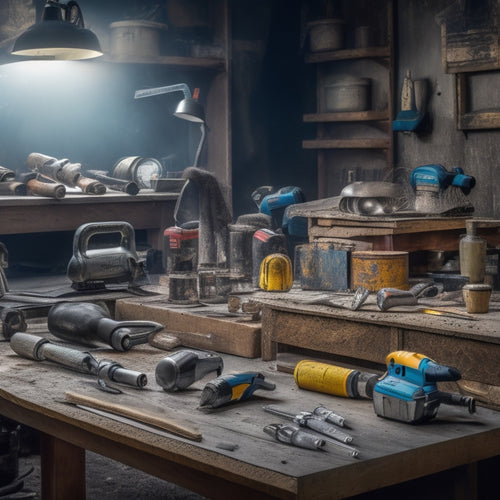
You'll need a range of specialized tools to prepare concrete masonry walls for finishing, sealing, or repairing. Essential installation tools like levels, tape measures, and chalk lines guarantee proper alignment and leveling. Cleaning tools, including wire brushes, joint rakes, and joint cleaning solutions, remove dirt and debris. Surface refinement tools like sanding blocks, grinding and polishing tools, and scraping and chiseling tools refine surfaces and remove imperfections. Additionally, you'll need removal and repair tools for tasks like crack repair and filling. By familiarizing yourself with these tools, you'll be well-equipped to tackle your concrete masonry wall project and achieve a professional-looking finish – and there's even more to explore when it comes to mastering these essential tools.
Key Takeaways
• Essential tools like levels, tape measures, and chalk lines ensure proper alignment and leveling of concrete masonry blocks.
• Wire brushes, joint rakes, and cleaning solutions are necessary for cleaning and preparing concrete surfaces for maintenance or repair.
• Sanding blocks, papers, and grinding/polishing tools refine surfaces, eliminate imperfections, and create high-gloss finishes.
• Scraping and chiseling tools, like steel or carbide-tipped tools, effectively remove old adhesive and debris from concrete surfaces.
• Pressure washing equipment, with proper nozzle selection and pressure adjustment, safely and effectively clean concrete masonry walls.
Tools Needed for Cinder Block
When preparing a cinder block wall for a decorative finish, you'll need to gather a specific set of tools to guarantee a strong bond between the block and the subsequent layers. Cinder block installation requires attention to detail, and the right tools will make certain a successful outcome.
For a strong foundation, you'll need a level, a tape measure, and a chalk line to make certain the blocks are aligned and level. A rubber mallet or tamping tool is necessary for settling the blocks into place. Additionally, a notched trowel is required for applying mortar, and a jointer or pointing trowel is necessary for filling gaps.
Proper cinder block maintenance also relies on the right tools. A stiff-bristled broom or a scrub brush can be used to remove dirt and debris from the surface. A garden hose or pressure washer can be used to clean the wall, but be cautious not to damage the block.
Having these tools at your disposal will make certain a successful cinder block installation and facilitate routine cinder block maintenance, ultimately leading to a durable and visually appealing finish. By investing in these essential tools, you'll be well on your way to achieving a professional-looking result.
Wire Brush and Steel Bristle
You'll need to employ a wire brush or steel bristle brush to aggressively remove dirt, grime, and old adhesive residue from the cinder block surface, creating a clean canvas for the subsequent finish. This step is vital in guaranteeing a strong bond between the concrete and the new finish.
When using wire brush techniques, it's important to work in small, circular motions to avoid scratching the surface. For steel bristle care, make certain to clean the brush regularly to prevent the buildup of debris, which can compromise its effectiveness.
Here are some key considerations to keep in mind:
-
Choose the right brush size and type for your specific project needs
-
Wear protective gear, including gloves and safety glasses, to prevent injury
-
Test the brush on a small, inconspicuous area to verify it won't damage the concrete surface
Sanding Blocks and Papers
To further refine the surface and remove any remaining imperfections, switch to sanding blocks and papers, which offer a more controlled and precise method of surface preparation. These tools are ideal for fine-tuning the surface, removing minor defects, and creating a smooth finish.
When selecting sanding papers, consider the grit selection to guarantee you're using the right level of coarseness for your specific needs. Start with a coarser grit (around 80-100) to remove any remaining imperfections, then progress to finer grits (120-150) for a smoother finish.
When using sanding blocks, employ sanding techniques that work in small, circular motions to maintain even pressure and prevent scratches. Apply moderate pressure, increasing as needed for more aggressive sanding. Be sure to work in a consistent pattern to avoid creating swirl marks or other imperfections.
Grinding and Polishing Tools
With the surface refined to a smooth finish, it's time to turn your attention to grinding and polishing tools, which will help you tackle more substantial imperfections and achieve a high-gloss finish. These tools are designed to remove deeper scratches and imperfections, while also producing a higher level of shine.
When selecting grinding and polishing tools, consider the following key factors:
-
Diamond blades: These blades are ideal for aggressive grinding and removing deep scratches and imperfections. They're available in various grit levels, ranging from coarse to fine, allowing you to tailor your grinding process to the specific surface finish you're trying to achieve.
-
Polishing pads: These pads are designed for finer grinding and polishing, producing a high-gloss finish. They're typically used in conjunction with a polishing compound to remove minor scratches and imperfections.
-
Grinding and polishing machines: These machines are designed to make the grinding and polishing process more efficient and effective. They can be used with a variety of grinding and polishing tools, and are ideal for large-scale projects.
Scraping and Chiseling Tools
When you're prepping a concrete wall, you'll likely need to remove old adhesive or break up debris that's stuck to the surface.
You'll find that scraping and chiseling tools are perfect for these tasks, as they allow you to target specific areas with precision and control.
Removing Old Adhesive
You'll likely need to tackle stubborn remnants of old adhesive, which can leave behind a residue that interferes with new coatings or coverings, by employing scraping and chiseling tools specifically designed for concrete walls. This vital step in surface preparation guarantees a strong bond between the new material and the wall.
Adhesive types, such as epoxy, acrylic, or silicone, can vary in their removal difficulty, but the right tools will make the process more efficient.
When selecting scraping and chiseling tools, consider the following factors:
-
Tool material: Choose tools made from durable materials, like steel or carbide-tipped, to withstand the rigors of scraping and chiseling concrete.
-
Edge type: Select tools with a sharp, angled edge to effectively remove old adhesive without damaging the wall surface.
-
Handle design: Opt for tools with ergonomic handles that provide a comfortable grip, reducing fatigue during extended use.
Breaking Up Debris
Frequently, the most effective way to break up debris on concrete walls is to employ scraping and chiseling tools that can withstand the abrasive nature of concrete and effectively dislodge stubborn debris.
You'll find that these tools are essential for removing old mortar, aggregate, and other substances that can compromise the integrity of your surface prep.
When selecting a scraping tool, look for one with a durable blade or edge that can withstand the rigors of concrete.
Chiseling tools, on the other hand, should have a sturdy handle and a robust chisel point that can effectively break up debris without damaging the surrounding concrete.
Joint Raking and Cleaning
When you're preparing concrete walls for surface finishing, you'll need to pay close attention to the joints.
You'll need to rake out debris deep into the joint, making sure to remove any loose material that could compromise the new finish.
Rake Out Debris Deep
Rake out debris deep into the joints, removing loose material and old filler that's preventing a strong bond between the old and new concrete. This vital step in surface preparation guarantees a clean slate for the new application, allowing for a strong and durable bond.
You'll want to focus on removing any debris that's accumulated in the joints, including dirt, dust, and old mortar.
-
Use a joint rake or a hammer and chisel to loosen and remove debris.
-
Work in small sections to maintain control and avoid spreading debris around.
-
Use a vacuum or brush to remove loose particles and dust, guaranteeing a clean surface for the next step.
Clean Joints Thoroughly
You'll need to thoroughly clean the joints to remove any remaining debris, dust, or old filler material that your initial raking didn't dislodge. This step is essential in joint maintenance techniques, as it guarantees a clean surface for effective joint sealing.
Use a wire brush or a joint cleaning brush to scrub the joints, working in small sections to maintain control. Be gentle yet firm, as you don't want to damage the surrounding masonry.
Use a vacuum or a damp cloth to remove any loosened debris or dust. If you find any stubborn material, you can use a joint cleaning solution to help dissolve it. Be sure to follow the manufacturer's instructions and take necessary safety precautions.
Once you've cleaned the joints, inspect them to confirm they're free of debris and dust. If you find any areas that need additional attention, repeat the cleaning process until you're satisfied.
Remove Old Mortar
Remove Old Mortar
Using a joint raker or a hammer and chisel, carefully dislodge and remove old, deteriorated mortar from the joints, taking care not to damage the surrounding masonry. This process, known as joint raking, is an essential step in surface preparation for concrete masonry walls. As you remove the old mortar, be mindful of the mortar removal safety guidelines to avoid accidents and injuries.
When removing old mortar, keep in mind the following key considerations:
-
Always wear protective gear, including gloves, safety glasses, and a dust mask, to prevent exposure to debris and dust.
-
Use the correct mortar removal techniques to avoid damaging the masonry units or joints.
-
Work in small sections to maintain control and guarantee thorough removal of old mortar.
Crack Repair and Filling
Your concrete wall's cracks and joints require careful attention to prevent further damage, as unsealed cracks can lead to water seepage, erosion, and structural compromise. To address these issues, you'll need to perform crack repair and filling. This process involves cleaning the cracks and joints to remove dirt, debris, and old sealants. You'll then need to apply a suitable crack sealer or filler, making certain to follow the manufacturer's instructions.
Proper surface preparation is essential for effective crack sealing. You should use a wire brush or scraper to remove loose material and create a clean, rough surface for the sealer to bond to. Additionally, verify the crack is dry and free of moisture before applying the sealer.
A well-executed crack repair and filling job will help prevent water infiltration and structural damage, while also improving the wall's appearance. By taking the time to properly repair and fill cracks, you'll be able to move forward with confidence, knowing your wall is stable and secure.
Pressure Washing Equipment
After confirming your concrete wall's cracks and joints are properly repaired and filled, it's time to move on to cleaning the surface. This often requires the use of pressure washing equipment to remove dirt, grime, and other substances that can interfere with subsequent surface prep and finishing operations.
As you prepare to clean your wall, it's crucial to choose the right pressure washing equipment and techniques to avoid damaging the surface.
Here are some key considerations for effective pressure washing:
-
Select the right pressure washer nozzle: Choose a wide-angle nozzle to cover more surface area and reduce the risk of damaging the concrete.
-
Adjust the pressure: Start with a lower pressure setting and gradually increase as needed to avoid damaging the surface or dislodging repair materials.
-
Maintain your equipment: Regularly inspect and maintain your pressure washer to guarantee it's functioning properly and efficiently, following the manufacturer's maintenance tips.
Frequently Asked Questions
Can I Use Surface Prep Tools on Freshly Poured Concrete Walls?
When working with fresh concrete, you should exercise caution when considering surface prep tools.
Fresh concrete techniques require a delicate touch to avoid damaging the surface.
Before applying surface preparation methods, you'll need to wait until the concrete has reached the required strength, typically 24-48 hours, depending on the mix and environmental conditions.
Premature use of surface prep tools can lead to unevenness, scratches, or even structural compromise.
How Do I Protect Surrounding Areas From Surface Prep Damage?
'You're about to release a storm of surface prep fury, but don't let it wreak havoc on surrounding areas!
To protect them, you'll need to employ high-quality surface protection techniques and damage prevention strategies. Tape off adjacent surfaces, lay down drop cloths, and erect barriers to contain the mess.
Seal any gaps or cracks to prevent dust and debris from escaping. By doing so, you'll safeguard your surroundings and guarantee a successful surface prep operation.'
Are Surface Prep Tools Suitable for Indoor Concrete Masonry Walls?
When working on indoor projects, you need to contemplate indoor air quality and tool compatibility.
Not all surface prep tools are suitable for indoor use, as they can release harmful particles or generate excessive noise.
You'll want to choose tools that are designed for indoor use, with features like dust containment or HEPA filtration, to maintain a safe and healthy environment.
Can I Rent Surface Prep Tools Instead of Buying Them?
When considering equipment for a project, you're wise to weigh the cost benefits of renting versus buying.
Renting surface prep tools can be a cost-effective option, especially for one-time or infrequent use. You'll avoid the upfront investment and storage concerns, while still accessing the tools you need.
Explore rental options from reputable suppliers to find the best fit for your project's requirements and budget.
Do I Need to Wear Protective Gear When Using Surface Prep Tools?
When operating heavy-duty equipment, you'll always need to prioritize your safety.
Yes, you do need to wear protective gear when using surface prep tools. It's important to follow strict safety protocols to avoid injuries.
You'll want to invest in essential protective equipment like gloves, safety glasses, and a dust mask to shield yourself from debris and dust.
Don't compromise on your well-being – take control of your work environment by adhering to these significant precautions.
Conclusion
As you stand back to admire your handiwork, remember that surface preparation is the unsung hero of concrete masonry wall projects.
It's the ancient Greek concept of 'arete' - pursuing excellence in every detail - that sets your work apart from the rest.
With the right tools and techniques, you've laid the foundation for a durable, long-lasting finish that will stand the test of time.
Now, go forth and conquer the world, one perfectly prepared wall at a time.
Related Posts
-

What Tools Do I Need for Concrete Wall Repair
As you prepare for a concrete wall repair job, you'll need a variety of tools to guarantee a successful outcome. Star...
-

Essential Power Tools for DIY Concrete Sculpting
As you begin DIY concrete sculpting, you'll need a strategic selection of power tools to achieve professional-grade r...
-

Why These Concrete Tools Are Always in Demand
You rely on a set of trusted concrete tools to deliver high-quality results, and it's not surprising - these tools ar...


