Must-Have Tools for Laying Concrete Block Beds
Share
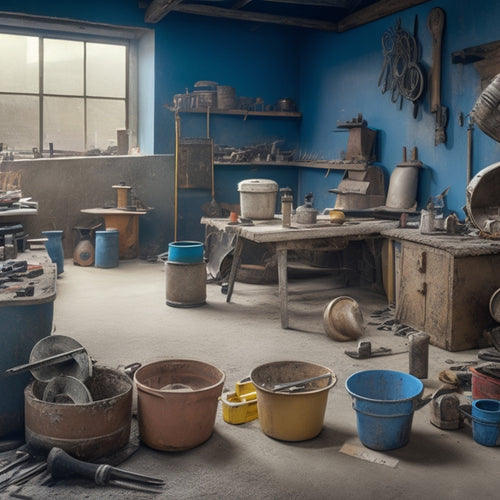
You'll need a range of essential tools to lay a concrete block bed, from safety gear like protective eyewear, durable gloves, and steel-toed boots, to measuring and marking tools like a quality tape measure, spirit level, and combination square. Cutting and shaping equipment, such as a block saw, masonry blade, and grinding wheel, are also necessary, along with mixing and pouring tools like a concrete mixer and pouring bucket. As you progress, you'll require specialized tools for block laying, joint sand and filling, finishing, and cleaning. With the right tools, you'll be well on your way to a professional-grade installation, and mastering these techniques will take your project to the next level.
Key Takeaways
• Protective gear like eyewear, gloves, and dust masks are essential for safety while laying concrete block beds.
• Measuring and marking tools like tape measures, spirit levels, and squares ensure accurate block placement and alignment.
• Cutting and shaping equipment like block saws, masonry blades, and grinding wheels help prepare blocks for laying.
• Mixing and pouring tools like concrete mixers, pouring buckets, and tamping tools aid in preparing and applying mortar correctly.
• Finishing and smoothening tools like trowels, float tools, and edging tools help achieve a professional-looking finish.
Safety Gear for Block Laying
Wearing the right safety gear is essential when laying concrete block beds, as you'll be handling heavy blocks, working with mortar, and exposing yourself to potential hazards like flying debris and sharp edges. You don't want to become a human projectile or end up with a face full of cement, trust us.
Protective eyewear is a must-have to shield your peepers from dust, debris, and those pesky mortar splatters. Don't skimp on quality, either – you want eyewear that can withstand the rigors of block laying.
Next, grab a pair of durable gloves that can handle the rough stuff. You'll be gripping blocks, mixing mortar, and wiping sweat from your brow (because, let's face it, this job can get hot and messy). Look for gloves with grip, flexibility, and some serious abrasion resistance. Your hands will thank you.
And while you're at it, throw on a dust mask, some steel-toed boots, and a hard hat for good measure. You might look like a total pro, but hey, safety is no joke.
Now, get out there and start laying those blocks – safely, of course!
Measuring and Marking Tools
You'll need a reliable set of measuring and marking tools to guarantee your concrete block bed is built to spec, from precise level and square measurements to accurate block alignment. Don't risk wonky walls or uneven courses – invest in the right gear to get it right the first time!
A good quality tape measure is a no-brainer; it's your go-to for measuring distances, widths, and heights. But don't forget about a spirit level and a square to confirm your blocks are perfectly aligned and plumb.
When it comes to marking precision, a chalk line reel or a laser level will help you snap accurate lines and reference points. And for those tricky corner blocks, a combination square will be your new best friend.
Mastering measuring techniques takes practice, but with the right tools, you'll be well on your way to becoming a block-laying pro!
Cutting and Shaping Equipment
With your concrete block bed's layout accurately measured and marked, it's time to turn your attention to cutting and shaping the blocks themselves, which requires a specialized set of tools designed to make precise cuts and adjustments.
You'll need the right block shaping techniques to guarantee a professional-looking finish.
To achieve cutting precision, you'll rely on the following essential tools:
-
Block saw: A heavy-duty saw designed specifically for cutting concrete blocks, allowing for clean, precise cuts.
-
Masonry blade: A high-quality blade designed for cutting through concrete, perfect for making curved or angled cuts.
-
Block splitter: A handy tool for breaking blocks into smaller pieces, ideal for creating custom shapes or fitting blocks into tight spaces.
- Grinding wheel: A versatile tool for smoothening out rough edges and making fine adjustments to your block shapes.
Mixing and Pouring Tools
Now that your blocks are cut and shaped, it's time to prepare the mortar that will hold them in place, and that requires a set of mixing and pouring tools. You'll need a concrete mixer to combine the cement, sand, and water into a workable paste. There are several types to choose from, including electric, gas-powered, and manual mixers. For small projects, a manual mixer might suffice, but for larger jobs, an electric or gas-powered mixer will save you time and energy.
When it comes to pouring techniques, you'll want to make sure you're getting the mortar into the right spots. A pouring bucket with a long handle will allow you to reach into tight spaces, while a mortar hawk will help you scoop and place the mortar with precision.
Here are some essential mixing and pouring tools to add to your arsenal:
| Tool | Description |
|---|---|
| Concrete Mixer | Combines cement, sand, and water into a workable paste |
| Pouring Bucket | Allows for precise pouring into tight spaces |
| Mortar Hawk | Scoops and places mortar with precision |
| Tamping Tool | Compacts and smooths out freshly poured mortar |
Block Laying and Leveling
After preparing the mortar, you're ready to start laying the blocks, guaranteeing they're properly aligned and leveled to create a strong and stable structure.
Now, it's time to get hands-on with the block laying and leveling process. You'll need to choose the right block type for your project, whether it's a standard 8x8x16 block or a specialty block for corners or curves.
When it comes to laying techniques, you've got options too - from the popular 'running bond' pattern to the more decorative 'stack bond' design.
Here are some must-have tools to get the job done:
-
Level and Straightedge: Confirm your blocks are perfectly aligned and level with these trusty tools.
-
Block Tamping Tool: Compact the mortar and settle the blocks into place with a few taps of this handy tool.
-
Block Alignment Pins: Keep your blocks in line with these simple yet effective pins.
- Block Laying Trowel: Spread and smooth out the mortar with this specialized trowel designed specifically for block laying.
With these tools and a solid understanding of block types and laying techniques, you'll be well on your way to creating a sturdy and impressive concrete block structure.
Joint Sand and Filling Tools
When you're working on a concrete block bed, you'll need to guarantee the joints are properly filled with sand to achieve a stable and level surface.
To do this efficiently, you'll require the right tools to spread sand evenly and fill gaps quickly.
You'll want to invest in a joint sand spreader and a few other essential filling tools to get the job done right.
Sand Spreading Tools Needed
You'll need a few specialized tools to spread joint sand and fill gaps between concrete blocks efficiently. Spreading joint sand is a vital step in laying concrete block beds, and having the right tools can make all the difference. With the right tools, you'll be able to achieve a consistent, even layer of sand that allows for proper drainage and prevents water from seeping into the joints.
Here are the essential sand spreading tools you'll need:
-
Sand spreader: This tool comes in various types, including manual and powered spreaders. Choose one that suits your project's scale and your personal preferences.
-
Sand rake: A sand rake helps to grade the sand evenly and remove any lumps or excess material.
-
Broom or tamping tool: Use a broom or tamping tool to compact the sand and guarantee it's evenly distributed.
- Sand grading tool: This tool helps you achieve the perfect sand grading techniques, making sure the sand is spread evenly and consistently.
Filling Gaps Efficiently
To guarantee a professional-looking finish, fill gaps between concrete blocks with the right joint sand and filling tools, carefully selecting products that meet the specific requirements of your project.
You'll need gap fillers that can withstand the elements and heavy foot traffic, so don't skimp on quality. Efficient techniques are key to saving time and avoiding a messy cleanup. Use a joint sand that's specifically designed for concrete block laying, and make sure it's compatible with your block type.
When it comes to filling tools, you'll need a combination of tamping tools and joint rakes to get the job done. Tamping tools help compact the sand, ensuring a solid bond between blocks, while joint rakes allow you to spread and level the sand evenly.
Don't forget to vibrate the blocks gently as you fill the gaps to remove any air pockets. With the right tools and techniques, you'll be able to achieve a smooth, even finish that'll make your concrete block bed look like a pro did it.
Finishing and Smoothening Tools
Concrete block beds require precise finishing and smoothening to achieve a uniform, crack-resistant surface, and that's where specialized tools come into play. You'll need the right arsenal to get the job done efficiently and effectively.
When it comes to surface preparation, you'll want to guarantee your concrete block bed is smooth and even. This is where trowel types come in - from v-notch to pointed, each serves a specific purpose.
Here are the must-have finishing and smoothening tools you'll need:
-
Trowels: For applying and spreading mortar, as well as smoothing out the surface.
-
Edgers: To create clean, defined edges and corners.
-
Floats: For smoothening and flattening the surface, removing excess mortar.
- Tamping tools: To compact and settle the mortar, guaranteeing a solid bond.
With these tools in your toolkit, you'll be well on your way to achieving a professional-looking finish that'll make your concrete block bed the envy of the neighborhood.
Cleaning and Maintenance Essentials
Every freshly laid concrete block bed requires a meticulous cleaning regimen to prevent mortar haze, dirt, and debris from compromising its appearance and longevity. You'll need the right tools to get the job done. Invest in a stiff-bristled broom or a power washer to remove excess mortar and debris. For tougher stains, reach for a mortar-removing acid or a specialized concrete cleaner. Don't forget to wear protective gear, like gloves and goggles, when working with harsh chemicals.
When it comes to maintenance tips, you'll want to seal your concrete block bed regularly to prevent water damage and staining. Apply a concrete sealer according to the manufacturer's instructions, making sure to follow all safety precautions.
Additionally, establish a regular cleaning schedule to keep your block bed looking its best. Regular cleaning techniques, such as sweeping and hosing down the area, can go a long way in maintaining the appearance and integrity of your concrete block bed.
Frequently Asked Questions
Can I Use a Regular Shovel for Mixing Concrete?
Hey, can you really get away with using a regular shovel for mixing concrete?
Honestly, it's not the best idea. You'll end up with a mess on your hands - literally. The wrong shovel type can leave you with a lumpy, uneven mix.
Invest in a shovel specifically designed for concrete mixing, like a square-edged shovel or a mixing hoe. Trust us, your back (and the concrete) will thank you.
How Often Should I Water the Blocks After Laying?
When you're done laying those blocks, you're probably wondering how often to water them.
Well, here's the deal: you want to keep them consistently moist, but not drowning. Aim for a watering frequency of 2-3 times a day, depending on the weather.
This helps with block curing, ensuring they set strong. Just remember, it's like baking a cake - too little water, it's crumbly; too much, it's a mess!
You got this, though!
Are All Concrete Blocks Suitable for Outdoor Use?
You're wondering if all concrete blocks are suitable for outdoor use? Well, not quite!
You need to take into account durability factors like weather resistance, freeze-thaw cycles, and structural integrity.
Environmental considerations like exposure to sunlight, rain, and extreme temperatures also play a role.
Don't assume all blocks can withstand the great outdoors; look for blocks specifically designed for exterior use, and always check the manufacturer's specs to verify your blocks can handle the elements.
Can I Use a Regular Trowel for Applying Joint Sand?
Hold your horses, you're about to make a rookie mistake!
Can you really use a regular trowel for applying joint sand? Well, not so fast! A regular trowel is too big and clumsy for the delicate task of joint sand application.
You'll end up with a mess on your hands. Instead, reach for a specialized joint sand trowel or a pointed trowel with a rubber edge - they're designed specifically for this job, and you'll be glad you did!
Is It Necessary to Seal the Blocks After Completion?
You're wondering if sealing those freshly laid blocks is a must-do, huh? Well, let me tell you - block sealing benefits are numerous!
It protects against stains, enhances appearance, and increases durability.
Now, sealing techniques vary, but you can't go wrong with a silane-based sealer applied with a low-pressure sprayer or roller.
Don't skip this step, or you'll be left with blocks that look dull and worn out faster than your favorite pair of jeans.
Trust me, sealing is worth the extra effort!
Conclusion
As you wrap up your concrete block bed project, remember that a strong foundation is like a tree's roots - it's what holds everything together.
You've got the right tools for the job, from safety gear to finishing touches. With these must-haves in your arsenal, you'll be able to build a solid base that'll last for years to come.
Now, get out there and start laying those blocks - a sturdy foundation is just a layer away!
Related Posts
-

What Tools Do I Need for Concrete Wall Repair
As you prepare for a concrete wall repair job, you'll need a variety of tools to guarantee a successful outcome. Star...
-

Best Tools for Concrete Restoration and Repair
When tackling concrete restoration and repair projects, you need a range of reliable tools to achieve professional-gr...
-

Must-Have Tools for Concrete Planter Projects
As you commence your concrete planter project, you'll need a range of specialized tools to achieve professional-grade...


