
Must-Have Tools for DIY Concrete Success
When taking on a DIY concrete project, you'll need the right tools to guarantee success and safety. Start with essential safety gear like goggles, gloves, and a respirator mask to protect yourself from debris and chemical exposure. Invest in a durable mixing drum and master various mixing techniques to achieve a smooth finish. Must-have finishing equipment includes trowels, edgers, and float blades. Don't forget concrete molds, curing and sealing solutions, cutting and grinding tools, measuring and testing tools, and cleanup and removal tools. With the right tools, you'll be well on your way to a successful project – and there's more to explore to take your project to the next level.
Key Takeaways
• Essential safety gear, including goggles, gloves, and a respirator mask, is crucial for protecting yourself from concrete-related hazards.
• Investing in a high-quality mixing drum, with features like rust-resistance and a curved design, ensures efficient and effective concrete mixing.
• Mastering various pouring techniques, such as straight, sectional, and vibration pouring, helps achieve a smooth, even finish for your DIY concrete project.
• Having the right finishing equipment, including trowels, edgers, and float blades, is vital for achieving a professional-looking finish and desired texture.
• Proper curing and sealing techniques, using products like curing compounds and sealing products, are critical for maintaining concrete strength and performance.
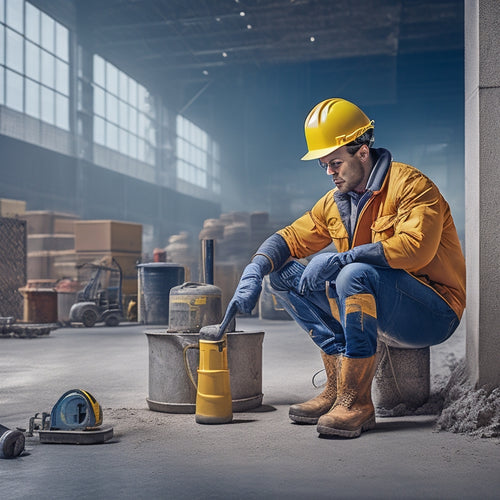
Essential Safety Gear Checklist
Wearing the right safety gear is essential when working with concrete, as it can protect you from serious injuries and long-term health risks.
When you're handling concrete, you're exposing yourself to potential hazards like flying particles, chemical splashes, and heavy objects.
That's why it's vital to wear safety goggles to shield your eyes from debris and chemical splashes.
You should also wear work gloves to prevent skin irritation and abrasions.
A respirator mask is a must-have to prevent inhaling concrete dust, which can cause respiratory problems.
Don't forget ear protection to reduce the risk of hearing loss from loud machinery.
A hard hat will protect your head from falling objects, while knee pads will save your knees from bruising and strains.
It's also a good idea to keep a first aid kit on hand in case of accidents.
Finally, wear concrete boots with good grip to prevent slips and falls.
Tools for Mixing and Pouring Concrete
When you're working with concrete, having the right tools for mixing and pouring is essential.
You'll need to choose a mixing drum that can handle the capacity you require, and you'll also need to master various concrete pouring techniques to achieve a smooth, even finish.
Mixing Drum Capacity
You'll need a mixing drum with sufficient capacity to handle the volume of concrete required for your project, as a drum that's too small can lead to inadequate mixing and a poor finish. The right mixing drum size is essential to guarantee your concrete is well-mixed and consistent.
When selecting a mixing drum, consider the following factors:
-
Drum size: Choose a drum that can hold at least 1.5 to 2 times the volume of concrete you need for your project. This allows for easy mixing and reduces the risk of overflow.
-
Optimal drum materials: Look for drums made from durable, rust-resistant materials like stainless steel or heavy-duty plastic. These materials can withstand the rigors of mixing and pouring concrete.
-
Drum shape and design: A drum with a curved or angled design can help to prevent concrete from sticking to the sides and make mixing easier.
- Drum accessibility: Confirm the drum has a wide enough mouth and is easily accessible to allow for efficient loading and unloading of concrete.
Concrete Pouring Techniques
Effectively pouring concrete requires mastering various techniques and using the right tools to achieve a smooth, even finish. As you prepare to pour, make certain you have a solid understanding of the concrete pouring techniques that will guarantee a successful outcome.
Here are some effective pouring methods to take into account:
| Technique | Description | Benefits |
|---|---|---|
| Straight Pouring | Pour concrete directly from the mixing drum | Fast and efficient, ideal for large areas |
| Sectional Pouring | Divide the pour into smaller sections, finishing each before moving to the next | Reduces pour volume, allows for better control |
| Vibration Pouring | Use a vibrating tool to remove air pockets and settle the concrete | Guarantees a dense, even finish |
| Pumping Pouring | Use a concrete pump to deliver concrete to the pour site | Ideal for large or complex pours, reduces labor |
| Hand Finishing | Use hand tools to finish and smooth the concrete surface | Allows for precise control and detail work |
Must-Have Finishing Equipment Essentials
When it comes to achieving a professional-looking finish, you'll need the right equipment to get the job done.
You're about to find out which finishing tools are essential to your DIY concrete project's success.
From trowels to edgers and float blades, you'll discover the must-have finishing equipment that'll help you achieve a smooth, even surface.
Trowel Selection Matters Most
What sets a professional concrete finish apart from an amateurish one is often the trowel selection, as it plays a significant role in achieving the desired texture and smoothness.
As you prepare to tackle your DIY concrete project, it's important to understand the importance of choosing the right trowel for the job. With so many trowel types available, selecting the correct one can be overwhelming. However, by understanding the differences between them, you can guarantee a high-quality finish.
Here are four key factors to take into account when selecting a trowel:
-
Trowel type: V-notched, square-notched, or rounded trowels each serve a specific purpose. Choose the one that best suits your project's requirements.
-
Blade material: Steel, stainless steel, or high-carbon steel blades offer varying levels of durability and resistance to wear.
-
Handle type: Wooden, fiberglass, or steel handles provide different levels of comfort and control.
- Trowel maintenance: Regular cleaning and maintenance are vital to extending the life of your trowel and guaranteeing top performance.
Edger Quality Is Key
With your trowel selection in place, you'll need to turn your attention to another vital finishing tool: a high-quality edger that can help you achieve crisp, clean edges and a polished overall appearance.
When it comes to edger quality, you shouldn't compromise – a subpar edger can lead to uneven edges, wasted time, and potential safety risks. Look for an edger that boasts exceptional durability, with a robust design that can withstand the demands of your project. A well-built edger will guarantee consistent performance, even in the most challenging conditions.
The edger's design is also essential. Opt for an edger with an ergonomic grip, allowing you to maintain control and precision while working. Additionally, consider an edger with adjustable blades, enabling you to tailor your edging to specific project requirements.
Float Blades Are Essential
You'll need a set of float blades in your arsenal to achieve a smooth, even finish, as they play a critical role in flattening and leveling the concrete surface. With the right float blade, you'll be able to remove excess water and air pockets, creating a strong bond between the concrete and the substrate.
When it comes to choosing the right float blade, you'll need to take into account the type of concrete you're working with and the desired finish. There are several float blade types to choose from, including:
-
Resilient blade: Ideal for finishing large areas and removing excess water.
-
Steel blade: Best for achieving a high-gloss finish and removing minor imperfections.
-
Aluminum blade: Lightweight and ideal for finishing small areas and detail work.
- Polyurethane blade: Perfect for achieving a smooth, matte finish.
Remember to prioritize float blade maintenance to guarantee peak performance and extend the life of your blades. Regularly clean and inspect your blades, and replace them as needed. By doing so, you'll be able to achieve a professional-looking finish and guarantee a safe working environment.
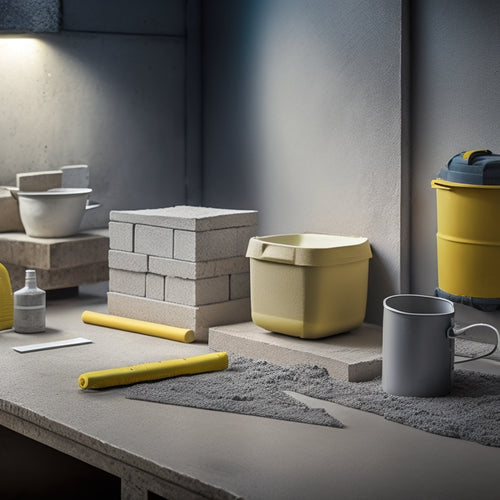
Concrete Molds and Forming Tools
Concrete molds and forming tools are vital for shaping and holding your concrete in place as it sets, allowing you to achieve the desired form and texture for your DIY project. These tools enable you to create complex designs and patterns, giving you the creative freedom to bring your vision to life.
With creative mold designs, you can produce unique and intricate shapes that add visual interest to your project. Reusable forming systems, on the other hand, offer a cost-effective and efficient way to create multiple identical pieces.
When selecting concrete molds and forming tools, prioritize safety and durability. Look for materials that can withstand the weight and pressure of the concrete, and opt for tools with smooth, rounded edges to prevent injuries.
It's also important to guarantee that your molds and forming tools are compatible with the type of concrete you're using, as some may require special coatings or treatments. By investing in high-quality concrete molds and forming tools, you'll be able to achieve professional-looking results while minimizing the risk of accidents and errors.
Curing and Sealing Solution Essentials
After shaping and forming your concrete, you're ready to focus on the vital process of curing and sealing, which requires a range of specialized solutions to guarantee the long-term durability and appearance of your project. This stage is essential, as it directly affects the strength, finish, and overall performance of your concrete.
To achieve success, you'll need the following fundamental curing and sealing solutions:
-
Curing compounds: These liquids or sprays are applied to the concrete surface to prevent moisture loss, promoting proper hydration and strength development.
-
Sealing products: Choose from a variety of sealers, such as acrylic, polyurethane, or epoxy-based, to protect your concrete from stains, cracks, and weathering.
-
Curing blankets or sheets: These insulating covers retain moisture and heat, supporting ideal curing conditions.
- Moisture-retaining sprays: These products help maintain the perfect moisture level, facilitating proper curing and reducing the risk of shrinkage cracks.
Cutting and Grinding Tool Essentials
With your concrete properly cured and sealed, it's time to move on to the next critical phase of your DIY project, where cutting and grinding tools take center stage to refine and perfect your creation. Now, you'll need to master various cutting techniques and grinding methods to achieve the desired shape, size, and finish.
To get started, you'll need the right tools for the job. Here are some must-haves:
| Tool | Purpose |
|---|---|
| Diamond blade saw | Cutting through concrete, asphalt, and stone |
| Angle grinder | Grinding and polishing concrete surfaces |
| Concrete grinder | Removing old adhesives, paint, and coatings |
Remember to always wear protective gear, including gloves, safety glasses, and a dust mask, when operating these tools. Additionally, verify you're working in a well-ventilated area to avoid inhaling dust and debris. By mastering these cutting and grinding tools, you'll be able to achieve professional-looking results and take your DIY project to the next level.
Measuring and Testing Tool Essentials
You'll need to accurately measure and test your concrete to guarantee it meets your project's specifications, which is where measuring and testing tools come into play. These tools guarantee measuring accuracy and testing consistency, giving you confidence in your concrete's quality. Without them, you risk costly mistakes and potentially hazardous structures.
To achieve ideal results, make sure you have the following essential measuring and testing tools:
-
Concrete tester: A device that assesses the concrete's strength, density, and other properties, helping you identify any defects or inconsistencies.
-
Laser level: A precision tool that guarantees your concrete pour is level, plum, and perfectly aligned, preventing uneven surfaces and structural weaknesses.
-
Moisture meter: A device that measures the concrete's moisture levels, alerting you to potential issues that could affect its strength, durability, or appearance.
- Thermometer: A tool that monitors the concrete's temperature, guaranteeing it's within the ideal range for proper curing and setting.
Cleanup and Removal Tool Essentials
Once you've poured and finished your concrete, it's time to tackle the often-overlooked but crucial process of cleanup and removal. This process requires a specific set of tools to prevent damage to your equipment, tools, and surrounding surfaces.
You'll need a putty knife or scraper to remove excess concrete from your tools and equipment. A stiff-bristled brush or broom will help you sweep away debris and dust. For more stubborn concrete residue, a wire brush or steel wool can be effective.
When it comes to cleanup strategies, it's vital to act quickly, as dried concrete can be much harder to remove. Make sure to wear protective gear, including gloves, safety glasses, and a dust mask, to prevent injury.
In addition to these tools, you'll also need a reliable removal technique. One effective method is to use a pressure washer to blast away concrete residue. Another approach is to use a chemical concrete remover, which can be especially helpful for removing dried-on concrete.
Whatever removal technique you choose, be sure to follow the manufacturer's instructions and take necessary safety precautions to avoid accidents. By having the right tools and strategies in place, you can guarantee a safe and successful cleanup and removal process.
Frequently Asked Questions
Can I Use a Regular Drill for Mixing Concrete?
When it comes to mixing concrete, you're probably wondering if your regular drill will cut it. Unfortunately, it won't.
Standard drills aren't designed for the intense mixing techniques required for concrete. You'll need a drill specifically designed for heavy-duty mixing, like a hammer drill or a mixing drill, to handle the thick, dense mixture.
Using the wrong drill type can lead to motor burnout, injury, or a subpar mix.
How Do I Know When Concrete Is Fully Cured?
You've mixed, poured, and waited - now the question is, when can you confidently say your concrete is fully cured?
The answer lies in the curing methods you've employed. Did you use a membrane-forming compound or a penetrating sealer?
Moisture retention is key. Check for a hard, uniform finish and resistance to scratches or marks.
Wait 28 days for full strength, but be patient, as ideal curing can take up to 6 months.
Can I Use a Regular Saw for Cutting Concrete?
When it comes to concrete cutting, you can't just use any saw. A regular saw won't cut it - literally.
You'll need a saw specifically designed for concrete, like a diamond blade saw or a concrete saw with a carbide-tipped blade. These saw types are built to handle the abrasive nature of concrete, ensuring a safe and efficient cut.
Using the wrong saw can lead to accidents, damage, and wasted time. Invest in the right tool to get the job done right.
Do I Need to Seal Concrete in Dry Climates?
You're wise to wonder about sealing concrete in dry climates. The answer is yes, you'll want to seal it to guarantee concrete longevity.
Unsealed concrete in dry climates can lead to rapid deterioration, cracking, and crumbling.
Sealing benefits include protecting the concrete from water absorption, reducing damage from freeze-thaw cycles, and preventing stains.
How Long Does It Take for Concrete to Set?
You're probably thinking, 'Concrete setting times can't be that complex, can they?' But, yes, it's essential to get it right.
The curing time of concrete depends on various setting factors, including temperature, humidity, and mix design.
Typically, concrete sets within 24 to 48 hours, but it can take up to 28 days to fully cure.
You'll want to monitor the conditions and follow the manufacturer's instructions to guarantee a safe and strong final product.
Conclusion
With your arsenal of must-have tools, you're now ready to tackle any DIY concrete project that comes your way.
Remember, a strong foundation is key, and with these essentials, you'll be building on solid ground.
Like a master sculptor, you'll shape and mold concrete into a work of art, and when the dust settles, you'll be left with a masterpiece that's as durable as it's beautiful.
Related Posts
-
10 Best Tools for Sealed Concrete Flooring on Budget
When starting on a sealed concrete flooring project on a budget, you'll need to prioritize essential tools without sa...
-
7 Must-Have Tools for Concrete Repair Organization
To effectively organize your concrete repair projects, you'll need a thorough toolkit that includes a well-planned st...
-
What Tools Do I Need for Concrete Block Laying
You'll need a thorough set of tools to guarantee accurate, efficient, and professional concrete block laying. Essenti...


