
Essential Tools for Polished Concrete Floor Installation
When taking on a polished concrete floor installation project, you'll need the right tools to achieve a flawless, high-gloss finish. Start by equipping yourself with concrete floor preparation tools like high-quality concrete grinders and moisture barrier installation tools. Next, invest in grinding and polishing machines, diamond tooling and abrasives, and edging and corner tools to refine your work. Don't forget dust collection and safety equipment, measuring and marking tools, concrete densifier applicators, and final sealing and coating tools to guarantee a successful outcome. With these essentials in hand, you'll be well on your way to mastering the installation process and achieving professional results - and there's more to discover when it comes to fine-tuning your technique.
Key Takeaways
• High-quality concrete grinders and surface preparation tools are essential for a smooth, even surface.
• Specialized grinding and polishing machines, including walk-behind and ride-on options, are necessary for achieving a high-gloss finish.
• Diamond tooling and abrasives, including metal-bond and resin-bond blades, are crucial for grinding and polishing stages.
• Dust collection and safety tools, such as dustless sanding systems and NIOSH-approved respirators, are vital for a safe and healthy work environment.
• Accurate measuring and marking tools, including laser levels and chalk lines, are critical for meeting polished concrete floor specifications.
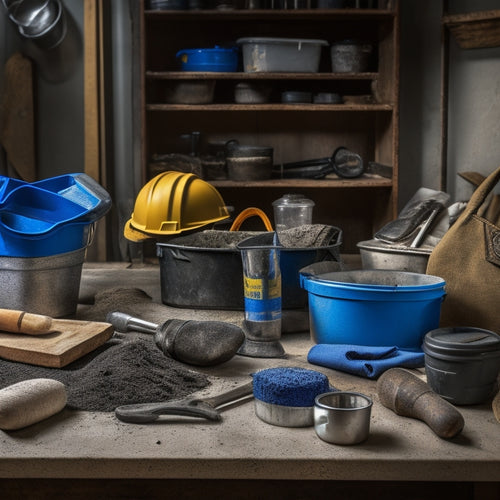
Concrete Floor Preparation Tools
You'll need to arm yourself with the right concrete floor preparation tools to guarantee a strong, durable, and visually appealing polished concrete floor, starting with a high-quality concrete grinder. This grinder will help you achieve a smooth, even surface by removing old coatings, adhesives, and imperfections.
Next, you'll need to make sure the floor is level. Concrete surface leveling is a vital step, as an uneven floor can lead to a subpar finished product. To achieve this, you'll need a self-leveling compound and a screed board.
Another important step is moisture barrier installation. This involves applying a specialized coating to prevent moisture from seeping up from the substrate and damaging your polished concrete floor. You'll need a high-quality moisture barrier product and a notched trowel to apply it evenly.
Grinding and Polishing Machines
With concrete floor preparation complete, it's time to move on to the next critical stage: grinding and polishing, which requires a range of specialized machines designed to progressively refine the surface to achieve the desired level of shine and reflectivity.
You'll need a combination of walk-behind and ride-on machines, each with its own unique features and capabilities. Walk-behind machines are ideal for smaller areas and tight spaces, while ride-on machines are better suited for larger areas and high-production grinding.
When selecting a grinding and polishing machine, consider the type of polishing techniques you'll be using, as well as the machine's power and speed.
It's also crucial to prioritize machine maintenance to guarantee peak performance and extend the machine's lifespan. Regularly check and replace worn or damaged parts, and keep the machine clean and well-lubricated. Proper machine maintenance will help you achieve consistent results and reduce downtime.
Diamond Tooling and Abrasives
When it comes to achieving a high-gloss finish, you'll need to select the right diamond blades and abrasives for the job.
You'll want to choose blades that can effectively cut through the concrete and remove imperfections, while also considering the sequence of grits to guarantee a smooth changeover between stages.
Diamond Blade Selection
Selecting the right diamond blade is fundamental to achieving a polished concrete floor that meets specifications and exceeds expectations.
You'll need to choose from various diamond blade types, each designed for specific tasks. For example, metal-bond blades are ideal for coarse grinding, while resin-bond blades are better suited for fine polishing. It's important to understand the characteristics of each blade type to make an informed decision.
Proper blade maintenance is also essential to extend the life of your diamond blades and guarantee peak performance. You should regularly inspect your blades for wear and damage, and perform routine cleaning to prevent clogging. Additionally, it's crucial to store your blades properly to prevent damage when not in use.
Grit Sequence Matters
You'll need to follow a specific grit sequence when switching between diamond tooling and abrasives to guarantee a polished concrete floor meets the desired level of shine and clarity. The grit selection importance cannot be overstated, as it directly impacts the final result. A well-planned grit sequence guarantees a smooth changeover between each stage, preventing scratches and swirl marks.
| Grit Level | Description |
|---|---|
| Coarse (16-30) | Initial grinding, removing old coatings and imperfections |
| Medium (40-80) | Refining the surface, removing scratches and marks |
| Fine (100-200) | Final polishing, achieving high gloss and clarity |
When analyzing grit patterns, it's crucial to take into account the concrete's hardness, the desired finish, and the equipment being used. A thorough grit sequence analysis will help you identify the best progression, guaranteeing a flawless finish. By following this sequence, you'll achieve a polished concrete floor that exceeds expectations. Remember, the key to success lies in the attention to detail and a deep understanding of the grit selection importance.
Edging and Corner Tools
When you're working on a polished concrete floor installation, you'll need to guarantee a seamless finish around edges and corners.
That's where specialized tools come in - you'll want to equip yourself with an edge grinder attachment and corner grinding blocks to tackle these areas with precision.
Edge Grinder Attachment
With precise control and versatility, an edge grinder attachment proves vital for refining edges and corners, allowing you to achieve a perfectly polished concrete floor. This tool is designed to navigate tight spaces and irregular surfaces with ease, making it an essential component of your edging and corner tools arsenal.
Here are three key benefits of using an edge grinder attachment:
-
Increased precision: The edge grinder attachment provides you with the precision and control needed to achieve sharp, defined edges and corners.
-
Reduced labor time: By using an edge grinder attachment, you can greatly reduce the time and effort required to refine edges and corners, allowing you to complete projects more efficiently.
-
Improved edge grinder maintenance: Regular maintenance of your edge grinder attachment is essential to guarantee peak performance. By following a regular maintenance schedule, you can extend the lifespan of your tool and prevent costly repairs.
When it comes to edge grinder benefits, the advantages are clear. Not only does it provide you with precise control, but it also enables you to achieve a high-quality finish, which is necessary for a polished concrete floor.
Corner Grinding Blocks
In conjunction with edge grinder attachments, corner grinding blocks provide a thorough solution for refining edges and corners, allowing you to tackle even the most intricate areas of your polished concrete floor with confidence.
These blocks are specifically designed to access tight spaces and corners, enabling you to achieve a seamless finish. With the right corner grinding techniques, you can effortlessly navigate curved edges, corners, and complex shapes.
Corner grinding blocks come in various grit levels, allowing you to progress from coarse to fine finishes. This versatility enables you to achieve your desired corner finish options, ranging from a matte finish to a high-gloss shine.
When selecting a corner grinding block, consider the type of concrete, the desired finish, and the level of precision required.
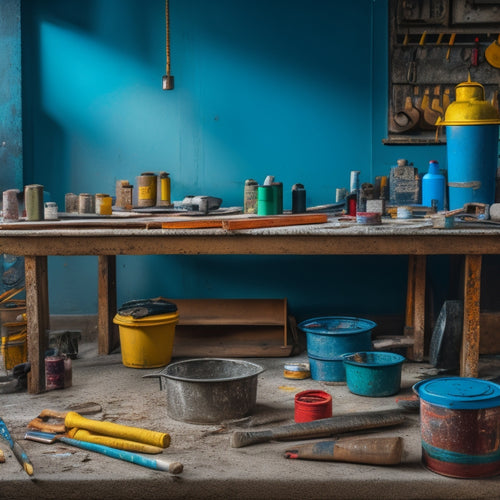
Dust Collection and Safety
You must prioritize dust collection and safety protocols during polished concrete floor installation to prevent respiratory issues and guarantee a successful project outcome.
As you work with concrete, you'll generate a significant amount of dust that can compromise air quality and threaten worker protection. To mitigate these risks, it's crucial to invest in the right tools and equipment.
Here are three crucial dust collection and safety tools you'll need:
-
Dustless sanding systems: These systems capture 99% of dust and debris, ensuring a cleaner work environment and reducing the risk of respiratory problems.
-
Respiratory protection: Provide workers with NIOSH-approved respirators to prevent inhalation of hazardous particles.
-
Ventilation systems: Install ventilation systems that can exchange air up to 10 times per hour to maintain ideal air quality.
Measuring and Marking Tools
Accurate measurements and markings are critical to achieving a polished concrete floor that meets specifications, and having the right tools for the job is vital to this process.
As you prepare to install a polished concrete floor, you'll need reliable measuring and marking tools to guarantee accurate layouts and precise cuts. A high-quality tape measure is a must-have for taking precise room measurements and marking cut lines. Look for a tape measure with a durable casing and a long, flexible tape that can withstand heavy use.
For creating straight lines and marking patterns, a chalk line is an indispensable tool. You'll use it to snap lines on the concrete surface, guiding your cuts and guaranteeing precise layouts. When choosing a chalk line, opt for a model with a sturdy reel and a consistent, vibrant chalk flow. Additionally, consider a chalk line with adjustable tension to customize the line's snap and durability.
Concrete Densifier Applicators
With precise measurements and markings in place, it's time to enhance the concrete's durability and stain resistance by applying a concrete densifier, which is where a reliable applicator comes into play. This significant step reveals the concrete densifier benefits, such as increased abrasion resistance, reduced porosity, and improved stain resistance.
When it comes to densifier application techniques, you'll need the right tools to guarantee a uniform and effective application. Here are three essential concrete densifier applicators to reflect on:
-
Microfiber Mops: Ideal for applying densifiers to large areas, microfiber mops provide even coverage and can be used with a variety of densifier products.
-
Spray Bottles with Fan Tips: These applicators allow for precise control over the densifier application, making them perfect for smaller areas or detail work.
-
Lambswool Applicators: Designed for applying densifiers to polished concrete surfaces, lambswool applicators guarantee a smooth, even finish.
Final Sealing and Coating Tools
The final step in achieving a polished concrete floor requires the application of a sealant or coating, and selecting the right tools for this process is essential to confirm a flawless finish. You'll need to choose from a variety of tools designed for sealing techniques and coating applications.
| Tool | Description |
|---|---|
| Microfiber Mop | For applying sealers and coatings evenly and efficiently |
| Lambswool Applicator | For applying sealers and coatings to large areas quickly |
| Foam Brush | For applying sealers and coatings to small, detailed areas |
| Notched Squeegee | For removing excess sealer or coating from the surface |
When selecting tools for final sealing and coating, consider the type of sealant or coating you're using, as well as the size and complexity of your project. You may need to invest in multiple tools to confirm a professional-grade finish. By choosing the right tools for the job, you'll be able to achieve a polished concrete floor that meets your high standards.
Frequently Asked Questions
Can I Install Polished Concrete Floors Over Existing Tile or Carpet?
You'll face installation challenges when installing polished concrete floors over existing tile or carpet, requiring thorough surface preparation, including removal of old flooring and leveling the substrate, to guarantee a successful and durable installation.
How Long Does a Polished Concrete Floor Installation Typically Take?
You'll typically spend 7-10 days on a polished concrete floor installation, with 3-5 days for grinding and polishing, and 4-5 days for the curing process, depending on the specific installation timeline and environmental conditions.
Are Polished Concrete Floors Suitable for High-Traffic Areas?
You're wondering if polished concrete floors can withstand a million footsteps a day? Yes, they can! Considering durability factors like densification and abrasion resistance, polished concrete floors are perfect for high-traffic areas, with minimal maintenance requirements like occasional cleaning and re-coating.
Can I DIY a Polished Concrete Floor Installation or Do I Need a Pro?
When considering DIY polished concrete floor installation, you'll face challenges like uneven grinding and inadequate sealing, whereas hiring a pro guarantees precision, efficient workflow, and high-quality results, making the latter a more reliable choice.
How Much Does a Polished Concrete Floor Installation Typically Cost?
You're likely wondering how much a polished concrete floor installation will set you back. The installation cost varies, but expect to pay between $3 and $15 per square foot, depending on pricing factors like floor size, complexity, and location.
Conclusion
As you stand back to admire your polished concrete masterpiece, remember that each tool in your arsenal is like a brush stroke on a canvas, working in harmony to create a work of art that's both functional and beautiful.
Just as a painter's brush leaves its mark, your tools have left their imprint on the concrete, transforming it into a gleaming, high-performance floor that will stand the test of time.
Related Posts
-
Essential Tools for Painting Concrete Walls
When painting concrete walls, you'll need a range of specialized tools to achieve a professional-looking finish. Star...
-
5 Tools Needed for Quick Fix Concrete Mixing
You'll need five essential tools to tackle a quick fix concrete mixing project efficiently. First, you'll require a s...
-

Why These Tools Are Crucial for Concrete Patio
You're about to commence on a concrete patio project, and having the right tools is vital to achieving professional-l...


