Essential Tools for Laying Concrete Flooring Tiles
Share
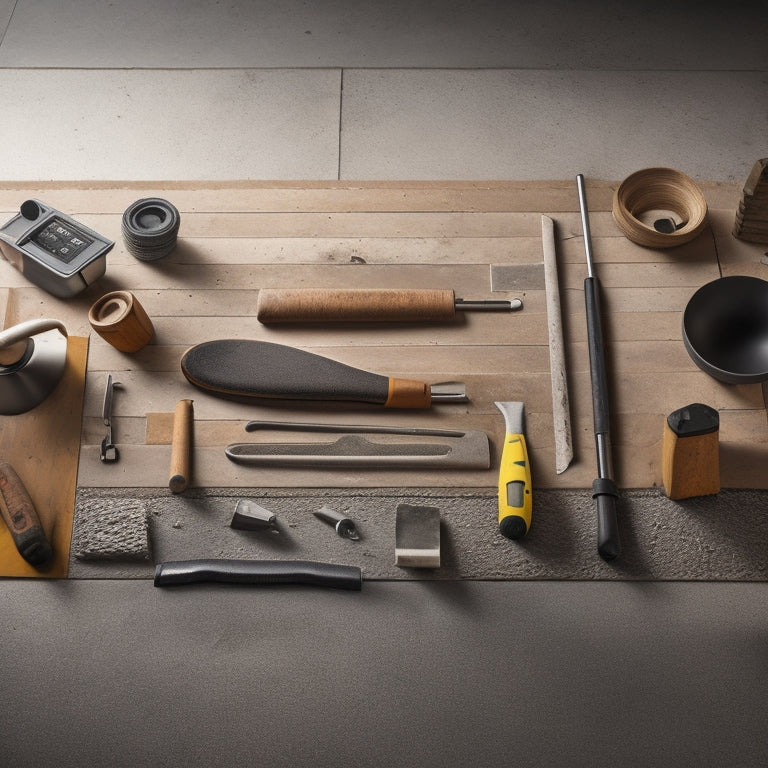
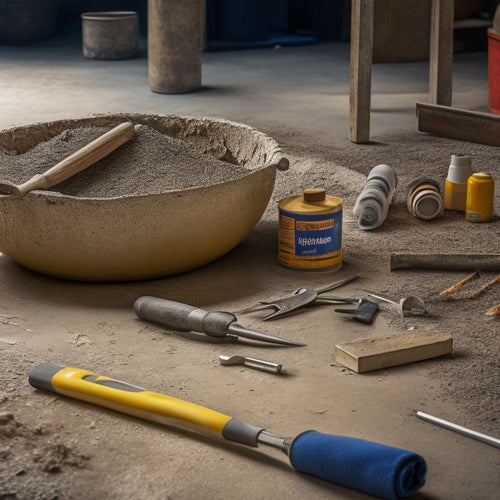
When laying concrete flooring tiles, you'll need a range of specialized tools to guarantee a successful installation. Begin with measuring and marking tools like measuring tapes, chalk lines, and combination squares to create accurate layouts. For cutting and shaping, invest in a wet saw or tile saw, tile nippers, and grinding tools. Adhesives and grout application tools like grout floats and mixers are also essential. Don't forget spacers, leveling compounds, and tamping equipment to guarantee a stable and even surface. With these tools, you'll be well on your way to a professional-looking installation - and understanding the specifics of each will make all the difference in achieving a flawless finish.
Key Takeaways
• Measuring and marking tools, including measuring tapes, chalk lines, and laser levels, ensure accurate tile layouts and prevent costly mistakes.
• Cutting and shaping tools, such as wet saws, tile nippers, and grinders, enable precise cuts and smooth edges for a professional finish.
• Adhesives and grout application tools, including grout floats, sponges, and mixers, facilitate a flawless and long-lasting tile installation.
• Spacers and leveling equipment, including plastic, metal, and adjustable spacers, ensure accurate grout joints and tile alignment.
• Tamping and compaction tools, such as hand tampers, plate compactors, and pneumatic tampers, eliminate air pockets and excess water for a stable installation.
Measuring and Marking Tools Needed
When laying concrete flooring tiles, you'll need a set of precise measuring and marking tools to secure accurate cuts and layouts.
A high-quality measuring tape is essential for taking precise room measurements and calculating tile quantities. Look for a tape that's durable, has clear markings, and can withstand harsh job site conditions.
You'll also need a chalk line to create precise straight lines and patterns on the subfloor. This tool allows you to snap a line quickly and easily, making sure your tiles are aligned correctly.
For more intricate layouts, consider using a combination square to create accurate angles and miter cuts. Additionally, a laser level can help you establish a level plane and make certain your tiles are installed perfectly level.
By investing in these essential measuring and marking tools, you'll be able to achieve professional-looking results and avoid costly mistakes.
With the right tools, you can focus on creating a beautiful and durable concrete floor that will last for years to come.
Cutting and Shaping Concrete Tiles
With your layout precisely marked, you're ready to start cutting and shaping concrete tiles to fit around obstructions, along edges, and into corners, guaranteeing a seamless, professional-looking installation. This stage requires precision and the right tools to achieve accurate cuts and shapes.
To master tile cutting techniques, you'll need the following essential tools:
-
Wet saw or tile saw: A must-have for making straight cuts in concrete tiles. These saws use a diamond-coated blade and water cooling to prevent overheating and guarantee clean cuts.
-
Tile nippers: Handy for cutting curved lines or irregular shapes, tile nippers are ideal for trimming tiles to fit around obstructions.
-
Tile cutter or snap cutter: A simple, manual tool for making straight cuts in smaller tiles. It works by scoring the tile and then snapping it along the scored line.
- Grinding and shaping tools: Including angle grinders, rotary hammers, and carbide-tipped bits, these tools help refine cuts, smooth edges, and shape tiles to fit perfectly into corners and around curves.
Adhesives and Grout Application Tools
As you prepare to set your concrete tiles in place, it's vital to have the right adhesives and grout application tools to guarantee a strong, long-lasting bond and a professional finish.
When it comes to adhesives, you'll need to choose from various types, such as epoxy-based, acrylic-based, or cement-based adhesives, each suited for specific tile types and installation conditions. Make certain to select an adhesive that's compatible with your concrete tiles and suitable for the intended use of the floor.
For grout application, you'll need a grout float, grout sponge, and a grout mixer. The grout float helps spread and level the grout, while the grout sponge is used for cleaning excess grout from the surface. A grout mixer guarantees the grout consistency is ideal for the specific type of grout you're using.
It's critical to achieve the right grout consistency, as it affects the final appearance and durability of the installation. By having the right adhesives and grout application tools, you'll be able to achieve a flawless, long-lasting concrete tile floor that meets your expectations.
Spacers and Leveling Equipment Required
When laying concrete flooring tiles, you'll need to make certain accurate spacing and leveling to achieve a professional finish.
To accomplish this, you'll require a range of spacers and leveling equipment, which we'll explore in this section.
You'll learn about the various spacer options available and the leveling compounds needed to ensure a perfectly aligned and even tile installation.
Spacer Options Available
You'll need to select from a range of spacer options to guarantee accurate grout joints and a visually appealing concrete flooring tile installation. The right spacer materials can make a significant difference in the final outcome of your project.
When choosing spacers, consider the type of concrete flooring tile you're using, as well as the desired grout joint width.
Here are some common spacer options available:
-
Plastic spacers: These are the most popular type, offering flexibility and ease of use. They come in various sizes and are suitable for most concrete flooring tile installations.
-
Metal spacers: These are ideal for larger grout joints and provide added strength and durability. They're often used in commercial or high-traffic areas.
-
Ceramic spacers: These are designed for use with ceramic or porcelain tiles and provide a more precise grout joint width.
- Adjustable spacers: These allow for flexibility in grout joint width and are ideal for complex tile layouts or when working with irregularly shaped tiles.
Proper spacer installation is essential to guarantee even grout joints and a professional-looking finish. Always follow the manufacturer's instructions and take the time to carefully plan your spacer layout to achieve the best results.
Leveling Compounds Needed
To guarantee a successful concrete flooring tile installation, it's essential to prepare the subfloor with leveling compounds. These compounds help create a smooth, even surface that's important for laying tiles accurately and preventing future cracks or unevenness.
You'll need to choose the right type of leveling compound for your specific project, taking into account factors like the subfloor material, tile size, and desired finish. Self-leveling compounds are a popular choice, as they can be poured onto the subfloor and spread evenly to create a level surface.
When selecting a leveling compound, look for products that are specifically designed for concrete flooring tile installations and offer features like high-strength, rapid-setting, and low-shrinkage properties.
Proper surface preparation is also essential, so make sure to clean and degrease the subfloor before applying the leveling compound. By using the right leveling compound and following the manufacturer's instructions, you'll be able to achieve a smooth, even surface that's perfect for laying concrete flooring tiles.
Tamping and Compacting Tools List
When you're laying concrete flooring tiles, you'll need to guarantee the surface is even and compacted to prevent unevenness and cracking.
To achieve this, you'll require a range of tamping and compacting tools that can help you attain the desired floor density.
In this section, we'll explore the tamping tools you'll need, compare different compaction methods, and discuss how to achieve ideal floor density.
Tamping Tools Overview
Among the essential tools for laying concrete flooring tiles, tamping tools take center stage, playing a significant role in ensuring a smooth, even, and durable tile installation.
You'll need these tools to achieve ideal compactness, which is vital for a successful installation. When you master tamping techniques, you'll be able to eliminate air pockets and excess water, resulting in a stronger and more stable floor.
Here are the tamping tools you'll need to get the job done:
-
Hand tamper: A manual tool used for compacting small areas and tight spaces.
-
Plate compactor: A heavy-duty tool that uses vibration to compact large areas quickly and efficiently.
-
Tamping rake: A long-handled tool with a flat or notched blade, ideal for compacting and leveling large areas.
- Pneumatic tamper: A powerful tool that uses compressed air to compact concrete, ideal for large-scale projects.
Compaction Methods Compared
You'll be able to optimize your concrete flooring tile installation by understanding the strengths and limitations of each tamping tool, which is where compaction methods come into play. Compaction is a critical step in soil preparation, as it guarantees the concrete flooring tiles are laid on a stable and even surface. There are various compaction methods to choose from, each with its own set of benefits and drawbacks.
| Compaction Method | Vibration Techniques | Effective Soil Depth |
|---|---|---|
| Hand Tamper | Manual | 2-4 inches |
| Plate Compactor | High-Frequency | 4-8 inches |
| Roller Compactor | Low-Frequency | 8-12 inches |
| Rammer Compactor | High-Impact | 12+ inches |
When selecting a compaction method, consider the type of soil, the thickness of the concrete slab, and the desired level of compaction. For example, plate compactors are ideal for compacting dense soils, while roller compactors are better suited for compacting loose soils. By choosing the right compaction method, you can guarantee a strong and durable concrete flooring tile installation that will last for years to come.
Floor Density Achieved
With the right compaction method selected, it's essential to achieve ideal floor density by utilizing the correct tamping and compacting tools, guaranteeing a stable and even surface for your concrete flooring tile installation.
You'll want to verify that your floor can withstand the intended load capacity and maintain its stability over time.
To achieve the best floor density, you'll need the following tamping and compacting tools:
-
Hand tamper: A handheld tool used for compacting small areas and tight spaces, guaranteeing a solid bond between the concrete and the subfloor.
-
Plate compactor: A walk-behind or ride-on machine that uses vibration and pressure to compact the concrete, increasing floor stability and load capacity.
-
ROLLER compactor: A heavy-duty machine that applies immense pressure to the concrete, eliminating air pockets and guaranteeing a dense, even finish.
- Vibratory screed: A tool that uses vibration to settle and compact the concrete, producing a smooth, even surface perfect for tile installation.
Grouting and Sealing Essentials
Concrete flooring tiles require precise grouting and sealing to guarantee a durable, waterproof, and visually appealing finish.
When it comes to grouting, you'll need to choose the right type for your project. You can opt for cement-based grout, epoxy-based grout, or acrylic-based grout, each with its own strengths and weaknesses. Cement-based grout is a popular choice, but epoxy-based grout offers superior durability and resistance to stains. Acrylic-based grout, on the other hand, is ideal for areas exposed to heavy foot traffic.
Once you've selected your grout, it's time to apply it. Use a grout float to spread the grout evenly, and then clean the excess with a damp sponge.
After the grout has dried, you'll need to seal it to protect it from stains and water damage. You can choose from a variety of sealing techniques, including topical sealers, penetrating sealers, and impregnating sealers. Topical sealers provide a protective barrier on the surface, while penetrating sealers absorb into the grout to repel stains. Impregnating sealers offer a combination of both.
Cleaning and Prepping Surfaces
Preparing the subfloor and tile surfaces is essential, as any dirt, oil, or old adhesive can compromise the bond between the tile and the adhesive. You can't skip this step, as a dirty or uneven surface will lead to a subpar installation.
To guarantee a strong bond, you'll need to remove any debris, old adhesive, or other substances that might interfere with the new installation.
Here are the essential tools you'll need for surface preparation and debris removal:
-
Broom or vacuum: Remove any loose debris, dust, or dirt from the subfloor and tile surfaces.
-
Adhesive remover: Dissolve and remove old adhesive, taking care not to damage the surface.
-
Surface scrubber: Use a stiff-bristled brush or scrubber to remove any remaining dirt, grime, or old adhesive.
- Damp cloth: Wipe down the surfaces to remove any remaining residue or dust.
Edging and Cornering Tools Guide
As you move on to the edging and cornering stage of your concrete flooring tile project, you'll need to select the right tools to achieve a professional finish.
You'll want to reflect on the cutting edge profiles that will define the aesthetic of your flooring, as well as the corner bead options that will guarantee a seamless joint.
Additionally, you'll need to choose edging strip designs that complement your tile layout and provide a smooth changeover between the tile and surrounding surfaces.
Cutting Edge Profiles
You'll need to create precise profiles for edges and corners to achieve a professional-looking finish, and that's where cutting edge profiles come into play. These profiles are designed to provide a seamless shift between concrete flooring tiles and adjacent surfaces, guaranteeing a sleek and polished appearance.
When it comes to selecting the right cutting edge profile for your project, you'll need to take into account the following factors:
-
Profile types: Choose from a range of profiles, including bullnose, half-bevel, and quarter-bevel, each designed for specific installation scenarios.
-
Installation techniques: Decide on the best method for your project, such as wet-cutting, dry-cutting, or grinding, to achieve the desired profile.
-
Material compatibility: Confirm the profile is compatible with your concrete flooring tile material, whether it's ceramic, porcelain, or natural stone.
- Customization options: Take into account profiles that can be customized to fit unique design requirements, such as curved or irregularly shaped edges.
Corner Bead Options
Frequently, corner beads prove to be the most challenging aspect of edging and cornering concrete flooring tiles, requiring specialized tools to achieve a flawless finish. As you navigate the complexities of corner bead installation, it is crucial to choose the right materials and tools to guarantee a professional-looking result.
When selecting corner bead materials, you'll encounter a range of options, each with its unique benefits and drawbacks. Here's a breakdown of some common corner bead materials and their characteristics:
| Material | Key Features |
|---|---|
| Aluminum | Durable, corrosion-resistant, and easy to install |
| Plastic | Affordable, flexible, and suitable for curved edges |
| Stainless Steel | High-end aesthetic, resistant to scratches and corrosion |
| Galvanized Steel | Cost-effective, durable, and suitable for high-traffic areas |
| PVC | Water-resistant, easy to clean, and ideal for bathrooms and kitchens |
When it comes to corner bead installation, you'll need to take into account factors such as adhesion, flexibility, and finishing techniques. By choosing the right corner bead materials and tools, you'll be able to create a seamless, professional-looking finish that elevates your concrete flooring tiles.
Edging Strip Designs
Your edging strip design selection plays a critical role in achieving a polished, professional-looking finish for your concrete flooring tiles, with various options available to suit different aesthetic and functional requirements.
When choosing the right edging strip design, you'll want to evaluate factors such as durability, ease of installation, and overall visual appeal.
Here are some popular edging strip design options to evaluate:
-
Modern Edging: Sleek and minimalist, modern edging strips provide a clean, contemporary look that complements modern interior design styles.
-
Decorative Strips: Add a touch of elegance with decorative strips featuring intricate patterns, designs, or textures that can enhance the overall aesthetic of your concrete flooring.
-
Rounded Edge Strips: Ideal for high-traffic areas, rounded edge strips provide a smooth, curved edge that reduces tripping hazards and makes cleaning easier.
- Transition Strips: Used to connect different flooring types, transition strips guarantee a seamless connection between concrete flooring and other materials, such as carpet or hardwood.
Mixing and Applying Adhesives
When preparing to lay concrete flooring tiles, it's vital to mix and apply adhesives correctly to guarantee a strong, long-lasting bond between the tile and the substrate.
You'll need to choose the right adhesive type for your specific project, considering factors like substrate type, tile material, and environmental conditions. Common adhesive types include epoxy-based, acrylic-based, and cement-based adhesives. Once you've selected the appropriate adhesive, it's important to mix it according to the manufacturer's instructions to achieve the correct consistency.
When applying the adhesive, you'll need to use the right application techniques. This typically involves spreading the adhesive evenly across the substrate using a notched trowel, holding the trowel at a 45-degree angle to guarantee proper coverage.
Make sure to hold the trowel at the correct angle, as this will affect the adhesive's ability to bond with the tile. Additionally, use a level to verify the adhesive is applied evenly and the tile is properly aligned.
Finishing and Polishing Tools Required
To achieve a high-gloss finish and a durable wear surface, you'll need to equip yourself with the right finishing and polishing tools, including diamond grinders, polishing pads, and specialized concrete finishing equipment.
These tools enable you to refine your polishing techniques and finishing methods to produce a flawless concrete floor.
Here are some essential tools you'll need:
-
Diamond grinders: For removing imperfections, grinding down high spots, and preparing the surface for polishing.
-
Polishing pads: Available in various grits, these pads help you achieve a high-gloss finish by progressively refining the concrete surface.
-
Concrete densifiers: Applied to the surface, these chemicals react with the concrete to create a harder, more durable finish.
- Floor buffing machines: Used in conjunction with polishing pads, these machines help you achieve a uniform finish and remove any remaining imperfections.
Frequently Asked Questions
Can I Use a Hammer to Tap Concrete Tiles Into Place?
When you're considering tile installation, using a hammer to tap concrete tiles into place is not recommended, as it can damage the tile or flooring. Instead, master flooring techniques by employing a rubber mallet or tapping block for precise, gentle alignment.
How Often Should I Clean My Concrete Flooring Tiles?
"As you step onto your concrete flooring, imagine a canvas of pristine art, awaiting your gentle touch. Clean your tiles regularly, ideally every 2-3 weeks, to prevent dirt buildup, and apply maintenance tips like sealing and mopping to preserve their beauty."
Are Concrete Flooring Tiles Suitable for Outdoor Use?
You're wondering if concrete flooring tiles are suitable for outdoor use? Yes, they can be, but you'll need to take into account durability factors like porosity, density, and finish, as well as weather resistance to guarantee they withstand the elements.
Can I Install Concrete Flooring Tiles Over Existing Flooring?
When you're planning to install concrete flooring tiles over existing flooring, you'll face unique installation challenges, so it's essential to assess flooring compatibility beforehand, ensuring a successful and durable outcome.
Do I Need to Seal Concrete Flooring Tiles After Installation?
As you ride into the sunset of your tile installation, you'll need to lasso those concrete flooring tiles with a sealant, releasing sealing benefits like stain resistance and ease of maintenance, via techniques like topical or integral sealing.
Conclusion
You've got the entire arsenal of essential tools for laying concrete flooring tiles at your disposal.
With these must-haves, you'll be unstoppable – like a well-oiled machine, churning out perfectly tiled floors left and right!
From measuring and marking to finishing and polishing, you're equipped to tackle even the most complex projects with ease.
Now, get out there and conquer that concrete jungle, one tile at a time!
Related Posts
-

Top Tools for Repairing Cracked Concrete Surfaces
When tackling a cracked concrete surface repair, you'll need the right tools to guarantee a durable fix. Start with e...
-

3 Best Tools to Buy for Concrete Repair Online
When buying tools for concrete repair online, you'll want to research multiple retailer options to find the best prod...
-

Reinforcement Tools Checklist for Concrete Block Walls
You'll need a range of reinforcement materials, including horizontal and vertical rebar, fiber mesh, and anchor bolts...


