Essential Tools for Concrete Wall Repair Success
Share
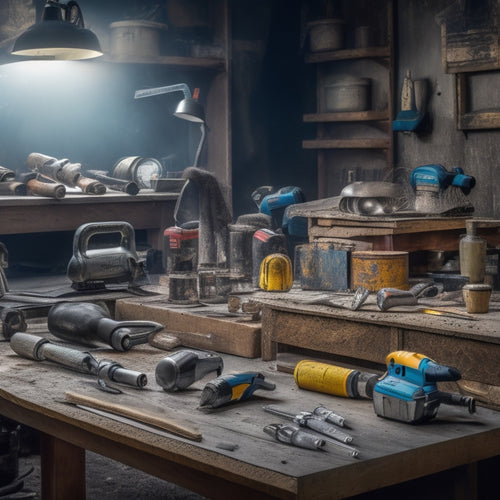
You'll need a thorough set of specialized tools to guarantee a successful concrete wall repair, as each phase of the process - from core drilling and cutting to finishing and smoothing - requires precise equipment to achieve ideal results. You'll require core drilling tools, mixing and patching essentials, surface preparation must-haves, crack repair toolset basics, bonding agent application tools, finishing and smoothing tools, safety and protection gear, and measuring and testing devices. With the right tools, you'll be able to tackle complex repairs with confidence; now, take the next step to mastering the art of concrete wall repair.
Key Takeaways
• Core drilling and cutting tools, such as rotary hammer drills and diamond core drills, provide precision and efficiency in concrete wall repair.
• Accurate mixing ratios and techniques, along with the right patching compound, are crucial for structural integrity and aesthetics.
• Surface preparation is key, requiring specialized tools like wire brushes and scrapers, as well as techniques like power washing and sandblasting.
• Crack repair tools, including injection guns and sealing tools, help achieve durable repairs, while assessment techniques evaluate crack dimensions and severity.
• Mastery of finishing tools, such as trowels and edgers, contributes to a smooth and seamless repair outcome, enhancing overall professionalism.
Core Drilling and Cutting Tools
When repairing cracks or damage in concrete walls, you'll often need to core drill or cut out sections of the wall to remove deteriorated concrete or prepare for patching, and that's where core drilling and cutting tools come in.
Core drilling tools, such as rotary hammer drills, diamond core drills, and electric core drills, are designed for precision and efficiency. Each type of core drill is suited for specific tasks, from removing small sections of concrete to drilling large holes for anchor bolts.
When selecting a core drill, consider factors like drill speed, torque, and bit type to guarantee the right tool for the job.
Cutting techniques, like saw cutting and abrasive cutting, are also essential for successful concrete wall repair. Saw cutting involves using a diamond blade saw to make precise cuts, while abrasive cutting uses high-pressure water jets or abrasive wheels to remove concrete.
Mixing and Patching Essentials
When you're preparing to repair a concrete wall, you'll need to get the mixing ratio just right, as an incorrect proportion of cement to aggregate can lead to a weak or brittle patch.
You'll also need to select a patching compound that's suitable for the specific repair task at hand, taking into account factors like the size and location of the damage, as well as the surrounding environmental conditions.
Mixing Ratios Matter
By understanding the significance of precise mixing ratios, you can guarantee the structural integrity and aesthetics of your concrete wall repair, as even slight deviations can lead to compromised bonding, uneven finishes, or even catastrophic failures.
In concrete wall repair, mastering mixing techniques is essential, and it all starts with the ratio importance. The standard mixing ratio for most concrete repairs is 1:1:2 (cement:sand:aggregate), but this can vary depending on the specific requirements of your project. It's important to follow the manufacturer's instructions for the specific products you're using, as deviations can lead to weaknesses in the repair.
When mixing, make sure you're using the correct water-to-cement ratio, as excessive water can dilute the mixture, compromising its strength. You should also avoid over-mixing, which can lead to air pockets and a weakened bond.
It's critical to mix in small batches, and only mix as much as you can apply within the working time of the product. By adhering to these guidelines, you can guarantee a strong, durable, and long-lasting repair that meets the highest safety standards.
Patching Compound Selection
Selecting the right patching compound is essential, as it directly impacts the performance and longevity of your concrete wall repair. With numerous options available, you must consider factors like bond strength, compressive strength, and workability to make an informed decision.
When choosing a patching compound, consider the type of repair you're performing. For example, epoxy-based compounds are ideal for high-stress areas, while acrylic-based compounds are better suited for non-structural repairs. You should also consider the surface preparation required, as some compounds may need a specialized primer or surface treatment.
Different patching techniques also require specific compound types. For instance, injection grouting requires a specialized compound that can flow easily, while hand-applied patching demands a compound with high workability.
Additionally, consider the environmental conditions of the repair site, as some compounds may not perform well in high-temperature or high-humidity environments.
Surface Preparation Must-Haves
You'll need a range of specialized tools to guarantee your concrete surface is properly prepared for repair, starting with a wire brush or scraper to remove any loose debris and old coatings. This initial step is essential in making certain a strong bond between the repair material and the substrate.
Next, you'll need to employ surface cleaning techniques, such as power washing or sandblasting, to remove dirt, grime, and any remaining old coatings. This will help expose the underlying substrate, allowing you to assess its condition using substrate assessment methods like visual inspection or sounding.
For a thorough assessment, you may also need a hammer, chisel, or sounding rod to identify any cracks, voids, or delaminations in the substrate. Additionally, a putty knife or scraper can be useful in removing any remaining old adhesive or coatings.
Remember to always wear appropriate personal protective equipment (PPE), such as gloves, safety glasses, and a dust mask, when working with power tools and performing surface preparation tasks.
Crack Repair Toolset Basics
What tools do you need to effectively inject epoxy or polyurethane into cracks, and how do they facilitate a successful repair?
To answer this, let's explore the fundamentals of a crack repair toolset. You'll need a high-pressure injection gun or pump to force the repair material into the crack, ensuring it reaches the entire depth and width.
A packer or injection port is also necessary to seal the crack and direct the flow of material. Additionally, a mixing stick or paddle is required to thoroughly mix the epoxy or polyurethane before injection.
When performing crack assessment techniques, it's vital to have a clear understanding of the crack's dimensions, orientation, and severity. This information will guide your repair approach and material selection.
Recent repair material innovations have led to the development of specialized epoxies and polyurethanes with improved flow rates, bonding properties, and durability. These advanced materials, combined with the right tools, enable you to achieve a strong and lasting repair.
Bonding Agent Application Tools
When applying bonding agents to prepare surfaces for repair, a specialized toolset is essential to confirm uniform distribution and ideal adhesion.
You'll need to choose the right tools for the job to guarantee a strong bond between the old concrete and the new repair material.
To achieve this, you'll require a range of application tools, including:
-
Roller extension poles: For applying bonding agents to large areas quickly and efficiently
-
Microfiber rollers: For achieving uniform coverage on smooth surfaces
-
Brushes: For applying bonding agents to irregular or textured surfaces
-
Spray bottles: For applying bonding agents to small or hard-to-reach areas
-
Squeegees: For removing excess bonding agent and achieving a smooth finish
Remember to always follow the manufacturer's instructions for the specific bonding agent type you're using, as different products may require unique application techniques.
Finishing and Smoothing Tools
With the bonding agent properly applied, it's time to focus on achieving a smooth, even finish by employing a range of finishing and smoothing tools that'll help you eliminate any imperfections and guarantee a professional-looking repair.
You'll need a selection of trowels, including a finishing trowel, a margin trowel, and a putty knife. Mastering trowel techniques is essential at this stage, as it directly affects the final appearance of the repair. Hold your trowel at a 45-degree angle and use long, sweeping strokes to spread the repair material evenly. Use your putty knife to scrape off excess material and create a smooth, flat surface.
For added precision, incorporate edging tools, such as an edger or a jointer, to create crisp, clean lines. These tools will help you achieve a seamless blend between the repaired area and the surrounding concrete.
Safety and Protection Gear
Your safety and the success of the repair job depend on wearing the right protection gear, so don't skip this essential step. As you prepare to tackle that concrete wall repair, remember that protecting yourself from potential hazards is vital. You must comply with established safety standards to avoid injuries and guarantee a successful outcome.
To achieve this, make certain you have the following protective equipment:
-
Hard hat and safety glasses: protect your head and eyes from falling debris and flying particles.
-
Dust mask or respirator: prevent inhalation of concrete dust and other airborne contaminants.
-
Steel-toed boots and non-slip gloves: provide traction and protection for your feet and hands.
-
High-visibility vest: increase your visibility in low-light environments.
-
Full-body protective suit: shield yourself from skin irritants and corrosive substances.
Measuring and Testing Devices
When evaluating concrete wall damage, you'll need to accurately measure and test various parameters to determine the best course of repair.
To do this, you'll rely on a range of specialized tools that provide precise data on crack widths, concrete strength, and moisture levels.
Crack Width Gauges
You'll need a reliable crack width gauge to accurately measure the width of cracks in concrete walls, as this critical measurement determines the severity of damage and guides your repair strategy. A high-quality gauge guarantees precise crack measurements, which are essential for evaluating the structural integrity of the wall and developing an effective repair plan.
When selecting a crack width gauge, consider the following key factors:
-
Accuracy: Look for gauges with precise measurement increments (e.g., 0.01 mm) to guarantee reliable results.
-
Range: Choose a gauge that can measure cracks within the expected width range for your project (e.g., 0-10 mm).
-
Durability: Select a gauge built with rugged materials to withstand harsh job site conditions.
-
Ease of use: Opt for a gauge with an intuitive design and clear instructions to minimize operator error.
-
Calibration: Confirm the gauge is calibrated regularly to maintain accuracy, using recognized gauge calibration methods.
Concrete Strength Testers
Measuring concrete strength accurately is essential to determining the overall health and stability of a structure, which is where concrete strength testers come into play. These testers provide valuable insights into the material's compressive strength, density, and other crucial properties.
As you assess the condition of a concrete wall, you need to determine the compressive strength to identify potential weaknesses or defects. Concrete strength testers enable you to do just that, ensuring you can make informed decisions about repairs or maintenance.
When selecting a concrete strength tester, look for devices that utilize non-destructive testing (NDT) methods. These tools are safer and more convenient, as they don't damage the structure during testing.
NDT methods include ultrasonic pulse velocity testing, rebound hammer testing, and penetrability testing. These tests provide accurate readings of the concrete's compressive strength, allowing you to pinpoint areas that require attention.
Moisture Detection Tools
By detecting excessive moisture levels in concrete walls, you can identify potential breeding grounds for structural damage, corrosion, and deterioration.
Moisture detection tools are essential for identifying moisture sources and determining the extent of damage. These tools use various detection techniques to measure moisture levels, helping you pinpoint areas that require repair.
Some common moisture detection tools include:
-
Moisture meters: Measure the electrical impedance or resistance of concrete to detect moisture levels.
-
Infrared thermography: Uses thermal imaging to identify temperature differences that may indicate moisture presence.
-
Concrete moisture testing kits: Provide a more thorough assessment of moisture levels through chemical testing.
-
Relative humidity (RH) probes: Measure the RH levels within the concrete to detect moisture.
-
Surface-mounted sensors: Continuously monitor moisture levels and alert you to changes.
Frequently Asked Questions
Can I Use a Regular Drill for Concrete Wall Repair Projects?
When tackling concrete wall repair projects, you may wonder if your regular drill will suffice. The answer is, it depends.
You'll need a drill capable of handling the demands of concrete, such as a hammer drill or rotary hammer.
Furthermore, bit selection is essential - choose bits specifically designed for concrete, like carbide-tipped or diamond-coated bits, to guarantee efficient drilling and minimize damage to the surrounding material.
How Long Does a Typical Concrete Wall Repair Project Take to Complete?
Get ready to plunge into the trenches of concrete wall repair, where time is of the essence!
You're probably wondering, how long will this project take to complete? The answer depends on the scope of the repair. Small cracks can be fixed in a day, while larger structural issues may require weeks or even months.
Effective project planning is vital to guarantee a timely repair. Factor in repair timeframes, material delivery, and labor costs to avoid costly delays.
With a solid plan, you'll be back to solid ground in no time!
Are There Any Specific Safety Protocols for Working With Epoxy?
When working with epoxy, you'll want to prioritize epoxy safety above all.
Make certain you wear personal protective equipment (PPE) like gloves, safety glasses, and a mask to prevent skin and eye irritation, as well as inhalation of harmful fumes.
Additionally, guarantee good ventilation in your workspace and avoid mixing epoxy in confined areas.
Always follow the manufacturer's instructions and take necessary precautions to minimize risks.
Can I Repair a Concrete Wall That's Been Damaged by Water?
Imagine water seeping into your concrete wall like a relentless intruder, causing cracks and crumbling.
You're right to wonder, 'Can I repair the damage?' The answer is yes, but it requires careful attention.
You'll need to identify the source of the water damage and address it before applying repair techniques such as patching, resurfacing, or injecting epoxy.
Make certain to assess the extent of the damage and take necessary safety precautions to guarantee a successful repair.
Do I Need a Professional License to Perform Concrete Wall Repairs?
When tackling concrete wall repairs, you're likely wondering if a professional license is required.
In most cases, you don't need a license for DIY repair techniques, but it's crucial to check local regulations.
However, if the damage is extensive or you're unsure about the repair, it's advised to hire a licensed professional.
License requirements vary by state and locality, so verify you comply with local laws to avoid potential risks and liabilities.
Conclusion
You've got the right tools in your toolbox, now it's time to hammer out a concrete wall repair that's built to last.
Don't drop the ball - with these essentials, you'll be on a roll, covering all bases from core drilling to finishing and smoothing.
Remember, the devil is in the details, so don't skimp on surface preparation, bonding agents, and crack repair.
With these tools, you'll be solid as a rock, delivering a repair that's strong, durable, and long-lasting.
Related Posts
-

Top Concrete Resurfacing Tools for a Pro Finish
When it comes to achieving a professional finish in concrete resurfacing projects, you require the right set of speci...
-

Essential Power Tools for DIY Concrete Sculpting
As you begin DIY concrete sculpting, you'll need a strategic selection of power tools to achieve professional-grade r...
-

What Tools Are Needed for Concrete Wall Foundations
You'll need a thorough array of tools and equipment to construct a concrete wall foundation that meets structural int...


