Essential Tools for Concrete Block Wall Repair
Share
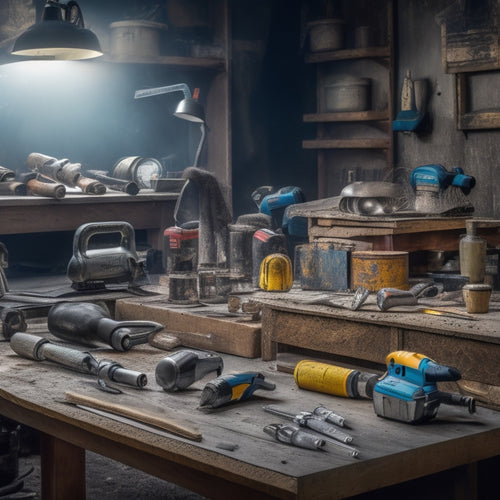
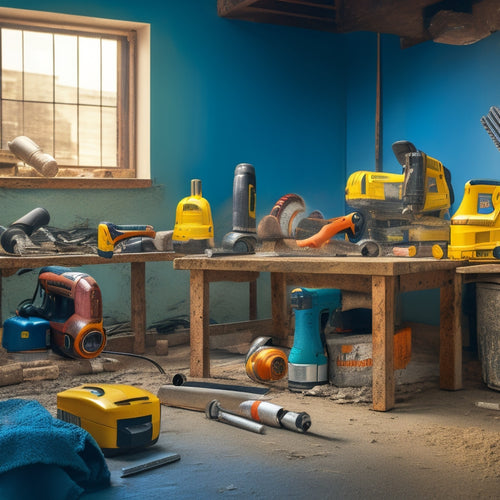
When tackling concrete block wall repair, you'll need a range of essential tools to get the job done right. From safety gear like hard hats and gloves to cleaning tools like wire brushes and pressure washers, each tool plays a crucial role in the process. You'll also need measuring and marking tools, block repair mixing tools, crack filling and sealing tools, and specialized tools for grout and mortar application, tamping, and finishing. With the right tools and techniques, you'll be able to achieve a durable, long-lasting repair. Now, take a closer look at each of these essential tools to guarantee a successful project outcome.
Key Takeaways
• Safety gear, including hard hats and gloves, is crucial to shield from hazards like falling debris and chemical splashes during concrete block wall repair.
• Effective cleaning tools, such as wire brushes and pressure washers, are necessary to remove dirt, debris, and old mortar for a strong bond with repair material.
• Measuring and marking tools, like tape measures and levels, ensure accurate assessments and precise markings for repair applications.
• Block repair mixing tools, including mixing buckets and low-speed drills, are essential for thorough blending of repair materials and achieving consistent results.
• Specialized tools, such as crack chasers and caulk guns, are required for filling and sealing cracks, and selecting the right tools enhances the effectiveness of the process.
Safety Gear and Protective Equipment
Wearing the right safety gear and protective equipment is vital before starting a concrete block wall repair project, as it shields you from potential hazards like falling debris, chemical splashes, and physical injuries.
You should prioritize personal protective equipment (PPE) that meets industry standards, such as hard hats, safety glasses, earplugs, dust masks, and gloves. Guarantee your PPE fits comfortably and is in good condition to prevent compromised protection.
Regular equipment maintenance is important to guarantee your gear remains effective. Inspect your equipment regularly for signs of wear and tear, and replace or repair items as needed. Clean and store your gear properly to prevent damage and extend its lifespan.
Don't overlook the importance of proper footwear, as it can prevent slips, trips, and falls. Steel-toed boots or shoes with good traction are vital for this type of project.
Block Repair Mixing Tools
With your safety gear in place, you can now focus on preparing the right block repair mixing tools to confirm a strong and durable bond between the old and new concrete.
You'll need a mixing bucket, a mixing stick or trowel, and a measuring cup to accurately measure the material ratios. The mixing bucket should be clean, dry, and free of any contaminants that could affect the bonding process.
When mixing, use a low-speed drill with a mixing paddle attachment to confirm thorough blending of the repair material. Follow the manufacturer's instructions for the recommended mixing techniques and material ratios.
Typically, a 1:1 or 2:1 cement-to-sand ratio is used for block repair. Make sure to mix the material in small batches to avoid waste and confirm consistent results.
Crack Filling and Sealing Tools
You'll need a set of specialized tools to effectively fill and seal cracks in the concrete block wall. This includes a crack chaser or grinder to widen and clean the crack, and a caulk gun or epoxy injection system to fill the gap.
Before filling, conduct a thorough crack assessment to determine the severity and type of crack, as well as the most suitable sealant type.
Here are the essential tools you'll need for crack filling and sealing:
-
Crack chaser or grinder: To widen and clean the crack, removing any debris or loose material.
-
Caulk gun or epoxy injection system: To fill the gap with a suitable sealant, such as polyurethane, silicone, or epoxy-based products.
-
Sealant selection: Choose from a range of sealant types, including acrylic, polyurethane, or silicone-based products, depending on the crack's size, location, and exposure to weather.
- Cleaning brushes and rags: To remove any excess sealant or debris from the surrounding area, ensuring a clean and professional finish.
Grout and Mortar Application
When you're preparing to apply grout or mortar to your concrete block wall repair, you'll want to make certain you're getting the consistency just right.
You'll also need to select the appropriate tool for the job, whether it's a grout float, pointing trowel, or jointer.
Mix Consistency Matters
Achieve a uniform mix consistency to secure a strong, durable bond between the concrete blocks and the grout or mortar, as inconsistencies can lead to structural weaknesses and water infiltration. When preparing your grout or mortar mix, you must verify that the mix ratios are accurate and consistent. This is vital, as even slight variations can affect the final product's quality.
To maintain control over your mix consistency, follow these guidelines:
-
Use a consistent mixing technique: Avoid over- or under-mixing, as this can alter the mix's chemical composition.
-
Monitor moisture control: Verify the mixing water is clean and free of contaminants, and adjust the mix accordingly to achieve the ideal consistency.
-
Use a precise measuring system: Measure your ingredients accurately to maintain consistent mix ratios.
- Test the mix regularly: Perform regular tests to verify the mix meets the required specifications and standards.
Tool Selection Importance
Selecting the right tools for grout and mortar application is essential, as it directly impacts the quality and efficiency of the concrete block wall repair process. You want to guarantee that the tools you choose are compatible with the specific grout or mortar mix you're using, as well as the surface you're applying it to. This will prevent damage to the material, the tool, or both.
When it comes to tool compatibility, consider the type of grout or mortar you're working with. For example, a grout float with a rubber edge is ideal for epoxy-based grouts, while a steel-edged float is better suited for cement-based grouts.
Your user experience also plays a significant role in tool selection. Consider the size and weight of the tool, as well as the grip and handle design. A tool that fits comfortably in your hand will reduce fatigue and improve your overall control.
Additionally, look for tools with adjustable handles or ergonomic grips to further enhance your user experience. By choosing the right tools for the job, you'll be able to work more efficiently and effectively, resulting in a higher-quality repair.
Application Technique Tips
To guarantee a successful concrete block wall repair, you must master the art of grout and mortar application, which begins with holding the trowel at a 45-degree angle to the wall surface. This allows for optimal spread and adhesion of the material.
Proper surface preparation is also essential, making sure the area is clean, dry, and free of debris.
Here are some additional application technique tips to keep in mind:
-
Apply grout or mortar in small sections, working from the bottom up to prevent drips and runs.
-
Use a level to confirm straight joints and maintain a consistent pattern.
-
Hold the trowel at a consistent angle to achieve a uniform spread and avoid air pockets.
- Use a damp cloth or sponge to wipe away excess material, preventing it from setting on the surface.
Tamping and Compaction Tools
You'll need a range of tamping and compaction tools to guarantee the repaired concrete block wall can withstand weight and stress over time. Mastering various tamping techniques and compaction methods is vital to achieving a solid, durable repair.
A hand tamper or plate compactor is essential for compacting the fill material, ensuring it's dense and evenly distributed. You'll also need a bullfloat or tamping rod to compact and smooth out the surface.
For more precise control, consider using a hand-held compactor or a vibrating plate compactor. These tools allow you to target specific areas and achieve ideal compaction.
When selecting tamping and compaction tools, consider the size and scope of your project, as well as the type of fill material being used. By choosing the right tools and techniques, you'll be able to achieve a strong, long-lasting repair that can withstand the test of time.
Cleaning and Surface Prep
Before applying new materials, thoroughly clean the damaged area to remove dirt, debris, and old mortar, ensuring a strong bond between the existing wall and the repair material. This vital step in concrete block wall repair requires attention to detail and the right tools.
You'll need to employ effective cleaning methods to prepare the surface for repair.
Here are the essential tools for cleaning and surface preparation:
-
Wire brush: Use a stiff-bristled wire brush to remove loose debris and old mortar from the damaged area.
-
Pressure washer: Employ a pressure washer to blast away dirt and grime, taking care not to damage the surrounding concrete.
-
Chemical cleaners: Apply chemical cleaners to dissolve and remove stubborn mortar or efflorescence (salt deposits).
- Surface scrubbers: Utilize surface scrubbers or scrub brushes to remove dirt and grime from the surface, ensuring a clean and even surface for repair.
Measuring and Marking Tools
With the surface clean and prepared, you can now accurately assess the damaged area and begin measuring for repairs. Measuring techniques are essential in determining the extent of the damage and the materials needed for the repair. You'll need tools such as a tape measure, level, and laser level to guarantee accurate measurements.
When it comes to marking methods, you'll need tools that can leave a clear, precise mark on the concrete surface. Chalk lines, marking chalk, and a marker with a fine tip are vital for this task.
Here's a breakdown of the measuring and marking tools you'll need:
| Tool | Purpose | Type |
|---|---|---|
| Tape measure | Measure length and width of damaged area | 25ft or 30ft |
| Level | Confirm surface is level and plumb | Bubble or laser |
| Laser level | Project level lines and planes | Self-leveling or manual |
| Chalk lines | Create straight lines for marking | Blue or red chalk |
Drill Bits and Mixing Drills
Precision is essential when drilling into concrete block walls, and selecting the right drill bits and mixing drills is important to guarantee efficient and effective repair.
You need to choose drill bits that can withstand the hardness of concrete and mixing drills that can handle the demands of mixing repair materials.
When it comes to drill bits, you'll need:
-
Masonry bits: designed for drilling into concrete, brick, and block.
-
Carbide-tipped bits: ideal for drilling into harder concrete surfaces.
-
Diamond-coated bits: best for drilling into extremely hard concrete or for making large holes.
- Step bits: useful for drilling multiple hole sizes without changing bits.
For mixing drills, consider the speed and power you need. Mixing drill speeds should be adjustable to accommodate different materials and mixing tasks.
Look for drills with high torque and variable speed controls to guarantee you can tackle any repair job.
Finishing and Smoothing Tools
When you're repairing a concrete block wall, achieving a professional-looking finish requires the right tools.
You'll need to smooth out the surface, create clean lines, and guarantee an even finish.
To do this, you'll rely on three essential tools: a trowel, an edger, and a float, which we'll discuss in detail below.
Trowel for Smooth Finish
You'll need a high-quality trowel to achieve a smooth finish on your concrete block wall repair, as it allows for even distribution of mortar and precise control over the finishing process. With the right trowel, you'll be able to achieve a professional-looking finish that's free of imperfections.
When it comes to trowel types, you'll want to evaluate the following:
-
V-notch trowels: Ideal for applying and smoothing out mortar, these trowels have a V-shaped notch that helps to spread the material evenly.
-
Square-notch trowels: These trowels have a square notch and are better suited for applying thin layers of mortar or for finishing small areas.
-
Pointing trowels: Designed for precision work, pointing trowels have a small, pointed blade that's perfect for filling small gaps or making minor repairs.
- Finishing trowels: These trowels have a flat, broad blade that's ideal for smoothing out large areas and achieving a high-gloss finish.
Mastering trowel techniques takes practice, but with the right tool and a bit of patience, you'll be able to achieve a smooth, professional-looking finish on your concrete block wall repair.
Edger for Clean Lines
With a smooth finish in place, it's crucial to focus on creating clean lines and defined edges using an edger, an essential tool for finishing and smoothing concrete block wall repairs.
As you work on perfecting your edging techniques, you'll need to choose the right edger type for the job. There are two primary edger types: manual and power edgers. Manual edgers are ideal for small, precise areas, while power edgers are better suited for larger surfaces.
When selecting an edger, consider the edge profile you want to achieve. Do you need a sharp, defined edge or a more rounded, subtle finish? Different edgers are designed to produce specific edge profiles, so it's crucial to choose the right one for your project.
To achieve clean lines, use your edger to create a consistent, controlled motion. Apply gentle to moderate pressure, depending on the type of edger and the surface you're working on.
Float for Even Surface
Your float is the go-to tool for achieving an even surface, as it effectively knocks down high spots and fills in low areas to create a uniform finish.
When choosing a float, consider the type of surface technique you're employing. There are various float types, including:
-
Bull float: Ideal for large, open areas, this float features a long handle and a wide, flat blade.
-
Darby float: Used for smaller areas, this float has a shorter handle and a narrower blade.
-
Finishing float: Designed for fine-tuning, this float has a very thin blade for achieving a high-gloss finish.
- Power float: A mechanized option for large-scale projects, this float increases efficiency and reduces fatigue.
Frequently Asked Questions
Can I Use Regular Cement for Concrete Block Wall Repair?
When it comes to concrete block wall repair, you're wondering if regular cement will do the trick.
While it might seem like a good idea, it's crucial to use a specialized cement, such as Type S or Type N, designed for masonry repairs.
Regular cement won't provide the necessary bonding strength and durability for a lasting fix.
You'll want to choose the right cement type and employ proper repair techniques to guarantee a strong, long-lasting repair.
How Long Does It Take for Repair Mortar to Fully Cure?
You're likely wondering how long it takes for repair mortar to fully cure.
This curing time depends on various factors, including the type of mortar, environmental conditions, and repair techniques you use.
Generally, most repair mortars take around 24 to 48 hours to set, but full curing can take anywhere from 7 to 28 days.
Be patient, as proper curing is essential for a strong and durable repair.
Do I Need a Permit for Concrete Block Wall Repairs?
You'll need to determine if a permit is required for your concrete block wall repairs. Check with your local government to understand permit requirements, as they vary by jurisdiction.
Familiarize yourself with repair guidelines to guarantee compliance. Don't assume a permit isn't necessary - it's better to verify upfront to avoid costly fines or project delays.
You're in control, so take the time to research and plan accordingly.
Can I Repair a Concrete Block Wall in Cold Weather?
When deciding to repair a concrete block wall, you'll need to take into account cold weather conditions.
In winter, you'll face unique challenges, like slower curing times and potential damage from freezing temperatures.
To overcome these obstacles, use winter repair techniques, such as using cold-weather cement, applying a bonding agent, and protecting the repair area from wind and moisture.
How Often Should I Inspect My Concrete Block Walls for Damage?
You'll be surprised to know that nearly 70% of structural damage to concrete block walls goes unnoticed until it's too late.
To avoid this, you should inspect your walls regularly. Aim for quarterly inspections, focusing on signs of damage like cracks, water stains, and crumbling mortar.
Be thorough, as early detection is key to preventing costly repairs. Stay on top of inspection frequency to catch damage signs before they spiral out of control.
Conclusion
With the right tools in your arsenal, repairing a concrete block wall is like conducting a symphony - every instrument plays its part in harmony to create a masterpiece.
You've got the baton, now lead the way.
Remember, precision and attention to detail are key to a strong, long-lasting repair.
Don't let cracks and gaps bring your wall down; with these essential tools, you'll be the maestro of concrete block wall repair.
Related Posts
-

Essential Power Tools for DIY Concrete Sculpting
As you begin DIY concrete sculpting, you'll need a strategic selection of power tools to achieve professional-grade r...
-

Top Tools for Beginners in Concrete Masonry Coating
You're about to begin a concrete masonry coating project, and having the right tools is essential. Start with essenti...
-

Essential Power Tools for Concrete Block Construction
When building with concrete blocks, you'll need a range of power tools to cut, drill, mix, and finish the blocks to g...


