
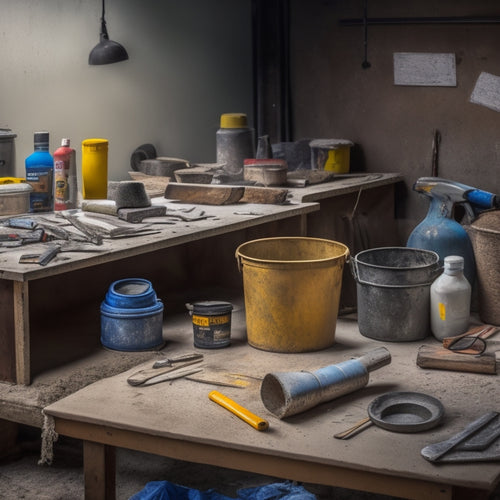
Essential Tools for a Successful Concrete Sealing Job
You'll need a combination of specialized tools and a clear understanding of their roles to achieve a successful concrete sealing job that meets your desired level of protection, appearance, and durability. From selecting the right sealer for your concrete type and intended use, to preparing the surface by cleaning, removing old sealers, and filling cracks, you'll require various tools like sprayers, rollers, and brushes for application. Additionally, safety gear like protective eyewear and gloves, and finishing tools like edgers and inspection checklists, are essential for a job well done. As you gather the necessary tools, you'll be one step closer to mastering the art of concrete sealing.
Key Takeaways
• Select the right sealer type based on concrete type, environmental conditions, and desired appearance and durability.
• Prepare the surface by cleaning, removing old sealers, filling cracks and holes, and etching for optimal sealant adhesion.
• Choose the appropriate application tools and techniques, such as sprayers, rollers, and brushes, for a uniform and even coating.
• Wear essential safety and protective gear, including eyewear, gloves, respirator masks, knee pads, and slip-resistant footwear, to prevent accidents.
• Use finishing and inspection tools, such as microfiber applicators, high-quality rollers, and edgers, to ensure a professional-looking finish and defect-free application.
Selecting the Right Sealer
Choosing the right sealer for your concrete project involves considering factors such as the type of concrete, intended use, and environmental conditions to guarantee a successful and long-lasting seal.
You'll need to determine the level of protection required, as well as the desired appearance and durability. There are several sealer types to choose from, including acrylic, polyurethane, epoxy, and silane-based sealers, each with its own performance factors and benefits.
Acrylic sealers, for instance, offer good UV resistance and are suitable for outdoor applications, while polyurethane sealers provide excellent chemical resistance and are ideal for high-traffic areas.
Epoxy sealers, on the other hand, offer superior durability and are often used in industrial settings. Silane-based sealers, meanwhile, penetrate deep into the concrete, providing long-lasting protection against water and salt damage.
Surface Preparation Essentials
When preparing a concrete surface for sealing, you'll need to tackle a few vital tasks to guarantee a strong bond between the concrete and the sealer.
First, you'll need to clean the surface thoroughly to remove dirt, grime, and other contaminants that can interfere with the sealing process.
Next, you'll need to remove any old sealers, fill in cracks and holes, and address any other surface imperfections that could compromise the seal.
Cleaning the Surface
You'll need to thoroughly sweep or blow away any loose debris from the concrete surface to secure a strong bond between the sealant and the substrate. This is especially important when working with surfaces that have been exposed to heavy foot or vehicle traffic, as dirt and grime can accumulate quickly.
Next, you'll need to choose the right cleaning agent for your specific surface type. The type of cleaning agent you select will depend on the level of dirt and grime on the surface, as well as the type of concrete you're working with.
| Surface Type | Recommended Cleaning Agent |
|---|---|
| New or lightly soiled concrete | Mild detergent and water |
| Heavily soiled or oil-stained concrete | Degreaser or industrial-strength cleaner |
| Acid-stained or etched concrete | Neutralizing agent to remove acid residue |
| Previously sealed or painted concrete | Solvent-based cleaner to remove old sealant or paint |
Remember to always follow the manufacturer's instructions for the cleaning agent you choose, and take necessary safety precautions to avoid skin and eye irritation. By properly cleaning the surface, you'll secure a strong bond between the sealant and the substrate, resulting in a longer-lasting and more effective seal.
Removing Old Sealers
Before applying a new sealant, it's vital to remove any existing sealers, coatings, or waxes that may interfere with the new sealant's adhesion.
You'll need to employ effective removal techniques to guarantee a strong bond between the concrete and the new sealant. The type of removal method you choose will depend on the sealer type you're dealing with. For example, if you're removing a solvent-based sealer, you may need to use a solvent-based stripper. On the other hand, if you're removing a water-based sealer, a water-based stripper or a pressure washer may be more effective.
It's essential to follow the manufacturer's instructions for the specific removal product you're using, as well as take necessary safety precautions to protect yourself and the surrounding environment.
You may also need to repeat the removal process several times to make certain all residue is removed. Once you've completed the removal process, make sure to clean the surface thoroughly to remove any remaining residue or debris.
Filling Cracks and Holes
Filling cracks and holes in the concrete surface is a critical step in surface preparation, as it guarantees a smooth, even application of the sealant and prevents underlying defects from showing through.
You'll need to identify the type of crack you're dealing with, as different crack types require specific filler materials. For instance, hairline cracks can be filled with a low-viscosity epoxy or polyurethane-based filler, while larger cracks may require a thicker, more flexible material.
When selecting a filler material, consider factors such as durability, flexibility, and color compatibility with the surrounding concrete. You'll also need to verify the filler is compatible with the sealant you'll be applying.
Take the time to properly prepare the crack or hole by cleaning it thoroughly and drying it completely before applying the filler. Use a V-shaped sander or grinder to open up the crack and create a surface for the filler to bond to.
Cleaning and Etching Tools
Prepare your concrete surface for sealing by employing the right cleaning and etching tools, which remove dirt, grime, and old coatings to secure a strong bond between the concrete and sealant.
You'll need to choose the most effective cleaning techniques for your specific project, whether it's power washing, scrubbing, or using a degreaser. Don't forget to test the surface for any remaining substances that could interfere with the sealant.
Next, apply an etching solution to open up the concrete's pores and create a profile for the sealant to adhere to. The type of etching solution you use will depend on the type of concrete you're working with, as well as the level of etching required.
Always follow the manufacturer's instructions for application and dwell time to guarantee the best results. Remember to thoroughly rinse the surface after etching to remove any residue.
Application and Spreading Tools
When you're ready to apply a concrete sealant, you'll need the right tools to guarantee a smooth, even coat.
You'll want to take into account the best sealant application methods for your specific project, and then select the appropriate spreader for the job.
Sealant Application Methods
You'll need the right tools to apply concrete sealant effectively, and that starts with selecting the ideal application method for your specific project. The right method will guarantee a uniform coat, adequate coverage, and a professional finish.
When it comes to sealant application methods, you have several options to choose from. Here are a few:
-
Sprayer types: From handheld sprayers to backpack sprayers, each type has its own advantages. Handheld sprayers are ideal for small areas, while backpack sprayers are better suited for larger projects.
-
Roller techniques: Using a roller can be an effective way to apply sealant, especially on smooth surfaces. You can use a microfiber roller or a lambswool roller, depending on the type of concrete and the desired finish.
-
Brush application: For more intricate areas or when you need more control, using a brush can be the best option. This method is ideal for applying sealant to vertical surfaces or small, detailed areas.
Spreader Selection Guide
Selecting the right spreader is vital to achieving an even, consistent sealant application, as it directly impacts the final appearance and performance of the sealed concrete.
You'll want to choose a spreader that suits the specific needs of your project, taking into account factors like sealant type, concrete texture, and application rate.
There are various spreader types to take into account, including notched squeegees, V-notched squeegees, and foam spreaders. Notched squeegees are ideal for applying thin, even coats, while V-notched squeegees are better suited for thicker applications. Foam spreaders, on the other hand, are perfect for large, open areas.
Regardless of the spreader type you choose, proper maintenance is essential to guarantee peak performance. Regularly clean and inspect your spreader for signs of wear, and replace worn or damaged parts as needed.
Even Coating Techniques
With your spreader in hand, now it's time to focus on perfecting your even coating techniques, where the right application and spreading tools can make all the difference in achieving a flawless sealant finish.
To guarantee a consistent and even application, you'll want to master the following techniques:
-
Maintain a consistent coating thickness: Use a gauge rake or notched trowel to achieve a uniform thickness, guaranteeing a strong bond between the sealant and the concrete.
-
Employ roller techniques for large areas: Use a roller extension pole to cover large areas quickly and efficiently, working in sections to maintain an even coat.
-
Work in small sections for precision control: Divide your work area into smaller sections, using a smaller roller or brush to achieve precise control and avoid overlapping or missing spots.
Safety and Protective Gear
Properly outfitting yourself with essential safety and protective gear is crucial before starting any concrete sealing project to prevent injuries and exposure to hazardous materials.
You'll need protective eyewear to shield your eyes from chemical splashes and flying debris. Safety gloves will protect your hands from harsh chemicals, abrasion, and punctures. Respirator masks are a must-have when working with sealers that emit harmful fumes. Don't forget to wear knee pads to cushion your knees from the hard concrete surface.
Additionally, slip-resistant footwear will prevent accidents caused by slippery surfaces. A first aid kit should always be on hand in case of minor accidents. Make sure it's fully stocked with essentials like bandages, antiseptic wipes, and pain relievers.
Finishing and Inspection Tools
You'll need a range of finishing and inspection tools to assure a smooth, even finish and to verify that the sealer has been applied correctly. These tools are essential to guarantee that your concrete sealing job meets the highest standards of quality and aesthetics.
To achieve a flawless finish, you'll require tools that facilitate advanced finishing techniques. These include:
-
Microfiber applicators for even sealer distribution
-
High-quality rollers for uniform texture and pattern
-
Edgers for precise sealer application along edges and corners
In addition to these finishing tools, you'll also need an inspection checklist to verify that the sealer has been applied correctly. This checklist should include items such as sealer coverage, evenness of finish, and absence of defects or imperfections.
Frequently Asked Questions
Can I Seal Concrete in Direct Sunlight or High Winds?
When sealing concrete, you shouldn't do it in direct sunlight or high winds. These conditions can negatively impact the sealing process, leading to uneven application and poor adhesion.
Instead, follow best practices and choose a shaded or covered area with minimal air movement. This allows you to maintain control over your sealing techniques, ensuring a smooth, even finish that lasts.
How Long Does It Take for the Sealer to Fully Dry?
You're probably keen to get back to your project!
Did you know that the average American spends around 2 hours daily waiting for things to dry?
Now, let's talk about the drying time for your concrete sealer. The curing process typically takes anywhere from 24 to 48 hours, depending on environmental factors.
You'll want to wait at least 24 hours before exposing the sealed surface to heavy foot or vehicle traffic.
Can I Apply a Second Coat of Sealer Immediately?
When you're wondering if you can apply a second coat of sealer immediately, it's crucial to reflect on the application timing and sealer types.
Most sealers require a specific drying time between coats, usually ranging from 30 minutes to several hours, depending on the product.
Check the manufacturer's instructions for specific guidelines.
Applying a second coat too soon can lead to uneven coverage, so be patient and follow the recommended waiting period for a successful application.
Is It Necessary to Seal All Concrete Surfaces?
You're likely aware that 75% of concrete surfaces are exposed to harsh weather conditions, making sealing essential.
But, is it necessary to seal all concrete surfaces? Not always. You need to weigh the pros and cons of sealing, considering factors like foot traffic and environmental exposure.
While frequent sealing may provide ideal protection, it can also lead to over-sealing, causing more harm than good.
Assess the surface's condition and sealing frequency to make an informed decision that suits your specific needs.
Can I Use a Sealer on Newly Poured Concrete?
When you're considering applying a sealer to newly poured concrete, remember that timing is essential.
Most sealer types require a minimum curing time of 28 days, but some can be applied as early as 7-10 days.
You'll need to check the manufacturer's instructions for specific guidelines.
If you apply a sealer too soon, it can trap moisture and hinder the curing process, leading to a weakened concrete surface.
Conclusion
Seal your success with a silky smooth finish!
You've scrubbed, spread, and sprayed your way to a superior seal.
Now, step back and survey your spotless surface, secure in the knowledge that your diligent efforts have yielded a durable, long-lasting seal.
With the right tools and techniques, you've triumphed over tricky terrain, transforming a lackluster landscape into a luxurious, leak-resistant haven.
Related Posts
-
3 Best Tools to Buy for Concrete Repair Online
When buying tools for concrete repair online, you'll want to research multiple retailer options to find the best prod...
-

Free Design Tools for Concrete House Planning
You can kick-start your concrete house planning project without breaking the bank, as there are several free design t...
-

Top Mixing Tools for DIY Concrete Block Laying
When it comes to DIY concrete block laying, the right mixing tools are vital for a strong and durable structure. You'...


