Essential Sanding Tools for DIY Concrete Projects
Share
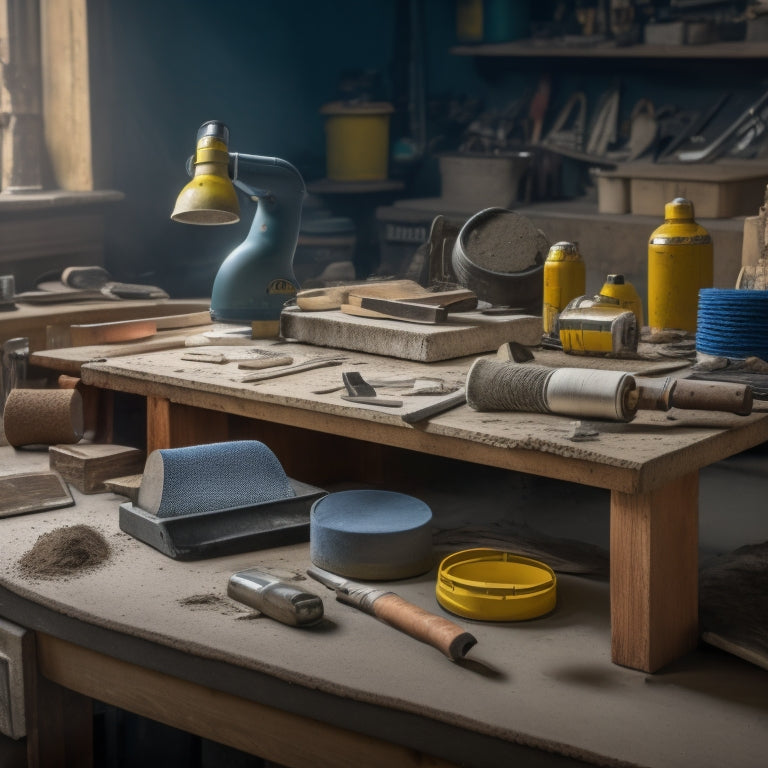
When tackling DIY concrete projects, you'll need a arsenal of essential sanding tools to achieve a professional finish. Start with the right sandpaper selection, choosing from open-coat, closed-coat, and semi-open coat options, and progress through grit sizes from 40-80 for rough sanding to 120-220 for polishing. Next, invest in power sanders like angle grinders and belt sanders, and don't forget hand sanding tools for detailed work. Diamond pad sanding and concrete sanding accessories like sanding pads and blocks will also be necessary. With the right tools and techniques, you'll be well on your way to a high-gloss finish, and by exploring further, you'll uncover the secrets to a flawless concrete surface.
Key Takeaways
• Select the right sandpaper type and grit size for your DIY concrete project, as it significantly impacts the final result.
• Invest in essential power sanders like angle grinders and belt sanders, and maintain them regularly for optimal performance.
• Hand sanding tools like sanding blocks, sandpaper, and files provide control and precision for intricate details and curved surfaces.
• Diamond pad sanding is ideal for achieving high shine, starting with coarse grits and progressing to finer grits for a high-gloss finish.
• Always wear safety equipment like protective eyewear, respiratory masks, and heavy-duty work gloves to minimize health risks during sanding activities.
Choosing the Right Sandpaper
When tackling a DIY concrete project, you'll need to select the right sandpaper to effectively remove imperfections, smooth out the surface, and achieve the desired finish.
The type of sandpaper you choose will greatly impact the outcome of your project. There are various sandpaper types, including open-coat, closed-coat, and semi-open coat, each suited for specific tasks. Open-coat sandpaper is ideal for aggressive removal of material, while closed-coat sandpaper is better for finer finishing work.
Sandpaper grits, measured in numbers, also play a vital role. Coarser grits (40-80) are used for removing imperfections and rough sanding, while finer grits (120-220) are used for polishing and finishing.
You may need to progress through multiple grits to achieve the desired finish. It's important to choose the correct grit sequence to avoid scratching the surface.
Essential Power Sanders Needed
As you move forward with your DIY concrete project, you'll need to equip yourself with the right power sanders to achieve a smooth, polished finish.
You'll find that an angle grinder and a belt sander are essential tools in your arsenal, each serving a specific purpose in the sanding process.
Angle Grinder Uses
What makes an angle grinder an essential power sander for DIY concrete projects is its versatility in tackling a wide range of tasks, from rough grinding to fine polishing.
With the right angle grinder techniques, you can effectively remove old coatings, smooth out rough surfaces, and even create decorative textures.
When working with concrete, it's critical to master various angle grinder techniques, such as using different grits, adjusting your angle, and controlling your speed.
Proper angle grinder maintenance is also essential to guarantee peak performance and extend the tool's lifespan. Regularly clean your grinder, check for worn-out parts, and store it properly to prevent damage.
By following these best practices, you'll be able to achieve professional-looking results and take your DIY concrete projects to the next level.
Whether you're a seasoned pro or a beginner, an angle grinder is an indispensable tool that will help you achieve the desired finish and texture for your concrete creations.
Belt Sander Options
For achieving a high-gloss finish or aggressively removing material on large, flat concrete surfaces, you'll need a belt sander, a powerhouse of a tool that excels at both speed and efficiency.
When selecting a belt sander, you'll want to take into account top brands like Makita, Bosch, and Hitachi, which offer high-quality models with varying features and price points. Look for a sander with a sturdy construction, adjustable tracking, and a reliable motor that can handle demanding tasks.
To guarantee peak performance and extend the life of your belt sander, regular maintenance is essential. You'll need to regularly clean the sander, inspect and replace worn belts, and perform routine checks on the motor and bearings.
Additionally, think about investing in a dust collection system to minimize mess and improve air quality. With proper care and maintenance, your belt sander will provide years of reliable service, helping you achieve professional-grade results on your DIY concrete projects.
Hand Sanding Tools for Details
When tackling intricate concrete details, you'll need to switch to hand sanding tools that offer greater control and precision. For these tasks, you'll want to reach for hand sanding tools like sanding blocks, sandpaper, and files. These tools allow you to target specific areas and refine your work with precision.
Mastering hand sanding techniques is essential for achieving a high-quality finish. Start by selecting the right grit sandpaper for the job, and then progress through a series of increasingly finer grits to achieve a smooth finish. Use detail sanding tips like applying gentle, consistent pressure and working in small, circular motions to avoid scratches.
When dealing with tight spaces or curved surfaces, files and sanding blocks can be particularly effective. These tools enable you to sand areas that are hard to reach with larger machines, ensuring a consistent finish across the entire project.
Block Finishing With Angle Grinders
You'll likely turn to angle grinders for block finishing, as these powerful tools can efficiently remove material and smooth out surfaces on a larger scale. For block shaping and texture enhancement, angle grinders are the go-to tools. They can be fitted with various abrasive discs, allowing you to tailor your sanding process to specific needs.
Here's a breakdown of the most common abrasive discs used for block finishing:
| Disc Type | Best For |
|---|---|
| Coarse Grinding Discs | Removing excess material, rough shaping |
| Fine Grinding Discs | Smoothing out surfaces, preparing for texture enhancement |
| Polishing Discs | Enhancing texture, creating high-gloss finishes |
| Wire Brushes | Removing rust, cleaning surfaces, and creating textured effects |
When working with angle grinders, remember to always wear protective gear, including gloves, safety glasses, and a dust mask. Keep the tool well-maintained, and regularly inspect the abrasive discs for wear. By following these guidelines and choosing the right disc for the job, you'll achieve professional-looking results in your DIY concrete projects.
Diamond Pad Sanding for Shine
With the block's shape and texture refined using angle grinders, it's time to switch to diamond pad sanding to achieve a high-shine finish. You'll need to shift from aggressive grinding to precise polishing techniques to bring out the concrete's natural beauty.
Here are the essential steps to achieve a mirror-like finish:
-
Start with coarse diamond pads (50-100 grit) to remove any remaining scratches or imperfections.
-
Progress to finer grits (200-400) for a higher polish.
-
Use a lubricant to reduce heat and prevent damage to the diamond pads.
- Regularly inspect and maintain your diamond pads to guarantee peak performance.
Concrete Sanding Accessories Required
When you're preparing for a DIY concrete project, you'll need to gather the right accessories to guarantee a smooth and efficient sanding process.
You'll want to stock up on sanding pads and blocks, which are designed for specific tasks and surfaces.
Additionally, consider investing in grinding wheel attachments, which can be swapped out to tackle various stages of your project.
Sanding Pads and Blocks
Five essential sanding pads and blocks are must-haves in your concrete sanding arsenal to achieve a smooth, even finish.
These tools will help you master various sanding techniques and guarantee a professional-looking outcome. Here are the top four sanding pads and blocks you need to get started:
-
Coarse grit sanding pad (60-80 grit): Ideal for removing old coatings, rough surfaces, and imperfections.
-
Medium grit sanding pad (120-150 grit): Suitable for general-purpose sanding, feathering out edges, and creating a smooth surface.
-
Fine grit sanding pad (220-240 grit): Perfect for final sanding and polishing, leaving a high-gloss finish.
- Rubber sanding block: A versatile tool for sanding curved or irregular surfaces, and for applying even pressure.
When choosing sanding pads, consider the pad materials, such as aluminum oxide, silicon carbide, or ceramic.
Each material is suited for specific sanding tasks and concrete types.
Grinding Wheel Attachments
You'll need grinding wheel attachments to tackle tough concrete surfaces, remove heavy imperfections, and prep for further sanding. These attachments are designed to withstand the rigors of concrete grinding, providing a more aggressive approach to surface preparation.
When selecting a grinding wheel attachment, consider the type of wheel material that best suits your project. Diamond-coated wheels are ideal for heavy-duty grinding, while silicon carbide wheels are better suited for lighter grinding tasks.
When using grinding wheel attachments, it's crucial to employ proper grinding techniques to achieve the best results. This includes maintaining a consistent RPM, applying moderate to heavy pressure, and making slow, overlapping passes.
Additionally, verify the wheel is properly secured to the grinder, and always wear appropriate personal protective equipment.
Safety Equipment for Sanding
Your safety gear is the first line of defense against the hazards of sanding concrete, and it's vital to wear the right equipment to protect yourself from airborne particles, dust, and debris.
When you're sanding concrete, you're not just dealing with dust - you're dealing with silica particles that can cause serious health issues if inhaled. That's why it's important to wear the right safety gear to protect yourself.
Here are the must-haves for your safety kit:
-
Protective Eyewear: Safety glasses or goggles that provide a seal around your eyes to prevent dust and debris from getting in.
-
Respiratory Masks: A dust mask or respirator that filters out 99.97% of airborne particles, including silica dust.
-
Dust-Resistant Coveralls: Clothing that prevents dust from getting on your skin and makes cleanup easier.
- Heavy-Duty Work Gloves: Gloves that provide grip, protection, and durability for your hands.
Frequently Asked Questions
Can I Sand Concrete in Cold or Wet Weather Conditions?
When you're planning to sand concrete, you'll face sanding challenges if you don't consider the weather.
You should avoid sanding in cold or wet weather conditions, as they can affect the quality of your work. Temperature effects are critical, as moisture can seep into the concrete, causing it to soften and become difficult to sand.
Instead, wait for a dry, moderate temperature to guarantee a smooth, even finish.
How Do I Prevent Dust From Getting Everywhere While Sanding?
You're in luck if you're planning to sand indoors on a rainy day, but don't let the cozy atmosphere fool you - dust containment is essential!
While sanding, you're generating a fine powder that can spread like wildfire. To prevent this, use a vacuum with a HEPA filter or a dustless sanding system, which captures 99% of particles.
Opt for wet sanding methods or utilize a dust-controlling sanding pad to minimize the mess. With these strategies, you'll contain the chaos and keep your workspace tidy.
What Are the Best Sanding Techniques for Avoiding Scratches?
When you're sanding, you'll want to master techniques that avoid scratches.
Start by selecting the right sanding grit, gradually progressing from coarse to fine.
Use orbital sanders, which move in a circular motion, reducing scratch risk.
Apply light, consistent pressure, maintaining a steady pace.
Don't apply too much pressure, as this can create swirl marks.
Can I Use Sanding Tools on Freshly Poured or Uncured Concrete?
When working with freshly poured or uncured concrete, you shouldn't use sanding techniques just yet.
The curing process is still underway, and sanding can disrupt the chemical reactions that strengthen the concrete.
Wait until the concrete has reached its initial set, usually within 24 to 48 hours, before applying any sanding techniques.
Premature sanding can lead to uneven surfaces, weakening the concrete's structural integrity.
How Do I Clean and Maintain My Sanding Tools and Pads?
You're the master chef of your DIY concrete project, and your sanding tools are the secret ingredients.
To keep them whipping up a smooth finish, you need to clean and maintain them regularly. Treat your sanding tools like a prized possession - store them in a dry place, brush off debris, and replace worn-out pads.
Proper sanding tool care guarantees a seamless workflow, and pad replacement is key to avoiding scratches and swirl marks.
Conclusion
With your arsenal of essential sanding tools, you're ready to tackle even the most demanding DIY concrete projects.
Like a master sculptor, you'll chisel away imperfections, revealing a polished masterpiece that shines like a beacon of pride.
Remember, precision is key, so don't skip a single grit – each step builds upon the last, ensuring a flawless finish that will leave onlookers in awe.
Related Posts
-

Must-Have Handheld Tools for Concrete Repair
When tackling a concrete repair project, it is crucial to have the right handheld tools to achieve a professional fin...
-

What Tools Ensure Strong Concrete Adhesion at Home
You'll need the right tools to guarantee strong concrete adhesion at home. For surface preparation, use concrete surf...
-

5 Tips for Accurate Concrete Measurement Tools
To guarantee accurate concrete measurement, you'll want to calibrate your measuring tools regularly, choosing a frequ...


