Essential Flooring Tools for Concrete Subfloors
Share
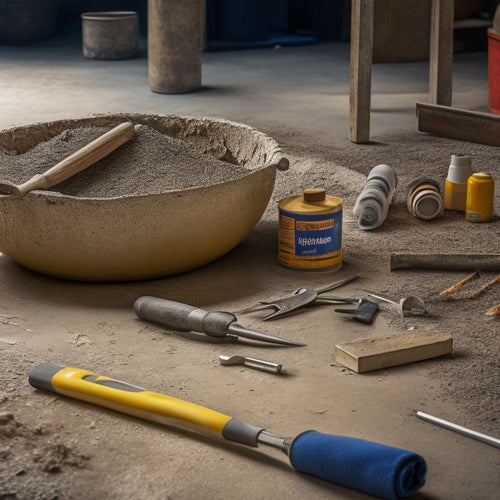
You'll need a range of specialized tools to successfully install flooring over a concrete subfloor. Start by preparing the subfloor with a hygrometer, self-leveling compounds, and waterproofing membrane as needed. When laying the flooring material, use a spirit level, straightedge, tapping block, and hammer to guarantee precise installation. Cutting and shaping tools like circular saws, jigsaws, and beveling equipment are also essential. Don't forget adhesives and fastening tools, as well as finishing and sealing tools like burnishers, grinders, and high-performance sealing compounds. With these tools, you'll be well-equipped to tackle the job - and that's just the starting point for achieving a professional-grade finish.
Key Takeaways
• Utilize a hygrometer or calcium chloride test kit to conduct moisture testing on the concrete subfloor before installation.
• Invest in a circular saw for straight cuts and a reciprocating saw for curved cuts to efficiently cut flooring material.
• Select the right adhesive for the flooring material and installation method, such as epoxy-based, acrylic-based, or polyurethane-based adhesives.
• Employ a tapping block and hammer to secure flooring material, ensuring consistent spacing and alignment with a spirit level and straightedge.
• Invest in a high-speed burnisher or propane-powered grinder for polishing and a dustless polishing system to reduce mess during finishing.
Preparing the Concrete Subfloor
Before installing your new flooring, you must confirm the concrete subfloor is properly prepared to provide a stable and even surface. This vital step guarantees your flooring material adheres correctly and prevents future issues like cracking or warping.
To begin, conduct thorough moisture testing to detect any hidden water issues that could compromise your flooring's integrity. Use a hygrometer or calcium chloride test kit to determine the moisture level of your subfloor. If the results indicate high moisture levels, you may need to apply a waterproofing membrane or wait for the subfloor to dry out completely.
Next, inspect the subfloor for any unevenness or cracks. Perform surface leveling to create a uniform surface, using self-leveling compounds or patching materials as needed.
Confirm the subfloor is clean, dry, and free of old adhesives, oils, or other substances that might interfere with the new flooring's adhesion.
Laying the Flooring Material
With your subfloor properly prepared, you're ready to begin installing your flooring material, carefully following the manufacturer's instructions to guarantee a precise and secure fit. This critical step requires attention to detail and a solid understanding of the installation techniques specific to your chosen flooring material.
Whether you're working with hardwood, laminate, or tile, it's important to follow the recommended installation methods to guarantee a successful outcome. As you begin laying the flooring material, make sure to maintain consistent spacing and alignment, using a spirit level and straightedge to verify accuracy.
Use a tapping block and hammer to tap the flooring material into place, taking care not to apply excessive force that could damage the material or subfloor. Additionally, be mindful of the flooring material's specific requirements, such as acclimation time, moisture levels, and adhesive application.
Cutting and Shaping Tools
You'll need a range of cutting and shaping tools to accurately size and fit your flooring material around obstructions, along walls, and into tight spaces.
When it comes to saw types, you'll want to have a combination of circular saws, reciprocating saws, and jigsaws on hand. Circular saws are ideal for straight cuts, while reciprocating saws excel at curved cuts and demo work. Jigsaws, with their precision and versatility, are perfect for intricate cuts and shaping.
For shaping techniques, you'll want to master the art of mitering, beveling, and coping. Mitering involves cutting precise angles to fit flooring material around corners and edges. Beveling allows you to create a subtle slope for a seamless shift between flooring materials. Coping, a technique used to fit flooring around irregular shapes, requires patience and attention to detail.
With the right saw types and shaping techniques, you'll be able to tackle even the most complex flooring installations with confidence. By investing in these essential cutting and shaping tools, you'll be well-equipped to take on any concrete subfloor project that comes your way.
Adhesives and Fastening Tools
In every flooring installation, selecting the right adhesives and fastening tools is essential to guarantee a secure and long-lasting bond between the flooring material and the subfloor. You need to choose the correct adhesive type and fastening technique to secure a successful installation. The wrong choice can lead to flooring failure, resulting in costly repairs or even replacement.
Here's a breakdown of common adhesive types and fastening techniques:
| Adhesive Type | Fastening Technique |
|---|---|
| Epoxy-based | Mechanical fastening (e.g., nails, screws) |
| Acrylic-based | Adhesive-only installation (no mechanical fastening) |
| Polyurethane-based | Hybrid installation (combines mechanical and adhesive fastening) |
| Cement-based | Underlayment installation (uses a separate underlayment layer) |
| Moisture-cure | Specialized fastening systems (e.g., self-leveling compounds) |
When selecting adhesives and fastening tools, consider factors such as subfloor condition, flooring material, and environmental conditions. By choosing the right combination of adhesive and fastening technique, you can create a strong and durable bond between the flooring material and the subfloor.
Finishing and Sealing Tools
After establishing a secure bond between the flooring material and subfloor, it's crucial to focus on the finishing and sealing process to enhance the flooring's durability and appearance.
You'll need the right tools to achieve a high-gloss finish and protect the flooring from wear and tear. For polishing techniques, invest in a high-speed burnisher or a propane-powered grinder to remove imperfections and achieve a reflective finish. Additionally, consider a dustless polishing system to minimize mess and maximize efficiency.
When it comes to sealing compounds, choose a high-performance option that's compatible with your flooring material. You'll need a high-quality applicator, such as a lambswool or microfiber mop, to guarantee even distribution and coverage.
Don't forget to also invest in a sealer remover, which will come in handy for future maintenance and repairs. By having the right finishing and sealing tools, you'll be able to achieve a professional-grade finish that exceeds your clients' expectations.
Remember to always follow the manufacturer's instructions and take necessary safety precautions to guarantee a successful outcome.
Frequently Asked Questions
How Do I Ensure a Dust-Free Environment During the Flooring Process?
To guarantee a dust-free environment, you'll want to implement effective dust control methods, such as sealing off the work area and using air filtration systems, which can capture 99.97% of airborne particles, assuring a clean and safe workspace.
Can I Use a Single Tool for Both Concrete and Wood Subfloors?
'Imagine a Swiss Army knife - versatile, yet not ideal for every task. You can't use a single tool for both concrete and wood subfloors; instead, invest in multi-surface tools to boost flooring efficiency and guarantee a precise fit for each substrate.'
What Safety Gear Is Necessary When Working With Concrete Subfloors?
When working with concrete subfloors, you'll need to prioritize safety by wearing essential gear, including safety goggles to protect your eyes from debris and knee pads to cushion your joints from harsh concrete surfaces.
How Often Should I Clean and Maintain My Flooring Tools?
You should clean and maintain your flooring tools daily, using gentle cleaning techniques to prevent damage, ensuring tool longevity and peak performance; regular upkeep saves time and extends the life of your equipment.
Are There Any Eco-Friendly Flooring Tools Available for Concrete Subfloors?
"As you envision a greener tomorrow, you're likely wondering if eco-friendly options exist for your concrete subfloor projects. Fortunately, innovative brands are incorporating sustainable materials and green technology into their products, offering you a guilt-free flooring experience."
Conclusion
You've reached the finish line, with a concrete subfloor transformed into a stunning foundation for your new flooring.
Like a master painter, you've blended the right tools with skill and precision, creating a masterpiece that will last for years to come.
Your arsenal of essential flooring tools has helped you conquer every curveball, from prep to finishing touches.
Now, step back and admire your handiwork – a flawless fusion of form and function that's ready to withstand the test of time.
Related Posts
-

Top Tools for Repairing Cracked Concrete Surfaces
When tackling a cracked concrete surface repair, you'll need the right tools to guarantee a durable fix. Start with e...
-

Must-Have Handheld Tools for Concrete Repair
When tackling a concrete repair project, it is crucial to have the right handheld tools to achieve a professional fin...
-

What Tools Do You Need for Concrete Flooring
You'll need a thorough arsenal of specialized tools to achieve a high-quality, professional-looking concrete floor, i...


