DIY Tools for Matching Concrete Block Texture
Share
You'll need a range of specialized tools to accurately replicate the unique texture of concrete block, including texture stamp mats, skins, rakes, and stamping tools that allow for precise control over pattern creation and refinement. These essential tools, combined with measuring and profiling devices, enable you to capture detailed surface topography and analyze texture parameters. By creating a reference sample, you can identify key features and characteristics to reproduce a consistent, natural-looking texture. With the right techniques and tools, you can achieve a high-quality finish that mimics the real thing - and with further exploration, you'll uncover even more ways to perfect your concrete block texture matching skills.
Key Takeaways
• Use a texture stamp mat to replicate various concrete block textures and patterns for a realistic look.
• Employ a texture rake to create subtle, natural-looking patterns on concrete surfaces.
• Utilize a block surface profiler to capture detailed topography of concrete block surfaces for texture analysis.
• Select the right mat material and size based on the desired finish, stamping technique, and surface compatibility.
• Practice blending edges and transitions to achieve a seamless, natural-looking concrete block texture.
Essential Texture Matching Tools
You'll need a set of essential texture matching tools to accurately replicate the desired pattern and texture on your concrete block surface. These tools will enable you to master various texture matching techniques, ensuring a professional-looking finish.
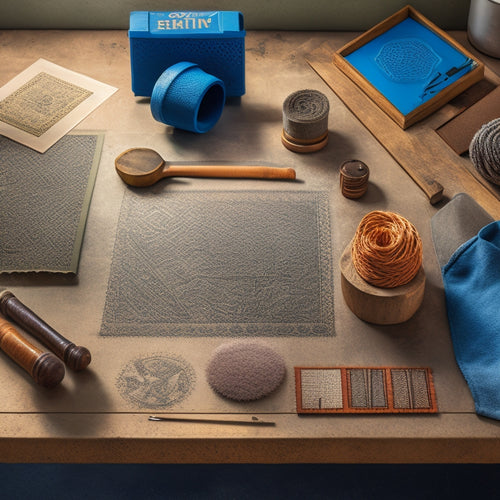
First, you'll require a texture stamp mat, which comes in different patterns and designs to match your concrete block's texture.
Next, invest in a set of texture skins, which are flexible and reusable, making them perfect for creating intricate details.
Additionally, a texture rake is essential for creating subtle, natural-looking patterns.
Don't forget a set of stamping tools, including a tamper, chisel, and edger, to refine and define your design.
These essential DIY supplies will give you the control you need to achieve a precise, high-quality finish.
Measuring and Profiling Devices
When working with concrete block texture, you'll need to accurately measure and profile the surface to achieve a precise match.
To do this, you'll rely on specialized tools that provide detailed data on the block's surface characteristics.
You'll use a Block Surface Profiler, Texture Analysis Tool, and Pattern Measurement Gauge to capture the unique features of the concrete block texture.
Block Surface Profiler
This block surface profiler, a precision measuring and profiling device, accurately captures the detailed topography of concrete block surfaces, providing valuable data for texture analysis and replication.
You'll appreciate its ability to quantify block texture variability, which is vital for achieving a consistent look in your DIY concrete block project. By using this tool, you'll gain insight into the surface finish techniques that will help you achieve the desired texture.
The block surface profiler is designed to scan the surface of the concrete block, recording minute details that would be impossible to detect with the naked eye.
The resulting data is then used to create a precise 3D model of the block's surface, allowing you to analyze and replicate the texture with ease.
This level of precision is fundamental for achieving a professional-looking finish, and the block surface profiler makes it possible. With this tool, you'll have the control you need to guarantee that your DIY project meets your high standards.
Texture Analysis Tool
Your texture analysis tool, integrated with advanced measuring and profiling devices, empowers you to scrutinize concrete block surfaces, extracting precise data on texture parameters, including roughness, waviness, and lay.
With this tool, you can employ texture comparison techniques to identify subtle differences between blocks, ensuring a uniform appearance in your project.
The device's advanced sensors and algorithms provide accurate surface texture evaluation, allowing you to quantify and analyze the texture of each block.
Pattern Measurement Gauge
To further refine your concrete block texture analysis, you'll use a pattern measurement gauge to capture precise spatial data on the block's surface geometry, including the spacing, depth, and arrangement of patterns. This handheld device allows you to measure the intricate details of the block's texture, providing valuable insights for pattern replication. By taking precise measurements, you can accurately recreate the texture of the original block, ensuring a seamless match.
The pattern measurement gauge is an essential tool for texture comparison, enabling you to quantify the differences between various block textures. With its adjustable arms and precision calipers, you can measure the width, depth, and spacing of patterns, as well as the radius of curves and the angle of inclines.
This data can be used to create a detailed profile of the block's texture, facilitating accurate pattern replication and texture comparison. By leveraging the precision of the pattern measurement gauge, you can confidently match concrete block textures, ensuring a professional finish for your projects.
Creating a Reference Sample
As you create a reference sample for your concrete block texture, you'll need to analyze the block pattern to identify its key features.
Next, you'll select a suitable texture measurement method to quantify the sample's characteristics.
Block Pattern Analysis
Analyze the block's surface to identify the pattern of indentations, protrusions, and other textures that define its unique characteristics. This is essential in creating a reference sample that accurately represents the original block's texture. As you examine the block, look for variations in the pattern, including changes in depth, shape, and size.
Note the block style variations, such as split-face, smooth-face, or fluted, which affect the overall texture.
Assess the texture consistency across the block's surface, checking for any inconsistencies or anomalies.
Identify the frequency and distribution of indentations, protrusions, and other textures.
Document the block's color, tone, and any other visual characteristics that may impact the texture.
Record your observations and take high-quality photographs of the block from multiple angles to create a thorough reference sample.
Texture Measurement Methods
You'll need to employ precise measurement methods to quantify the block's texture, capturing its unique characteristics in a reference sample that accurately represents the original block's surface.
To achieve this, you'll focus on measuring texture consistency, which involves evaluating the block's surface irregularities. One approach is to use a profilometer, an instrument that scans the surface to create a 3D profile. This will help you quantify the block's texture regarding roughness, waviness, and other parameters.
Alternatively, you can use a texture analyzer, which uses a stylus to trace the surface and generate a 2D profile. Both methods provide detailed information about the block's texture, allowing you to create a precise reference sample.
When taking measurements, it's crucial to confirm the block is clean and dry, as any contaminants or moisture can affect the accuracy of the results.
Sample Preparation Tips
Prepare your concrete block by carefully selecting a representative area that embodies the texture characteristics you want to replicate.
Make sure this section is free from defects, cracks, or other anomalies that could skew your reference sample. This step is essential in creating an accurate reference sample that will serve as the basis for your DIY texture matching endeavor.
When preparing your sample, keep the following tips in mind:
-
Clean the surface: Remove any dirt, oil, or other substances that may interfere with the measurement process.
-
Dry the surface: Confirm the concrete block is completely dry to prevent moisture from affecting the sample.
-
Avoid over-handling: Minimize handling the sample to prevent introducing scratches or other marks that could alter its texture.
-
Document your process: Keep a record of your preparation techniques and sample types to maintain consistency and reproducibility.
-
Store the sample properly: Keep the sample in a controlled environment to prevent degradation or contamination.
Texturing With Stamps and Mats
Texturing With Stamps and Mats
Using stamps and mats, you can effectively replicate the texture of natural stone, brick, or wood on your concrete block surfaces. This technique allows you to achieve a high level of realism and detail, making it ideal for creating unique and authentic-looking textures.
When it comes to stamp techniques, you have several options to choose from. You can use a single stamp to create a uniform pattern or combine multiple stamps to create a more complex design. Additionally, you can experiment with different stamping pressures and angles to achieve varying levels of texture and detail.
| Mat Selection Criteria | Description |
|---|---|
| Texture Pattern | Choose mats with texture patterns that match your desired finish, such as stone, brick, or wood. |
| Material Compatibility | Verify the mat material is compatible with your concrete block surface and the stamping technique you're using. |
| Durability | Select mats that can withstand repeated stamping and cleaning without losing their texture or shape. |
Achieving Uniform Patterns
To achieve uniform patterns when texturing concrete block surfaces with stamps and mats, start by carefully aligning the stamp or mat with the surface, guaranteeing a precise registration that will help you maintain consistency throughout the process. This will enable you to replicate the same texture consistency across the entire surface, which is essential for achieving a professional-looking finish.
Here are some additional tips to help you achieve uniform patterns:
-
Use a level to verify the stamp or mat is perfectly horizontal or vertical, depending on the design variations you're trying to achieve.
-
Apply even pressure to the stamp or mat to prevent uneven texture patterns.
-
Use a consistent amount of pressure and speed when moving the stamp or mat across the surface.
-
Use a reference point, such as a grid or a template, to help you maintain consistent spacing and alignment.
-
Practice on a small, inconspicuous area before applying the texture to the entire surface to confirm you've got the technique down pat.
Blending Edges and Transitions
As you've mastered the art of achieving uniform patterns, now focus on blending edges and shifts to create a seamless, realistic look by feathering the texture out towards the edges, allowing the pattern to fade naturally into the surrounding surface.
Edge blending is a significant step in creating a believable concrete block texture. To achieve a smooth shift, use a soft-bristled brush or a foam pad to gently merge the texture with the surrounding surface.
When working with shift techniques, it's important to take into account the angle and direction of the blend. For example, if you're blending the texture with a vertical surface, use a vertical motion to feather the pattern. For horizontal surfaces, use a horizontal motion.
This attention to detail will guarantee a natural-looking shift that doesn't draw attention to itself.
Finishing Touches and Details
With your blended edges and shifts in place, turn your attention to adding finishing touches and details that will elevate your concrete block texture from good to great.
You've laid the foundation, now it's time to refine your work.
To take your concrete block texture to the next level, focus on the following finishing techniques and surface treatments:
-
Apply a subtle texture variation to mimic the natural imperfections found in real concrete blocks.
-
Use a wire brush to add subtle scratches and scuffs, giving your texture a worn, weathered look.
-
Experiment with different sealers or waxes to enhance the color and protect the surface.
-
Add a touch of realism with strategically placed 'dirt' or 'grime' accents.
-
Consider adding a slight sheen or gloss to give your texture a more authentic, freshly poured appearance.
Frequently Asked Questions
Can I Reuse Texture Mats and Stamps on Multiple Projects?
When reusing texture mats and stamps, you'll want to take into account their durability and versatility.
If you're dealing with high-quality mats and stamps, you can likely reuse them multiple times without compromising the pattern. However, you'll need to clean and maintain them properly to prevent wear and tear.
The stamp pattern's versatility is also essential - if it's complex, it might be more challenging to reuse. You'll need to weigh the benefits of reuse against the potential loss of detail and texture.
How Do I Clean and Maintain My Texturing Tools?
You've likely heard that cleaning your tools immediately after use can extend their lifespan.
But is it really that simple? Yes, it's true! Proper cleaning techniques are essential for tool maintenance.
You'll want to scrub your texture mats and stamps with soap and water, then dry them thoroughly to prevent rust.
Regularly inspect for damage and store them in a dry place.
What Safety Precautions Should I Take When Working With Concrete?
When working with concrete, you must take essential safety precautions to avoid injuries and health risks.
You should always wear a dust mask to prevent inhaling concrete particles, protective gloves to shield your hands from abrasion, and safety goggles to protect your eyes from debris.
Additionally, knee pads can save your joints from strain.
Finally, apply a concrete sealer to minimize dust generation and guarantee a safe working environment.
Can I Use DIY Texturing Tools on Other Materials Besides Concrete?
You're wondering if you can apply your texturing skills to alternative materials beyond concrete. The answer is yes, you can!
Many DIY texturing tools are versatile and can be used on various surfaces.
You'll need to adjust your texturing techniques depending on the material's properties. For instance, you might use a stamping tool on plaster or a trowel on drywall.
Experiment with different tools and techniques to achieve the desired texture on your chosen material.
How Long Does It Take to Master the Art of Concrete Texturing?
Mastering the art of concrete texturing takes time and dedication.
You'll need to develop a range of texture techniques through consistent practice and skill development.
As you work on various projects, you'll refine your skills, but don't expect to become an expert overnight.
With regular practice, you can achieve a high level of proficiency in a few months, but to truly master the craft, plan on investing at least a year or more.
Conclusion
You've finally gotten to the finish line, and your DIY concrete block texture matching project is looking spot on.
Now, it's time to put the icing on the cake and add those finishing touches.
Remember, the devil is in the details, so don't skimp on the blending and texturing.
With these DIY tools and techniques, you'll be able to match that concrete block texture like a pro, and your end result will be a seamless, professional-looking finish that'll make you proud.
Related Posts
-

What Tools Do You Need for Concrete Success
For concrete success, you'll need a range of essential power tools, including rotary hammers, angle grinders, concret...
-

5 Best Tools for Stamping Concrete Walls
When it comes to stamping concrete walls, you'll need a range of specialized tools to achieve the desired texture and...
-

Ergonomic Concrete Tools for Tight Spaces
When you're tackling concrete work in tight spaces, ergonomic tools are your best bet for comfort and efficiency. The...


