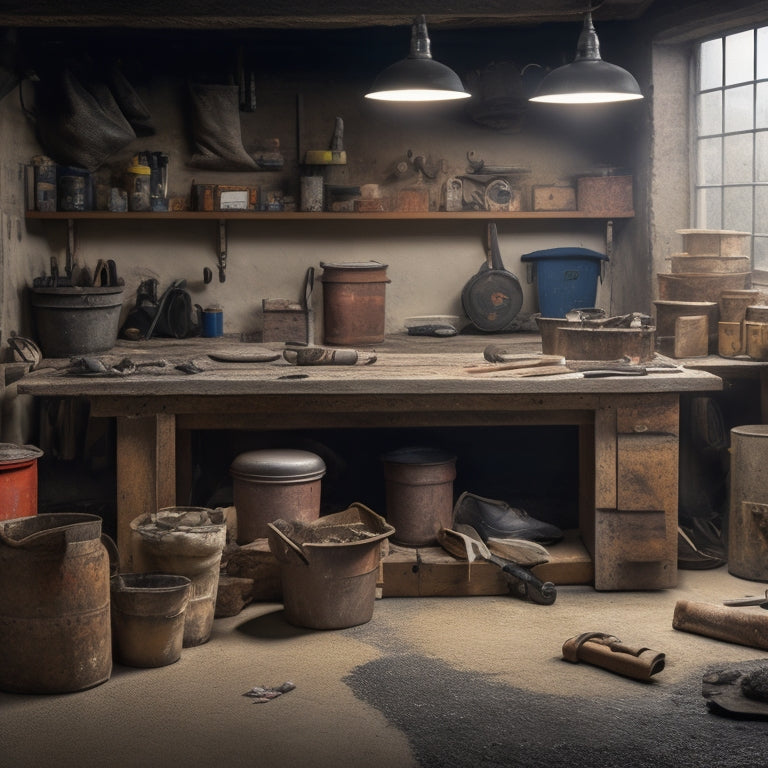
7 Must-Have Concrete Tools for Quick Repairs
You'll want to stock up on seven essential concrete tools to tackle quick repairs like a pro. Start with a high-quality trowel for smooth finishing, an edger for crisp corners, and a reliable mixer for consistent batches. A float will help you achieve even surfaces, while a chisel is a must-have for removing old concrete. Don't forget tamping tools for compaction and a caulking gun with the right sealant application techniques. With these must-haves in your concrete toolkit, you'll be well-equipped to tackle quick repairs - and a more in-depth exploration of each tool's specifics will help you perfect your skills.
Key Takeaways
• High-quality trowels are essential for smooth finishing, eliminating air pockets and excess water, and come in various types for specific applications.
• Precise edgers with 45-degree blade angles ensure crisp, professional corners and require regular maintenance for optimal performance.
• Reliable mixers blend cement, aggregate, and water into uniform mixtures, and selection should consider project size and safety features.
• Floats remove excess water, air pockets, and bubbles for a uniform finish, and come in different materials and ergonomic handle options.
• Chisels are necessary for removing old, deteriorated concrete, and proper removal techniques involve scoring, using a hammer, and wearing protective gear.
Trowels for Smooth Finishing
Use a high-quality trowel to achieve a smooth, even finish on your concrete surface, as it helps to eliminate air pockets and excess water.
There are several trowel types to choose from, including V-notched, square-notched, and pool trowels, each designed for specific applications. When selecting a trowel, consider the size and type of your concrete project, as well as the desired finish.
Proper trowel maintenance is essential for achieving a professional-looking finish. Regularly clean your trowel with soap and water to prevent the buildup of concrete residue.
You should also apply a rust inhibitor to the metal parts to prevent corrosion. Additionally, store your trowel in a dry place, away from direct sunlight, to prevent damage to the handle or blade.
Edgers for Crisp Corners
As you work on achieving crisp corners with your edger, you'll quickly realize that precise blade angles are essential to getting the job done right.
You'll need to master smooth edge techniques to guarantee a professional-looking finish, and understanding corner finishing essentials will help you avoid common mistakes.
Precise Blade Angles Matter
You'll get crisp, professional-looking corners by setting your edger's blade angle to precisely 45 degrees, guaranteeing a seamless joint where the concrete meets the adjacent surface. This angle allows for a clean, sharp edge that's vital for a strong bond between the concrete and the adjacent material. To achieve this precise angle, you'll need to use angle measurement tools, such as a protractor or a digital angle finder, to verify accuracy.
Regular blade maintenance techniques are also important to maintain the edger's performance and extend its lifespan. Clean the blade regularly to prevent debris buildup, and store it in a dry place to prevent rust.
Additionally, inspect the blade for signs of wear and tear, and replace it when necessary. A dull or damaged blade can compromise the quality of your work and even lead to accidents.
Smooth Edge Techniques
To produce a smooth edge, employ an edger with a precision-ground blade that's specifically designed for creating crisp corners. This type of blade will help you achieve a sharp, defined edge with minimal effort.
This is vital for guaranteeing a professional-looking finish and preventing tripping hazards.
When using an edger, make certain to maintain a consistent angle and apply gentle to moderate pressure, depending on the type of concrete you're working with. This will help you achieve a smooth, even surface.
For best results, use smoothing techniques such as making slow, overlapping passes with the edger, and working in small sections to maintain control.
Proper surface preparation is also essential for a successful repair. Confirm the area is clean, dry, and free of debris before applying any repair materials.
This will help the materials adhere properly and reduce the risk of defects or failures.
Corner Finishing Essentials
Forming crisp corners requires precision edgers that can maneuver tight angles and curved areas, ensuring a professional finish that complements the smooth edges you've just created.
When it comes to corner repair techniques, having the right tools makes all the difference. You'll want to invest in edgers that are designed specifically for corner finishing, with features like adjustable handles and pivoting heads that allow for precise control.
Here are some essential corner finishing tools to add to your arsenal:
-
Radius edgers: For curved corners and rounded edges, radius edgers provide a smooth, consistent finish.
-
Corner trowels: These specialized trowels are designed for reaching into tight corners and applying even pressure for a crisp finish.
-
Pivoting edgers: Perfect for maneuvering complex angles and curves, pivoting edgers give you the flexibility you need to achieve a professional finish.
-
Corner finishing floats: These tools help to remove excess concrete and smooth out the surface, leaving a clean, crisp corner.
-
Safety gloves: Don't forget to protect your hands with heavy-duty gloves that provide grip, protection, and control.
Mixers for Consistent Batches
Accurate batching relies on mixers that can consistently blend cement, aggregate, and water into a uniform mixture. As you prepare for your concrete repair job, investing in a reliable mixer is essential. You'll want to choose a mixer that can handle the specific mixing techniques required for your project. Look for a mixer that can efficiently blend ingredients to achieve batch consistency. This guarantees that your concrete is strong, durable, and meets safety standards.
When selecting a mixer, consider the size and type of project you're working on. For small to medium-sized projects, a portable mixer may be sufficient. For larger projects, you may need a more heavy-duty mixer that can handle high volumes of concrete.
Regardless of the size, make sure your mixer is designed with safety features such as protective guards and stable frames. By investing in a high-quality mixer, you'll be able to produce consistent batches of concrete, guaranteeing a successful and safe repair job.
Floats for Even Surfaces
You'll need a reliable float to achieve a smooth, even surface, especially when working with freshly poured concrete. A float is an important tool that helps you remove excess water, air pockets, and bubbles from the surface, leaving you with a uniform finish. With so many float types and materials available, it's vital to choose the right one for your project.
Here are some key considerations when selecting a float:
-
Float types: Bull floats, fresno floats, and darby floats are popular options, each suited for specific tasks and surface sizes.
-
Float materials: Aluminum, magnesium, and resin floats offer varying levels of durability, weight, and cost-effectiveness.
-
Handle type: Look for floats with ergonomic handles that reduce fatigue and improve control.
-
Size and weight: Choose a float that's easy to maneuver and suitable for your concrete surface.
-
Surface texture: Select a float that's designed for your desired finish, whether it's smooth, textured, or patterned.
Chisels for Removing Old Concrete
Demolition work begins with the right tool, as a sturdy chisel helps you break away old, deteriorated concrete, making way for new constructions.
When it comes to removing old concrete, having the right chisel types is vital. You'll need a variety of chisels, including flat, pointed, and claw chisels, each designed for specific removal techniques. Flat chisels are ideal for breaking up large areas, while pointed chisels are better suited for precision work. Claw chisels, on the other hand, are perfect for gripping and pulling out small concrete pieces.
When using chisels, it's important to follow proper removal techniques to guarantee your safety. Always wear protective gear, including gloves, safety glasses, and a dust mask. Start by scoring the concrete with a chisel, then use a hammer to break it up.
Be careful not to hit your hands or surrounding structures. As you remove the old concrete, take your time and work in small sections to maintain control. Remember, the right chisel and removal technique can make all the difference in a successful demolition project.
Tamping Tools for Compaction
Before pouring new concrete, compact the soil and gravel base with tamping tools to prevent settling and assure a stable foundation.
You'll want to make certain the surface is even and dense to support the weight of the new concrete. This is where tamping tools come in, helping you achieve the best compaction benefits.
Here are some essential tamping tools to have in your toolkit:
-
Hand tampers: ideal for small areas and tight spaces
-
Plate compactors: perfect for larger areas, these tools use a heavy plate to compact the soil
-
Rammers: great for compacting soil and gravel in tight spaces, such as trenches
-
Compaction rollers: suitable for large areas, these rollers use weight and pressure to compact the soil
-
Tamper bars: versatile tools that can be used for both compaction and demolition
Caulking Guns for Sealing Gaps
When you're working with caulking guns for sealing gaps, you'll want to master the techniques that guarantee a strong, lasting seal.
You'll need to know how to apply sealant efficiently, maintain your gun to prevent clogs, and choose the right caulk tube for the job.
Sealant Application Tips
You'll achieve a professional-looking seal by holding the caulking gun at a 45-degree angle, allowing the sealant to flow smoothly into the gap. This technique guarantees a strong bond between the sealant and the concrete, creating a durable and long-lasting seal.
When choosing a sealant, consider the type of gap you're filling and the environmental conditions it'll be exposed to. For example, silicone-based sealants are ideal for high-temperature applications, while polyurethane-based sealants are better suited to joints subject to heavy traffic.
Here are some additional application techniques to keep in mind:
-
Use a steady, consistent motion to apply the sealant, avoiding sudden stops or starts.
-
Apply gentle pressure to the gun to maintain a consistent flow of sealant.
-
Use a damp cloth to wipe away excess sealant as you go, preventing it from drying on the surface.
-
Fill the gap in small sections, allowing each section to dry before moving on to the next.
-
Inspect the sealant as it dries, verifying it's even and free of bubbles or imperfections.
Gun Maintenance Essentials
Regular cleaning and lubrication of your caulking gun's moving parts, such as the piston rod and barrel, guarantee a smooth sealant flow and prevent clogs.
You'll want to focus on gun cleaning, paying attention to areas where dried sealant tends to accumulate. Use a soft-bristled brush or cloth to wipe away debris, and a mild solvent to dissolve stubborn residue. Avoid using harsh chemicals that can damage the gun's components.
When it comes to lubricant selection, choose a silicone-based lubricant specifically designed for caulking guns. Apply a thin, even layer to the piston rod and other moving parts to keep them running smoothly.
Be cautious not to over-lubricate, as excess lubricant can attract dirt and dust, causing more harm than good. By following these simple maintenance steps, you'll guarantee your caulking gun operates efficiently, reducing the risk of accidents and injuries.
Caulk Tube Selection
Selecting the right caulk tube for your project is essential, as it directly impacts the quality of the seal and the overall appearance of the finished job.
When choosing a caulk tube, you'll need to take into account the type of caulk you're using, the size of the gap you're filling, and the surface you're applying it to.
Here are some key factors to take into account:
-
Caulk types: Silicone, acrylic, and polyurethane caulk each have unique properties and uses. Choose the right type for your project based on factors like flexibility, adhesion, and UV resistance.
-
Application techniques: Will you be using a bead, a stripe, or a fill-and-tool method? Different techniques require different caulk viscosities and flow rates.
-
Tube size and capacity: Make sure you have enough caulk to complete the job, and think about using a larger tube for bigger projects.
-
Nozzle type and size: Choose a nozzle that's designed for your specific application, such as a fine tip for detail work or a wide mouth for filling large gaps.
-
Brand and quality: Not all caulk tubes are created equal. Look for reputable brands and high-quality materials to guarantee a durable, long-lasting seal.
Frequently Asked Questions
What Safety Gear Should I Wear When Working With Concrete Tools?
When working with concrete tools, you're exposed to hazardous materials and flying debris. You must prioritize your safety above all.
Wear safety gloves to protect your hands from cuts, abrasions, and chemical exposure.
Don't forget eye protection, such as goggles or safety glasses, to shield your eyes from concrete dust and flying particles.
This essential gear will help prevent serious injuries and guarantee you can work efficiently and effectively.
Can I Use a Single Tool for Multiple Concrete Repair Tasks?
When tackling concrete repairs, you're likely wondering if you can get away with using a single tool for multiple tasks. The answer is yes, and it's all about tool versatility.
By investing in a multi-functional tool, you'll boost repair efficiency and reduce the risk of accidents caused by switching between tools.
Look for tools that can handle tasks like mixing, scraping, and tamping, and you'll be well on your way to completing repairs quickly and safely.
How Often Should I Clean and Maintain My Concrete Tools?
You should clean your concrete tools after every use to prevent material buildup and guarantee peak performance.
For maintenance, set a weekly schedule to inspect and sharpen tools, and perform a deep clean monthly.
Regular cleaning frequency and maintenance tips will extend the lifespan of your tools, reduce the risk of accidents, and assure precise repairs.
What Are the Best Materials for Concrete Tools' Handles and Grips?
When choosing concrete tools, you prioritize handle materials that guarantee a secure grip and reduce fatigue.
Opt for ergonomic designs with contoured handles made from high-quality materials like fiberglass, wood, or composite materials. These materials provide durability, comfort, and slip-resistance, allowing you to work safely and efficiently.
Consider handles with textured grips or rubberized coatings for added traction, and look for tools with adjustable handles to fit your hand size.
Are There Any Specific Storage Requirements for Concrete Tools?
Imagine a treasure chest overflowing with rusty, tangled tools - a nightmare! You won't let that happen, will you?
When it comes to storing your concrete tools, you're the master of tool organization. Keep them dry and protected from the elements with weather-resistant containers or sheds.
Label each storage bin so you can grab what you need in a flash. By keeping your tools organized and protected, you'll guarantee they remain in top condition, ready to tackle any concrete repair that comes your way.
Conclusion
You've got the concrete tools, now it's time to get to work!
As the ancient Greek philosopher, Aristotle, once said, 'Well begun is half done.'
With these 7 must-haves, you're off to a solid start.
Remember, quick repairs are just the beginning - it's the foundation upon which you'll build a structure that'll stand the test of time.
So, get mixing, tamping, and caulking - the clock is ticking, and your concrete masterpiece awaits!
Related Posts
-

What Tools to Rent for a Concrete Home Reno
When tackling a concrete home renovation, you'll need to rent a variety of specialized tools to get the job done. For...
-
Concrete Foundation Building Tools for Homeowners' Success
As you start your concrete foundation building project, it is vital to have the right tools to guarantee success. You...
-

Top Mixing Tools for DIY Concrete Block Laying
When it comes to DIY concrete block laying, the right mixing tools are vital for a strong and durable structure. You'...


