7 Best Tools for Cracked Concrete Block Repair
Share
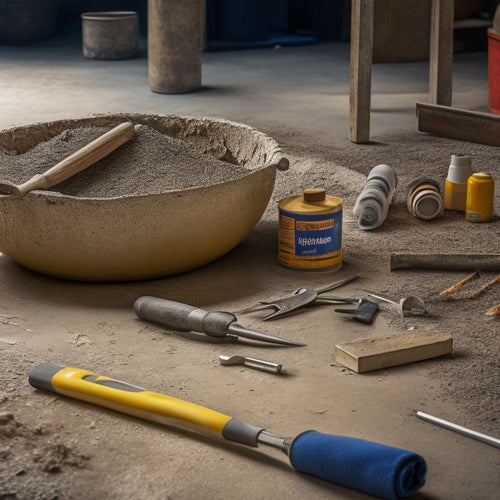
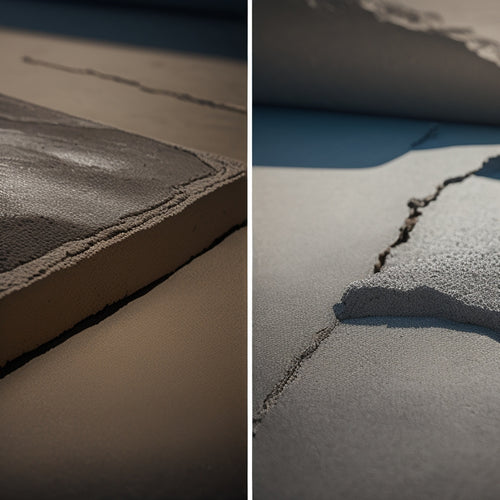
To tackle cracked concrete block repairs, you'll need a robust set of specialized tools. Start with concrete crack inspection tools like high-intensity flashlights, magnifying glasses, and crack comparators to assess crack extent and source. Next, gather filling and chiseling tools, such as chisel sets, masonry hammers, and flexible filling knives. Crack injection equipment, including pumps, packers, and hoses, is also essential. Additionally, consider surface preparation and cleaning tools, reinforcement and anchoring tools, and finishing and smoothing tools like trowels, floats, and grinders. With these tools, you'll be well-equipped to tackle any cracked concrete block repair – and understanding how to use them effectively is just the starting point.
Key Takeaways
• For effective concrete crack inspection, use a high-intensity flashlight, magnifying glass, crack comparator, and moisture meter to assess crack extent and source.
• A chisel set, sturdy masonry hammer, flexible filling knife, and grout scoop are essential filling and chiseling tools for concrete block repair.
• Crack injection equipment, including a crack injection pump, injection packers, hoses, and fittings, ensure proper filling and long-lasting repairs.
• Reinforcement and anchoring tools, such as fiber-reinforced polymers (FRP), rebar, wire mesh, and epoxy-based anchors, provide added strength and durability.
• Surface preparation and cleaning tools, including power washers, wire brushes, sandblasters, and grinding wheels, ensure a strong bond between the repair material and concrete.
Concrete Crack Inspection Tools
Inspect the cracked concrete block thoroughly with specialized tools to identify the extent of the damage, locate its source, and determine the best course of repair.
You'll need a range of tools to conduct a thorough crack detection and moisture assessment. A high-intensity flashlight will help you illuminate the crack, while a magnifying glass or loupe will allow you to examine it up close.
A crack comparator or crack width gauge will provide an accurate measurement of the crack's width and depth. Additionally, a moisture meter will help you assess the level of moisture in the concrete, which is essential for determining the best repair approach.
A thermal imaging camera can also be used to detect temperature anomalies that may indicate hidden moisture issues. By using these specialized tools, you'll be able to gather critical information about the crack and develop an effective repair strategy.
Remember to carefully document your findings to guarantee a successful repair.
Mixing and Applying Epoxies
When you're preparing to repair cracked concrete blocks with epoxy, it's vital that you get the mixing and application process right.
You'll need to understand the essentials of epoxy mixing, including the importance of maintaining the correct ratio of resin to hardener.
Epoxy Mixing Essentials
You'll need to carefully measure and mix the epoxy resin and hardener to achieve a strong, durable bond for your cracked concrete block repair. The type of epoxy you're using will determine the mixing process, as different epoxy types have varying mixing ratios and curing agents.
| Epoxy Type | Curing Agent |
|---|---|
| General-purpose epoxy | Polyamine |
| High-temperature epoxy | Aromatic amine |
| Fast-cure epoxy | Mercaptan |
| Epoxy patching compound | Polyamide |
| Structural epoxy | Cycloaliphatic amine |
When mixing, be certain to follow the manufacturer's instructions for the correct ratio of resin to hardener. It's crucial to mix thoroughly, scraping the sides and bottom of the mixing container to guarantee a uniform blend. Avoid mixing in a circular motion, as this can create air bubbles. Instead, mix in a figure-eight pattern to minimize air entrapment. Finally, apply the mixed epoxy to the cracked concrete block within the recommended pot life, which is the amount of time the epoxy remains workable after mixing.
Epoxy Ratio Importance
Maintaining the correct epoxy ratio is essential, as it directly affects the final bond strength, durability, and overall performance of your cracked concrete block repair. You'll need to guarantee the precise ratio of resin to hardener to achieve ideal epoxy durability.
When mixing epoxies, it's important to follow the manufacturer's instructions, as different epoxy types have unique requirements. Even a slight deviation from the recommended ratio can greatly impact the repair's integrity. For instance, an epoxy mixture with too much resin may result in a weak bond, while an excessive amount of hardener can lead to brittleness.
You'll need to carefully measure and mix the components to achieve the perfect ratio. It's also critical to take into account the environmental conditions you're working in, as temperature, humidity, and other factors can influence the epoxy's curing process.
Application Techniques Matter
Now that you've guaranteed the correct epoxy ratio, it's time to focus on mixing and applying the epoxy to the cracked concrete block, as the application technique you use can greatly impact the final repair's strength and durability.
To achieve ideal results, you'll need to master the art of mixing and applying epoxies. Start by mixing the epoxy resin and hardener in a well-ventilated area, using a mixing stick or drill to combine the components thoroughly.
Avoid introducing air into the mixture, as this can lead to bubbles and weaknesses in the repair.
Once mixed, apply the epoxy to the cracked concrete block using a suitable tool, such as a trowel or injection gun. Work the epoxy into the crack, ensuring it's fully saturated and free of air pockets.
Your application technique will directly influence the repair's success, so take your time and work methodically.
Filling and Chiseling Tools
What tools do you need to effectively fill and chisel cracked concrete blocks, restoring their original strength and appearance? To achieve a successful repair, you'll require a combination of specialized tools that cater to the specific needs of filling and chiseling.
Here are the essential tools you'll need:
-
Chisel set: A set of flat, pointed, and claw chisels will help you remove loose debris and old filler material from the crack.
-
Masonry hammer: A sturdy hammer designed for heavy-duty masonry work will provide the necessary force to drive your chisels.
-
Filling knife: A flexible, flat-bladed knife is ideal for applying and smoothing out filler material in tight spaces.
- Grout scoop: A grout scoop or old screwdriver can be used to pack filler material firmly into the crack, ensuring a solid bond.
When selecting chisel types, consider the width and depth of the crack, as well as the type of concrete block you're working with.
For filling methods, you may opt for epoxy-based or polyurethane-based fillers, depending on the level of strength and flexibility required.
Surface Preparation Essentials
When preparing a cracked concrete block for repair, you'll need to start by cleaning the surface thoroughly to remove dirt, oil, or other substances that might interfere with the repair process.
You'll also need to remove any old fills or previous repair attempts that may be loose or damaged.
Clean the Surface
Remove any dirt, oil, or other contaminants from the cracked concrete block surface using a pressure washer or a stiff-bristled broom to guarantee a strong bond between the repair material and the block. This vital step ensures that the repair material adheres properly to the surface, resulting in a long-lasting and durable fix.
To guarantee a thorough cleaning, consider the following techniques:
-
Power washing: Use a wide-angle spray tip to remove dirt and debris from the surface. Keep the nozzle at least 12 inches away from the surface to avoid damaging the concrete.
-
Wire brushing: Use a stiff-bristled wire brush to scrub away stubborn dirt and grime.
-
Chemical cleaning: Apply a concrete cleaner to the surface and let it sit for 10-15 minutes before rinsing with water.
- Sandblasting: Use a sandblaster to remove heavy buildup or old coatings from the surface.
Remove Old Fills
Remove Old Fills
You'll need to scrape off any existing fills or old repair materials from the cracked concrete block surface to guarantee a strong bond with the new repair material. This step is important in ensuring the new repair material adheres properly to the concrete block. Old fill removal is a vital part of surface preparation, and it's necessary to do it correctly to avoid compromising the entire repair process.
Here are some common tools and techniques used for old fill removal:
| Tool/Technique | Description |
|---|---|
| Wire brush | Used to remove loose debris and old fill material |
| Chisel and hammer | Effective for breaking up and removing old, hardened fill material |
| Grinding wheel | Used to smooth out the surface and remove remaining old fill residue |
| Chemical stripper | Applied to dissolve and remove old epoxy or polyurethane-based fill materials |
| Vacuum cleaner | Used to remove dust and debris after old fill removal |
Crack Injection Equipment
How do you guarantee a successful crack injection process?
By selecting the right equipment for the job, starting with a reliable crack injection pump that can handle the specified pressure and flow rate for your repair project. This pump is the heart of your crack sealing operation, and it's crucial to choose one that can deliver the required pressure and flow rate to guarantee effective filling of the crack.
Here are the key components you'll need to complete your crack injection equipment setup:
-
Crack injection pump: A reliable pump that can handle the specified pressure and flow rate for your repair project.
-
Injection packers: These are used to seal the crack and prevent the injection material from leaking out.
-
Hoses and fittings: Durable hoses and fittings that can withstand the pressure and flow rate of the injection process.
- Injection materials: The right type and quantity of epoxy or polyurethane-based materials for your specific crack sealing needs.
Reinforcement and Anchoring Tools
When repairing cracked concrete blocks, you'll need to reinforce and anchor the affected area to assure long-term stability and prevent further damage. This involves selecting the right tools for the job, which can be overwhelming given the numerous options available. To facilitate a successful repair, it's crucial to understand the different reinforcement techniques and anchoring methods.
For reinforcement, you can use fiber-reinforced polymers (FRP), rebar, or wire mesh. FRP is a popular choice due to its high strength-to-weight ratio and resistance to corrosion. Rebar, on the other hand, provides excellent tensile strength and is often used in conjunction with wire mesh.
Anchoring methods include epoxy-based anchors, mechanical anchors, and chemical anchors. Epoxy-based anchors offer high bonding strength and are suitable for most concrete types. Mechanical anchors provide a secure hold and are ideal for high-load applications. Chemical anchors, such as those using polyurethane foam, offer excellent durability and resistance to environmental factors.
Finishing and Smoothing Tools
What finishing tools will you need to achieve a smooth, even surface after repairing cracked concrete blocks? To complete the finishing touches, you'll require specialized tools that can refine the surface and eliminate any imperfections.
Here are the must-have finishing and smoothing tools for the job:
-
Trowels: For applying and smoothing out patching compounds or concrete resurfacers.
-
Floats: To achieve a smooth, even surface by removing excess material and creating a uniform finish.
-
Edgers: For creating clean, defined edges and corners, ensuring a professional-looking finish.
- Grinders or Sanders: To refine the surface, removing any imperfections or bumps, and achieving a high-quality finish.
These tools will help you master various smoothing techniques, allowing you to achieve a flawless finish that's both durable and aesthetically pleasing.
Frequently Asked Questions
Can I Repair Cracked Concrete Blocks Without Professional Help?
You can repair cracked concrete blocks without professional help, but it's essential to assess the damage first.
If the cracks are minor and the blocks aren't structurally compromised, you can attempt a DIY repair.
You'll need to choose the right repair materials, such as epoxy-based adhesives or polyurethane-based fillers, and follow established DIY techniques.
How Long Does Concrete Block Repair Typically Take to Complete?
When tackling concrete block repair on your own, you'll want to plan for a realistic repair timeline.
The actual repair work itself can take anywhere from a few hours to a few days, depending on the extent of the damage.
However, you'll also need to factor in the curing process, which can take several days to weeks, depending on the type of repair material used.
Are There Any Eco-Friendly Options for Concrete Block Repair?
When considering eco-friendly options for concrete block repair, you'll want to focus on sustainable materials and innovative repair techniques.
Look for products made from recycled materials or natural aggregates, which reduce the carbon footprint of your project.
Additionally, explore techniques like injection grouting or fiber reinforcement, which minimize waste and promote structural integrity.
Can I Paint Over Repaired Concrete Blocks Immediately?
Think of a freshly repaired concrete block as a newly planted seedling - it needs time to settle and grow strong before withstanding harsh weather.
You can't paint over it immediately, or the new paint will flake off like autumn leaves.
Instead, allow the repair compound to fully cure, then follow proper surface preparation protocols to guarantee a strong bond between the repair and paint.
This patience will yield a durable, long-lasting finish.
Do I Need to Replace the Entire Concrete Block if It's Severely Damaged?
When evaluating a severely damaged concrete block, you'll need to determine if it's salvageable or if replacement is the best option.
If the damage is extensive, with large cracks or crumbling, replacement might be the only viable solution.
However, if the damage is limited to surface cracks or minor chips, repair techniques like epoxy injection or patching may be sufficient.
Weigh the cost and feasibility of repair against replacement options to make an informed decision.
Conclusion
You've got the right tools for the job, now it's time to tackle that cracked concrete block.
From inspecting cracks to finishing and smoothing, you're equipped to repair like a pro.
With epoxy mixing and application, filling and chiseling, surface preparation, crack injection, reinforcement, and anchoring, you'll restore strength and durability.
Your concrete block will be renewed, and your repair will last.
Get to work and reap the benefits of a job well done.
Related Posts
-

Top Tools for Repairing Cracked Concrete Surfaces
When tackling a cracked concrete surface repair, you'll need the right tools to guarantee a durable fix. Start with e...
-

What Tools Ensure Strong Concrete Adhesion at Home
You'll need the right tools to guarantee strong concrete adhesion at home. For surface preparation, use concrete surf...
-

What Tools Are Needed for Concrete Wall Foundations
You'll need a thorough array of tools and equipment to construct a concrete wall foundation that meets structural int...


