5 Tools and Materials for Concrete Countertops
Share
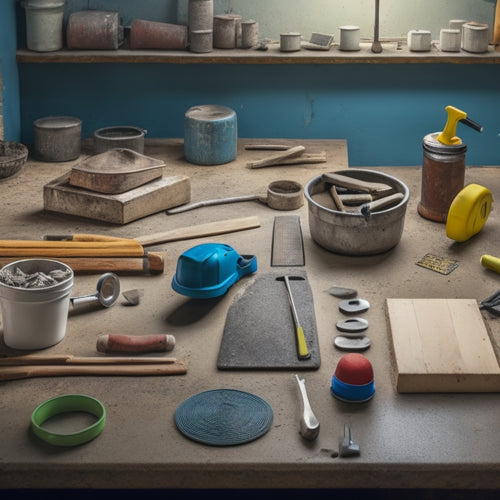
You'll need a steel trowel for consolidating and leveling concrete, a resin trowel for applying thin coats, and a finishing trowel for a smooth finish. A bull float and hand float are essential for removing excess water and air, and creating a dense layer. Additionally, you'll require diamond polishing pads in various grits, blending pads, and metal-bonded or resin-bonded diamond pads for grinding and polishing. With these tools and materials, you'll be well on your way to crafting stunning concrete countertops, and understanding the nuances of each tool will be vital in achieving your desired outcome.
Key Takeaways
• A steel trowel is essential for consolidating and leveling concrete during the initial pour of a concrete countertop.
• A bull float or hand float is necessary for removing excess water and air to create a dense layer.
• Diamond polishing pads, available in various grits, are crucial for grinding and polishing the concrete surface.
• A sealer or coating, such as a water-based sealer or epoxy coating, is required to protect the concrete from stains and damage.
• Precise measurement techniques and proper mixing equipment are vital for achieving the correct mix ratio and consistency for a strong finish.
Essential Troweling and Floating Tools
When constructing concrete countertops, you'll rely heavily on a set of essential troweling and floating tools to achieve a smooth, even finish. Among the trowel types, you'll need a steel trowel for initial pours, a resin trowel for applying thin layers, and a finishing trowel for the final touches.
The steel trowel's stiffer blade helps to consolidate and level the concrete, while the resin trowel's flexible blade is ideal for applying thin, even coats. The finishing trowel's soft, rounded edge is perfect for creating a smooth, blemish-free surface.
To guarantee a flawless finish, you'll need to master various floating techniques. Floating involves using a specialized tool to remove excess water and air from the surface, creating a dense, even layer.
You'll need to use a bull float for larger areas and a hand float for smaller, more detailed sections. By combining the right trowel types with expert floating techniques, you'll be able to achieve a professional-grade finish that's both durable and visually stunning.
Concrete Finishing and Edging Tools
You'll next need to select the right concrete finishing and edging tools to refine your countertop's surface and create clean, defined edges. These tools will help you achieve the desired texturing techniques and decorative edges that will elevate your concrete countertop's aesthetic appeal.
Some essential concrete finishing and edging tools to evaluate include:
-
Edgers: used to create decorative edges, such as rounded, beveled, or square edges
-
Floats: used to smooth out the surface of the concrete and remove any imperfections
-
Trowels: used to apply and smooth out the concrete, as well as to create unique texturing techniques
When choosing your concrete finishing and edging tools, contemplate the specific design elements you want to achieve. Do you want a smooth, glossy finish or a more textured, rustic look? Do you want decorative edges or clean, simple lines?
Polishing and Grinding Materials
Selecting the right polishing and grinding materials is essential to achieving a high-gloss finish or a specific level of texture on your concrete countertop.
You'll need to choose from a range of diamond polishing pads, which come in various grits and bond types. Coarse grits (30-60) are used for initial grinding, while finer grits (100-3000) are used for polishing. You may also need to use blending pads, which help to bridge the gap between grinding and polishing.
When it comes to grinding pads, you'll want to choose ones specifically designed for concrete. These pads typically feature aggressive diamond abrasives and are available in various sizes and shapes.
For more aggressive grinding, you can use metal-bonded diamond grinding pads, which are ideal for removing thick layers of concrete or exposing aggregate. For finer grinding, you can use resin-bonded diamond grinding pads, which provide a smoother finish.
Remember to always follow the manufacturer's instructions and use the correct pad for your specific application to achieve the desired results.
Sealers and Coatings for Protection
To guarantee your concrete countertop remains durable and resistant to stains, spills, and scratches, apply a high-quality sealer or coating that suits your specific design and functional requirements. There are various types of sealers and coatings available, each with its own strengths and weaknesses.
Here are three essential options to take into account:
-
Water-based sealers: Easy to apply, they provide a non-yellowing, UV-resistant finish that won't alter the appearance of your concrete.
-
Epoxy coatings: Offering superior protection against heavy wear and tear, they're ideal for high-traffic areas and commercial applications.
-
Penetrating sealants: These invisible sealers absorb into the concrete, providing long-term protection without altering the surface appearance or texture.
When selecting a sealer or coating, contemplate factors such as durability, maintenance requirements, and aesthetic appeal.
Additionally, make sure the product you choose offers adequate UV protection to prevent discoloration and degradation over time.
Measuring and Mixing Essentials
Accurate measurements and thorough mixing are critical steps in creating a strong, durable concrete countertop, as they directly impact the final product's integrity and appearance.
When it comes to measuring, you'll want to employ precise techniques to guarantee accurate proportions of cement, aggregate, and water. Invest in a digital scale or calculator to simplify the process.
For mixing, you'll need a sturdy mixing bucket, a mixing stick or drill with a mixing paddle, and a clean, dust-free workspace.
To achieve the perfect mix, you'll need to follow established mixing ratios. A general rule of thumb is to use one part cement to two parts aggregate. However, this ratio may vary depending on the specific application and design requirements. Be sure to consult the manufacturer's instructions for specific guidelines.
When mixing, start with the dry ingredients, gradually adding water while mixing in a consistent, figure-eight pattern. Avoid overmixing, as this can lead to a weak, porous finish.
Frequently Asked Questions
Can I Use a Regular Drill for Mixing Concrete?
You're wondering if you can use a regular drill for mixing concrete. The short answer is, it's not recommended.
Regular drills aren't designed for mixing heavy materials like concrete, and can lead to motor burnout or damage.
Instead, consider investing in a heavy-duty drill or mixer specifically designed for concrete mixing. These tools typically feature higher torque and variable speed controls, allowing for more efficient and effective mixing techniques.
How Do I Prevent Color Variation in My Countertop?
To prevent color variation in your countertop, you'll need to master precise color mixing techniques.
Start by using a consistent ratio of colorant to concrete, and guarantee each batch is thoroughly mixed.
When applying stains, follow precise stain application tips, such as using a uniform spray pattern and allowing even drying times.
Additionally, consider using a color-controlled mixing system to eliminate human error and achieve a uniform hue.
Can I Install Concrete Countertops Outdoors?
You're probably thinking that outdoor concrete countertops are a recipe for disaster, but surprisingly, they can thrive in harsh weather conditions.
By choosing the right mix design and applying a high-performance sealant, you can guarantee outdoor durability and weather resistance.
Just be sure to select materials that can withstand freeze-thaw cycles, UV exposure, and extreme temperatures.
With proper planning and execution, your outdoor concrete countertops can be a stunning addition to your exterior space.
How Long Does It Take to Complete a Concrete Countertop Project?
You're likely wondering how long it takes to complete a concrete countertop project.
The project timeline largely depends on the curing process, which can take anywhere from 24 to 48 hours, depending on the specific mix and environmental conditions.
After pouring the concrete, you'll need to allow it to set, then sand and seal it, adding another few days to the process.
With careful planning, you can complete a concrete countertop project in about 7-10 days.
Are Concrete Countertops Resistant to Heat Damage?
As you carefully place a hot skillet on your concrete countertop, you're like a master chef conducting a symphony of flavors, but the real question is, will your countertop be able to take the heat?
The answer is yes! Concrete countertops are surprisingly heat-resistant, thanks to their dense composition.
However, you'll still need to exercise some countertop maintenance, like using trivets and placemats, to prevent thermal shock and guarantee your surface remains damage-free.
Conclusion
You've got the right mix of tools and materials to create stunning concrete countertops. Now it's time to put them to work and make your vision a reality.
Remember, 'the devil is in the details,' so don't skip the finishing touches. With these essentials, you'll be well on your way to crafting countertops that are both functional and aesthetically pleasing.
By following these guidelines, you'll be able to 'hammer out' a beautiful, long-lasting result that will impress for years to come.
Related Posts
-

Must-Have Tools for Laying Concrete Tiles
When laying concrete tiles, you'll need a range of essential tools to get the job done right. Start with subfloor pre...
-

Why You Need Affordable Concrete Wall Construction Tools
You need affordable concrete wall construction tools to guarantee a profitable project, as the cost of equipment can ...
-

Ergonomic Concrete Tools for Tight Spaces
When you're tackling concrete work in tight spaces, ergonomic tools are your best bet for comfort and efficiency. The...


