
3 Best Tools for DIY Concrete Floor Installation
You'll need a sturdy mixing bucket, a pouring scoop or tamping tool, and a magnesium or stainless steel float to guarantee a successful DIY concrete floor installation. These essential tools will help you mix, pour, and finish your concrete like a pro. The mixing bucket and pouring scoop will allow you to combine and spread the concrete evenly, while the float will help you achieve a high-gloss finish. With these tools in your arsenal, you'll be well on your way to creating a durable and attractive concrete floor; now, it's time to explore the finer details of the process to take your project to the next level.
Key Takeaways
• A sturdy mixing bucket with a non-slip handle is essential for combining concrete mix, water, and aggregate.
• A pouring scoop or tamping tool is necessary for spreading concrete evenly and achieving a smooth finish.
• A magnesium or stainless steel float is ideal for achieving a high-gloss finish and removing excess water.
• Safety goggles, protective gloves, and a dust mask are crucial for protecting yourself from chemical splashes, abrasions, and respiratory issues.
• Durable and easy-to-clean tools are vital due to the harsh mixing conditions and heavy materials involved in concrete floor installation.
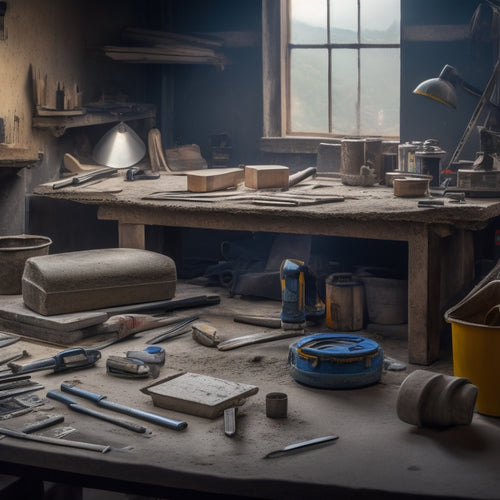
Essential Mixing and Pouring Tools
You'll need a set of essential mixing and pouring tools to accurately blend and distribute the concrete mixture, ensuring a strong and durable floor.
A sturdy mixing bucket is a must-have, as it allows you to combine the concrete mix with the right amount of water and aggregate. Look for a bucket that's specifically designed for mixing concrete, with a heavy-duty construction and a non-slip handle.
In addition to a mixing bucket, you'll need pouring tools to distribute the concrete mixture evenly across the floor. A pouring scoop or tamping tool is necessary for spreading the concrete to the desired thickness and removing any air pockets.
A pouring chute or funnel can also come in handy, especially when working with large quantities of concrete. Make sure to choose pouring tools that are durable and easy to clean, as they'll be exposed to the harsh conditions of concrete mixing and pouring.
With the right mixing and pouring tools, you'll be able to achieve a smooth, even finish that sets the stage for a successful DIY concrete floor installation.
Finishing and Smoothing Essentials
With the concrete mixture poured and spread evenly, it's time to focus on finishing and smoothing the surface to achieve a high-quality, professional-looking finish. You'll need to master trowel techniques to remove excess water, fill in gaps, and create a smooth, even surface. A magnesium or stainless steel float is ideal for this step, as it allows you to obtain a high-gloss finish.
Next, you'll need to apply surface sealants to protect your concrete floor from stains and damage. Choose a sealant that suits your specific needs, such as epoxy, polyurethane, or acrylic. Make certain to follow the manufacturer's instructions for application and drying times.
In addition to trowels and sealants, you'll need other finishing tools, such as edgers, joint cutters, and grout floats. These tools will help you create a seamless, professional-looking finish.
Remember to work methodically, taking your time to guarantee each step is completed correctly before moving on to the next. With the right tools and techniques, you'll be able to achieve a beautiful, long-lasting concrete floor that meets your expectations.
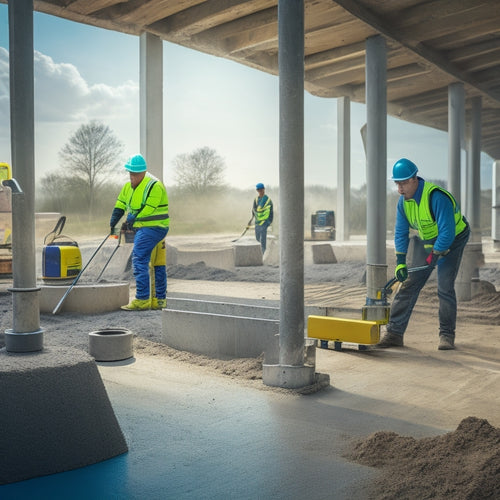
Safety and Protection Gear
Safety and Protection Gear
Before diving into the installation process, gear up with essential safety and protection gear to minimize the risk of injury and prevent damage to your skin, eyes, and respiratory system. You'll need the right gear to protect yourself from the harsh chemicals, heavy materials, and physical demands of concrete flooring installation.
Here's a rundown of the must-haves:
| Safety Gear | Description |
|---|---|
| Safety Goggles | Protect your eyes from chemical splashes and debris |
| Protective Gloves | Shield your hands from abrasion, cuts, and chemical exposure |
| Dust Mask | Filter out dust and particles to prevent respiratory issues |
| Steel-Toed Boots | Safeguard your feet from heavy objects and materials |
| Knee Pads | Reduce strain and discomfort from kneeling on hard surfaces |
Frequently Asked Questions
Can I Use a Regular Drill for Mixing Concrete?
When it comes to mixing concrete, you'll need a drill that's up to the task. A regular drill won't cut it, as it can't handle the thick, heavy mixture.
Instead, opt for a drill specifically designed for mixing concrete, such as a hammer drill or a mixing drill. These drill types are built for heavy-duty mixing and can handle the intense torque required.
Additionally, employ proper mixing techniques, like using a slow and steady pace, to guarantee a smooth, consistent mix.
How Do I Fix a Crack in a Newly Poured Concrete Floor?
When you notice a crack in your newly poured concrete floor, don't panic. You can fix it with a crack repair compound specifically designed for concrete.
First, clean the crack thoroughly, removing any debris. Then, apply the compound according to the manufacturer's instructions, ensuring a smooth finish.
For ideal concrete maintenance, seal the floor after the repair to prevent further damage. By acting quickly, you'll prevent the crack from spreading and keep your floor looking its best.
Can I Install Concrete Flooring Over Existing Tile or Carpet?
You're wondering if you can install concrete flooring over existing tile or carpet.
The short answer is yes, but it requires careful existing surface preparation.
You'll need to remove the old tile or carpet using specialized tile removal techniques, such as scraping, grinding, or using a tile stripper.
Confirm the subfloor is level, clean, and dry before proceeding with the concrete installation.
How Long Does It Take for Concrete to Fully Cure?
You're wondering how long it takes for concrete to fully cure. The curing process is vital, and you should know that it's affected by temperature.
In ideal conditions, with temperatures between 65°F and 75°F, concrete typically takes around 28 days to reach its full strength. However, if it's too hot or cold, the curing process slows down.
Be patient, as proper curing is necessary for a durable and long-lasting concrete floor.
Do I Need a Permit to Install a Concrete Floor in My Home?
You're about to commence on a concrete floor installation journey, but first, navigate the permit landscape - it's like charting a course through uncharted waters.
You'll need to determine if your project requires a permit, and that depends on your location and installation regulations.
Research local permit requirements, consult with authorities, and guarantee compliance to avoid costly rework.
Don't risk getting stuck in the mud; get the necessary approvals before pouring that concrete.
Conclusion
As you stand back to admire your handiwork, the freshly poured concrete floor glistens like a canvas of liquid silver, waiting for your skilled touch to transform it into a durable, high-gloss masterpiece.
With the right tools in your arsenal, you've conquered the DIY concrete floor installation process.
Now, it's time to let your creation set, harden, and shine – a reflection of your ingenuity and craftsmanship.
Related Posts
-
3 Best Hand Tools for DIY Concrete Construction
When tackling a DIY concrete construction project, you'll need three essential hand tools to achieve a professional-l...
-

Why These Tools Are Crucial for Concrete Patio
You're about to commence on a concrete patio project, and having the right tools is vital to achieving professional-l...
-
What Tools Ensure Precise Concrete Leveling Results
You need a range of specialized tools to achieve precise concrete leveling results. Laser leveling instruments provid...


