10 Tools for a Flawless Concrete Flooring Installation
Share
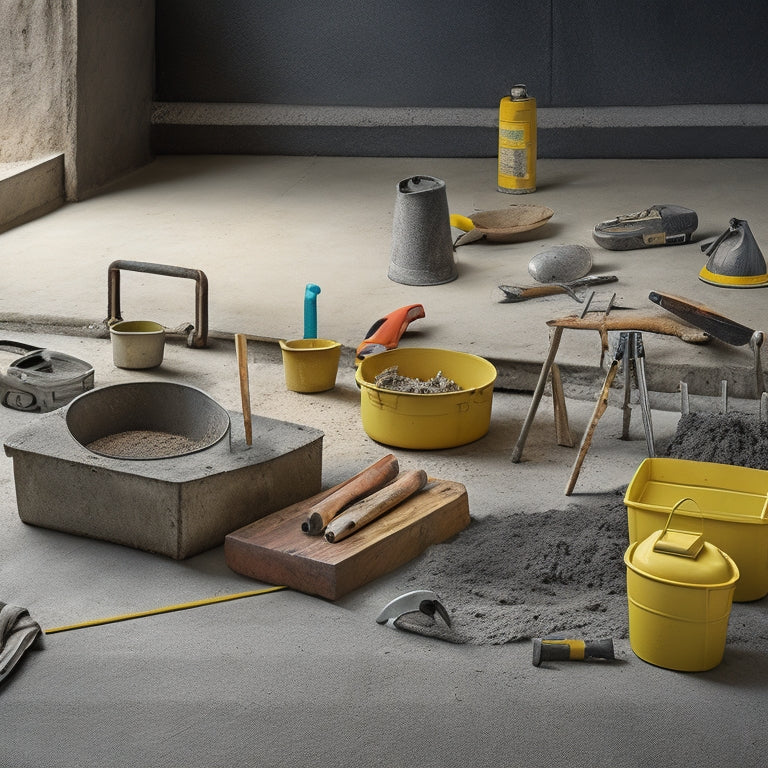
To achieve a flawless concrete flooring installation, you'll need to equip yourself with the right tools for the job. Start with essential concrete floor preparation tools like floor scrapers, shot blasters, and grinders to achieve a clean, even surface. Next, bring in polishing and grinding machines, edging and corner tools, and floor scraping and removal equipment to remove old adhesives and paint. Don't forget crack repair and filling tools, floor leveling and flattening systems, and dust containment systems to maintain a safe and clean work environment. Finally, equip yourself with safety gear, finishing and detailing tools, and get ready to take your concrete flooring installation to the next level - and discover the finer details that will set your work apart.
Key Takeaways
• Achieve a clean, even surface with essential tools like floor scrapers, shot blasters, and grinders for removing old adhesives and paint.
• Efficient grinding techniques involve starting with coarse grit, progressing to higher grits, and regular inspection and adjustment of diamond tools.
• Edging tools like edgers, corner trowels, and radius edgers are crucial for professional finishes in tight spaces and intricate designs.
• Dust containment systems and debris clearance methods like vacuuming, shot blasting, and grinding are necessary for a clean installation surface.
• Proper machine selection, including walk-behind, ride-on, and edge grinders, impacts the quality of the concrete floor finish.
Concrete Floor Preparation Tools
You'll need a set of specialized tools to secure a well-prepared concrete floor, including a floor scraper, shot blaster, or grinder to remove old adhesives, paint, and other substances that can compromise the bond between the old concrete and the new flooring material.
These tools will help you achieve a clean, even surface that's essential for a successful installation. Depending on the surface texture you're aiming for, you may also need to use a scarifier or a milling machine to roughen or smooth out the concrete.
Additionally, a vacuum or a dust collector will come in handy to remove debris and dust generated during the preparation process.
When choosing your flooring materials, consider the surface texture you want to achieve. For example, if you're installing a flooring material that requires a high-gloss finish, you'll need to secure the concrete surface is extremely smooth.
On the other hand, if you're going for a more rustic look, a textured surface may be desirable. Whatever your goal, having the right tools for the job will secure a successful concrete flooring installation that meets your expectations.
Polishing and Grinding Machines
As you move on to the polishing and grinding phase of your concrete flooring installation, you'll need to choose the right machine for the job, considering factors like floor size, surface condition, and desired finish.
You'll also want to develop efficient grinding techniques to guarantee a smooth, even surface.
Machine Selection Matters
Selecting the right polishing and grinding machines is essential to achieving a high-quality concrete floor finish, with the wrong choice leading to subpar results, increased labor costs, and even equipment damage. You'll want to evaluate the type of machine, its power, and its intended use when making your selection. There are three main machine types: walk-behind, ride-on, and edge grinders. Each has its own strengths and weaknesses, and choosing the right one will depend on the size of your project, the type of concrete, and your personal preference.
Here's a breakdown of some popular equipment brands and their features:
| Brand | Machine Type | Power |
|---|---|---|
| HTC | Walk-behind | Electric |
| Husqvarna | Ride-on | Gasoline |
| Lavina | Edge Grinder | Electric |
| Terrco | Walk-behind | Gasoline |
| SASE | Ride-on | Electric |
When selecting a machine, don't be afraid to ask questions or seek advice from industry experts. Remember, the right machine can make all the difference in achieving a flawless concrete floor finish.
Efficient Grinding Techniques
With the right machine in hand, it's time to focus on efficient grinding techniques that maximize productivity and achieve the desired level of polish.
You'll want to develop a strategy that balances speed, precision, and control to get the most out of your equipment and diamond tools.
Here are some essential tips to enhance your grinding techniques:
-
Start with a coarse grit: Begin with a lower grit level to remove surface imperfections and work your way up to higher grits for a smoother finish.
-
Maintain tooling geometry: Regularly inspect and adjust your diamond tools to guarantee they're properly aligned and seated for peak performance.
-
Control your speed and pressure: Adjust your machine's speed and pressure to suit the specific concrete type and desired finish.
-
Work in sections: Divide the floor into manageable sections to maintain even coverage and prevent pattern marks.
-
Monitor your progress: Regularly inspect your work to identify areas that require additional attention and make adjustments as needed.
Edging and Corner Tools
You'll need edging and corner tools to achieve a professional finish on your concrete flooring installation, particularly when working with tight spaces, curved edges, or intricate designs. These tools enable you to master edging techniques and corner finishing, ensuring a seamless shift between the floor and surrounding features.
| Tool | Description |
|---|---|
| Edger | A handheld tool used for creating clean, defined edges along walls and obstructions |
| Corner Trowel | A specialized trowel for finishing corners, allowing for precise control and smooth shifts |
| Radius Edger | Designed for curved edges, this tool helps you achieve a consistent, flowing finish |
| Corner Bead Tool | Used to shape and form corner beads, ensuring a crisp, professional finish |
When selecting edging and corner tools, consider the specific demands of your project. For instance, if you're working with tight spaces, an edger with a compact design may be ideal. By investing in the right tools, you'll be able to execute advanced edging techniques and corner finishing with ease, resulting in a polished, high-quality finish that exceeds client expectations.
Floor Scraping and Removal
When you're preparing a concrete floor for installation, you'll need to tackle three critical steps in the floor scraping and removal process.
You'll start by removing old adhesives, which can be a stubborn task without the right tools and techniques.
Next, you'll prepare the floor surface to guarantee it's even and clean.
Old Adhesive Removal
Remove old adhesive residue from the concrete floor by scraping and grinding the surface to confirm a strong bond between the new flooring and the substrate.
You'll need to tackle this vital step before installing your new flooring to guarantee a successful installation.
When it comes to old adhesive removal, you'll encounter different adhesive types, each requiring specific removal techniques. For instance, epoxy-based adhesives are notoriously difficult to remove, while acrylic-based adhesives are relatively easier.
Here are some essential tools and techniques to keep in mind for effective old adhesive removal:
-
Use a floor scraper or putty knife to scrape off loose adhesive residue.
-
Employ a concrete grinder or orbital sander to grind away stubborn adhesive.
-
Apply a chemical adhesive remover to break down the adhesive bond.
-
Utilize a heat gun to soften the adhesive for easier removal.
-
Don't forget to wear protective gear, including gloves, safety glasses, and a dust mask.
Floor Surface Preparation
With the old adhesive residue removed, you're ready to tackle the next vital step: scraping and removing any remaining imperfections on the concrete floor to create a smooth, even surface for your new flooring installation.
This process, known as floor surface preparation, is essential to guarantee a strong bond between the new flooring and the concrete substrate.
Using a floor scraper or a ride-on scrubber, you'll need to remove any surface contaminants, such as dirt, oil, or old coatings, that could compromise the flooring's adhesion.
Be sure to also check for any cracks or unevenness, filling them with a self-leveling compound if necessary.
It's also essential to conduct moisture testing to identify any areas with high moisture levels, which could affect the flooring's performance.
By taking the time to properly prepare the floor surface, you'll set yourself up for a successful installation that will last for years to come.
Don't skip this step – a well-prepared surface is the foundation of a flawless concrete flooring installation.
Debris Clearance Methods
You'll need to employ effective debris clearance methods to eliminate any remaining dirt, dust, and other contaminants from the floor surface, ensuring a clean slate for your new flooring installation. This vital step is often overlooked, but it's important to remove debris types such as old adhesive, paint, and oil to achieve a successful installation.
To accomplish this, you'll need to utilize various clearance techniques. Here are some methods to keep in mind:
-
Floor scraping: using a floor scraper to remove thick, stubborn debris
-
Shot blasting: using a shot blaster to remove thin layers of debris and profiling the concrete
-
Grinding: using a grinder to remove thin layers of debris and smoothing the surface
-
Vacuuming: using a vacuum to remove loose debris and dust
-
Chemical cleaning: using a chemical cleaner to remove oil and other stubborn contaminants
Crack Repair and Filling
Concrete flooring installation requires addressing cracks and imperfections before applying a finish, as these defects can compromise the integrity and appearance of the final product. You'll need to conduct a thorough crack assessment to identify the type, size, and location of cracks. This will help you determine the best course of action for repair.
For effective crack repair, you'll need to choose the right repair materials. Epoxy-based products are ideal for filling deep cracks, while polyurethane-based materials work well for smaller, hairline cracks. Make sure to follow the manufacturer's instructions for application and curing times. It's also crucial to prepare the crack area by cleaning it thoroughly and removing any debris or old filler material.
Once you've filled the crack, use a leveling compound to even out the surface. Allow the compound to dry completely before sanding it down to a smooth finish.
Remember to work methodically and patiently, as crack repair can be a time-consuming process. By taking the time to properly assess and repair cracks, you'll guarantee a flawless concrete flooring installation that will last for years to come.
Concrete Sealing and Coating
Sealing and coating your newly installed concrete floor is an essential step that not only enhances its appearance but also provides a protective barrier against stains, abrasion, and damage from environmental factors. This process involves applying a layer of protection to the concrete surface, which can greatly extend its lifespan.
When it comes to sealing techniques, you have several options to choose from, including:
-
Topical sealers that form a protective layer on the surface
-
Penetrating sealers that absorb into the concrete for long-term protection
-
Acrylic sealers that offer a high-gloss finish
-
Epoxy sealers that provide exceptional durability and resistance
-
Polyurethane sealers that offer a flexible, abrasion-resistant finish
In addition to sealing techniques, you'll also need to take into account the type of coating to apply. This can include epoxy, polyurethane, or acrylic coatings, each with its own unique benefits and characteristics.
Floor Leveling and Flattening
When you're preparing a concrete floor for installation, you'll need to guarantee it's perfectly level and flat.
To achieve this, you'll rely on specialized tools that help you assess and correct the surface.
You'll use laser guided scanning to identify imperfections, conduct a surface profile assessment to determine the necessary adjustments, and employ high-tolerance grading to make the necessary corrections.
Laser Guided Scanning
By utilizing laser guided scanning technology, you can accurately detect even the slightest deviations in floor elevation, guaranteeing precise floor leveling and flattening. This innovative tool enables you to identify imperfections that may be invisible to the naked eye, allowing you to take corrective action before it becomes too late.
To get the most out of laser guided scanning, it's crucial to master laser calibration techniques. Proper calibration guarantees that your scanner is providing accurate data, which is critical for achieving ideal floor leveling and flattening results.
Some of the key benefits of laser guided scanning include:
-
Increased scanning precision: Laser guided scanning technology offers unparalleled accuracy, allowing you to detect even the slightest deviations in floor elevation.
-
Improved floor quality: By identifying imperfections early, you can take corrective action to guarantee a smooth, even floor that meets the highest standards.
-
Reduced labor costs: Laser guided scanning streamlines the floor leveling and flattening process, reducing labor costs and saving you time and money.
-
Enhanced safety: By identifying potential trip hazards and other safety risks, you can take steps to mitigate them and create a safer working environment.
-
Better decision making: With accurate data at your fingertips, you can make informed decisions about the best course of action for your flooring project.
Surface Profile Assessment
You can now use laser guided scanning data to conduct a surface profile assessment, which involves analyzing floor elevation and flatness to identify areas that require leveling and flattening. This critical step guarantees that your concrete flooring installation meets the required specifications.
By analyzing the scan data, you can determine the surface texture and profile measurement, which helps you pinpoint areas with unevenness, cracks, or other defects. This information enables you to create a precise plan for leveling and flattening the floor, guaranteeing a smooth and even surface.
With advanced software, you can generate detailed reports and 3D models of the floor's surface profile, allowing you to visualize and quantify the extent of any imperfections. This data-driven approach enables you to optimize your leveling and flattening process, reducing the risk of errors and guaranteeing a flawless concrete flooring installation.
High-Tolerance Grading
With surface profile assessment complete, high-tolerance grading begins, where precision floor leveling and flattening techniques are employed to correct deviations and imperfections identified in the scan data.
You'll utilize high-precision measurements to guarantee accurate corrections, assuring a flawless concrete flooring installation.
In this stage, you'll apply advanced grading techniques to rectify any irregularities, including:
-
Micro-grade adjustments: Fine-tuning floor levels to achieve ideal flatness
-
Laser-guided screeding: Guaranteeing precise floor elevation and plane alignment
-
High-strength filling compounds: Repairing cracks and voids with durable, long-lasting materials
-
Advanced leveling tools: Utilizing specialized equipment for precise floor leveling and flattening
-
Real-time monitoring: Continuously tracking progress to assure accurate corrections
Through high-tolerance grading, you'll achieve a concrete floor that's not only level and flat but also meets the most stringent tolerances, providing a solid foundation for your flooring installation.
Dust Containment Systems
As you prepare for a flawless concrete flooring installation, don't overlook the importance of dust containment systems. Dust containment systems play an essential role in minimizing airborne particulates during concrete flooring installation, as they effectively capture and remove dust and debris at the source.
By investing in a reliable dust collection system, you'll greatly improve air quality on the job site. This is vital, as airborne dust can compromise the health and safety of your team, while also affecting the overall quality of the installation.
When selecting a dust containment system, look for one that's designed specifically for concrete flooring applications. These systems typically feature high-efficiency filters, robust vacuums, and strategically placed dust collection points.
By containing dust at the source, you'll reduce the risk of it spreading throughout the site, making cleanup faster and more efficient. A good dust containment system will also help you meet regulatory standards for air quality, guaranteeing a safer, healthier work environment for everyone involved.
Safety and Protective Gear
Protecting yourself and your team from hazardous materials and flying debris is essential, and that's where safety and protective gear come into play. You can't afford to compromise on safety, especially when working with concrete flooring installation.
Make certain you and your team are equipped with the necessary personal protective equipment (PPE) to prevent injuries and guarantee a smooth installation process.
Here are some essential safety and protective gear you should consider:
-
Hard hats and safety glasses: Protect your head and eyes from falling objects and debris.
-
Dust masks and respirators: Prevent inhalation of hazardous dust and particles.
-
Steel-toed boots and gloves: Safeguard your feet and hands from heavy objects and sharp edges.
-
High-visibility vests: Ensure you're visible in low-light environments and to prevent accidents.
-
First aid kits: Be prepared for any medical emergencies that may arise.
Finishing and Detailing Tools
You'll need a range of specialized finishing and detailing tools to achieve a high-quality, professional-looking concrete floor installation. These tools are designed to help you refine your concrete surface, ensuring a smooth, even finish that's free of imperfections.
A power trowel, for instance, is essential for smoothing out the concrete surface, allowing you to achieve a high-gloss finish. You'll also need a range of edging tools, such as edgers and joint cutters, to create clean, defined edges and joints.
When it comes to decorative finishes, you'll require specialized tools to achieve the desired effect. For example, a concrete stamp or stencil can be used to create intricate patterns and designs, while a texture mat can be used to add texture and visual interest to the surface.
In addition, you may need to use specialized smoothing techniques, such as burnishing or polishing, to achieve a high-shine finish. With the right finishing and detailing tools, you'll be able to create a stunning, one-of-a-kind concrete floor installation that showcases your skills and attention to detail.
Frequently Asked Questions
Can I Install Concrete Flooring Over Existing Wooden Floors?
When you consider installing concrete flooring over existing wooden floors, you'll face installation challenges, so it's vital to guarantee flooring compatibility; assess the wooden floor's structural integrity and prepare it properly to avoid costly issues down the line.
How Long Does a Concrete Flooring Installation Typically Take?
You're planning a 1,000 sq. ft. office renovation, and you're wondering how long it'll take to install concrete flooring. Typically, a project like this takes 7-10 business days, considering a 5-day installation timeline and 2-5 days for project scheduling and preparation.
Are Concrete Floors Suitable for Homes With Radiant Heating Systems?
You'll find concrete floors ideal for homes with radiant heating systems, as they efficiently absorb and distribute heat, leveraging the radiant heating benefits. However, you'll need to take into account thermal conductivity to guarantee peak performance.
Can I Install Concrete Flooring in Areas With High Moisture?
You can install concrete flooring in areas with high moisture by applying moisture barriers and waterproof coatings to prevent water seepage, ensuring a durable and long-lasting floor that withstands humidity and moisture exposure.
Do Concrete Floors Require Regular Maintenance to Stay Durable?
You'll need to develop a routine maintenance plan, incorporating advanced cleaning techniques and sealing options, to guarantee your concrete floors remain durable and resistant to wear, tear, and environmental factors.
Conclusion
You've made it through the gauntlet of concrete flooring installation, and now your floor shines like a polished gem.
With these 10 essential tools, you've tackled every challenge, from prep to finish.
Your floor is a masterpiece, a symphony of smoothness and precision, like a Swiss watch ticking away with precision.
You've earned the right to stand back and admire your handiwork, knowing that your concrete floor will stand the test of time.
Related Posts
-

Why You Need Affordable Concrete Wall Construction Tools
You need affordable concrete wall construction tools to guarantee a profitable project, as the cost of equipment can ...
-

Concrete Foundation Building Tools for Homeowners' Success
As you start your concrete foundation building project, it is vital to have the right tools to guarantee success. You...
-

Why These Concrete Tools Are Always in Demand
You rely on a set of trusted concrete tools to deliver high-quality results, and it's not surprising - these tools ar...


