10 Best Concrete Subfloor Prep Tools for Success
Share
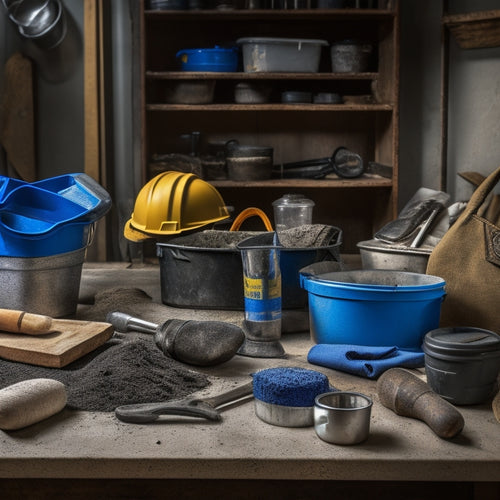
You're about to tackle concrete subfloor preparation, a critical step in your flooring project. To guarantee success, you'll need the right tools for the job. Start with floor scrapers to remove old adhesives, then move on to concrete grinders and walk-behind sanders for surface smoothing. Don't forget edgers for tight spaces, ride-on scrubbers for large areas, and crack chasers for repairs. Next, use floor polishers to achieve a flawless finish. Finally, employ moisture test kits to guarantee a safe and durable flooring installation. Now that you have the essential tools, it's time to dive deeper into their features and best practices to achieve a professional-grade finish.
Key Takeaways
• Adhesive removal tools, like floor scrapers, are essential for removing old adhesive from concrete subfloors to ensure a successful prep process.
• Surface smoothing tools, including concrete grinders and walk-behind sanders, address imperfections and provide a uniform surface for flooring installation.
• Finishing tools, such as floor polishers, offer adjustable speed and control for a flawless finish, and efficient dust collection systems minimize mess and improve air quality.
• Heavy-duty preparation tools, like shot blasters and ride-on scrubbers, provide aggressive surface removal capabilities for thick coatings and rough surfaces.
• Safety and quality assurance tools, including moisture testing kits and efficient dust collection systems, ensure a safe working environment and prevent flooring failures.
Floor Scrapers for Old Adhesive
You'll likely need a floor scraper to remove old adhesive from your concrete subfloor, as it's an essential step in preparing the surface for new flooring installation.
When selecting a floor scraper, consider the type of adhesive you're dealing with and the surface of your subfloor. There are various adhesive removal techniques, and the right scraper blade type can make all the difference. For example, a scraper with a carbide-tipped blade is ideal for removing thick, stubborn adhesives, while a scraper with a steel blade is better suited for scraping off thinner adhesives. Additionally, some scrapers come with adjustable handles, allowing you to customize the angle of attack for best results.
When scraping, work in small sections, applying gentle to moderate pressure, and use a push-pull motion to remove the old adhesive. Remember to always wear protective gear, including gloves, safety glasses, and a dust mask, to avoid injury and exposure to hazardous materials.
Concrete Grinders for Smoothing
With the old adhesive removed, it's time to tackle any imperfections in the concrete subfloor, and that's where concrete grinders come in, playing an essential role in smoothing out the surface to guarantee a successful flooring installation.
You'll need to choose the right grinder type for your specific surface preparation needs. There are two main types: walk-behind grinders and handheld grinders. Walk-behind grinders are ideal for large areas, providing high production rates and efficient surface preparation. Handheld grinders, on the other hand, are perfect for smaller areas, corners, and edges, offering greater control and precision.
When selecting a grinder, consider the level of surface preparation required. Will you need to remove thick coatings, or simply smooth out minor imperfections? Different grinder types and abrasives are suited to specific tasks, so it's vital to choose the right combination for your project.
Edgers for Tight Spaces
Your concrete grinder may excel at covering large areas, but it's often ineffective in tight spaces, making edgers an essential tool for precision surface preparation in corners, along baseboards, and around obstructions.
To master tight space techniques, you need an edger that's designed for precision and control. Look for edger features such as adjustable handles, angled heads, and compact designs that allow you to maneuver in tight spaces with ease.
When working in tight spaces, it's vital to maintain control over the edger to avoid damaging surrounding surfaces. Opt for an edger with a variable speed control, allowing you to adjust the speed to suit the specific task at hand.
Additionally, consider an edger with a dust collection system to minimize mess and improve visibility.
Hand Sanders for Detail Work
When tackling concrete subfloor prep, you know that detail sanding techniques make all the difference. To achieve a flawless finish, you need the right hand sander for the job. Two key factors to evaluate when selecting a hand sander for detail work are the grit sequence and the sander's ergonomics, as these directly impact the quality of the finished surface and the operator's comfort during extended use.
Here's a breakdown of popular hand sander types and their features:
| Hand Sander Type | Grit Sequence | Ergonomic Features |
|---|---|---|
| Orbital Sanders | 80-120-220 | Contoured grip, adjustable speed |
| Detail Sanders | 120-220-320 | Compact design, finger rest |
| Belt Sanders | 80-120-180 | Adjustable belt tracking, comfort grip |
| Rotary Sanders | 120-220-320 | Variable speed, ergonomic handle |
When choosing a hand sander, consider the specific demands of your project. Do you need to tackle tight spaces or smooth out large areas? By selecting the right hand sander and mastering detail sanding techniques, you'll be able to achieve a showroom-quality finish that sets your concrete subfloor apart. Remember, the right tool makes all the difference in achieving success.
Ride-On Scrubbers for Large Areas
You'll need to switch to heavier machinery, like ride-on scrubbers, to tackle large areas of concrete subfloor efficiently, especially after refining smaller sections with hand sanders.
Ride-on scrubbers are designed to cover vast areas quickly, making them ideal for commercial or industrial projects. When choosing a ride-on scrubber, look for features such as adjustable handlebars, multi-directional cleaning, and variable speed control. These features will allow you to customize the machine to your specific needs and enhance your cleaning process.
Regular ride-on scrubber maintenance is essential to guarantee peak performance and extend the machine's lifespan. Check the brushes regularly and replace them when worn, as this will affect the machine's cleaning ability.
Additionally, clean the machine's filters and vacuum system regularly to prevent clogs and maintain suction power. Proper maintenance will also help prevent costly repairs and downtime.
Shot Blasters for Heavy Duty
When you're tackling heavy-duty concrete subfloor prep, you'll appreciate the capabilities of shot blasters.
These powerful tools allow you to control the blast pattern to target specific areas, ensuring a more efficient process.
Blast Pattern Control
Controlling blast pattern is essential for achieving ideal results with shot blasters, particularly in heavy-duty applications where surface preparation demands precision and power.
You need to master blast pattern techniques to guarantee consistent and efficient surface preparation. To achieve this, you'll require the right blast pattern equipment, designed to optimize your shot blasting experience.
Here are four key considerations to help you control your blast pattern:
-
Nozzle angle and orientation: Adjust the nozzle to achieve the desired blast pattern, taking into account the surface type and the level of aggression required.
-
Blast distance and speed: Control the distance between the nozzle and the surface, as well as the speed of movement, to achieve the desired level of surface preparation.
-
Air pressure and flow rate: Regulate air pressure and flow rate to optimize the blast pattern, guaranteeing consistent results and minimizing waste.
- Pattern overlap and indexing: Strategically plan pattern overlap and indexing to ensure thorough coverage and prevent missed spots.
Aggressive Surface Removal
Shot blasters designed for heavy-duty applications tackle aggressive surface removal tasks with ease, delivering unparalleled power and precision to strip away thick, stubborn coatings and rough surfaces.
When you're dealing with heavily contaminated or damaged substrates, these machines are your best bet. By employing advanced surface preparation techniques, you can effectively remove old adhesives, epoxies, and other stubborn substances, preparing the substrate for a successful installation.
To guarantee peak results, it's vital to assess the substrate using substrate assessment methods, such as visual inspection, moisture testing, and surface profiling. This helps you identify potential issues and choose the right shot blaster for the job.
With the right machine and proper technique, you can achieve a surface that's clean, uniform, and ready for finishing. Whether you're working on a large industrial project or a residential renovation, these heavy-duty shot blasters will help you get the job done efficiently and effectively.
Walk-Behind Sanders for Efficiency
Operating walk-behind sanders allows you to efficiently cover large areas of concrete subfloor, achieving a more uniform surface preparation in less time.
These powerful machines are designed to streamline your workflow, allowing you to tackle large projects with ease. With a walk-behind design, you can maintain a consistent pace, guaranteeing a uniform finish across the entire subfloor.
When selecting a walk-behind sander, consider the following key factors:
-
Sandpaper selection: Choose the right grit sandpaper for your specific project needs, ranging from coarse to fine.
-
Motor power: Opt for a machine with sufficient horsepower to tackle tough concrete surfaces.
-
Dust collection: Confirm the sander is equipped with an efficient dust collection system to minimize cleanup and improve air quality.
- Weight and maneuverability: Select a machine that's lightweight and easy to maneuver, reducing operator fatigue and improving productivity.
Crack Chasers for Repair
After efficiently sanding your concrete subfloor with a walk-behind sander, you'll likely uncover cracks and joints that require repair, making a crack chaser an indispensable tool for the next step in your subfloor preparation process.
A crack chaser is a specialized saw designed to cut and remove damaged concrete, allowing you to create a clean, V-shaped groove for repair. This tool is crucial for effective crack sealing, as it enables you to remove loose material and debris that can compromise the bond between the old and new concrete.
When selecting a crack chaser, consider the type of repair you're doing and the size of the cracks. For smaller cracks, a handheld chaser may suffice, while larger cracks may require a walk-behind or ride-on model.
Familiarize yourself with various repair techniques, such as epoxy injection or polyurethane foam injection, to guarantee a strong, long-lasting bond. By using a crack chaser in conjunction with these techniques, you'll be able to achieve a durable, crack-free subfloor that's ready for finishing.
Remember to always follow the manufacturer's instructions and take necessary safety precautions when operating a crack chaser.
Floor Polishers for Finishing
When you're selecting a floor polisher for finishing, you'll want to take into account the polisher's speed and control, as these factors directly impact the quality of the finished surface.
You'll also need to guarantee the polisher is equipped with an efficient dust collection system to minimize mess and maximize productivity.
Additionally, look for a polisher that provides effective leveling and smoothing action to achieve a flawless finish.
Polisher Speed and Control
You'll need to select a floor polisher that offers adjustable speed and control to effectively finish your concrete subfloor, as this combination enables you to tailor the polishing process to the specific requirements of your project. This is essential because different surface preparation tasks demand distinct polisher techniques. For instance, high-speed polishing is ideal for removing old coatings, while low-speed polishing is better suited for fine-tuning the surface.
When choosing a polisher, consider the following key factors:
-
Variable speed control: Allows you to adjust the speed to match the task at hand.
-
Soft-start feature: Prevents sudden jolts that can damage the machine or the floor.
-
Ergonomic design: Guarantees comfortable handling and reduced fatigue during extended use.
- Digital display: Provides real-time monitoring of speed, temperature, and other critical parameters.
Efficient Dust Collection Systems
Equipping your floor polisher with an efficient dust collection system is essential for maintaining a clean and safe work environment, as it effectively captures and contains dust and debris generated during the finishing process.
You'll want to invest in a system that can keep up with the high-volume dust generation of concrete floor polishing. Look for dust extraction systems that utilize effective filtration methods, such as HEPA filters or cyclonic dust collection, to guarantee maximum dust containment.
A well-designed system won't only improve air quality but also reduce the risk of dust-related health issues and equipment damage. Additionally, an efficient dust collection system will minimize downtime for cleaning and maintenance, allowing you to focus on the task at hand.
Leveling and Smoothing Action
By selecting a floor polisher that effectively combines leveling and smoothing action, you can achieve a superior finish on your concrete subfloor, guaranteeing a strong bond between the subfloor and subsequent flooring materials.
When it comes to leveling and smoothing, you'll want to focus on floor polishers that can efficiently remove imperfections and create a uniform surface.
Here are some key features to look for:
-
Variable speed control: This allows you to adjust the polisher's speed to suit the specific needs of your subfloor, delivering optimal results.
-
Aggressive cutting action: A polisher with aggressive cutting action can quickly remove old adhesives, paint, and other substances, preparing the subfloor for new flooring installations.
-
Effective dust collection: A polisher with a built-in dust collection system or compatibility with a dust collection system helps minimize mess and guarantees a cleaner working environment.
- Compatibility with smoothing compounds: Look for a polisher that can work seamlessly with various smoothing compounds, allowing you to achieve a smooth, even finish.
Moisture Test Kits for Safety
Measuring the moisture levels in your concrete subfloor is crucial, as excessive moisture can lead to flooring failures. That's why investing in a reliable moisture test kit is essential for ensuring a safe and successful installation.
You'll want to select a kit that employs accurate moisture measurement techniques, such as relative humidity (RH) testing or calcium chloride testing. These methods provide precise readings, allowing you to identify potential issues before they become major problems.
When evaluating moisture test kits, look for features like ease of use, durability, and compact design. A good kit should also include accessories like test probes, humidity sensors, and a carrying case.
Additionally, consider investing in humidity control solutions, such as dehumidifiers or vapor barriers, to mitigate moisture-related issues. By using a high-quality moisture test kit and implementing effective humidity control solutions, you'll be well on your way to ensuring a successful and long-lasting flooring installation.
With the right tools and techniques, you'll be able to identify and address moisture-related issues, ensuring a safe and successful installation.
Frequently Asked Questions
Can I Use a Concrete Subfloor Prep Tool on a Freshly Poured Floor?
When you're working with a freshly poured floor, it's crucial to wait until the surface curing process is complete before using a concrete subfloor prep tool.
You shouldn't rush this step, as the floor needs time to set and harden. Premature use can damage the surface, leading to unevenness and potentially costly repairs.
Allow the recommended curing time to pass, usually 24-48 hours, before proceeding with your subfloor prep work.
How Often Should I Replace Worn-Out Subfloor Prep Tool Accessories?
When it comes to accessory maintenance, you'll want to establish a replacement frequency to guarantee peak performance.
As you use your subfloor prep tool, regularly inspect the accessories for signs of wear, such as worn-down edges or reduced effectiveness.
Replace them every 3-6 months or sooner if you notice a decline in performance.
This proactive approach will prevent damage to your tool and subfloor, ultimately saving you time and resources in the long run.
Are Concrete Subfloor Prep Tools Suitable for DIY or Only for Professionals?
When tackling a concrete subfloor project, you might wonder if the prep tools are within your DIY reach or best left to the pros.
The truth is, with some skills and patience, you can master the DIY route, but be prepared to invest time in learning the nuances.
However, for large-scale or complex projects, professional expertise is essential to guarantee a flawless finish and avoid costly mistakes.
Can I Rent Concrete Subfloor Prep Tools Instead of Buying Them?
You're considering renting concrete subfloor prep tools instead of buying them. That's a smart move, especially for one-time or infrequent projects.
You'll find subfloor rental options at equipment rental stores or online platforms. Compare the rental cost to buying the tools outright, factoring in the project's duration and frequency of use.
Calculate the total cost, including delivery, operation, and maintenance fees. This cost comparison will help you decide whether renting is the most cost-effective option for your specific needs.
Do I Need to Wear Protective Gear When Using Concrete Subfloor Prep Tools?
You're probably aware that the construction industry sees over 1,000 eye injuries daily.
When using concrete subfloor prep tools, you're not exempt from this risk. You need to take safety precautions seriously!
Wear gear like safety glasses, dust masks, and gloves to protect yourself from debris and hazardous materials.
Don't compromise on quality - invest in gear that meets ANSI standards. Your safety is worth it.
Conclusion
You've got the right tools for the job, and now it's time to get to work.
As you gaze out at the expanse of concrete before you, remember that a smooth, even surface is within reach.
Will you be able to transform this rough, uneven floor into a polished masterpiece?
With the right prep tools, the answer is a resounding 'yes'.
Related Posts
-

5 Tools Needed for Quick Fix Concrete Mixing
You'll need five essential tools to tackle a quick fix concrete mixing project efficiently. First, you'll require a s...
-

Ergonomic Concrete Tools for Tight Spaces
When you're tackling concrete work in tight spaces, ergonomic tools are your best bet for comfort and efficiency. The...
-

Top Tools for Beginners in Concrete Masonry Coating
You're about to begin a concrete masonry coating project, and having the right tools is essential. Start with essenti...


