
10 Best Concrete Repair Tool Kit Must-Haves
When building your concrete repair tool kit, you'll need a range of essential tools and materials to guarantee a durable and long-lasting repair. Start with chiseling and scraping tools, like flat, pointed, and scraper chisels, as well as high-quality trowels and floats for a smooth finish. Don't forget concrete crack injection systems, stucco patching compound options, power drills, and mixing accessories. Add stucco finishing and texturing tools, cleaning and preparation solutions, bonding agents, and primer systems to your kit. Finally, include measuring and testing devices to guarantee accurate repairs. As you assemble your kit, you'll uncover the importance of each tool in achieving a professional finish.
Key Takeaways
- A comprehensive concrete repair tool kit should include essential tools for chiseling, scraping, and finishing, such as chisels, trowels, and floats.
- The kit should also contain repair materials and compounds, including concrete repair compounds, stucco patching compounds, and epoxy resins.
- Injection systems and bonding agents, such as concrete crack injection systems and epoxy-based bonding agents, are crucial for effective repairs.
- Mixing and application equipment, including power drills and mixing accessories, as well as safety gear and protective equipment, are also necessary.
- Cleaning, preparation, and measurement tools, such as cleaning solutions, wire brushes, and measuring devices, complete a well-rounded concrete repair tool kit.
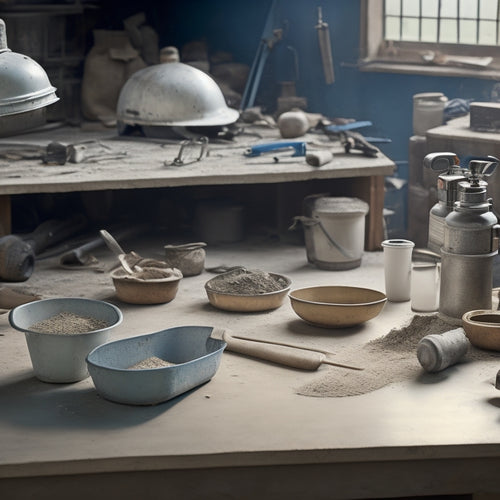
Essential Chiseling and Scraping Tools
Break out the heavy artillery with a set of essential chiseling and scraping tools, which form the backbone of any concrete repair kit.
You'll need a variety of chisel types to tackle different tasks. Start with a flat chisel for removing large areas of damaged concrete, then switch to a pointed chisel for more precise work. Don't forget a scraper chisel for removing old adhesive or debris.
When it comes to scraper techniques, you'll want to master the art of using a scraper with a curved or angled edge to remove material without gouging the surrounding concrete. For tougher jobs, reach for a scraper with a flat edge and a sturdy handle.
Remember to choose tools with durable handles and high-carbon steel blades that can withstand the rigors of concrete repair.
Keep your tools organized and within reach to maximize efficiency. With these essentials in your kit, you'll be well-equipped to tackle any concrete repair job that comes your way.
High-Quality Trowels and Floats
Smoothing out rough concrete surfaces requires commanding the use of high-quality trowels and floats. You need the right tools to achieve a smooth, even finish.
When selecting trowels, consider the type of concrete you're working with and the desired finish. There are various trowel types, including v-notched, rounded, and flat trowels, each suited for specific applications.
For floats, the material is essential. You'll want to choose floats made from durable, high-quality materials that can withstand the demands of concrete finishing.
Here are some must-haves for your concrete repair tool kit:
- A v-notched trowel for creating a textured finish
- A rounded trowel for achieving a smooth, curved surface
- A flat trowel for applying and spreading materials
- A magnesium float for its lightweight, durable, and rust-resistant properties
- A resin float for its flexibility and ability to conform to irregular surfaces
Concrete Crack Injection Systems
When you're dealing with concrete cracks, you'll need to decide on a filling method that suits the job.
You'll choose between low-pressure injection, high-pressure injection, or gravity feed methods, each with its own set of requirements and tools.
Your epoxy injection gun will be an essential component of your concrete crack injection system, so selecting the right one is important.
Crack Filling Methods
Filling cracks in concrete structures is a delicate process that requires precision and attention to detail.
You'll need to assess the crack's width, depth, and orientation to determine the best repair technique. When it comes to crack filling methods, you have several options to choose from, depending on the severity of the crack and the type of concrete structure.
Here are some common crack filling methods:
-
Low-pressure injection: Suitable for cracks with widths up to 1/4 inch, this method involves injecting a low-viscosity epoxy or polyurethane resin into the crack.
-
High-pressure injection: Used for wider cracks, this method involves injecting a higher-viscosity resin into the crack using specialized equipment.
-
Gravity feed: This method involves pouring a resin into the crack, allowing it to flow into the crack by gravity.
-
Surface sealing: A simple method involving applying a sealant to the surface of the crack to prevent water ingress.
-
Overlayment: A more extensive method involving applying a new layer of concrete over the existing cracked surface.
Remember to always follow proper crack assessment and repair techniques to guarantee a successful and long-lasting repair.
Epoxy Injection Guns
You've selected the right crack filling method for your concrete repair job, but now it's time to choose the right tool for the task. Epoxy injection guns, also known as concrete crack injection systems, are an essential part of your toolkit. These guns are designed to inject epoxy into cracks and crevices, guaranteeing a strong and durable bond.
When selecting an epoxy injection gun, consider the following factors:
| Feature | Description |
|---|---|
| Pressure Control | Ability to adjust pressure to guarantee proper epoxy flow and minimize waste |
| Material Compatibility | Compatibility with various epoxy types and viscosities |
| Injection Rate | Adjustable injection rate to accommodate different crack sizes and epoxy application techniques |
| Curing Time | Consideration of epoxy curing times to guarantee proper setup and hardening |
| Durability | Construction and build quality to withstand repeated use and heavy-duty applications |
Stucco Patching Compound Options
When selecting a stucco patching compound, you'll want to contemplate quick fix solutions that can swiftly address minor cracks and imperfections.
You'll also need to reflect on color matching options to ascertain a seamless blend with the surrounding surface.
Additionally, look for compounds that promise durable finishes, providing long-term protection against the elements.
Quick Fix Solutions
Within a short timeframe, stucco patching compound becomes a lifesaver for addressing minor cracks and damage to exterior surfaces.
When you're in a pinch, these quick fix solutions can help you salvage your exterior surfaces without breaking the bank. As a DIY enthusiast, you'll appreciate the ease of application and the temporary solutions these compounds provide.
Here are some must-haves for your stucco patching compound kit:
- A fast-setting compound that hardens within 10-15 minutes to minimize downtime
- A water-resistant formula that prevents further damage from moisture
- A textured finish that blends seamlessly with surrounding stucco surfaces
- A durable compound that withstands weathering and erosion
- A low-shrinkage formula that reduces the risk of further cracking
These DIY techniques will buy you time until you can perform a more extensive repair.
Color Matching Options
By the time you're ready to tackle a stucco repair, matching the original color of your exterior surface is crucial to achieving a seamless finish. You don't want the repaired area to stand out like a sore thumb, drawing attention away from the rest of the structure.
To guarantee a precise color match, you'll need a stucco patching compound that allows for flexibility in color blending techniques. Look for products that offer tinting options, allowing you to customize the color to your specific needs. Some products come with pre-tinted formulas, while others require you to mix and match different tints to achieve the desired shade.
It's important to choose a product that provides a wide range of color options to guarantee a precise match. When selecting a stucco patching compound, consider the type of stucco you're working with, as well as the environment it's exposed to.
Different products are designed for specific types of stucco, such as acrylic or cement-based. By choosing the right product and utilizing advanced color blending techniques, you can achieve a seamless finish that blends perfectly with the surrounding area.
Durable Finishes Guarantee
Three key factors contribute to a durable finish in stucco repair: adhesion, flexibility, and weather resistance. You want a finish that lasts, and these factors are vital in achieving that.
When selecting a stucco patching compound, look for products that meet high durability standards.
To guarantee finish longevity, consider the following:
-
Adhesion promoters: These additives improve the bond between the patching compound and the substrate, reducing the risk of delamination.
-
Elastomeric properties: Compounds with elastomeric properties can stretch and compress with the natural movements of the substrate, reducing cracking and improving durability.
-
UV resistance: Choose compounds with built-in UV protection to prevent degradation from sun exposure.
-
Water resistance: A water-resistant compound is fundamental in areas exposed to moisture or high humidity.
-
Breathability: Allow the substrate to breathe by selecting a compound that permits moisture vapor transmission, reducing the risk of blistering or peeling.
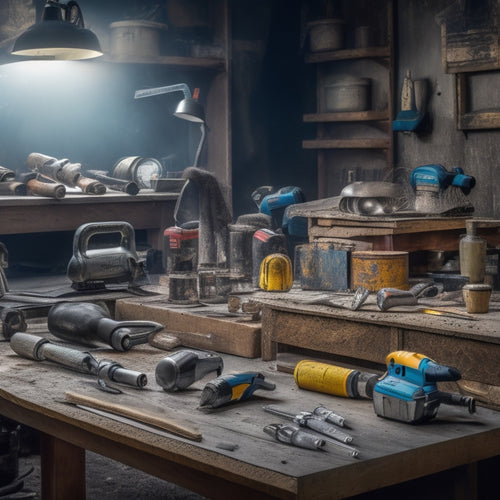
Power Drills and Mixing Accessories
Since you're about to tackle concrete repair, having the right power drills and mixing accessories is essential for efficient and effective mixing and drilling.
You'll need a power drill that can handle the demands of mixing concrete, such as high torque and variable speed control. Look for power drill features like adjustable speed triggers, ergonomic grips, and durable construction to guarantee reliable performance.
When it comes to mixing, having the right accessories can make all the difference. Invest in a mixing paddle that's specifically designed for concrete, with features like reinforced blades and a comfortable grip.
Mixing technique tips include starting with a slow speed to prevent splashing, gradually increasing speed as the mix thickens, and using a figure-eight pattern to guarantee thorough mixing.
Additionally, consider a mixing bucket with a non-slip base and a measuring scale to accurately mix your concrete.
Safety Gear and Protective Equipment
When working with concrete, you're likely to encounter hazardous materials, heavy equipment, and physically demanding tasks, which makes wearing proper safety gear and protective equipment a top priority.
You don't want to risk injury or illness when working on a concrete repair project.
Some essential safety gear and protective equipment to include in your concrete repair tool kit are:
- Protective gloves to prevent cuts, abrasions, and chemical exposure
- Safety goggles to shield your eyes from debris and chemical splashes
- Respirator masks or dust masks to prevent inhalation of harmful particles
- Knee pads to reduce strain and discomfort from prolonged kneeling
- Hard hats and steel toed boots to protect your head and feet from falling objects and heavy equipment
Remember to also include hearing protection, first aid kits, and safety signage in your tool kit to guarantee a safe working environment.
Stucco Finishing and Texturing Tools
Now that you've got your safety gear in check, it's time to focus on the tools that'll help you achieve a professional-looking finish. For stucco application techniques, you'll need a range of specialized tools to achieve decorative stucco finishes.
| Tool | Description | Purpose |
|---|---|---|
| Trowel | A flat, rectangular tool with a handle | Applying and smoothing stucco mix |
| Float | A flat, rectangular tool with a handle, often made of metal or wood | Smoothing and flattening stucco surfaces |
| Texture Mat | A rubber or plastic mat with a textured pattern | Creating decorative patterns and textures on stucco surfaces |
These tools will help you achieve a high-quality, professional-looking finish. The trowel is used to apply and smooth the stucco mix, while the float helps to flatten and smooth the surface. The texture mat adds a decorative element, allowing you to create unique patterns and textures on your stucco surfaces. With these tools in your kit, you'll be well-equipped to tackle a range of stucco application techniques and achieve the desired decorative stucco finishes.
Cleaning and Preparation Solutions
You'll need to get your surfaces properly cleaned and prepared before applying any concrete repair materials. This vital step guarantees a strong bond between the old and new concrete, and it's important to remove any surface contaminants that could compromise the repair.
To achieve a clean and prepared surface, you'll need the following cleaning and preparation solutions in your tool kit:
- A degreaser to remove oil and grease stains
- A wire brush or scrub brush to remove dirt and debris
- A pressure washer to blast away stubborn dirt and grime
- A concrete cleaner to etch the surface and create a better bond
- A vacuum or blower to remove dust and debris after cleaning
Bonding Agents and Primer Systems
When you're preparing a concrete surface for repair, you need to guarantee a strong bond between the old and new materials.
To achieve this, you'll require bonding agents and primer systems that meet specific surface preparation needs, such as filling pores or creating a mechanical bond.
You'll want to take into account epoxy-based bonding agents for high-strength applications and acrylic primer options for more versatility.
Surface Preparation Needs
Most concrete repair projects require at least three essential surface preparation steps: cleaning, profiling, and applying bonding agents or primer systems.
You'll need to verify the surface is free from dirt, oil, and other contaminants that can affect bond strength. This is where surface cleaning techniques come into play. You may use pressure washing, wire brushing, or chemical cleaning agents to remove impurities.
Next, you'll need to assess the substrate using various substrate assessment methods, such as sounding, chaining, or delamination testing. This helps identify areas of weakness or damage that need attention.
To guarantee a strong bond, you'll need to:
- Remove old coatings, adhesives, or other substances that may interfere with bonding
- Grind or scarify the surface to create a rough texture for better adhesion
- Apply a bonding agent or primer system to promote bonding between the old and new concrete
- Use a degreaser to remove oil or grease stains that can compromise bonding
- Allow the surface to dry completely before applying the repair material
Epoxy-Based Bonding Agents
After preparing the surface, applying an epoxy-based bonding agent is a critical step in guaranteeing a strong, durable bond between the old and new concrete.
You'll want to select an epoxy that's specifically designed for concrete repair, as it will provide a strong, long-lasting bond. These epoxies typically consist of a two-component system, comprising a resin and hardener, which you'll mix together according to the manufacturer's instructions.
When applying the epoxy, make certain to follow the recommended bonding techniques. This may include applying a thin layer to the prepared surface, using a brush or roller to guarantee even coverage.
You'll also want to confirm the epoxy is fully cured before applying the new concrete, as this will help prevent any weak points in the bond.
In epoxy applications, it's crucial to carefully follow the manufacturer's instructions, as the mixing ratio and curing time can greatly impact the bond's strength.
Acrylic Primer Options
Three key types of acrylic primer options are available for concrete repair: water-based, solvent-based, and silane-based.
When choosing an acrylic primer, you'll want to take into account the specific needs of your project, including the type of concrete, environmental conditions, and desired finish.
You'll find that acrylic primers offer several benefits, including improved adhesion, enhanced durability, and reduced repair time.
Here are some key factors to take into account when selecting and applying an acrylic primer:
-
Compatibility: Verify the primer is compatible with the specific type of concrete and repair material being used.
-
Surface preparation: Properly prepare the surface by cleaning and profiling the concrete to guarantee ideal bonding.
-
Application temperature: Follow the manufacturer's recommended application temperature range to guarantee proper curing.
-
Curing time: Allow the primer to cure according to the manufacturer's instructions before applying the repair material.
-
Moisture tolerance: Evaluate the level of moisture exposure the repair will be subject to and choose a primer that can withstand it.
Measuring and Testing Devices
By the time you begin a concrete repair project, it's essential to have a set of measuring and testing devices at your disposal to guarantee accurate assessments and effective solutions. These devices help you identify the root cause of the problem, determine the extent of the damage, and monitor the progress of the repair.
| Device | Function |
|---|---|
| Laser Distance Meter | Measures distances accurately, guaranteeing precise calculations for material quantities and repair area dimensions |
| Moisture Meter | Detects moisture levels in concrete, helping you identify potential issues and prevent further damage |
| Crack Width Gauge | Measures the width of cracks, enabling you to assess the severity of the damage and plan the repair accordingly |
| pH Meter | Tests the pH level of the concrete, allowing you to determine the likelihood of acidic or alkaline damage |
Having these measuring and testing devices in your toolkit guarantees that you're well-equipped to tackle concrete repair projects efficiently and effectively.
Frequently Asked Questions
What Is the Ideal Storage Method for Concrete Repair Tools?
When storing concrete repair tools, you'll want to prioritize tool organization by investing in storage solutions like portable cases, stackable bins, or pegboards, ensuring easy access and protecting your tools from damage and rust.
Can I Use a Concrete Repair Kit for DIY Home Renovations?
You can effectively use a concrete repair kit for DIY home renovations, leveraging DIY renovation benefits like cost savings and control, if you become proficient in concrete repair techniques like surface prep, bonding, and finishing.
Do Concrete Repair Tool Kits Come With Instructional Guides?
When you purchase a concrete repair tool kit, you'll typically find instructional materials, such as manuals or DVDs, that walk you through various repair techniques, ensuring you're equipped to tackle complex projects with confidence.
Are Concrete Repair Tools Compatible With All Types of Concrete?
Fast-forward to the modern era of concrete repair, and you'll find that most tools are designed to be versatile, but you'll still need to ascertain they're compatible with specific concrete types, like high-flow or low-slump, to achieve peak results.
How Often Should I Replace Worn-Out Concrete Repair Tools?
You should replace worn-out concrete repair tools based on frequency indicators like usage hours, project cycles, or visual signs of wear, as tool longevity varies; regularly inspecting and maintaining tools guarantees peak performance and extends their lifespan.
Conclusion
You've assembled a first-rate concrete repair tool kit, equipped with the essentials to tackle any job. Now, get ready to tackle the staggering 15,000 miles of crumbling roads and highways in the US, a number that's expected to triple by 2025. With your new kit, you'll be well-prepared to contribute to the massive undertaking of repairing America's infrastructure, one crack at a time.
Related Posts
-
What Tools Do You Need for Concrete Success
For concrete success, you'll need a range of essential power tools, including rotary hammers, angle grinders, concret...
-
Essential Power Tools for DIY Concrete Sculpting
As you begin DIY concrete sculpting, you'll need a strategic selection of power tools to achieve professional-grade r...
-
7 Best Tools for Concrete Block Construction
You'll need a solid foundation, precise cutting, and seamless finishing to guarantee your concrete block construction...


